Click to enlarge
After the last sundeck we built in Durban we were glad to have a small break. Temperatures reached about 38°C and even though we only had to sand and seal it, it was almost impossible to work in those conditions.
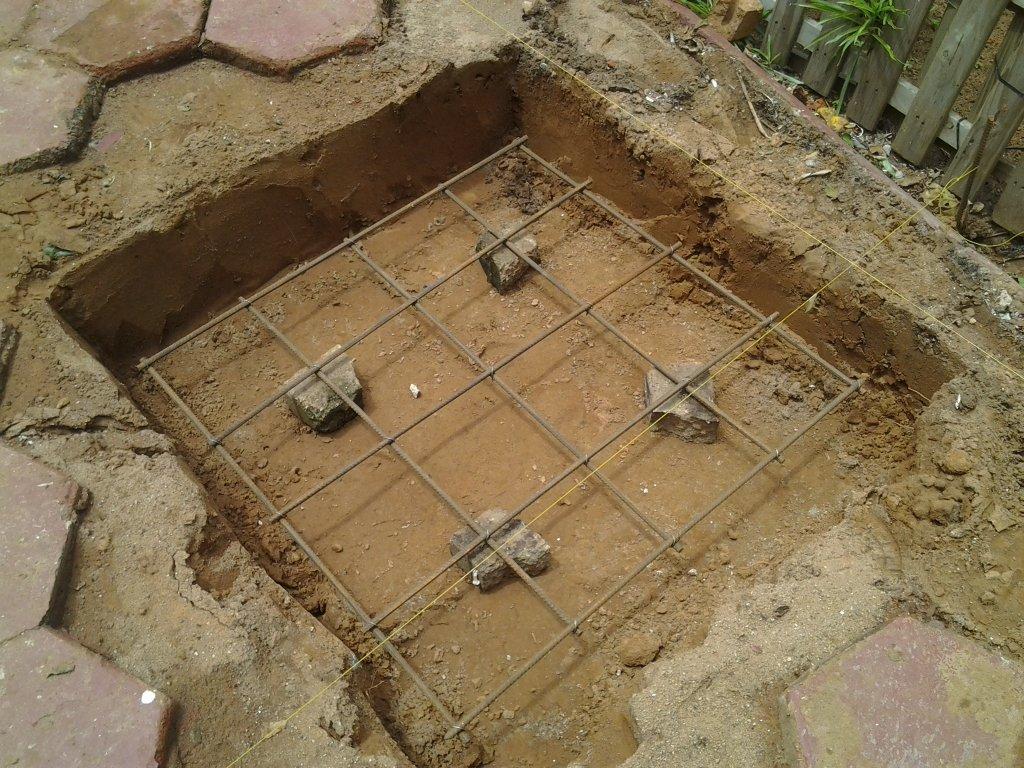
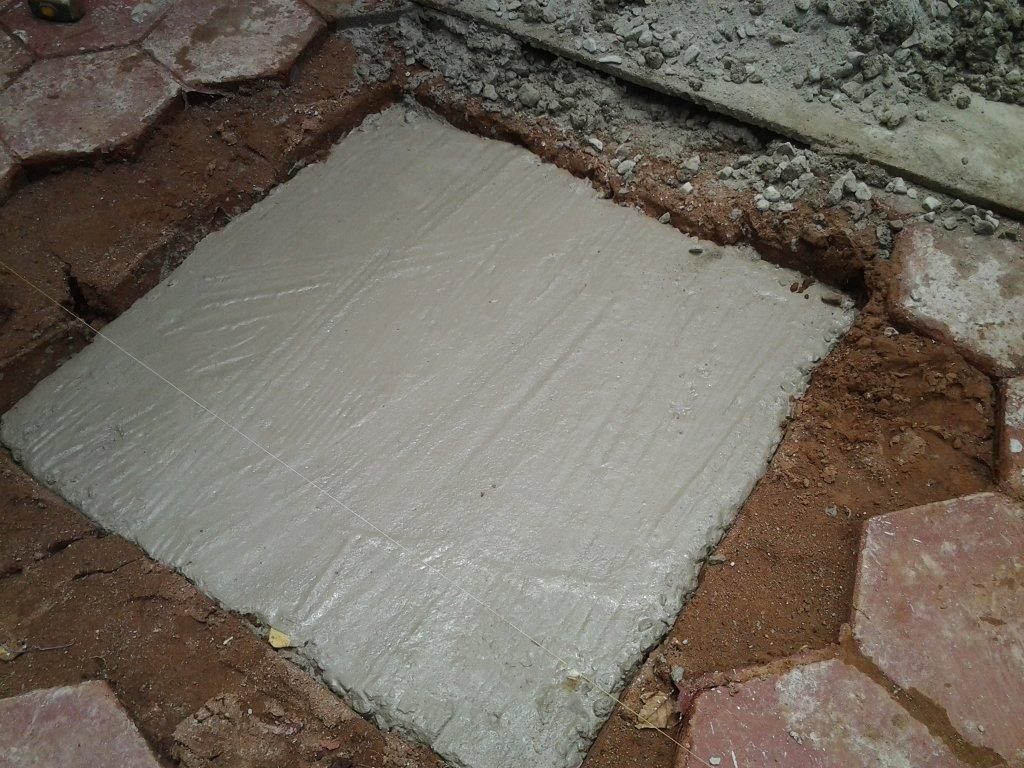
This next sundeck in Durban measured about 5.7m wide along the front of the house by 4m deep. It was on the first floor at a height of 3.2m above ground level. Due to the size we had to support it using 4 balau posts each of 90mm x 90mm in size and the other two ends of the beams were set in feet cut and anchored to the wall. Initially we were going to set the posts in concrete the normal 600mm deep. However the location was in the Bluff which is almost completely a sand dune. We dug to 1m deep in sand that had the same consistency as building sand, and could still stick a re-bar another metre into the ground. Instead of the normal 600 deep in concrete method we had to throw feet or pads of 1m x 1m x 200mm with re-bar set in the middle. This created a larger footprint and will prevent the posts from sinking over time. The re-bar ensures that the whole pad has to sink at the same time instead of cracking. The posts were then set on top of those with a re bar hammered into the bottom of the post and drilled into the concrete. See the two pics alongside.
Click to enlarge
The posts are set as square to the wall as possible but there is no need to set them exactly square as they will simply support the beams and any difference won’t make a material effect structurally.
This deck needed 4 posts as the length was 5.7m and it is generally quite difficult to find beams in that size that long so they had to be joined in the middle with a post to support them. We were using 30 x 102 joists which can be spanned a maximum of 1.8m between beams so two beams were required thus doubling up the number of posts.
We cut the posts to length on the ground and then connected our beams using a joiner block to create one long beam. They were half checked and the balau beams of 30 x 220 were placed and secured on the half checks. Galvanised hex bolts were used to secure the beams to the posts.
The joists went on next and were left long so that the deckboards could start from the house side and the joists cut off once we reached our desired depth. If the joists are cut to length before the deckboards go on, then it will result in a half deckboards being used to finish it on the house side. What can also happen is that the last deckboard is not only a half deckboard but also a wedged shaped one. So deckboards are always started on the house side and run to the desired depth and the joists are then cut to fit.
Click to enlarge
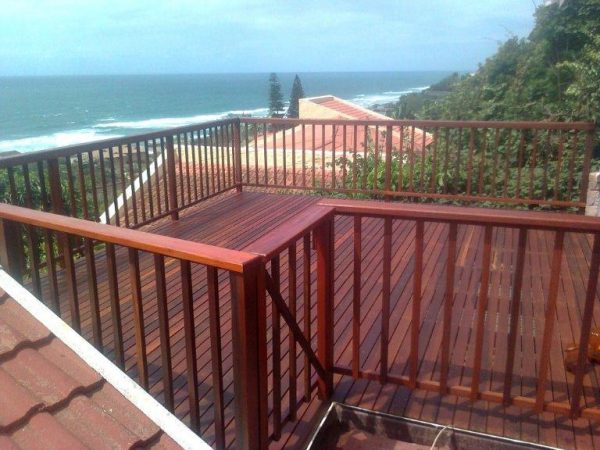
On these types of decks I also like installing a fascia beam of the same size as the joists so as to provide support on the front of the deck as well as providing a beam that the balustrade can be attached to. Without this the balustrade would need to be attached to the main beam beneath which would mean the main beam would need to be set near the end of the deck and perfectly square to the deckboards or the balustrade will run out of parallel to the boards. With this method it is not important if the main beam is not perfectly square as it doesn’t have to line up with anything on the deck itself. It is merely there for support and the tolerance is therefore much greater.
The balustrade uprights of 60 x 60 were installed prior to the deckboards so that we could deck around them by notching the boards. Once the boards were down, the cross supports on the balustrade were installed 100mm off the deck surface for the bottom one and flush with the top of the posts for the top one. This top cross support can sometimes be set 100 down from the top of the uprights, but setting it directly underneath the capping provides greater support to the capping and will prevent it from bowing over time. Pickets of 25 x 30 were then set equidistant apart between balustrade uprights, cut to length and a capping of 30 x 102 placed on top and secured.
Screw holes were epoxied closed with a saw dust mixture to match the colour, sanded and sealed.
Related articles
- Timber Sundecks in Durban (thewoodjoint.co.za)


