Timber Stairs Built in Hillcrest – February 2013

Timber stairs Durban

Click to enlarge

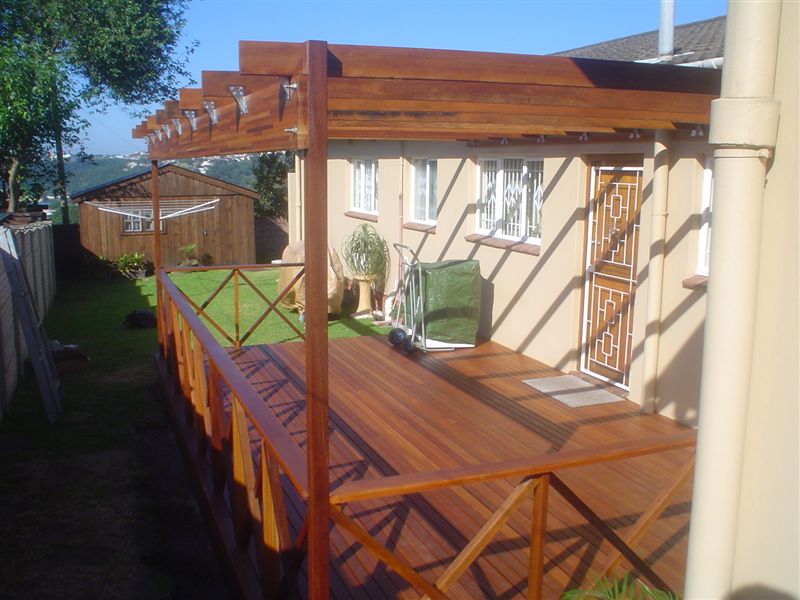
As a deck builder and timber stair builder in Durban I have had to learn how to build timber stairs the hard way, through trial and error (and a bit of Googling).  Timber stairs have always been a tricky one for me and I have battled to build them in the past. At first I Google’d ‘building timber’ stairs and found a few videos on the topic which explained it quite nicely. Most of the videos online though are American and they therefore explain it in inches. But after converting it the technique and calculation used to work out your runs and risers becomes quite clear.

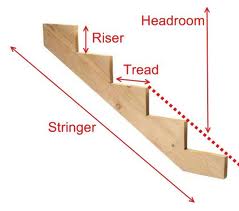
The riser is the vertical piece of the step and the run (or tread) is the horizontal piece. Building regulations in South Africa state that the riser can be no more than 200mm high and the tread or run can be no shorter than 250mm. Timber, either in pine or balau, will come standard at either 140mm wide or 220 wide. One should therefore use two pieces of 140 wide stock in order to get a tread of 280mm wide. I have seen stairs built using 220 wide stock which although is not completely according to building regulations can work if a gap is left between the front of the top tread and the back of the tread below that. The gap should be at least 30mm to get back to your minimum of a 250mm wide tread, although building regulations state that this gap should be no bigger than 20mm. Because the stairs are open, one can normally get away with this as your foot will be able to move past the back-end of the tread as you climb the stairs. Be sure to check with building regulations before designing your stairs to ensure you are compliant or that your contractor is adhering to these regulations.

Timber stair builder

Click to enlarge

First you need to calculate the exact height of your riser and the exact width of your tread. I will use 1,1m as the height of the stairs for the example below.

Assuming a riser of about 200mm or less divide 1, 100mm by 200mm. You get 5.5 risers. Increase this to 6 risers because if you take it back to 5 risers you riser will be more than 200mm.

So 6 risers and therefore 5 treads. The top tread of course being the deck itself.

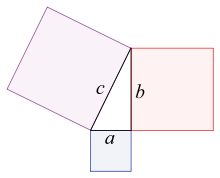
1, 100mm divided by 6 risers give you an exact riser height of 183.3mm. 5 treads of 280mm each will result in a total floor length of 1, 4m. From this you can work out the length of the stringer. a²+ b² = c². Remember him? Yeah!!! The stringer by the way is the piece that runs down diagonally from the deck to the floor and to which the treads are attached.

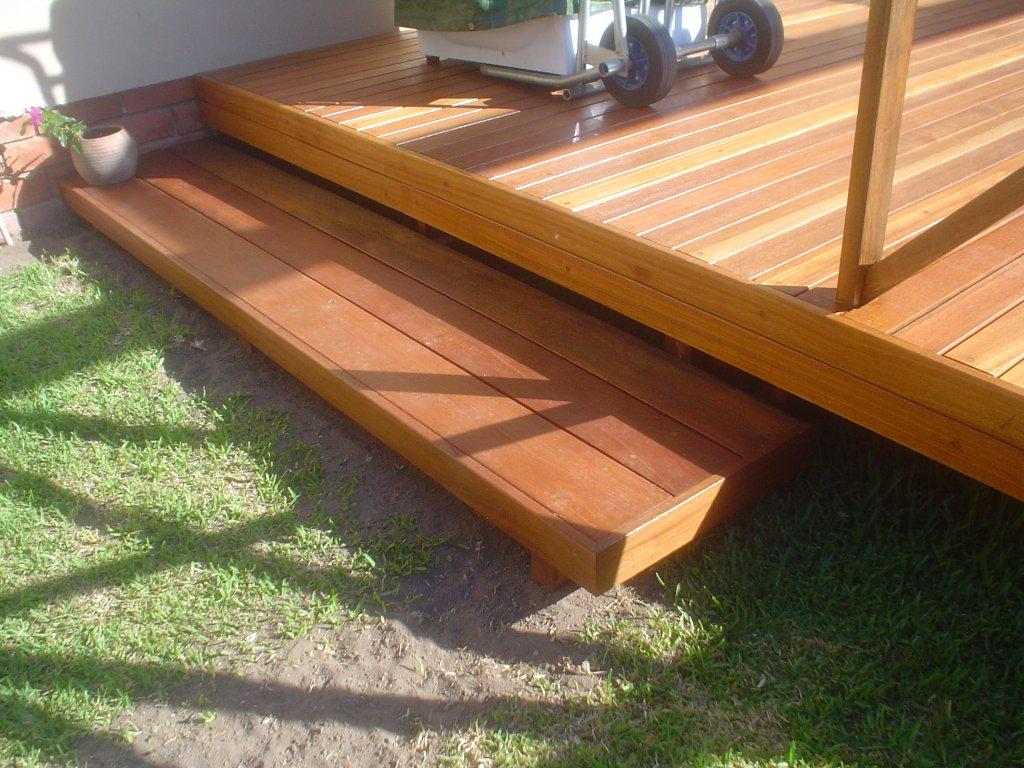
Now lay the stringer flat on the ground, starting your markings a comfortable distance from the end to allow for cutting to the correct angle and possibly notching the end to accommodate any lip that may exist on the deck. Deckboards can either be set flush with the joist or they can hang slightly over which will dictate whether or not the stringer needs to be notched so that it can be fastened to the joist or beam.

Timber stairs Durban

Click to enlarge

With the stringer flat on the ground, take a large square with markings on both sides (the big black square) and slide it along the one side of the stringer so that you reach the 183.3mm mark on one side and the 280mm mark on the other side. Of course you would round this to the nearest millimetre. One can buy little clamps that clamp to the sides of the square to make this job easier. In fact sophisticated stair stringer squares can be bought but the big black square works just as well. With your riser height and tread width marked on the stringer you can now draw a line around the square at the corner. This is where your riser and tread will be. Move the square down to the end of the marks and repeat to mark the next one. Continue until the end of the stringer. Cut the top end of your stringer off parallel to the riser at the correct distance to attach to the joist. The bottom of the stringer will be cut, either parallel to the riser or tread depending on whether you want a vertical or horizontal end which will either attach to the concrete ground (horizontal) or be set into the soil using a post and concrete (horizontal or vertical).

If you have as much difficulty understanding this as I did, then you are not alone. Try it and you will find it becomes second nature.
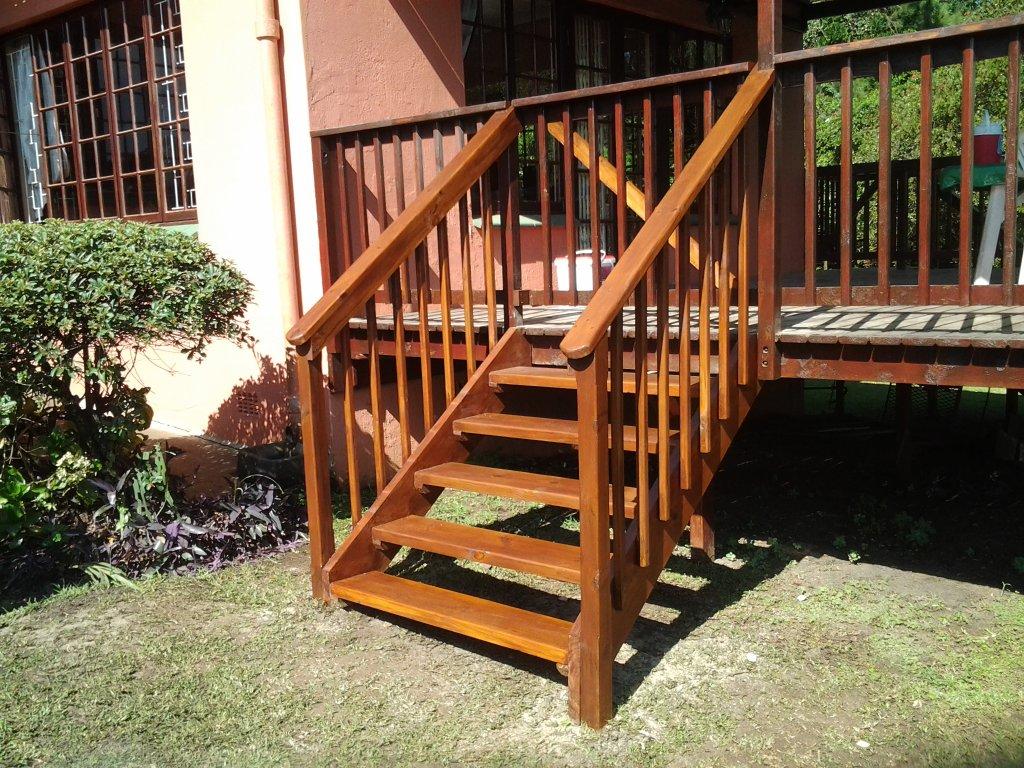
Now it’s just a matter of attaching your treads and job done. If you have a balustrade running down the sides of your stairs this can be attached now. Care should always be taken where the balustrade capping and cross supports, on the stairs, meet the same on the deck as they are running at different heights. It is better to take the balustrade up, level out whilst still on the stairs and then meet the horizontal.

Timber Deck Installed in Queensburgh, Durban

Sundeck installer Durban

Click to enlarge

This was our second deck we installed in Durban and this time around we got the spec right and didn’t spend all our money on timber. The deck was pretty much on ground level but still required normal 30 x 102 joists as it was not supported by a concrete base. Should there have been a concrete slab on which to support it then we could have used smaller batons instead of joists. We still sued a cleat and beam system although later in my Sundeck installer career I learned the other method of a joist as the cleat attached to the wall with the joists Téd off that and a fascia beam on the front.

There was a fair amount of digging to get the garden to the correct level as the one side was quite a bit more elevated than the other.
This deck had a floating step which was quite large, bigger than a normal tread. It worked very well in that it appears that the step is not attached to the deck at all and is large enough to step down comfortably on to it.

Sundecks builder Durban

Click to enlarge

Being our second deck we set everything out and started decking it. Half way through our deckboards we realised that the front beam was not straight. It bowed inwards and as the deck boards went down it became more and more noticeable. So all the deckboards came off, the beam was straightened and back they went. A costly mistake in time but a lesson learnt that will ensure that that mistake never happens again. A simple piece of fish line or builder’s line must be placed along the front edge of the beam when fastening the joists to ensure that it is straight. A false joist can be used here in the middle of the beam attached in the same direction as the joists will lie to hold it in place while the joists go down. The same rule applies for joists. When I joist is placed down it must also be square off the wall and the rest of the joists must be parallel to that one. Timber will always be bowed in one direction or another, some more than others. But they must be pulled straight before being attached. In the case of joists this will ensure that they screw line on the deckboards is straight and more appealing to the eye. Also it keeps the distance between joists exactly 550 between centres for the entire length of the joist. This is particularly important on joists that are placed on the end of the deck as the deckboards will be cut there and if not straight then the deckboards will either not be straight or they will form a lip where the joist bows inwards or outwards.

Sundecks Durban

Click to enlarge

The balustrade on this deck was pretty straight forward to. We notched the cross pieces so that they fitted snuggly together in the same plane rather than overlapping them. We built a pergola in balau above which eventually took a roof. The client however attended to the roof sheeting.

Wooden Sundeck Built in Forest Hills Durban

sundecks Durban

Click to enlarge

This sundeck we built in Forest Hills Durban was an add-on to a deck we completed in 2012. The client initially built a 20 odd square metre deck off the front of his grant flat. It was then decided to extend the deck around the corner to tie up with the kitchen door.
We needed to decide which way the deck boards should run. Traditionally they should have run the length of the deck extension, but because of the way the existing deck had been built, it would have resulted in an odd line that would have been visually unappealing. Had the extension been built at the same time as the deck then the deckboards could have met at a 45° angle to turn the corner. Instead they would need to either meet at a 90° angle or they would need to run the same way (i.e. the width of the deck rather than the length). It was decided to run them the same way as the existing deck resulting in them running the width of the deck rather than the length.

With this in mind we set out to lay the substructure which consisted of long joists of about 9.2m. The width of the deck was 1.2m so we set 2 joists and a cleat along the wall. The challenge in setting such long joists of course is to ensure that they are set straight. Our joists were each 4.5m long so had to be joined in the middle without allowing them to bend or bow at the join. It was easier to join the joists beforehand, set a false deckboard of pine to hold them at their 1.2m width and then dig our holes for posts. We used H4 CCA gum poles as posts as they would not be visible from the outside and budget did not allow for balau posts. The poles were half checked to accept the joists, secured to the joists using kalgard 60mm screws and concreted in with 6 inch nails hammered into the base to prevent the post from sinking over time. A dry mix was used so as to be able to work with the post and joist immediately after setting them.

wooden decks Durban

Click to enlarge

There was a concrete gas bottle plinth that was not decked and we had to deck around that and fill the vertical surfaces with balau cladding for aesthetics. Also the plinth that existed directly outside the kitchen door was slightly higher than we would have liked and as such we could not use our 30 x 102 joist and had to use a 30mm baton to arrive at the same height as the rest of our joists.
Once the substructure was down it was relatively plain sailing as our rough pre-cut balau deckboards were screwed down. We intentionally left them slightly long and after they were all down, snapped a chalk line along the edge and cut with a skill saw to get a straight line.

We cladd a few ends to close it all in, epoxied our screw holes to prevent water collecting in them and being soaked up by the end grain. Once dry we sanded flat and sealed using a top quality timber preservative with an oak tint.
A few pot plant stands were thrown in from the scrap off cuts which will now keep the pot plants off the deck and allow the water to drain away quickly and prevent accelerated degradation of the balau.

10m² took us 2 days to complete. The crew received a nice bonus based on square meterage and it was off to the next job.

For a free no obligation quote, or simply for an advice, please use the form below to contact me or you can call us on 082 496 5444.

Go back

Your message has been sent

Warning
Warning
Warning
Warning
Warning

Warning.