Deck Maintenance and Deck Sealing

deck maintenance

Click to enlarge

I was prompted to write an article on deck maintenance and deck sealing this week as we had a small quiet patch and as a “filler in” we sanded and sealed a picnic table, repaired a broken ball and claw foot and a leather couch and this reminded me to write this article.

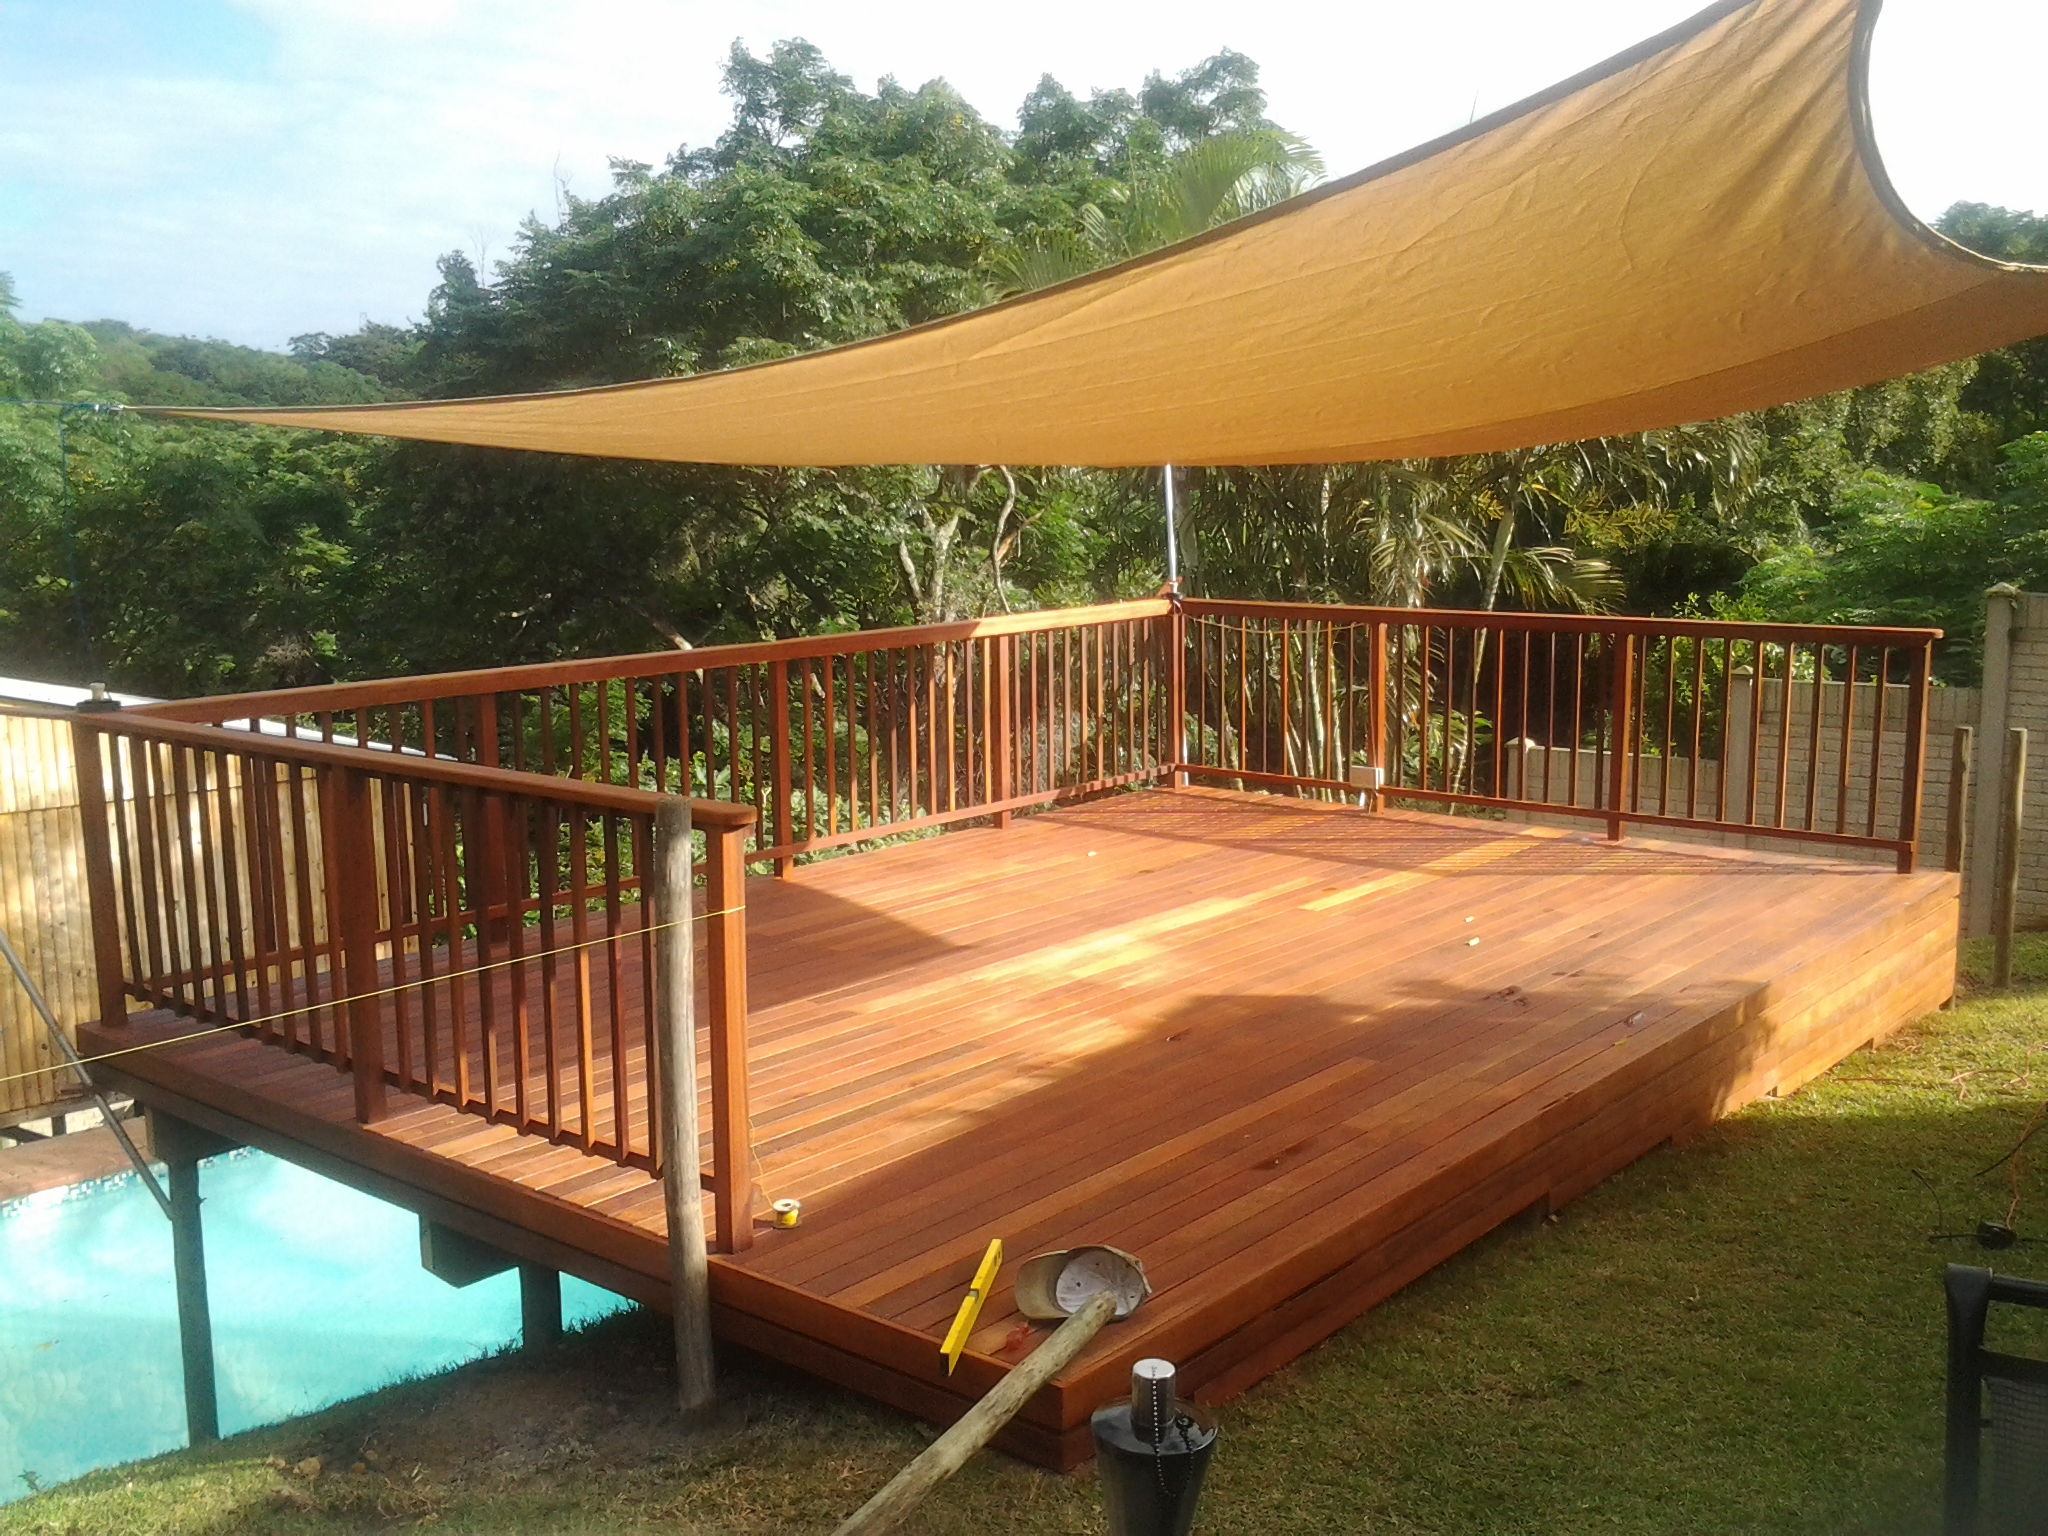
Deck maintenance and deck sealing is always a question asked when quoting on new decks. Clients want to know that if they invest this kind of money in their property, will it be expensive to maintain in subsequent years. The simple answer is no, but if not correctly sealed in the beginning, then it can become an expensive and time-consuming task each time it needs to be maintained. The question is also sometimes asked when choosing between timber or composites.

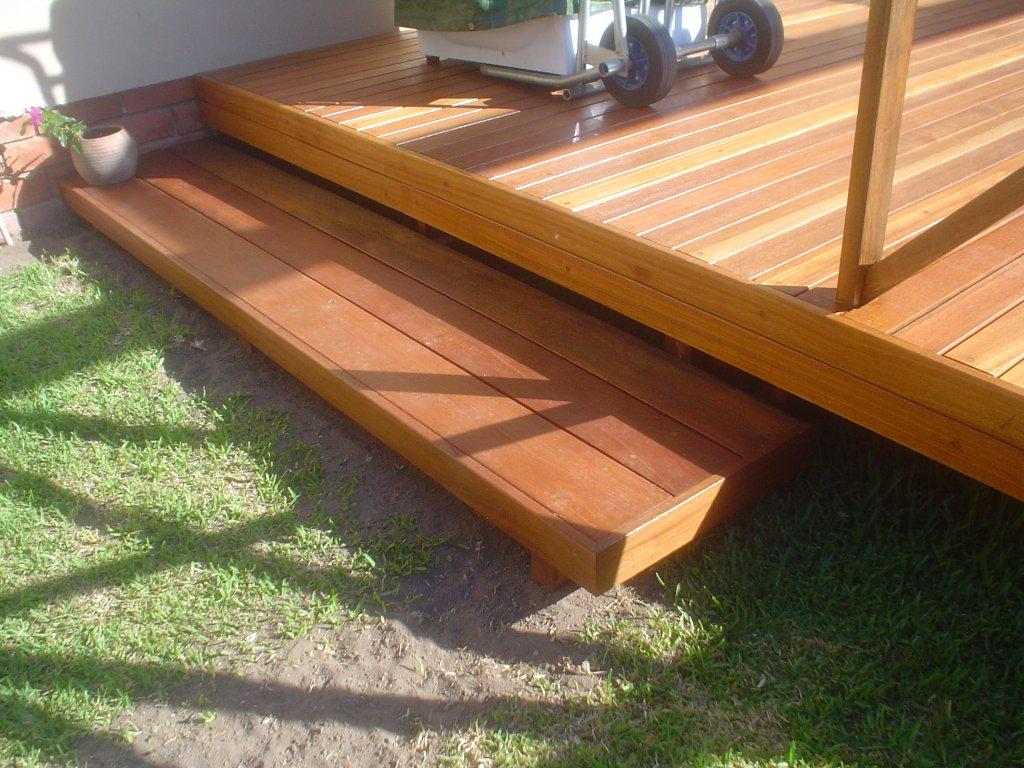
There are many ways to seal a deck. “Finishing” is the correct term for it and this term also applies to all other timber products. Varnish, polyurethane, oil, sealer, paint etc. are all products used to “finish” a project. When it comes to decks there are certain products to stay well clear of. Because a deck lives outside in the hot African sun, any finish that dries on the surface of the timber will result in problems once it starts to degrade. All finishes will degrade and it is therefore very important to stay away from those that dry on the surface. It is common sense that anything that has dried on the surface will have the tendency to lift, either by cracking, flaking or peeling. When it comes time to maintain the deck, one will either have to sand it all off, or lightly sand it and re coat it with the same or similar product that was used in the beginning and live with a patchy finish. Therefore varnish is a big no-no. Polyurethane, although very durable and hard will also crack and flake and is better left for the purpose it was intended, indoor finishing on cupboard tops etc.

So that leaves us with those finishes that soak into the wood, nourishing them and when they degrade will not peel or flake because they have not dried on the surface. Simple hey? Not so. There are products which contain higher wax contents than others and although still classed a timber sealer, tend to soak in and leave a waxy film on the surface. This waxy film (or coating for want of a better word) will also tend to go blotchy once the sun does it work on it and will therefore also require some degree of sanding. Before we carry on, it is virtually impossible to sand the entire coating off. The electric sanders do not reach all corners, especially on a balustrade. The belt sander, rotex sander and any other sander will be too wide for the deckboard. Because there is a gap between boards, to allow water to drain away from the deck, the surface of the deck is not perfectly flat. So one will need to tilt the sander left and right as they sand down the length of the deckboard in order to remove the whole coating. Try it, it will cure you of varnish for outdoor products. The corners where the machines cannot reach will need to be sanded by hand and your labour bill will be more than erecting a new deck. I tried in my early days and learnt the hard way.

Oils can be used with some success. Raw linseed oil will take weeks to dry as it is raw and completely natural and therefore needs to soak in completely before you can walk on it. Also when the sun bakes down on the deck it will start to get soft and can become very hot to walk on. Boiled Linseed Oil will dry quicker as it contains additives that help the drying process but will still take a few days to dry. In the meantime the dog will run on the deck and leave muddy footprints that will dry into the surface. Again a lesson I learnt when experimenting with my own deck. Boiled Linseed Oil is not really boiled, it just means it has additives to help it dry faster than raw Linseed Oil. So for all intents and purposes it is a sealer. Danish oil will work well. I have not finished a deck in Danish Oil, but have used it quite successfully on outdoor furniture.

So now that we’ve eliminated the definite no no’s, we are left with timber preservatives or penetrating finishes. These are very viscous, almost as viscous as water. They are easy and quick to apply, no runs, no streaks and they go on quickly as they soak right into the wood. Seeing as they soak right in, they cannot flake or peel as there is no coating that has dried on the surface. We use a product manufactured by Timberlife called Satinwood 28 Base. This is a product designed for woods of low porosity. They also manufacture one for woods of high porosity. Don’t get them mixed up or the sealer will disappear right through your pine deck in a day or two or sit like a coating on your balau deck.

At least 2 coats are necessary on the first application and because the deck is new, one will need to reseal it about 3 to 4 months later. After the first year this maintenance interval will increase to every 6 months and the older the deck gets the longer the maintenance interval will become. The deck will slowly become saturated (well almost) with the sealer and it will last longer. It comes in clear and one can add a tint of your choice. They recommend that you use at least the lightest tint as the tint contains stabilisers which slow down the degradation process due to UV in the sun’s rays.

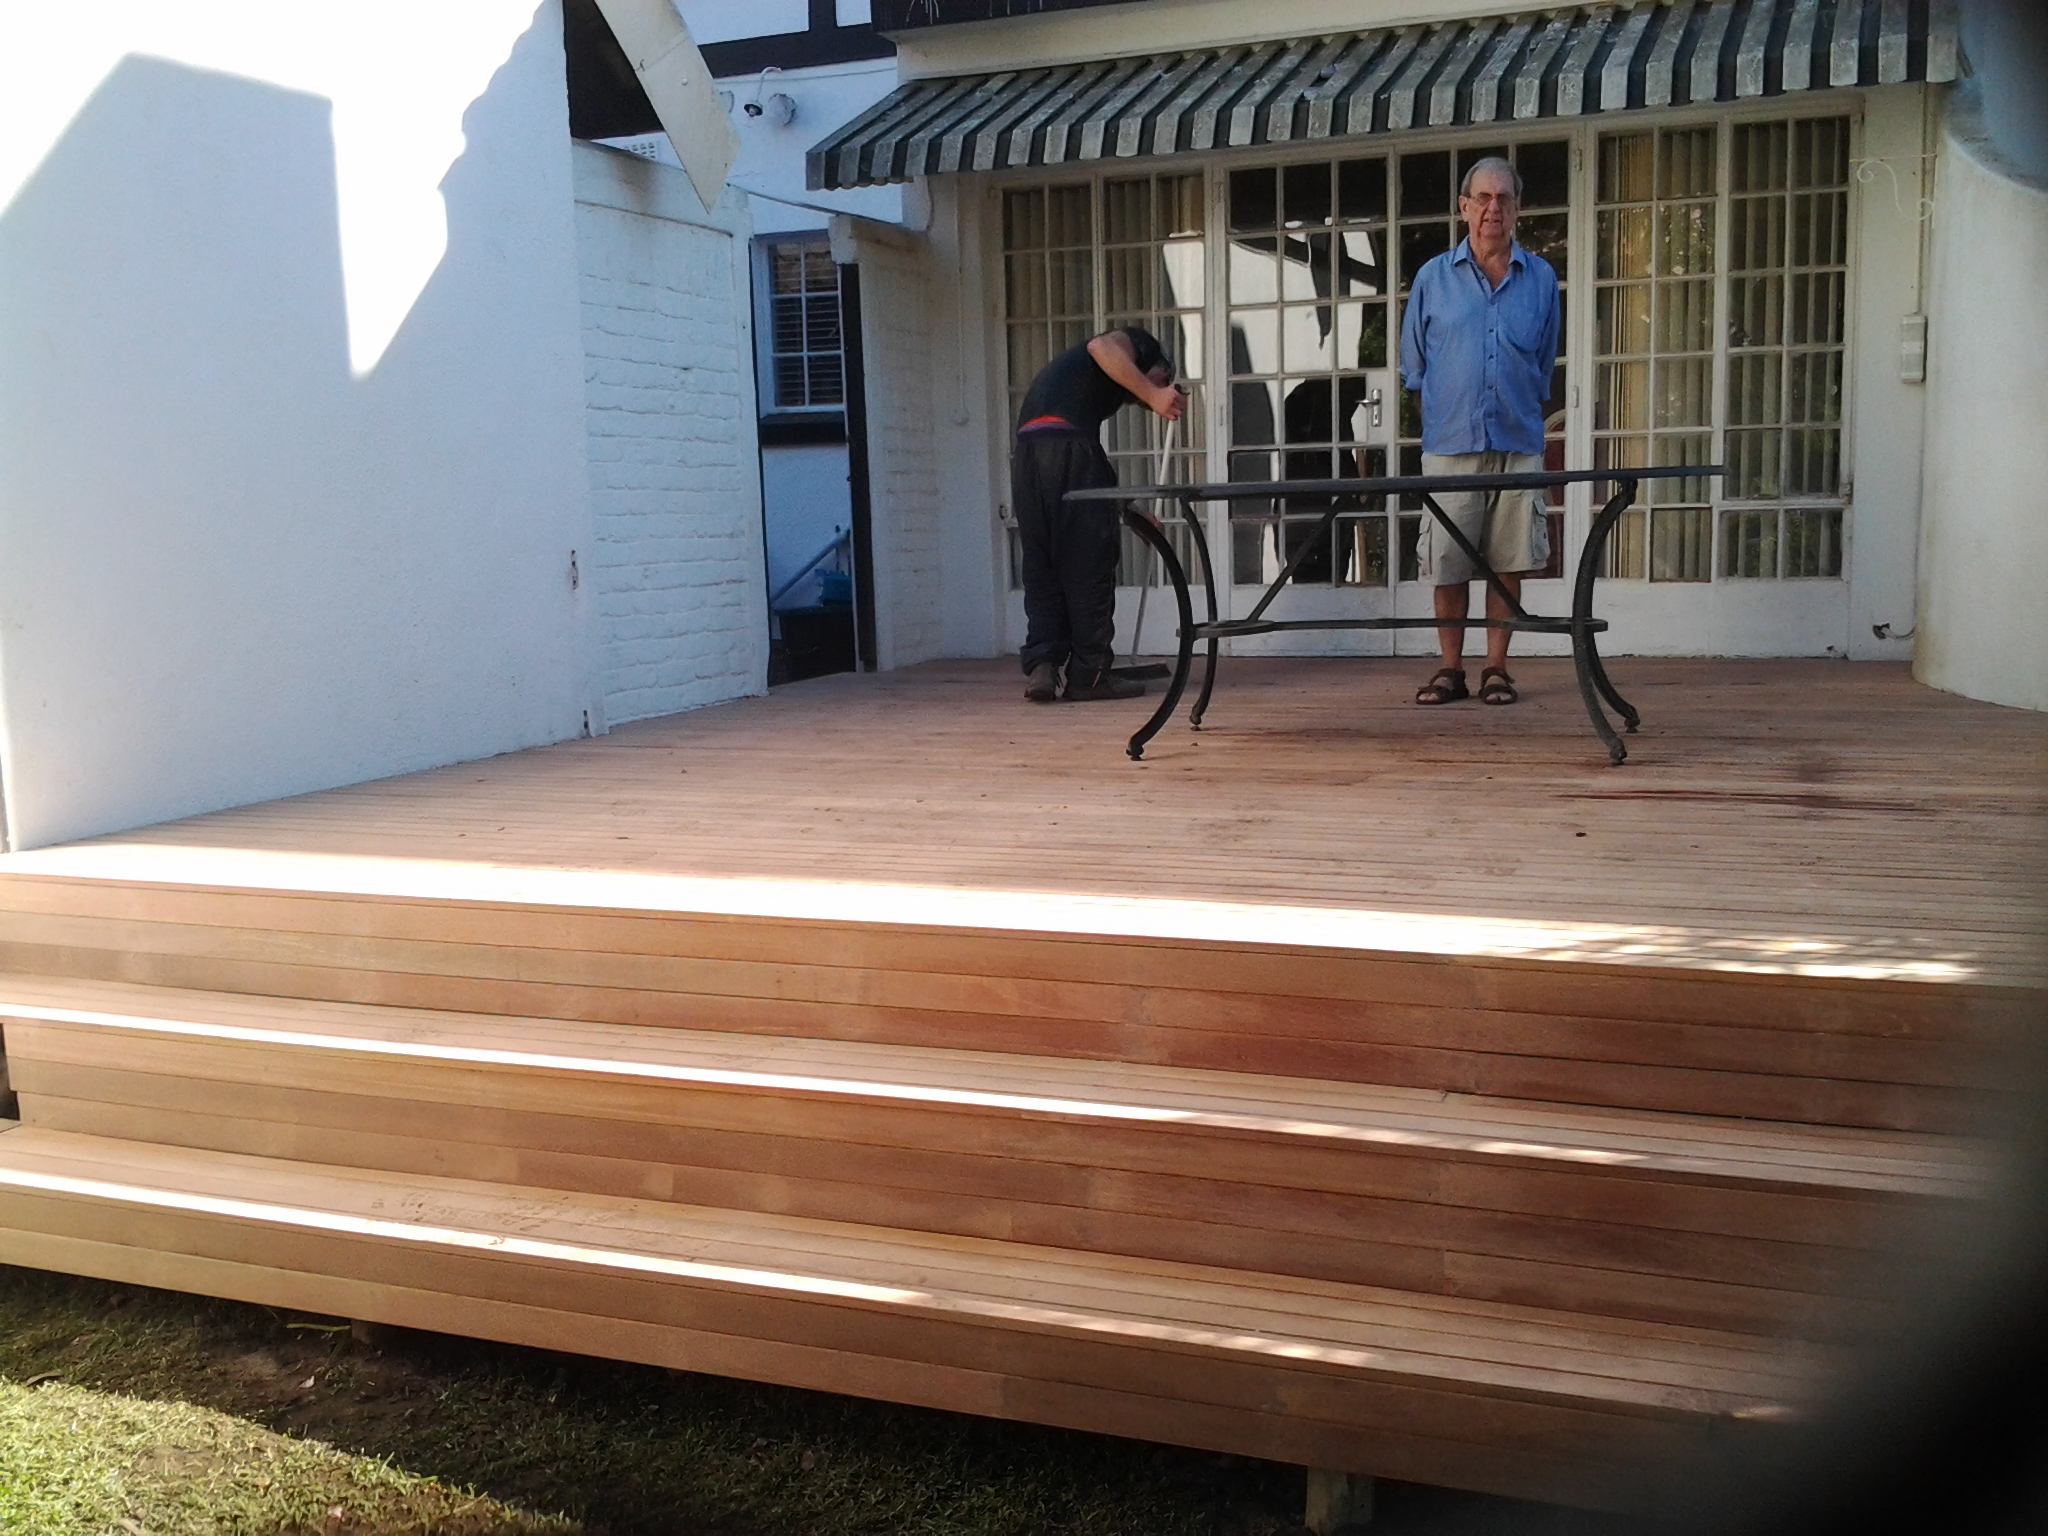
Even though it will need to be done every 3 to 4 months in the first year, the process is simple. Wash the deck and reseal. No need to call in the professionals and pay their rates. No need to sand and no paint stripper required. DIY it on a Saturday or Sunday or get your domestic helper to do it.

Timberlife also supply a product called Ultra Care Gold. This has a higher wax content as mentioned above and is not suitable for horizontal deck surfaces but works very well on the vertical posts of balustrades. They also sell Deckwash which is used to wash the deck on a monthly basis and again nourishes it and leaves it looking new for longer. It is inexpensive and well worth using. Simply mop it on and mop it off.

So in short stay away from finishes that dry on the surface. Stick with those that penetrate the timber and nourish it.  In the case of a deck that has been coated with a coating that has dried on the surface one can either lightly sand and re-seal with the same coating or if budget allows one can remove the coating, by using paint stripper and a high pressure cleaner. Stick to a maximum of 150 bar pressure otherwise the timber can be damaged. I’ve successfully removed coatings on decks with this technique. It is messy, uses a fair amount of water and a considerable amount of paint stripper. Depending on the thickness of the coating, one might need to apply the paint stripper more than once and blast it off with the high pressure cleaner.

High pressure cleaning can also be used to clean the deck before resealing it with Satin Wood 28 Base, but is often not necessary. I say not often necessary if you catch it before the balau starts to “grey”. Balau will tend to turn a grey colour if left unsealed or if the sealer that is there reaches a point where it is almost completely degraded due to the sun’s UV. If this occurs and the deck is then resealed, it will go very dark, regardless of what tint you use. The grey colour is in fact a thin layer of black algae. You will find that it is quite slippery when wet. This black algae needs to be removed first before resealing. Again Timberlife, and Woodoc, and some other manufacturers supply a product that will remove a lot of this by bleaching it. Timbrite is the one I use and it can be scrubbed on with a brush and then hosed off. It won’t take all of it away, so high pressure cleaning is a quicker way of getting rid of it. I would suggest scrubbing Timbrite on with a brush, then high pressure cleaning it off with 150 bars of pressure. This will renew the wood back to almost its original colour.

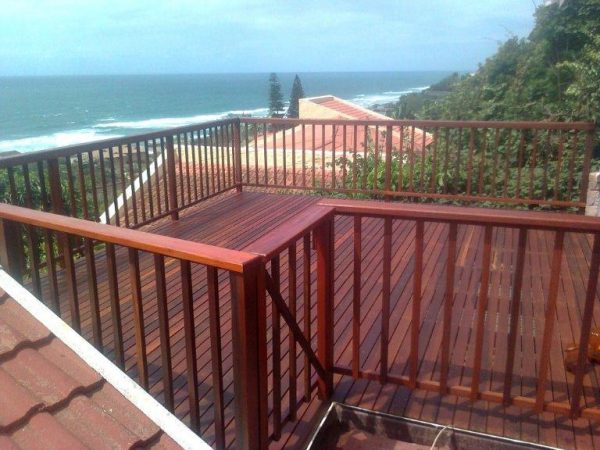
Leaving a balau deck unsealed will not necessarily speed up the rotting process. Balau is extremely durable as it contains natural resins and oils which repel water and the toxins in it discourage insects. So sealed or unsealed it will still last for years. Some prefer it unsealed to give it the natural grey look, but take note that if you then decide to seal it, clean it first as described above.

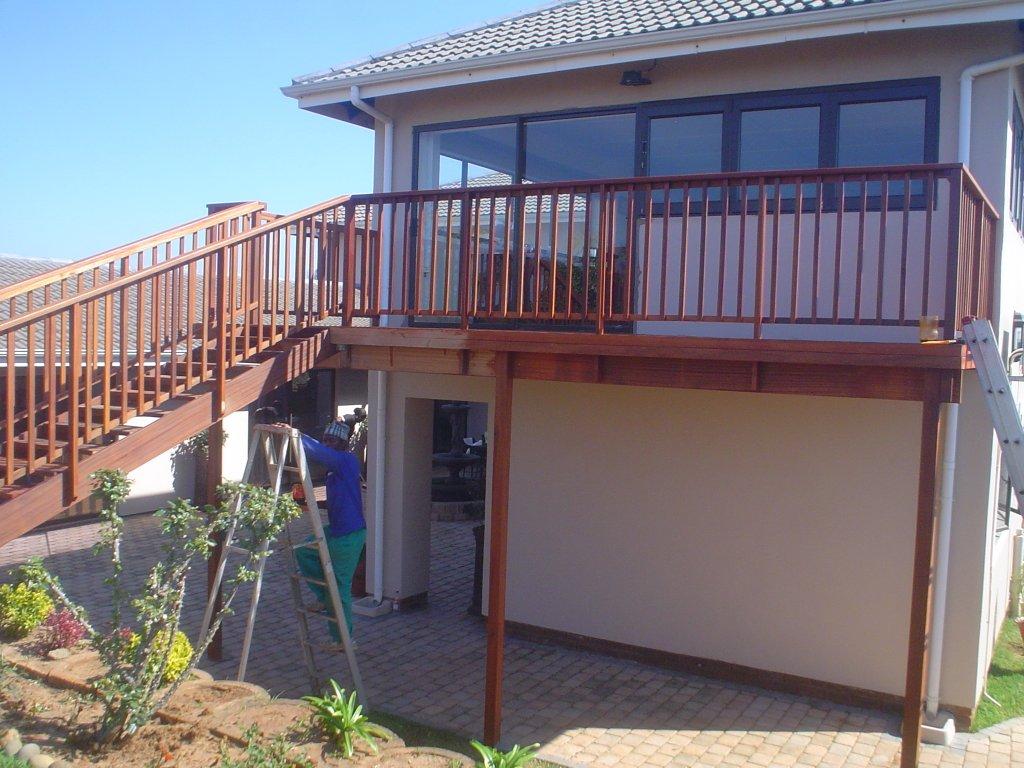
All the above also applies to outdoor furniture or any other timber that is in direct contact with the sun’s rays, especially those that are in the horizontal plane as they are getting more direct sunlight than the vertical pieces.

Timberlife are of course not the only ones who sell these products. They can be commonly found in hardware stores (Dulux, Woodoc and Plascon), but buying from the manufacturer is of course cheaper, but a bit more effort is required than popping in to your local hardware store.  All of them do pretty much the same job.

Good luck and remember that a deck is a living thing, nourish it, feed it and it will reward you.  If you’re feeling lazy, not interested in DIY or simply don’t have the time complete this form and I will submit a quote to maintain your timber deck.  Or you can reach us 082 496 5444.

← Back

Thank you for your response. ✨

Sundeck Built at Pennington on the South Coast

Sundecks South Coast

Click to enlarge

This was my first deck I built. I had been toying with the idea of building sundecks for some time, rather than trying to sell furniture which I had been making for some years. There simply isn’t a viable market to make furniture in South Africa unless one has large regular orders and a production line can be set up for a specific product. Saying that I still make the odd Adirondack Chair and picnic table, but my focus changed at that point to decking. Something that could not be imported and sold as flat pack.

I secured this job at a very cheap rate. It was in Pennington which was too far to commute each day so we stayed down there. With a crew that had never built a deck and myself who had studied it in theory only we proceeded to build.

We had to first remove an old deck that had been built using non treated pine which had rotted beyond imagination. It still annoys me to see decks being built out of non-treated pine. Some are often built from H2 treated pine where as they should be at least H3 but preferably H4 treated pine. I will go into more detail on that subject in a later article. Perhaps it is ignorance, and not a specialised deck building company doing the job, but there is a vast difference between the different grades of CCA Treated Pine.

Sundecks South Coast

Click to enlarge

Nevertheless, we cut away at our rotten deck which was actually unsafe to walk on so it took some time to carefully remove all pieces and the joists. We left the post in tact as they were teak and were still very good. Once down we placed our cleat on the wall of the house, erected our main beam and set out our joists. There was a canter lever involved which worked well as we had increased the size of our joists to 40 x 140 so we could span them longer and canter lever longer than if we had used 30 x 102 joists.

The deckboards went down without a problem. Our balustrade had to match the neighbour’s balustrades as it was situated in a complex with other decks. It was a simple criss cross style balustrade so went down without much hassle and relatively quickly.
The biggest challenge on this deck was removing the old one which took us just over a full day. Removing a deck can be very dangerous, as you can imagine, and needs to be thought out carefully and taken down with extreme care so as not to damage buildings around it or result in injury to crew.

Sundecks KZN

Click to enlarge

We made no money on this job because we had over sized most of our timber, the client had requested 21 x 72 deck boards which were a lot more expensive than the standard 19 x 68 boards and we had to factor in accommodation and food for a week while we built it. Nevertheless it was our first deck and we learnt a lot.

Timber Deck Installed in Queensburgh, Durban

Sundeck installer Durban

Click to enlarge

This was our second deck we installed in Durban and this time around we got the spec right and didn’t spend all our money on timber. The deck was pretty much on ground level but still required normal 30 x 102 joists as it was not supported by a concrete base. Should there have been a concrete slab on which to support it then we could have used smaller batons instead of joists. We still sued a cleat and beam system although later in my Sundeck installer career I learned the other method of a joist as the cleat attached to the wall with the joists Téd off that and a fascia beam on the front.

There was a fair amount of digging to get the garden to the correct level as the one side was quite a bit more elevated than the other.
This deck had a floating step which was quite large, bigger than a normal tread. It worked very well in that it appears that the step is not attached to the deck at all and is large enough to step down comfortably on to it.

Sundecks builder Durban

Click to enlarge

Being our second deck we set everything out and started decking it. Half way through our deckboards we realised that the front beam was not straight. It bowed inwards and as the deck boards went down it became more and more noticeable. So all the deckboards came off, the beam was straightened and back they went. A costly mistake in time but a lesson learnt that will ensure that that mistake never happens again. A simple piece of fish line or builder’s line must be placed along the front edge of the beam when fastening the joists to ensure that it is straight. A false joist can be used here in the middle of the beam attached in the same direction as the joists will lie to hold it in place while the joists go down. The same rule applies for joists. When I joist is placed down it must also be square off the wall and the rest of the joists must be parallel to that one. Timber will always be bowed in one direction or another, some more than others. But they must be pulled straight before being attached. In the case of joists this will ensure that they screw line on the deckboards is straight and more appealing to the eye. Also it keeps the distance between joists exactly 550 between centres for the entire length of the joist. This is particularly important on joists that are placed on the end of the deck as the deckboards will be cut there and if not straight then the deckboards will either not be straight or they will form a lip where the joist bows inwards or outwards.

Sundecks Durban

Click to enlarge

The balustrade on this deck was pretty straight forward to. We notched the cross pieces so that they fitted snuggly together in the same plane rather than overlapping them. We built a pergola in balau above which eventually took a roof. The client however attended to the roof sheeting.

Wooden Sundeck built in The Bluff Durban – Jan 2013

sundecks durban

Click to enlarge

After the last sundeck we built in Durban we were glad to have a small break. Temperatures reached about 38°C and even though we only had to sand and seal it, it was almost impossible to work in those conditions.

This next sundeck in Durban measured about 5.7m wide along the front of the house by 4m deep. It was on the first floor at a height of 3.2m above ground level. Due to the size we had to support it using 4 balau posts each of 90mm x 90mm in size and the other two ends of the beams were set in feet cut and anchored to the wall. Initially we were going to set the posts in concrete the normal 600mm deep. However the location was in the Bluff which is almost completely a sand dune. We dug to 1m deep in sand that had the same consistency as building sand, and could still stick a re-bar another metre into the ground. Instead of the normal 600 deep in concrete method we had to throw feet or pads of 1m x 1m x 200mm with re-bar set in the middle. This created a larger footprint and will prevent the posts from sinking over time. The re-bar ensures that the whole pad has to sink at the same time instead of cracking. The posts were then set on top of those with a re bar hammered into the bottom of the post and drilled into the concrete.  See the two pics alongside.

timber decks durban

Click to enlarge

The posts are set as square to the wall as possible but there is no need to set them exactly square as they will simply support the beams and any difference won’t make a material effect structurally.

This deck needed 4 posts as the length was 5.7m and it is generally quite difficult to find beams in that size that long so they had to be joined in the middle with a post to support them. We were using 30 x 102 joists which can be spanned a maximum of 1.8m between beams so two beams were required thus doubling up the number of posts.

We cut the posts to length on the ground and then connected our beams using a joiner block to create one long beam. They were half checked and the balau beams of 30 x 220 were placed and secured on the half checks. Galvanised hex bolts were used to secure the beams to the posts.

The joists went on next and were left long so that the deckboards could start from the house side and the joists cut off once we reached our desired depth. If the joists are cut to length before the deckboards go on, then it will result in a half deckboards being used to finish it on the house side. What can also happen is that the last deckboard is not only a half deckboard but also a wedged shaped one. So deckboards are always started on the house side and run to the desired depth and the joists are then cut to fit.

Timber deck installers Durban

Click to enlarge

On these types of decks I also like installing a fascia beam of the same size as the joists so as to provide support on the front of the deck as well as providing a beam that the balustrade can be attached to. Without this the balustrade would need to be attached to the main beam beneath which would mean the main beam would need to be set near the end of the deck and perfectly square to the deckboards or the balustrade will run out of parallel to the boards. With this method it is not important if the main beam is not perfectly square as it doesn’t have to line up with anything on the deck itself. It is merely there for support and the tolerance is therefore much greater.
The balustrade uprights of 60 x 60 were installed prior to the deckboards so that we could deck around them by notching the boards. Once the boards were down, the cross supports on the balustrade were installed 100mm off the deck surface for the bottom one and flush with the top of the posts for the top one. This top cross support can sometimes be set 100 down from the top of the uprights, but setting it directly underneath the capping provides greater support to the capping and will prevent it from bowing over time. Pickets of 25 x 30 were then set equidistant apart between balustrade uprights, cut to length and a capping of 30 x 102 placed on top and secured.

Screw holes were epoxied closed with a saw dust mixture to match the colour, sanded and sealed.

Timber Sundecks in Durban

Wooden decks Durban

Click to enlarge

“Summertime ….. And The Livin’ is Easy “… Or it CAN be !! …Yes, with the South African summer right on the doorstep now, what’s the best Christmas present you could give to your family (and yourself)? (This one won’t fit into a Christmas stocking however …)

Ponder and Dream of how ‘lekker’ it would be to have a good quality sundeck in our sunny climate, leading off your lounge, and onto your pool or into your garden… and yes, in South Africa a sundeck is as important as your lounge, or more so because of our outdoor lifestyle.

Who to get to build it?
The benefits of having it professionally installed versus a ‘fly by night builder’, or tackling this mammoth task yourself; the importance of the maintenance of your valued product and the importance of what wood type to use in its construction are all considerations to take into account when planning to invest in this forever “best thing I ever did” choice. Make it your Christmas gift to the whole family, all in one!

Wooden decks Durban

Click to enlarge

Materials used in the construction include the following. All are good quality materials, able to weather the weather (pun intended) if properly maintained. An example:

• Balau (an imported hardwood from Indonesia, extremely dense, contains toxins that prevent termite damage and resins which repel water to prevent rot).
• Kalgard screws (similar to epoxy coating where the coating on the screw is baked on
• Stainless Steel Screws
• Epoxy to fill screw holes where the screw has been counter sunk to prevent water getting in the little hole which slows down rot
• Timber preservative rather than varnish (varnish sits on top and cracks and flakes from the UV in the sun’s rays, whereas timber preservative soaks into the wood nourishing it thereby preventing flaking and peeling of varnish.)
The Wood Joint pays special attention to detail in all products and places great importance on durability and longevity in their products by applying sound techniques and slightly over engineering most products.

Wooden decks Durban

Click to enlarge

They pride themselves in their quality workmanship and use only top quality timber sourced from reputable suppliers.

A sundeck is a valuable addition to any home and will not only provide many years of enjoyment, but will also enhance the value of your property.

With the correct care, maintenance costs can be kept to a minimum and the life span of your deck increased.

The Wood Joint will assist you in a design that will be cost effective and will best suit your needs taking into account the existing structure that is in place.

With years of experience in the deck building industry, The Wood Joint can advise, design, maintain and erect your deck in the most cost effective and structurally best methods.

Other Products, Other Timbers …
“We have listed the three most commonly used timbers to construct decks which have been selected due to their structural strength, longevity and cost effectiveness. There are however other timbers that can be used and these can be discussed individually.”
The Wood Joint (www.thewoodjoint.co.za) from my experience and that of many is dependable, reliable, knowledgeable and professional … View their website to see the quality and standard of their Sundecks and a wider portfolio of other specialities their experience encompasses:

• Sundecks
• Balustrades
• Pergolas
• Walkways
• Garden Bridges
• Pool Decks
• Screens (vertically installed to provide privacy)
• Cladding (on walls mainly for aesthetic purposes)
Wood
Balau

The most commonly used, and most cost effective timber, is Balau which is sourced from south East Asia. It is a yellow – brown to dark brown timber with a fine texture and interlocked grain and is extremely durable under tropical conditions.

It is a fairly heavy timber weighing between 800 kgs and 1, 000 kgs per cubic metre when dry.

It can be sealed or left unsealed. Unsealed it weathers to a grey colour. It can also be stained easily using a variety of tints to change the colour.

Garapa

Garapa is also a popular decking material as it is hard, heavy, tough and strong and is naturally resistant to rot, decay and insect attack. Found most commonly in Argentina, Brazil, Venezuela and Eastern Peru.

It normally weighs between 800 kgs and 960 kgs per cubic metre when dry. A fine grained timber varying in colour from yellowish to yellow – brown / yellow – pink.

It is, to a degree, scratch resistant reducing sanding during scheduled maintenance.

Massaranduba

Sourced form the West Indies and Central and South America, this timber is suitable for decks due to its hardness.

It is extremely heavy weighing in at about 1, 050 kgs per cubic metre when dry.

The texture is fine and uniform. The grain is usually straight but sometimes interlocked.

The heartwood is light red to rose red.

Keruing

Keruing is naturally found in South East Asia.

The timbers vary in colour from pinkish-brown to dark brown and look rather characterless. Grain is straight or shallowly interlocked and the texture is moderately coarse and even. All of the species contain oleo-resins and many of them will exude it onto surfaces during drying or when exposed to heat or sunshine when in use.

The weight is variable too but is generally within the range 720 to 800 kg/m3 when dried.

It is moderately durable.

For free quotes and more information on The Wood Joint’s various wooden products contact us on 082 496 5444 or complete the form below.

← Back

Thank you for your response. ✨


Wooden Sun Decks

English: Timber Decking Europe 4

English: Timber Decking Europe 4 (Photo credit: Wikipedia)

Although wooden decks have always been popular as a method of construction it is becoming more and more popular as trends move towards more natural methods and finishes in construction while considering environmental impact and the foot print building creates.  Provided timber is sourced from sustainably managed forests, wooden decks are of course as natural as one can get.

Wooden decks add value to your property at an affordable cost, in comparison to other construction methods, and, if well looked after, can last a lifetime.  They complement our outdoor lifestyle in South Africa and offer years of enjoyment.

STEEL, CONCRETE OR TIMBER

The choice between using concrete, steel or timber in your sun deck is a complex choice with many variables to consider.  One should take into account the following when making a decision: –

  • Cost effectiveness
  • Ease of build
  • Environmental impact
  • Longevity

It is often best to research this independently based on your unique requirements and conditions.

THE TIMBER USED

There are a number of different types of timber available which have been carefully selected to fit your taste, your pocket and the environment we found ourselves in.

The most common timbers used are: –

SA Pine:

This must be CCA Treated to at least an H4 level if outdoors and exposed to the elements.  CCA stands for Copper, Chrome and Arsenic.  The copper prevents algae growing on the timber caused by dampness.  Algae causes rot by breaking down the fibres in wood.  Hence the wood can get wet without rotting.  The arsenic prevents insect infestation and the chrome binds to two to prevent them from leaching out of the timber.  The amounts of chemicals present in the timber do not affect humans, animals or plants in any significant way and it is therefore safe to humans, plants and animals.  The level of treatment (H4) refers to the strength of the solution and the pressure at which it is forced into the timber.

Balau:

Sourced from South East Asia this timber is the most cost effective hardwood.  There is no need to pre treat it as it is naturally resistant to rot and decay due to the high levels of oils and resins present in the timber.  Balau decking boasts a fire rating of Class A which is the same as concrete or steel.

Garapa, Massaranduba, Keruing:

These are all equally matched to Balau in terms of durability and workability but are slightly more expensive.  It is therefore common to use Balau as the sub structure with these timbers as the deck boards and visible components of the sun deck.

It is not advisable to use pine as your substructure with a balau or similar hardwood as deck boards as the timbers expand and contract at different rates and can cause screws to either break or pull out.

When taking into account what timber to use one must remember that the cost to install the deck is often the greater percentage of the total cost and the benefits of paying slightly more to get a balau deck are far greater than the cost saving of using pine.

Composites:

Composites are manufactured deck boards using largely re-cycled plastic.  They are available in a range of colours.  The argument is that they are more enviro-friendly than wood and that installation is easier, and therefore less expensive to install.  They are normally more expensive per square metre of deck in terms of materials and it is argued that they are maintenance free. However they cannot be sanded once they are installed as they are a plastic composite and should scratches occur on the surface they may prove difficult to remove.  They are installed using a CCA Treated Pine baton or joist and the substructure is normally pine.  They are however being installed successfully and should not be ignored.

SEALING OR FINISHING A WOODEN DECK

The myth that a timber sun deck is expensive to maintain is unfounded, provided it is installed using good quality timber and construction methods are sound.  If finished with the correct sealer, maintenance can be reduced to a minimum and maintenance intervals can be increased.

A common mistake that is often made is to coat the deck with a coating that does not penetrate the deck surface but rather dries on the surface.  With the hot African sun beating down on the deck the horizontal surfaces often start to crack and flake.  Using a penetrating timber preservative avoids this occurring and reduces labour costs at scheduled maintenance intervals.

Screw holes should always be filled with an epoxy to avoid them “popping” and to avoid water penetrating the timber through the screw hole.  One must remember that water penetrates wood largely from the end grain and therefore any screw holes left unfilled will allow water to easily penetrate the timber.  End grains should also be well sealed to avoid this.

After taking into account your unique requirements and environment it is difficult to argue that a well constructed timber sun deck, using quality timber from reputable suppliers will not add value to your property while providing many years of enjoyment.

The warmth of wood cannot be replicated by other building materials.