Wooden Sundeck, Toti, Durban

Wooden Sundeck Installer Durban

Click to enlarge

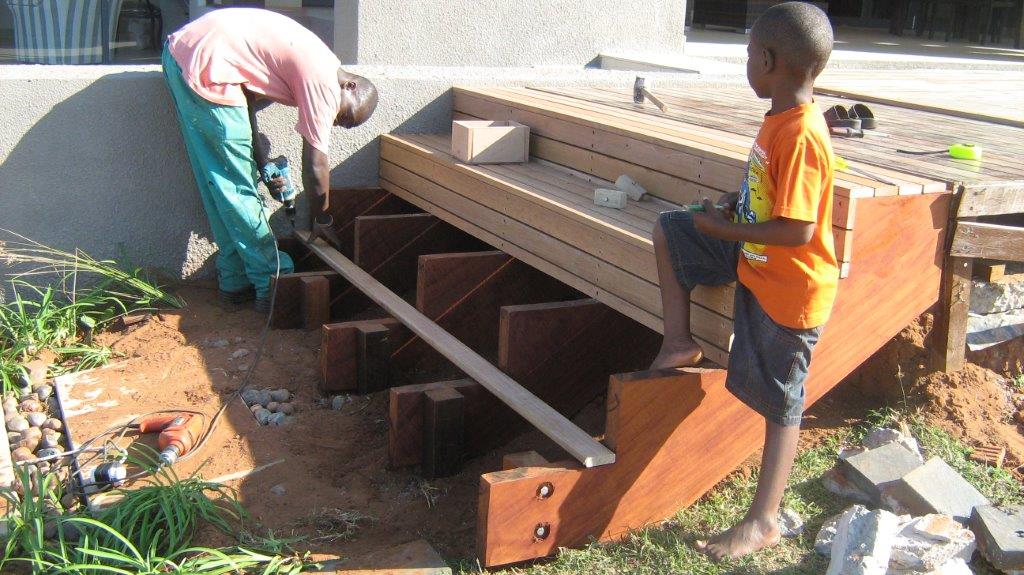
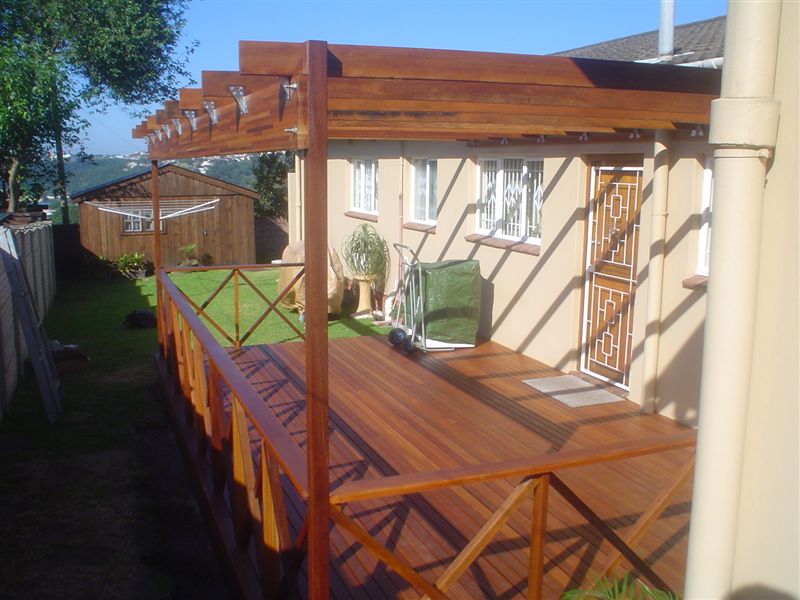
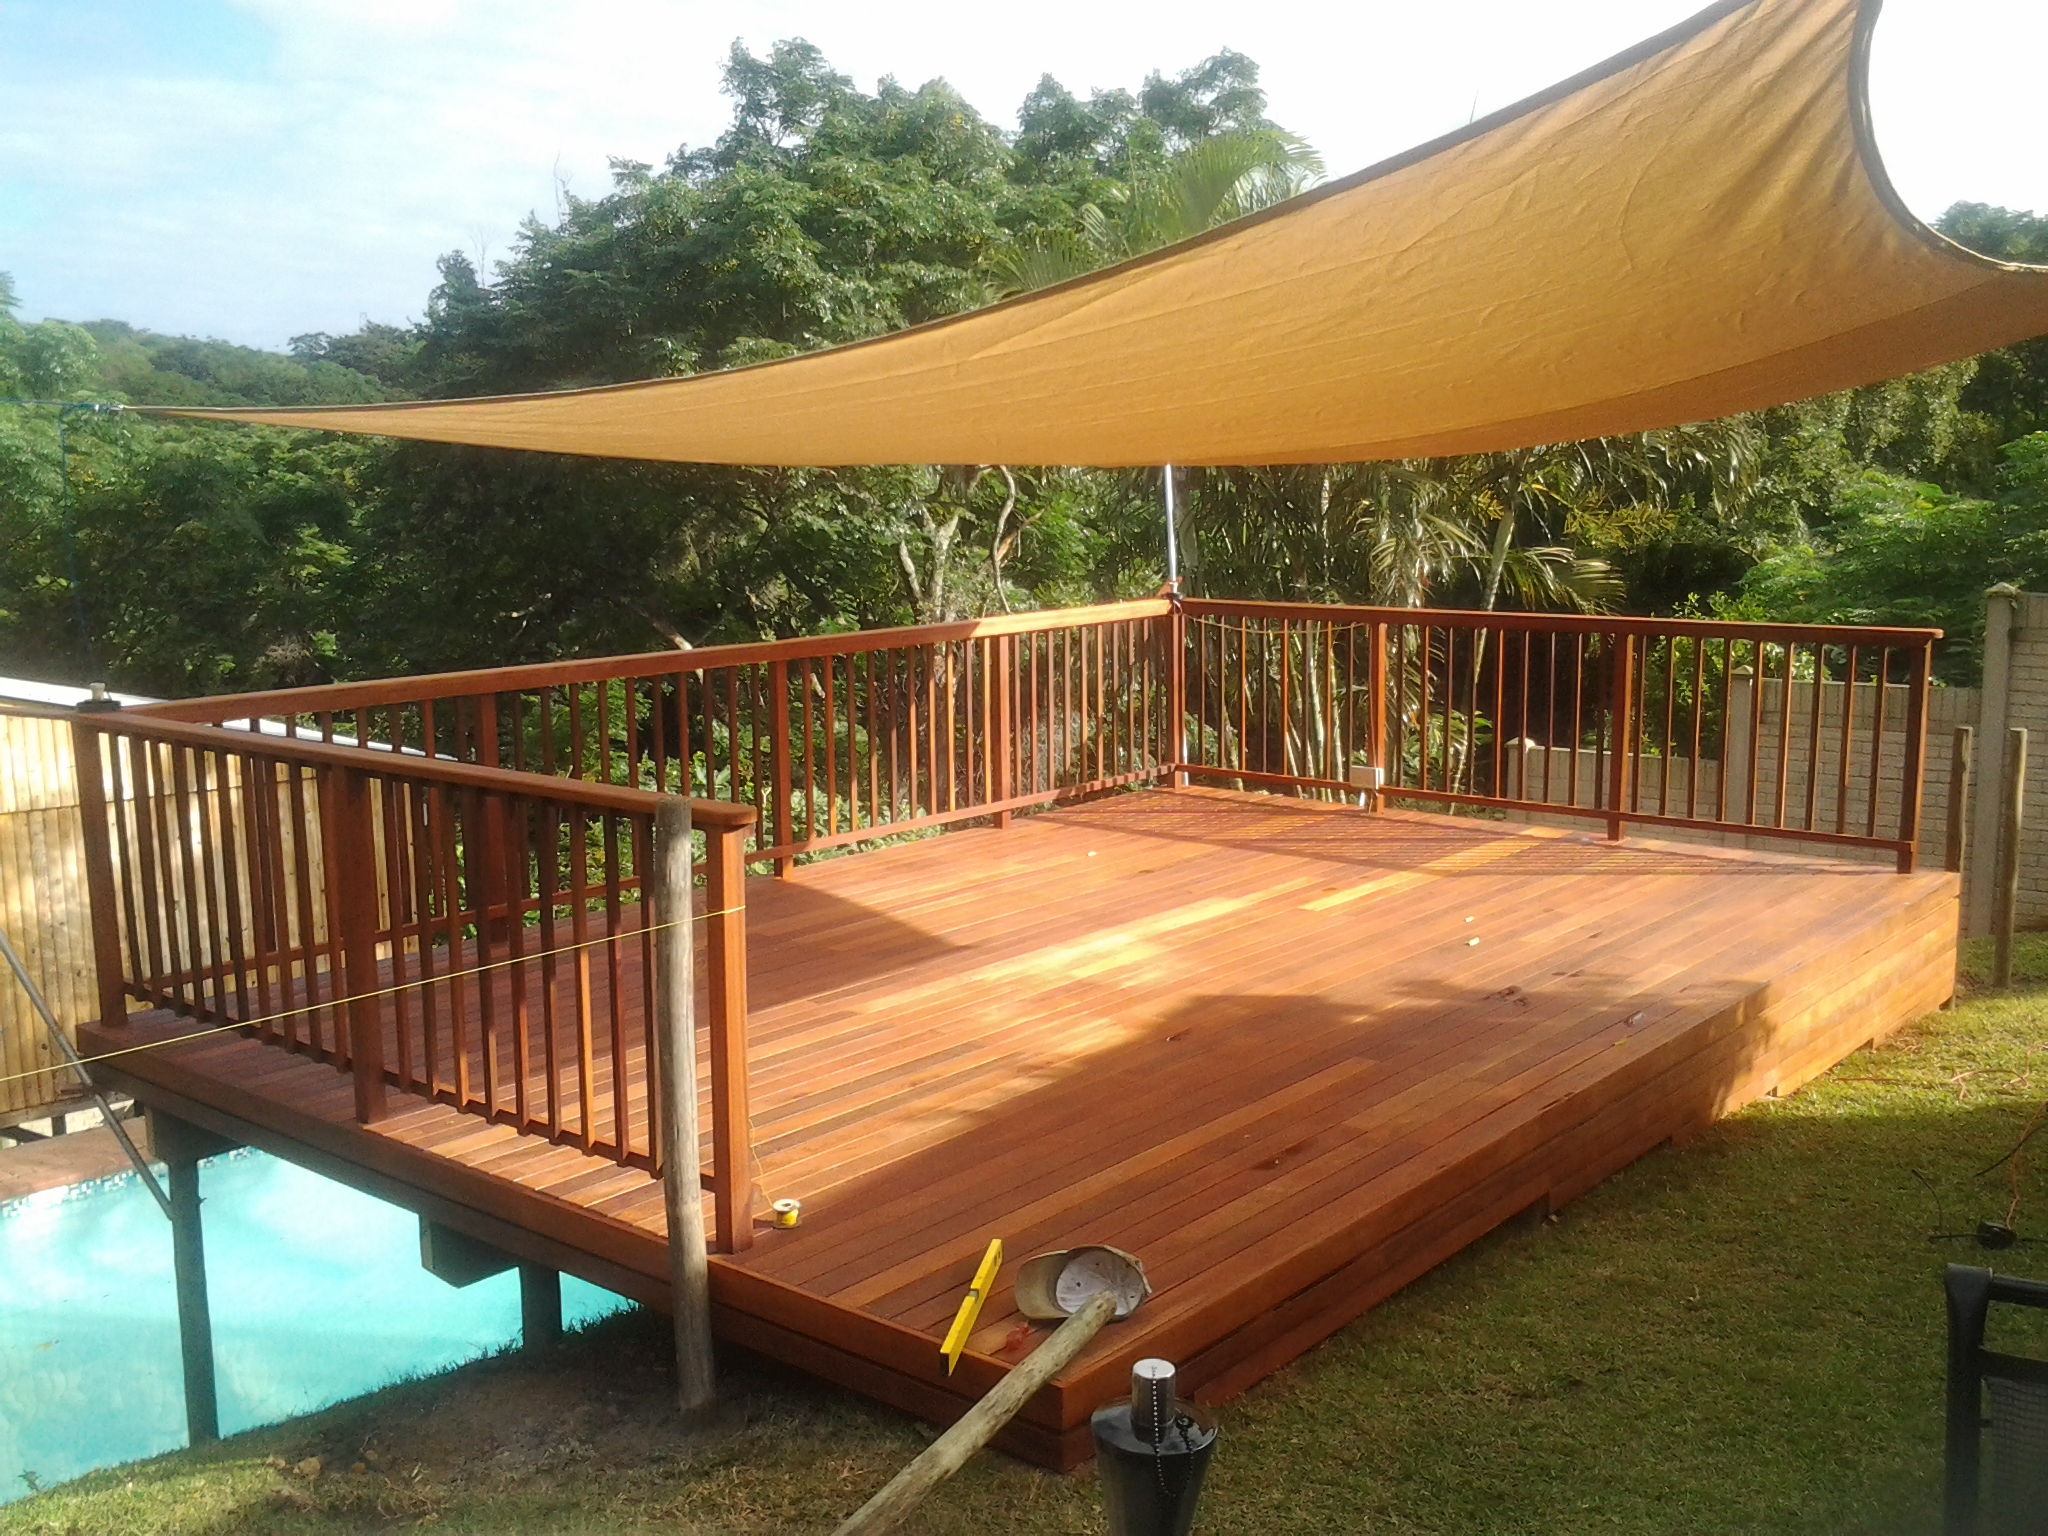
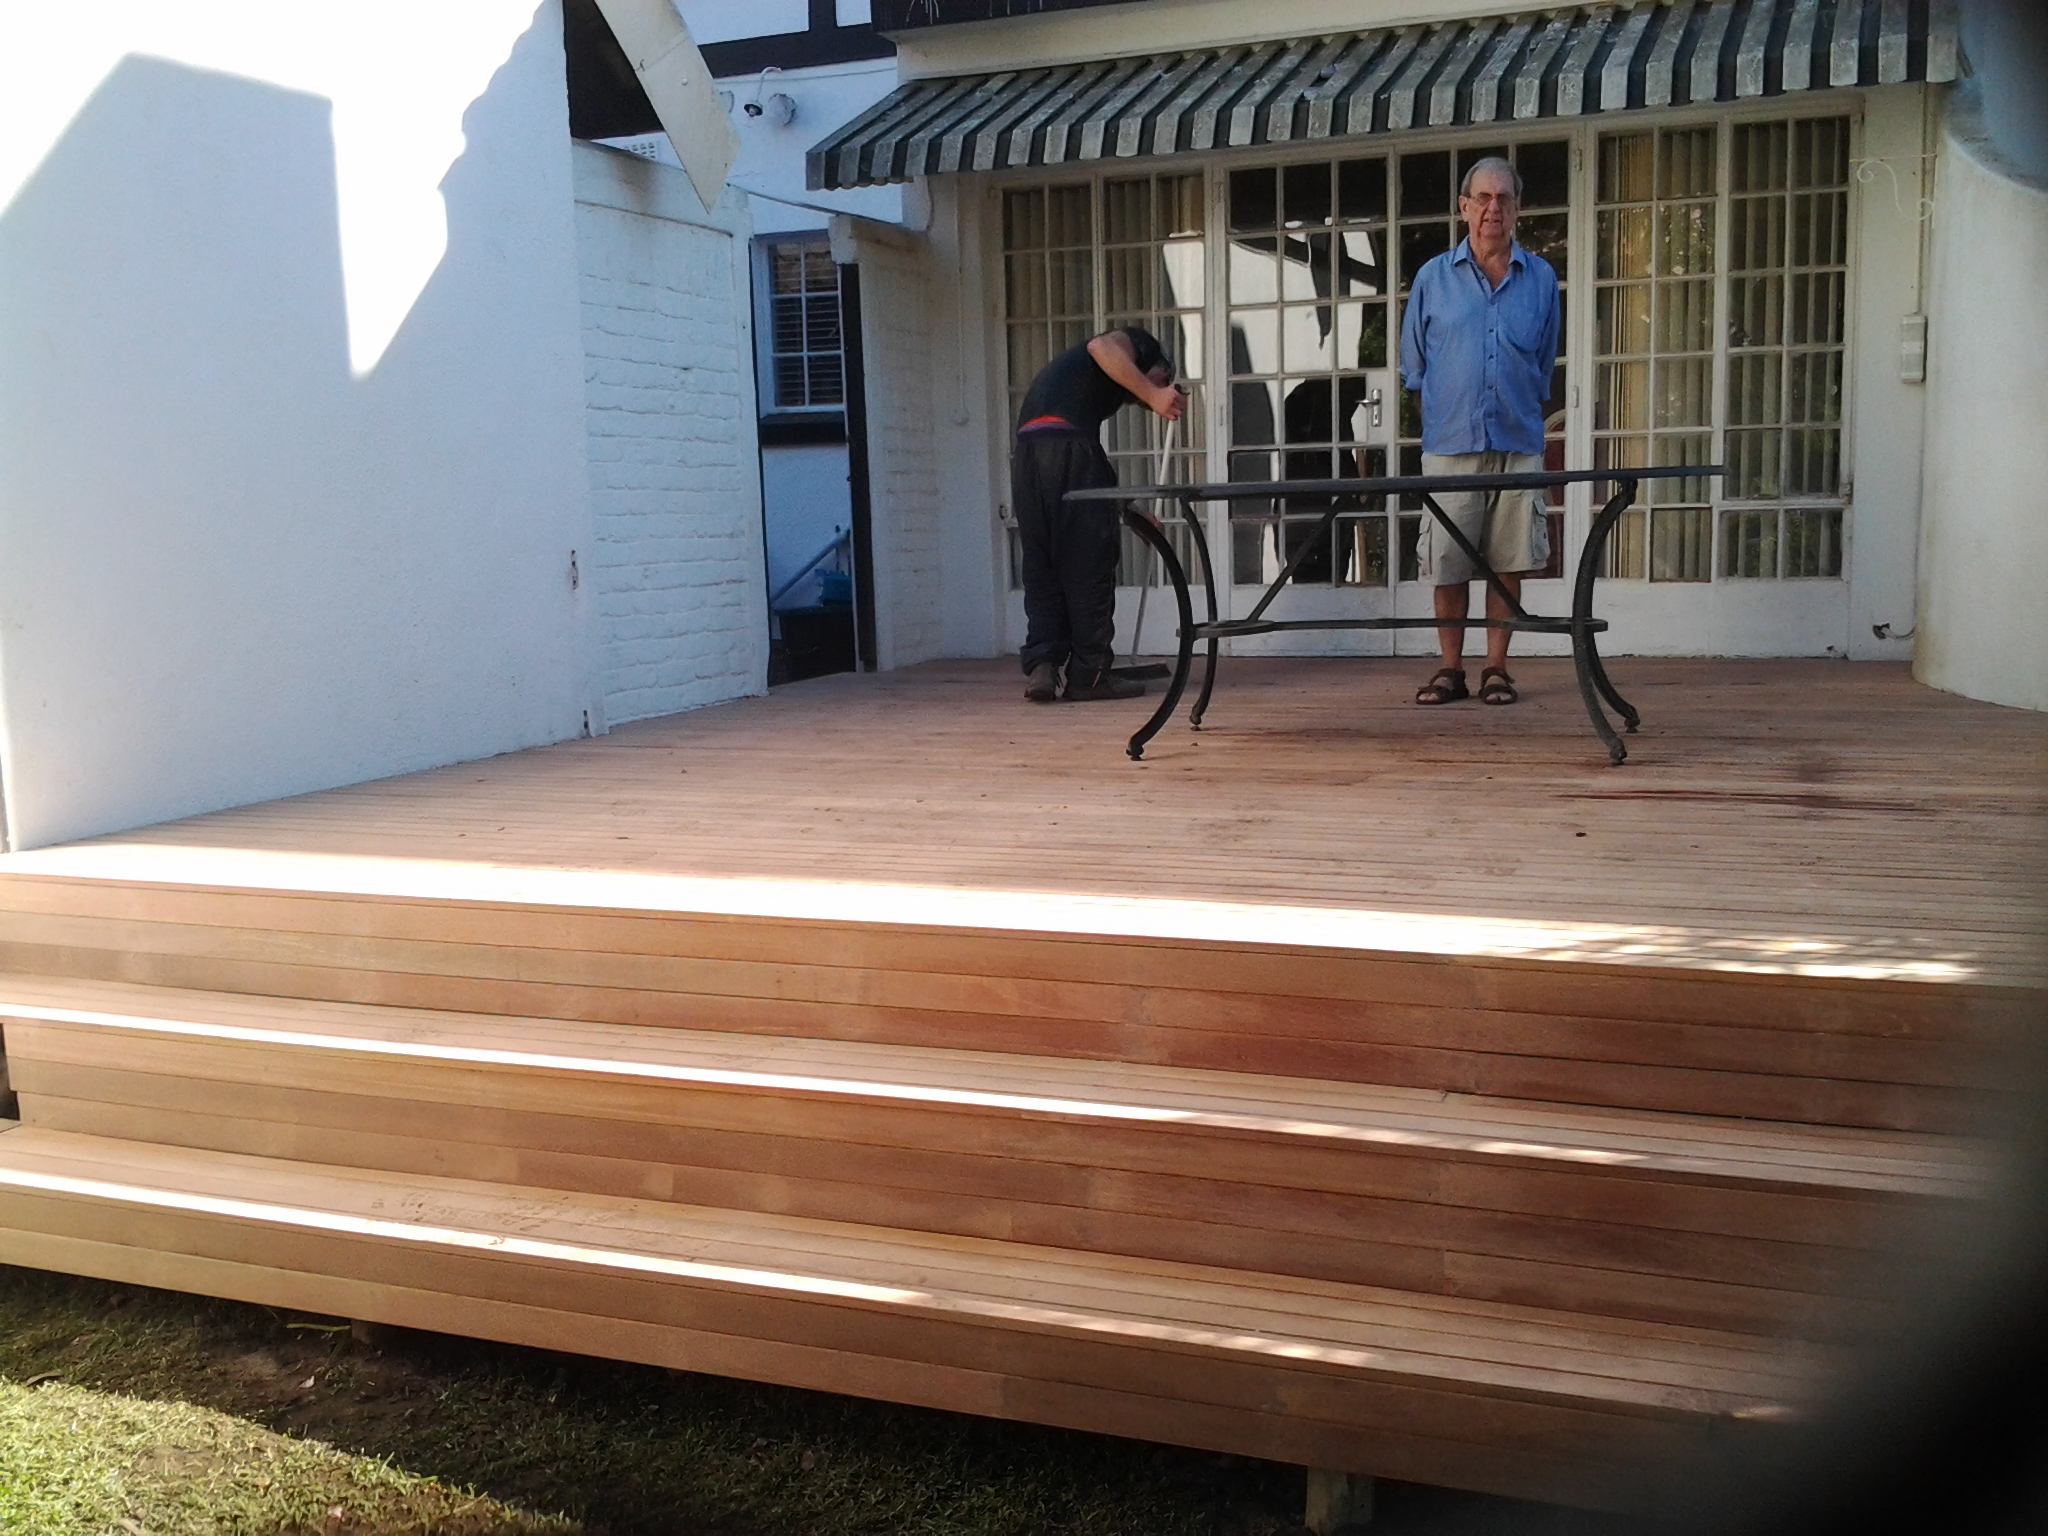
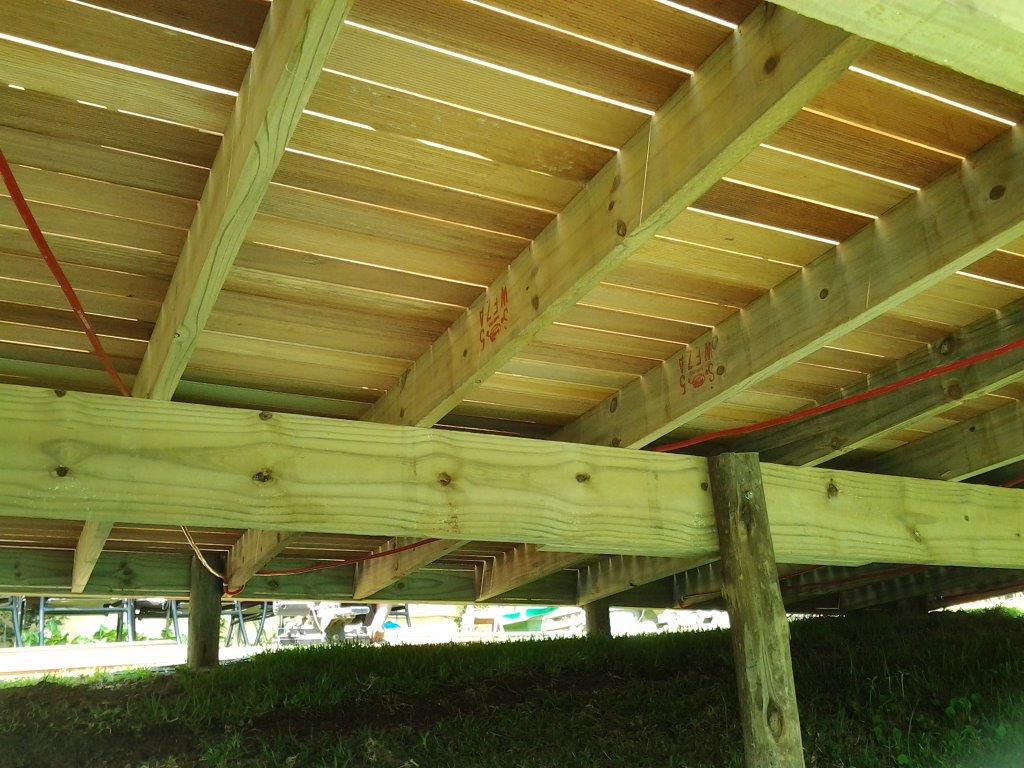
We built this wooden sundeck in Toti using CCA Pine, for the first time, as our substructure and decked it using balau deckboards. For a long time I have been using only balau as a substructure. But after some careful investigation I have accepted that a CCA treated pine substructure is as good if not better than a balau one.

The manufacturers of the solution that is used to pressure treat the timber guarantee their product for between 30 to 50 years depending on which manufacturer you use. Provided the company doing the pressure treatment treats it correctly and provided the correct Hazard Level (H level) is used in the correct application, the timber will be guaranteed against rot and insect infestation by the manufacturer of the solution. I will write another more detailed article on CCA pressure treatments, but for the purpose of this article you will need to know what it broadly means.

Wooden Sundeck Installer Durban

Click to enlarge

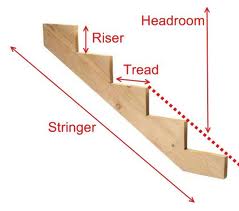
H2 CCA Treated pine is good for roof trusses where it is not exposed to the elements such as rain. H3 treated is good for outdoors such as decks and H4 is good for in the ground or in contact with wet soil. H5 is good for in salty water and is normally a combination of CCA and creosote treatment. H2 is commonly sold off the shelf at most timber yards. H3 and H4 is more specialised so one needs to find a supplier who is regularly treating to H3 or H4. Under no circumstances should H2 be used as a substitute. It will rot within a few years. Simple. Do not use it in decks, keep it for the roof.

Wooden Sundeck Installer Durban

Click to enlarge

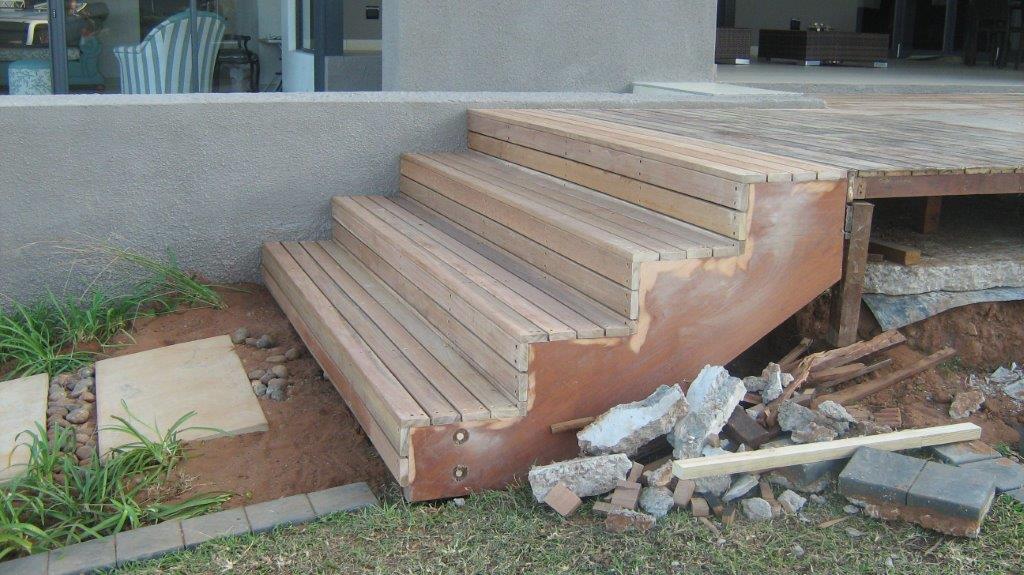
In order to activate a guarantee against the manufacturer one would need to take photos of the deck going up ensuring that the correct H level is used, an audit process would need to be completed on the company treating the timber and the build would probably need to be registered with the manufacturer and possibly inspections conducted during the build. So although it is possible to activate a guarantee, it is not really practical as the substructure will go up in 2 days and the deck will be done in 5 days. However, if the manufacturer is willing to offer this sort of guarantee, then we can safely assume that the timber we are using will hold up to its promise. In a nutshell, H3 or H4 treated CCA Pine is suitable for a substructure for a deck and may very well outlast a balau substructure. I would not be too keen to use it as deckboards for two reasons. Although it won’t rot or get eaten by ants, it will expand and contract a lot more than balau which will result in checking, cracking, warping, bowing etc. over time. The second reason is that because it is half as dense, one needs to use a 32mm thick deckboard as opposed to a 19mm deckboard in balau. So twice as much timber is used and the cost is actually slightly more in pine per square metre than balau. So why not use balau in the surface? It is much better looking and much more stable (i.e. it remains flat for many more years).

Wooden Sundeck Installer Durban

Click to enlarge

The cost saving in using CCA pine vs. balau in the substructure is great and this allows me to keep my prices low whilst still providing a quality product. The CCA Pine will last as long if not longer than the balau substructure if the correct H grade of CCA pine is used.

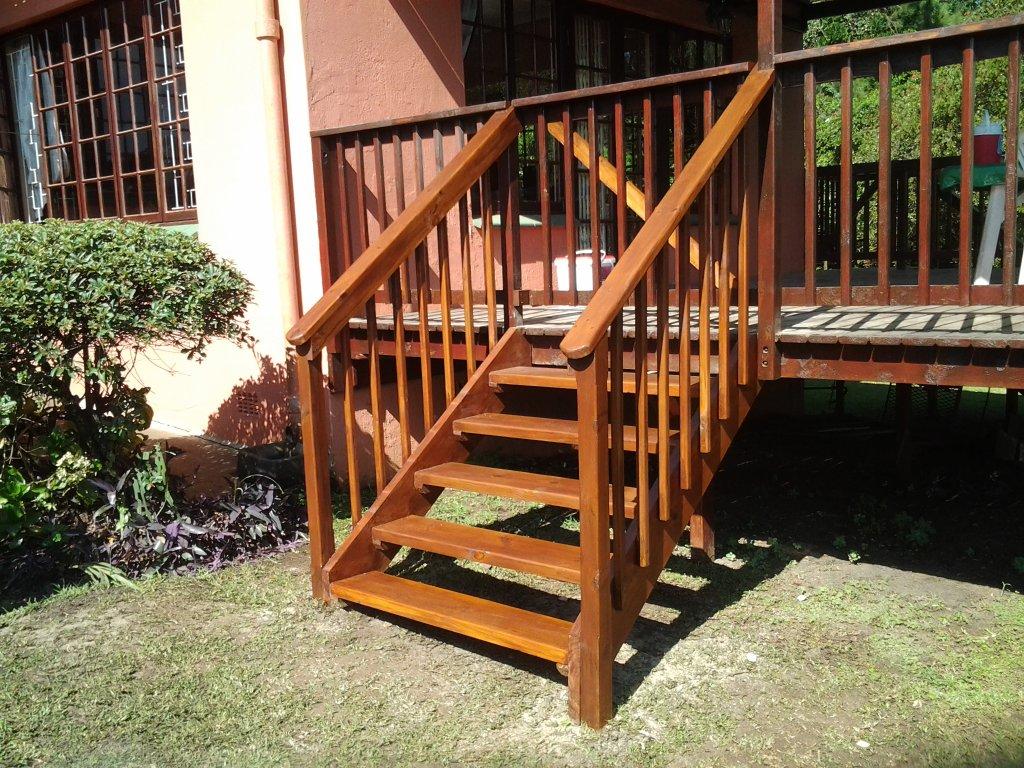
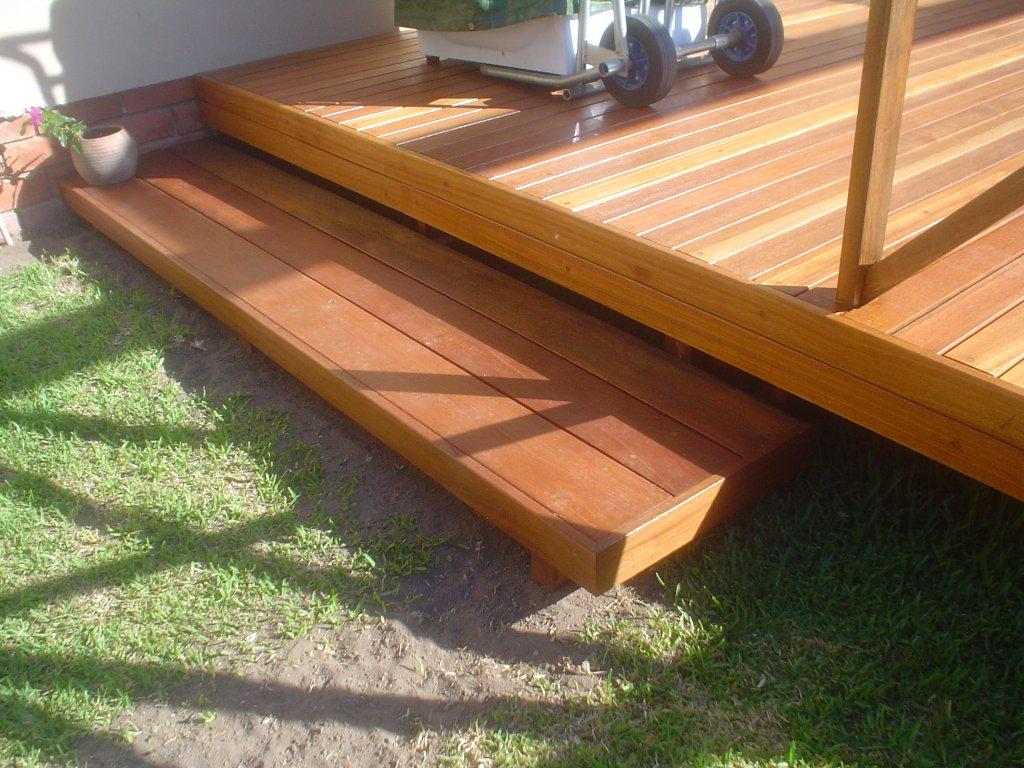
All areas that have pine exposed are clad with deckboards so that the pine is not visible. Balustrades remain full balau.

For a no obligation quote on wooden decks, balustrades, pergolas and any other outdoor timber construction, please complete the form below and I will get back to you.  Or you can call us on 082 496 5444.

← Back

Thank you for your response. ✨

Timber Stairs Built Hawaan Forest Estate, Durban

Timber stairs Durban

Click to enlarge

These timber stairs I built-in Durban were the first stairs I built. This was towards the beginning of my deck building career and I had no idea really what to do. I had been involved in carpentry for a fair while so I had an understanding of timber, how it behaves and how to construct and manufacture items, but I had no idea of what needed to be done to build stairs both effectively and affordably. I resorted to Google and surprisingly, or not, I found hundreds of videos on how to make stairs. Mostly American videos so a few adaptions to our local conditions and I had a good idea of what was required.

I used the more conventional, more expensive method of building stairs. I took three pieces of 50 x 220 stock and cut my treads and risers out of the timber (see the diagram attached). This is done by first calculating the riser and tread based on the height of the deck that you need to reach with the stairs. Although an optimal height of each riser is about 190mm and the tread about 280mm, it will vary depending on the vertical height so as to keep each riser and tread the same height and length.

Timber stairs Durban

Click to enlarge

Once these two measurements have been calculated, one uses a large steel square to draw the risers and treads on the stock. The square is simply placed on the stock and the two points are marked off on each end of the square resulting in a right angle where the tread meets the riser. The trick was cutting through the 50mm wood with a hand-held skill saw. My skill saw has a small blade so it kept jamming and burning the wood. In hindsight I would have used 40mm stock or even less as the strength of the timber exists in the width, not the thickness. So a 30 or 40 by 220 would have been much more affordable and much easier to work with. Nevertheless, we persevered and eventually had 3 lovely stringers cut and ready for installation.

From there it was a matter of placing the stringers in place with the tread level and securing them in place with posts concreted into the ground. The inner most stringer was secure directly to the wall using sleeve anchors and this became our starting point from which we set the others, level to that and to ground. With all our stringers in place we decked the surface using 19 x 68 deckboards. We added a bit of substructure to the sides to accept our cladding, clad it and sealed it using a Nova product. Nova produces some top quality timber preservatives, but be careful not to mix them up with the varnishes. Varnish is a no go on any deck as it will peel and flake as the sun breaks it down. To get it off afterwards is near impossible and varnishing over it again results in a blotchy effect. One can’t use anything other than varnish once it has been varnished so stay away from varnish or anything that dries on the surface, with the exception of water based sealers. An article on sealing decks can be found here.

You can find a large reference base on Wikipedia about stairs here.

For a free no obligation quote please complete the form below and we will contact you.  Or you can call us on 082 496 5444.

← Back

Thank you for your response. ✨

Timber Stairs Built in Hillcrest – February 2013

Timber stairs Durban

Click to enlarge

As a deck builder and timber stair builder in Durban I have had to learn how to build timber stairs the hard way, through trial and error (and a bit of Googling).  Timber stairs have always been a tricky one for me and I have battled to build them in the past. At first I Google’d ‘building timber’ stairs and found a few videos on the topic which explained it quite nicely. Most of the videos online though are American and they therefore explain it in inches. But after converting it the technique and calculation used to work out your runs and risers becomes quite clear.

The riser is the vertical piece of the step and the run (or tread) is the horizontal piece. Building regulations in South Africa state that the riser can be no more than 200mm high and the tread or run can be no shorter than 250mm. Timber, either in pine or balau, will come standard at either 140mm wide or 220 wide. One should therefore use two pieces of 140 wide stock in order to get a tread of 280mm wide. I have seen stairs built using 220 wide stock which although is not completely according to building regulations can work if a gap is left between the front of the top tread and the back of the tread below that. The gap should be at least 30mm to get back to your minimum of a 250mm wide tread, although building regulations state that this gap should be no bigger than 20mm. Because the stairs are open, one can normally get away with this as your foot will be able to move past the back-end of the tread as you climb the stairs. Be sure to check with building regulations before designing your stairs to ensure you are compliant or that your contractor is adhering to these regulations.

Timber stair builder

Click to enlarge

First you need to calculate the exact height of your riser and the exact width of your tread. I will use 1,1m as the height of the stairs for the example below.

Assuming a riser of about 200mm or less divide 1, 100mm by 200mm. You get 5.5 risers. Increase this to 6 risers because if you take it back to 5 risers you riser will be more than 200mm.

So 6 risers and therefore 5 treads. The top tread of course being the deck itself.

1, 100mm divided by 6 risers give you an exact riser height of 183.3mm. 5 treads of 280mm each will result in a total floor length of 1, 4m. From this you can work out the length of the stringer. a²+ b² = c². Remember him? Yeah!!! The stringer by the way is the piece that runs down diagonally from the deck to the floor and to which the treads are attached.

Now lay the stringer flat on the ground, starting your markings a comfortable distance from the end to allow for cutting to the correct angle and possibly notching the end to accommodate any lip that may exist on the deck. Deckboards can either be set flush with the joist or they can hang slightly over which will dictate whether or not the stringer needs to be notched so that it can be fastened to the joist or beam.

Timber stairs Durban

Click to enlarge

With the stringer flat on the ground, take a large square with markings on both sides (the big black square) and slide it along the one side of the stringer so that you reach the 183.3mm mark on one side and the 280mm mark on the other side. Of course you would round this to the nearest millimetre. One can buy little clamps that clamp to the sides of the square to make this job easier. In fact sophisticated stair stringer squares can be bought but the big black square works just as well. With your riser height and tread width marked on the stringer you can now draw a line around the square at the corner. This is where your riser and tread will be. Move the square down to the end of the marks and repeat to mark the next one. Continue until the end of the stringer. Cut the top end of your stringer off parallel to the riser at the correct distance to attach to the joist. The bottom of the stringer will be cut, either parallel to the riser or tread depending on whether you want a vertical or horizontal end which will either attach to the concrete ground (horizontal) or be set into the soil using a post and concrete (horizontal or vertical).

If you have as much difficulty understanding this as I did, then you are not alone. Try it and you will find it becomes second nature.
Now it’s just a matter of attaching your treads and job done. If you have a balustrade running down the sides of your stairs this can be attached now. Care should always be taken where the balustrade capping and cross supports, on the stairs, meet the same on the deck as they are running at different heights. It is better to take the balustrade up, level out whilst still on the stairs and then meet the horizontal.

Timber Deck Installed in Queensburgh, Durban

Sundeck installer Durban

Click to enlarge

This was our second deck we installed in Durban and this time around we got the spec right and didn’t spend all our money on timber. The deck was pretty much on ground level but still required normal 30 x 102 joists as it was not supported by a concrete base. Should there have been a concrete slab on which to support it then we could have used smaller batons instead of joists. We still sued a cleat and beam system although later in my Sundeck installer career I learned the other method of a joist as the cleat attached to the wall with the joists Téd off that and a fascia beam on the front.

There was a fair amount of digging to get the garden to the correct level as the one side was quite a bit more elevated than the other.
This deck had a floating step which was quite large, bigger than a normal tread. It worked very well in that it appears that the step is not attached to the deck at all and is large enough to step down comfortably on to it.

Sundecks builder Durban

Click to enlarge

Being our second deck we set everything out and started decking it. Half way through our deckboards we realised that the front beam was not straight. It bowed inwards and as the deck boards went down it became more and more noticeable. So all the deckboards came off, the beam was straightened and back they went. A costly mistake in time but a lesson learnt that will ensure that that mistake never happens again. A simple piece of fish line or builder’s line must be placed along the front edge of the beam when fastening the joists to ensure that it is straight. A false joist can be used here in the middle of the beam attached in the same direction as the joists will lie to hold it in place while the joists go down. The same rule applies for joists. When I joist is placed down it must also be square off the wall and the rest of the joists must be parallel to that one. Timber will always be bowed in one direction or another, some more than others. But they must be pulled straight before being attached. In the case of joists this will ensure that they screw line on the deckboards is straight and more appealing to the eye. Also it keeps the distance between joists exactly 550 between centres for the entire length of the joist. This is particularly important on joists that are placed on the end of the deck as the deckboards will be cut there and if not straight then the deckboards will either not be straight or they will form a lip where the joist bows inwards or outwards.

Sundecks Durban

Click to enlarge

The balustrade on this deck was pretty straight forward to. We notched the cross pieces so that they fitted snuggly together in the same plane rather than overlapping them. We built a pergola in balau above which eventually took a roof. The client however attended to the roof sheeting.

Timber Sundecks in Durban

Wooden decks Durban

Click to enlarge

“Summertime ….. And The Livin’ is Easy “… Or it CAN be !! …Yes, with the South African summer right on the doorstep now, what’s the best Christmas present you could give to your family (and yourself)? (This one won’t fit into a Christmas stocking however …)

Ponder and Dream of how ‘lekker’ it would be to have a good quality sundeck in our sunny climate, leading off your lounge, and onto your pool or into your garden… and yes, in South Africa a sundeck is as important as your lounge, or more so because of our outdoor lifestyle.

Who to get to build it?
The benefits of having it professionally installed versus a ‘fly by night builder’, or tackling this mammoth task yourself; the importance of the maintenance of your valued product and the importance of what wood type to use in its construction are all considerations to take into account when planning to invest in this forever “best thing I ever did” choice. Make it your Christmas gift to the whole family, all in one!

Wooden decks Durban

Click to enlarge

Materials used in the construction include the following. All are good quality materials, able to weather the weather (pun intended) if properly maintained. An example:

• Balau (an imported hardwood from Indonesia, extremely dense, contains toxins that prevent termite damage and resins which repel water to prevent rot).
• Kalgard screws (similar to epoxy coating where the coating on the screw is baked on
• Stainless Steel Screws
• Epoxy to fill screw holes where the screw has been counter sunk to prevent water getting in the little hole which slows down rot
• Timber preservative rather than varnish (varnish sits on top and cracks and flakes from the UV in the sun’s rays, whereas timber preservative soaks into the wood nourishing it thereby preventing flaking and peeling of varnish.)
The Wood Joint pays special attention to detail in all products and places great importance on durability and longevity in their products by applying sound techniques and slightly over engineering most products.

Wooden decks Durban

Click to enlarge

They pride themselves in their quality workmanship and use only top quality timber sourced from reputable suppliers.

A sundeck is a valuable addition to any home and will not only provide many years of enjoyment, but will also enhance the value of your property.

With the correct care, maintenance costs can be kept to a minimum and the life span of your deck increased.

The Wood Joint will assist you in a design that will be cost effective and will best suit your needs taking into account the existing structure that is in place.

With years of experience in the deck building industry, The Wood Joint can advise, design, maintain and erect your deck in the most cost effective and structurally best methods.

Other Products, Other Timbers …
“We have listed the three most commonly used timbers to construct decks which have been selected due to their structural strength, longevity and cost effectiveness. There are however other timbers that can be used and these can be discussed individually.”
The Wood Joint (www.thewoodjoint.co.za) from my experience and that of many is dependable, reliable, knowledgeable and professional … View their website to see the quality and standard of their Sundecks and a wider portfolio of other specialities their experience encompasses:

• Sundecks
• Balustrades
• Pergolas
• Walkways
• Garden Bridges
• Pool Decks
• Screens (vertically installed to provide privacy)
• Cladding (on walls mainly for aesthetic purposes)
Wood
Balau

The most commonly used, and most cost effective timber, is Balau which is sourced from south East Asia. It is a yellow – brown to dark brown timber with a fine texture and interlocked grain and is extremely durable under tropical conditions.

It is a fairly heavy timber weighing between 800 kgs and 1, 000 kgs per cubic metre when dry.

It can be sealed or left unsealed. Unsealed it weathers to a grey colour. It can also be stained easily using a variety of tints to change the colour.

Garapa

Garapa is also a popular decking material as it is hard, heavy, tough and strong and is naturally resistant to rot, decay and insect attack. Found most commonly in Argentina, Brazil, Venezuela and Eastern Peru.

It normally weighs between 800 kgs and 960 kgs per cubic metre when dry. A fine grained timber varying in colour from yellowish to yellow – brown / yellow – pink.

It is, to a degree, scratch resistant reducing sanding during scheduled maintenance.

Massaranduba

Sourced form the West Indies and Central and South America, this timber is suitable for decks due to its hardness.

It is extremely heavy weighing in at about 1, 050 kgs per cubic metre when dry.

The texture is fine and uniform. The grain is usually straight but sometimes interlocked.

The heartwood is light red to rose red.

Keruing

Keruing is naturally found in South East Asia.

The timbers vary in colour from pinkish-brown to dark brown and look rather characterless. Grain is straight or shallowly interlocked and the texture is moderately coarse and even. All of the species contain oleo-resins and many of them will exude it onto surfaces during drying or when exposed to heat or sunshine when in use.

The weight is variable too but is generally within the range 720 to 800 kg/m3 when dried.

It is moderately durable.

For free quotes and more information on The Wood Joint’s various wooden products contact us on 082 496 5444 or complete the form below.

← Back

Thank you for your response. ✨


Timber or Wooden Balustrades

Wooden Balustrades

A classic criss cross style balustrade

Timber balustrades are built in various designs and various different timbers can be used. The most affordable hardwood of course being balau with more expensive options being Massaranduba, keuring etc. The pieces required for balustrades are most commonly found in balau as they form part of the structural pieces stocked by most timber merchants. Massaranduba, keuring etc. are largely supplied in deckboards only and are used for the actual decking with balau being used as the substructure. All three of them are equally as durable and strong and only really differ in colour and grain.

In this article we will discuss the picket style balustrade.

PICKET STYLE

This type of balustrade is often the only one that completely adheres to standard building regulations as the gap between any two pieces is, or can be made, less than 100mm. It should be designed with a cross horizontal support at the top and bottom to give the pickets a support to be attached to. The bottom horizontal support is normally set about 100mm from the ground and secured to each vertical post in as long a length as possible. The top horizontal support can either be set at the top of the post and directly beneath the capping or set 100mm down from the capping to provide a gap between it and the capping. The former being my personally preferred method as it then gives the capping a more rigid support and will reduce bowing and cupping of the cap.

Each picket is then attached to these horizontal supports so that the gap between vertical pickets is equal. Care should be taken in setting the first and last one as the width of each picket needs to be taken into account when calculating the centre of each picket due to the first and last one being the vertical post itself. Pickets can be pre routed on the corners to give it a profile or left square. They can also be routed in situ resulting in the router not running all the way to the end of the picket.

A capping is then placed and secured on top of the horizontal support and posts, or just to the posts if the latter method was used. This capping can then be routed over the edges to break the sharp corner. This capping should also be secured in as long a length as possible to avoid joins wherever possible. If a join is necessary it should be joined with a 45° join directly above a vertical post. This will reduce lifting on the joint.