Floor Sanding Durban

Floor sanding Durban

Click to enlarge

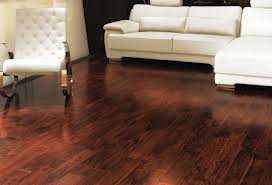
Many home owners, with old houses, are finding that once they remove the carpets, which became so popular in the 70’s, that there are lovely solid wood floors beneath. After so many years of being trapped beneath a carpet, they do of course need some sanding and sealing in order to bring them back to their previous splendour. Most often there is nothing wrong with these floors and all that is required is a sand and seal to bring them back to new. At times one might find that some of the boards are lifting as the adhesive has given way in which case you will need to clean up the surface and re-adhere them to the substrate. Some of the older floors were stuck down using linoleum glue and I have found floors where this has all come off and left the boards loose. It then needs to be cleaned using mineral spirits. It is best to remove all of this and then use a modern-day adhesive to re-apply them.

Most contractors who installed solid wood floors of yesteryear used top quality timber and therefore you will find that the timber itself is quite all right to last another 100 years, if not longer. Because floors are generally not exposed to much water and weathering, their condition will remain almost as original and all that is required is a good sand and seal.

Floor sanding Durban

Click to enlarge

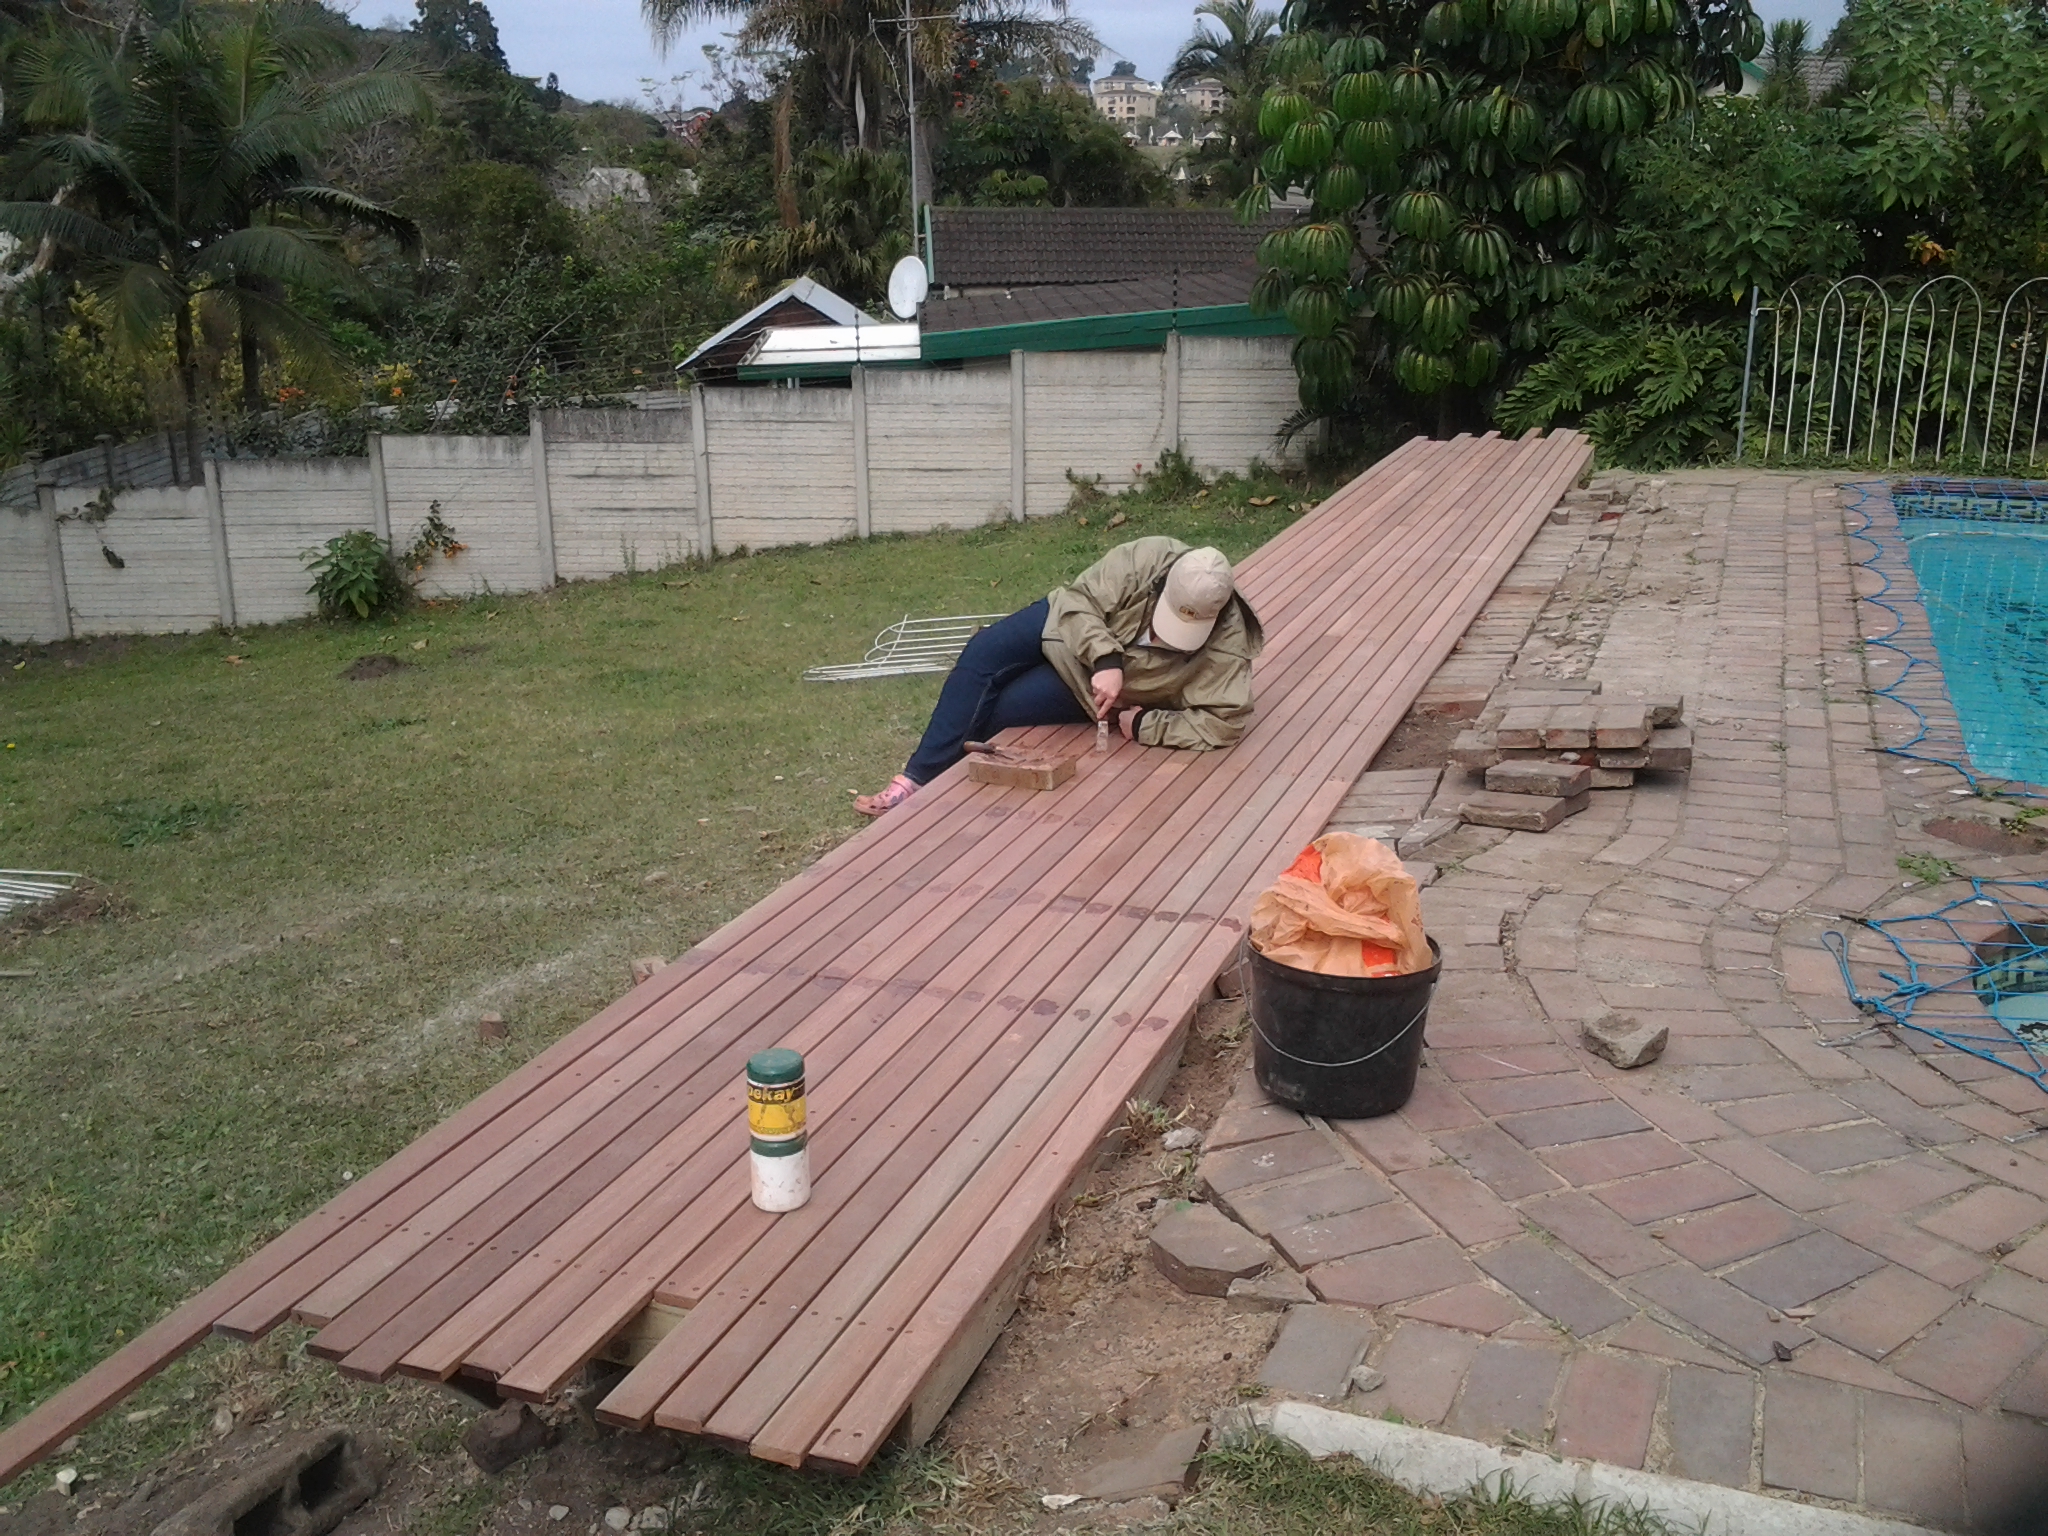
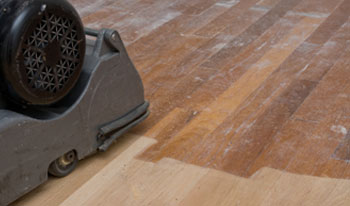
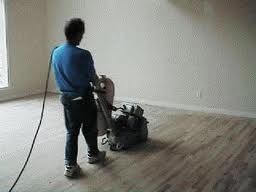
We use an industrial floor sander with a rough grit paper to remove all old sealer and any dirt and blemishes that may have taken hold over the years. The floor sander cannot reach all corners and once we have the majority of it off we use belt sanders and a rotex sander to reach the corners and up against the skirting or wall. Once it’s all off we come back and sand to a smoother finish using a smoother grit paper on all machines until we have reached the desired smoothness.

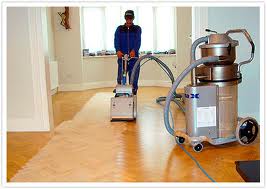
Once the floor is sanded to the desired smoothness by slowly taking the grit of the paper up, the floor should be completely swept to get rid of all dust. Be careful not to wet the floor with water. Water will cause the fibres in the wood to rise which will result in it going out of smooth and the sanding process will need to be started all over again. A good industrial vacuum cleaner will do the job and will lift all dust to get your floor ready to seal. There are dustless floor sanders available which either work by containing the dust in a bag or they connect to a vacuum cleaner that sucks the dust up as it is being sanded. The latter of course is the better option as then there is much less cleaning after sanding.

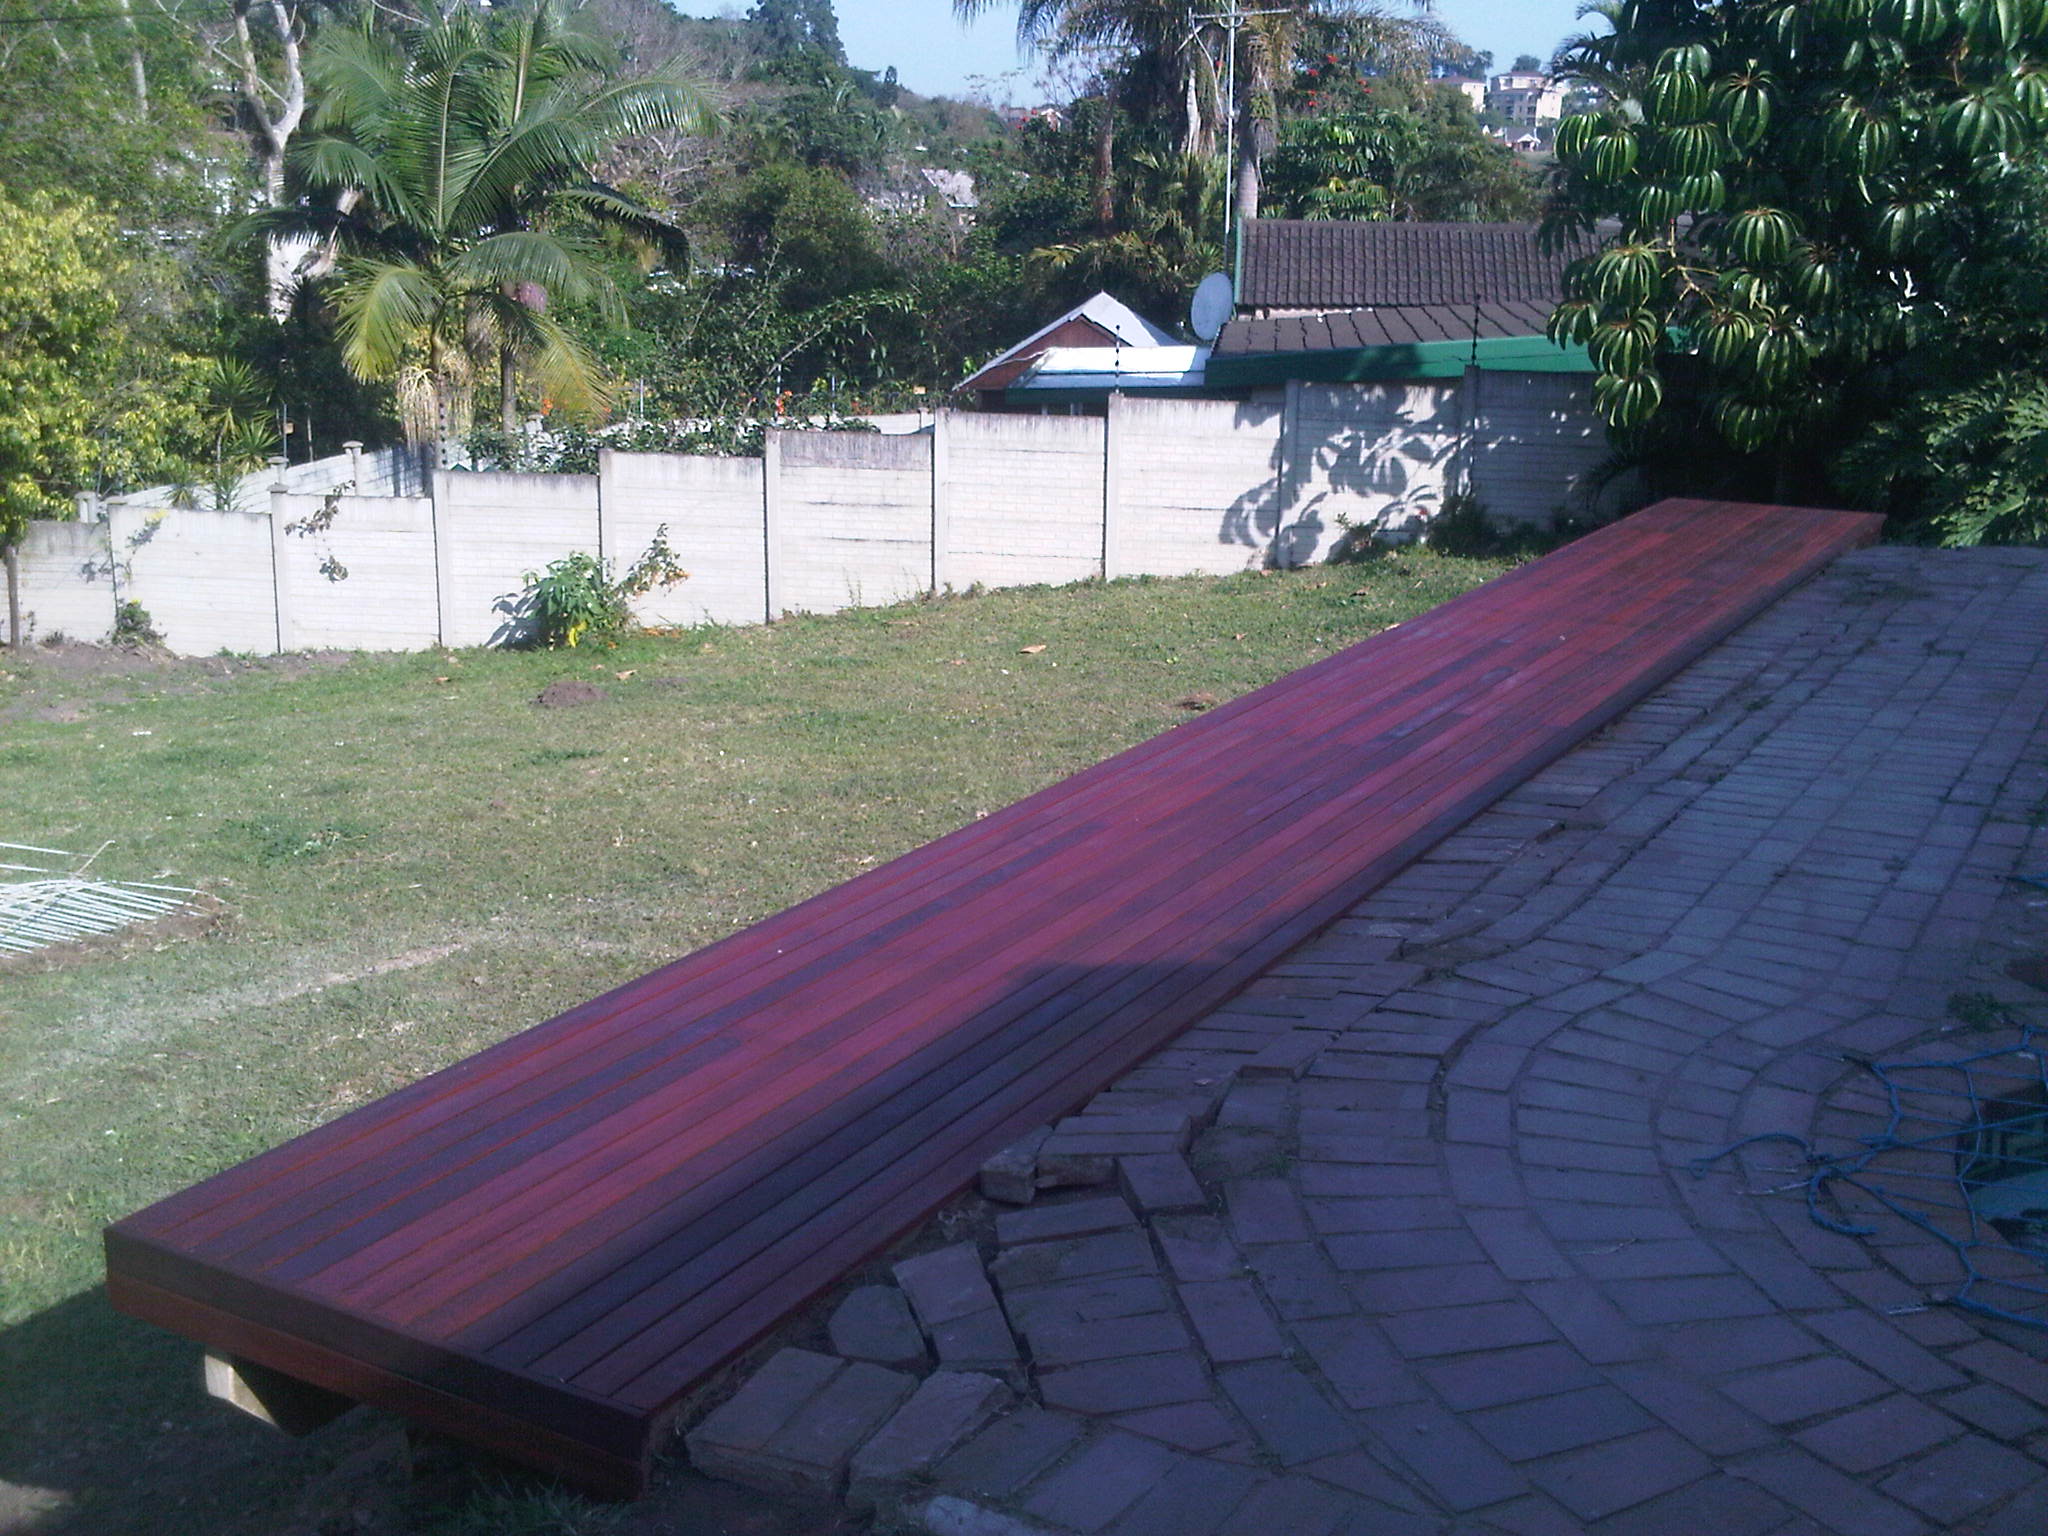
Once your dust is up you are ready to start sealing. There are various sealers on the market but the best to use is a polyurethane sealer. You can get a good quality water based one which will allow you to apply subsequent coats more quickly as it dries much quicker. You can get all three coats down in one day using water based polyurethane. The other polyurethane is a two pack one which contains a catalyst so that it dries extremely hard. The choice is yours. Two pack polyurethane will take longer to get your coats down so will cost more due to the time factor but will probably last longer, but will also be more harmful to the environment. Water based coating technology has come a long way these days and I wouldn’t completely shy away from it. But chose a well know brand to make sure that you are getting quality all the way.

Floor sanding Durban

Click to enlarge

You will need to lightly sand after the first coat to get rid of the fibres that stand up after sealing. As mentioned above water will make these fibres rise, so you will find with water based polyurethane these fibres will be more prominent resulting in a rough finish. So lightly sand them off, suck the dust up, and apply the second coat. Feel the wood between coats 2 and 3 to see if that step needs to be repeated as the last thing you want is a rough finish after all that sanding. Take your shoes off too as you don’t want to damage the finish.

For a free no obligation quote, call us on 082 496 5444 or use the contact form below.

← Back

Thank you for your response. ✨

Solid Wood Flooring Installer Durban


Solid wood floors Durban

Click to enlarge

Solid wood flooring in Durban, and for that matter throughout the world, has risen again in popularity over the last few years. Many years ago solid wood floors were quite popular and in the 1970’s these were replaced with carpets. Many old houses are no finding top quality solid wood floors beneath their carpets and renovating them by pulling up the carpets and sanding and sealing them. Solid wood floors add an air of class to any house and of course add tremendous value.

There are various different types of wood that one can use, all of which vary in price, durability, hardness etc. I’ll list a few of the most popular in order of cost with the most expensive at the top. This list is by no means exhaustive but will give you an idea of what you can choose from. I won’t list current prices as these can change from time to time. For a costing please contact me below or through the contact us page.

  • Teak
  • Kiaat
  • American White Oak
  • Ash
  • Beech
  • Maple
  • Cypruss
  • Oregon
Solid wood floors Durban

Click to enlarge

Being solid wood floors they can be sanded many times, unlike laminates which can only be sanded a few times if at all. They are of course more expensive so one needs to carefully budget to ensure that the right choice will be made.

They can be installed in two methods. One is to glue them down to the substrate, normally the concrete floor using a suitable good quality adhesive. The other is to suspend then on batons about 30mm off the floor. Each method has its own pro and cons and at times one can only use the one method. For instance if the finished surface needs to be raised 50mm or so then a suspended or sprung floor will be required. If the reverse is true then they will need to be glued down. Also if the substrate is not completely flat, then it is better to suspend the boards. Gluing boards to a substrate that is not 100% flat it asking for trouble as the boards will eventually lift and the floor will need to be re-done.

Boards are normally purchased from a manufacturer and can either come straight-edged or with a tongue and groove on them. Normally those that are glued down come with a straight edge and those that will be suspended will come with a tongue and groove so that a nail can be inserted at a 45 degree angle to secure the board through the tongue so as not to be visible from the top.

Solid wood floors Durban

Click to enlarge

Once the floor is down the gaps need to be filled and then sanded to get all boards flat to each other. Sanding will proceed until a smooth finish is obtained and then it will be sealed using a good quality polyurethane. Nowadays there are many water based polyurethane sealers which behave in a similar fashion to the old tried and tested two pack sealers which contain an activator to harden them. Normally three coats are put down with a light sand between coats to ensure a smooth finish. After the first coat, especially with water based sealers, the fibres in the wood will be raised and need to be sanded off before the second coat is applied. This is sometimes not necessary between coats 2 and 3 unless there is dust in the air that settles on the surface before it dries. The best test is to feel the surface between coats to establish if a light sand is required.

For a free no obligation quote, please call us on 082 496 5444 or use the contact form below.

← Back

Thank you for your response. ✨

Sealing a Wooden Sundeck by The Wood Joint – Durban

Sealing a wooden sundeck can be a time-consuming task. One needs to ensure that the sealer gets in between the gap on the deckboards so as to seal both edges of each deckboard. Balustrades can also be very time-consuming as there are many corners and tight gaps to get in to.

We use Timberlife Satin Wood Base 28 which is oil based and very viscous. It has zero wax content so that nothing dries on the surface of the timber making future maintenance easy and very cost-effective. You simply clean and re-apply. No more sanding.

One way is to paint it on using a brush. Another is to use a sponge to rub it on. And yet another is to spray it on. Each method of application has its pros and cons. I’ll list each one here: –

Brushing it on

  • Very time-consuming
  • The brush tends to flick the sealer because it so viscous so when brushing up towards the wall one needs to ensure it doesn’t flick on the wall
  • Fairly accurate as you can get the sealer where you want it

Sponging it on

  • Quite messy so wear gloves
  • No flicking but lots of dripping as the sponge gets squeezed. Use plastic beneath if you don’t want it to spoil the paving, but it is ok if it lands on the deck as you will sponge that too pretty soon
  • Fairly accurate and much quicker than brushing
  • You may need to touch up with a brush in the corners
  • Can’t get successfully into the gaps between deckboards
  • You can use a sponge roller for the surface

Spraying

  • Very messy so mask the walls or use a piece of cardboard to protect the wall. Have thinners or turps on hand to clean it off the wall quickly if it gets on the wall. If the wall is PVA, be very careful, but it cleans off quite easily from acrylic paints and windows
  • Watch the wind, it can cause havoc
  • Penetrates everywhere
  • Use a garden sprayer on the finest setting it has

So there are many ways to seal your wooden deck if using a viscous sealer such as Timber Life Satin Wood Base 28 or Woodoc Deck Dressing. Use a combination of them and you will have your deck sealed in no time. Be careful of spraying though. Use lots of plastic, watch the pool, watch the wind. But even with these few pitfalls, it is much, much faster than brushing. Watch the video above of us spraying a deck. For a free no obligation quote, call us on 082 496 5444 or use the form below.

← Back

Thank you for your response. ✨

Choosing a Wooden Deck Builder in Durban

Wooden deck builder Durban

Click to enlarge

There are many wooden deck builders in Durban. With a simple search on Google you will find a few companies on page 1. If you trawl the various magazines that advertise home improvement services, you will find many there too. There are also various portals on the net that list these companies. Most of these wooden deck builders can be trusted and will deliver a relatively good quality product at a reasonable price. If however you dig a bit deeper you will find that there are literally hundreds of people in Durban who claim to be wooden deck builders. Again some of these you can trust as they are competent deck builders but have just perhaps not had the opportunity to learn how e-marketing works or the funds to pay for adverts on these portals or in these magazines. There are however many that can’t be trusted for various reasons ranging from running away with your deposit, to not building correctly, taking short cuts and using the wrong timber.

I have come up against a few of them in my career as a wooden deck builder in Durban. I have lost many jobs due to price only to find later that the installer has either not finished the job, has used the wrong materials such as non-treated or incorrectly classified CCA pine in their build, or has built it incorrectly and it is structurally flawed. Needless to say this leads to wasted money and a very unhappy client. The best price is not always the best option to go with because pure economics says that if the price is unrealistically low, then the builder must be taking short cuts in order to earn a living. If you consider that most contractors ask for a 50% or 60% deposit in order to purchase materials, then it makes sense that the profit margins are between 40% and 50% of the job. If one contractor is quoting a very low price he is either shaving his margins or buying sub-standard materials.

Wooden deck builder Durban

Click to enlarge

Be very careful when selecting a contractor. Do your research first and find out about other jobs he has done. Phone his references and get this info first hand from a satisfied client. A contractor will of course not list a reference who will not give him a good reference, so make sure he has provided enough references to ensure that he has at least done a few jobs that his clients have been happy with. Do a little research on the net yourself to find out what materials are available for decking and then ask him questions to test his knowledge of the product he claims to be an expert at.

Here are some questions you should ask a prospective contractor before awarding him your wooden deck build: –

What materials is he going to use? Balau is by far the best for the surface of your deck. There are others and they tend to increase in price, but balau is by far your most cost-effective hard wood. It is quite acceptable to use CCA treated pine as a substructure provided he is sourcing it from a reputable supplier who is regularly tested by SABS to ensure he is conforming to their standards.

Make sure he is using the correct hazard classification (H1 – H5) in his substructure. H2 CCA Pine is good for roofing where it is not subjected to the elements. H3 is good for outdoors in the rain and H4 is good for in the ground or in constant contact with wet soil. H5 is good for in water and H6 is good for in salt water. If he claims to be using balau as a substructure make sure he installs balau when he starts and stop the works if he does not. Many people won’t know the difference between pine and balau especially if he has coated it to make it darker. Meranti too can look very similar to balau. Check the delivery note when the supplier delivers it to your property to make sure it is in fact balau and not meranti or some other unsuitable timber.
Ask him what screws he is using. Kalgard coated screws are good. Stainless steel screws are even better. Ask him if he intends to close the screw hole with epoxy to prevent water getting in thereby increasing the chance of rot at the screw hole.
Check what his maximum spans are on his beams and joists. A piece of wood can only be spanned a certain distance before it breaks. Beams of 50 x 228 should only be spanned a max of 3m and 38 x 114 joists should only be spanned a maximum of 1.8 to 2.0m. Posts should be set in concrete to at least 600mm unless the deck is low-level in which case they can be set at about 300.
By asking a few questions about how he intends to build it and what he intends to use you will quickly learn if he knows what he is talking about or not.

In the picture alongside we built a narrow deck of 9m x 1m to extend the paved area next to the pool.

For a free no obligation quote or just for some advice please feel free to contact us on 082 496 5444 or use the form below.

← Back

Thank you for your response. ✨


Wooden Decking Durban

Wooden decking Durban

Click to enlarge

I haven’t written or posted an article on wooden decking in Durban here for a while. The main reason is that we have been extremely busy building wooden sundecks in Durban. It is quite odd to be this busy in the middle of winter. Normally people want their sundecks built-in summer and winter is traditionally quiet in this industry for both builders and suppliers. I can only think it is because we have had quite a mild winter in Durban and as a result people have been installing sundecks rather than fire places. This coupled with the fact that we lowered our prices in about April 2013 after implementing a few cost saving techniques and securing our timber at very reasonable rates without affecting the quality. I hope this continues into the summer and carries us right up to the end of the year with flat-out building jobs.

We were awarded a 90m² wooden sundeck in Toti recently. It was to be installed on top of an existing concrete slab that doubled up as the roof of the parking area beneath. The concrete had just been waterproofed using Torch On so we could not secure our batons, or joists to the surface by drilling. We brought the level of the deck up so that the existing balustrade would be 1m above the surface of the deck. The existing concrete slab was about 1.4m below the top of the balustrade so we had about 400mm to raise it which allowed us enough space to build a super structure with 38 x 152 beams and 38 x 114 joists with a 19mm deckboard on top. This allowed us to keep the beams and joists off the surface and we installed 76 x 76 square posts to the beams to support it. Because we were using 38 x 152 beams we had to install posts more often as opposed to the 38 x 228 beams where the posts can be installed less frequently. The posts sat on top of some 3mm closed cell insertion rubber cut to 100mm x 100mm squares to stop the posts from cutting into the waterproofing over time. This system allowed us to suspend the superstructure as a sort of floating structure without having to secure anything to the concrete surface so that we didn’t need to damage the waterproofing. Again we used an H3 CCA Treated Pine substructure and balau deckboards.

Wooden decking Durban

Click to enlarge

This time around we spaced our joists perfectly so that we only had to waste a small amount of deckboards as off cuts. We did this by slotting an extra deckboard in where we had to, to prevent having an off cut of 400mm or so. We calculated that we would have about R5, 000-00 worth of 400mm off cuts if we had cut these. So it made sense to rather spend the money on a few extra joists than the off cuts.

We sprayed this deck with sealer rather than using a brush. We brushed the edges as it can often make a mess against the wall spraying it on and then sprayed the entire surface. Because we are using oil based sealer there is no chance of runs or streaks so it is quite safe to spray it on and we saved at least a day or two. Our biggest time consumer on this job was getting our timber up to the first floor. The service lift was big enough to take our deckboards from corner to corner, but was out-of-order on the day, so we carried them up two flights of stairs. The longer pieces had to be hauled 6m up the side of the building using ropes attached to each side of the timber. In hindsight we should have hauled the deckboards up that way too.

Wooden decking Durban

Click to enlarge

For a free no obligation quote or just to ask some advice on building your wooden deck, please contact me using the form below or you can call us on 082 496 5444.

← Back

Thank you for your response. ✨

Wooden Balau Deck Built in The Bluff – February 2012

Wooden sundecks Durban

Click to enlarge

The Bluff is a wonderful place for a wooden deck builder in Durban. A lot of the properties there have relatively steep gardens and lend themselves well to installing wooden decks. It allows the property owner to make use of land which would have otherwise not been usable.
This property was very steep with a steep flight of concrete stairs to get from road level to the house. There was a second steep flight of stairs from the house to some outbuildings which contained a pub, pool and a small granny flat. The idea was to deck from the pub area over a small retaining wall towards the pool and around the corner of the pub to the braai area. All in all we were looking at about 35m² of decking. The client didn’t want a full height balustrade of 1m, but instead opted for a 500mm high simple balustrade as can be seen from the pics alongside. He didn’t want to obstruct the view when in a seated position.  There was also to be a flight of stairs to gain access from the pool area which was built over some existing concrete stairs.

The actual construction of the deck was relatively simple in that we were attaching joists or batons to the existing concrete floor directly outside the pub area and deck boards on top of that. We needed to place an under beam on the edge by the pool side as that was about 1.5m above ground level. This wooden deck was built completely out of balau so cost a little more than one with a CCA Pine substructure.

Wooden decks Durban

Click to enlarge

As I’ve mentioned in other articles we now build our substructures primarily out of H3 CCA pine with balau deck boards on top. The guarantee that comes with the H3 CCA Pine provides a good basis for an argument that it will outlast the balau as a substructure.

This wooden deck was left unsealed and allowed to go grey in colour from the sun’s UV. Balau won’t necessarily rot any quicker if left unsealed. It is so hard and dense that water does not easily get absorbed by it. The cause of rot is water that allows fungi and algae to grow. The algae causes the fibres in the wood to break down which is rot. Because the water cannot penetrate the balau that easily rot is reduced to a minimum.  Also balau contains many natural oils and resins which prevent water getting in. It also contains toxins which prevent insects from eating it. So overall it is a very suitable timber to use in wooden decks. Pine on the other hand, if left untreated, will rot very quickly, hence the need to CCA treat it to prevent rot and to prevent insect infestation.

When left unsealed balau will turn a grey colour. The grey is actually black algae but it is contained to the surface of the wood so doesn’t necessarily affect the integrity of the timber. It can however become slippery when wet. It is advisable to therefore pressure clean the deck from time to time to remove this black algae. After many years, leaving it unsealed can also produce small fissures in the wood which can collect water. One important thing to remember is that if you do plan to seal your balau deck after it has greyed, then it is imperative to remove this black algae before sealing it otherwise the final product will be very dark. This can be done by bleaching it using Timbrite or other suitable bleach designed for the purpose of reviving old greyed wood. One can also use a pressure cleaner or sand it off. But sanding is not always that practical on decks once they are constructed as there are many areas where the sander can’t reach.

For a free no obligation quote or just some advice please call us on 082 496 5444 or use the form below to send me an e-mail.

← Back

Thank you for your response. ✨


Stairs and Balustrade – Durban North – July 2011

Wooden stairs

Click to enlarge

This wooden stair job started off as just a few stairs to gain access to the granny flat from the other side of the garden and then progressed into a small balustrade on either side too. The client originally had a fence there of CCA pine slats which we had to remove and then build our stairs. She wanted to then put some sort of fence on either side to keep dogs out and originally we were going to re-use some of the CCA pine slats. After speaking to her we agreed that a balau balustrade at the same height as the stairs would finish it off more neatly and add more value to her property.

The stairs were fairly simple and we used two stringers on each side of 30 x 228 balau. We then attached cleats at the required height for each tread. For the cleats we used 30 x 40 balau and for the treads we used 30 x 140 and doubled them up to get a tread of 285 wide with a 5mm gap in between each board. This type of stairs can only really be about 1m wide before you need to increase the thickness of your timber to 40mm. If the timber is too thin and the steps are too wide then the tread will bend each time someone walks on it. If you want to make your stairs wider than 1m then you must use a 40mm thick piece of balau. If you are using pine then this thickness needs to be increased even more because pine is so much softer than balau.

I prefer to use a different system when building wide stairs. One can add an extra stringer in the middle to give it support. However the stringers on the end have the cleats attached to the inside of them. The stringer in the middle cannot have the cleat attached to the inside as the stringer itself will protrude above the level of the tread. So you will need to cut recesses out of the middle stringer so that the tread can sit on a flat surface.

Wooden stairs

Click to enlarge

The other alternative to this is to build a structure underneath each tread on which deck boards are attached. This method is common in building stairs with closed risers. The above method and the one we used on this build is common for stairs with open risers.

We had a challenge on this job in that the wall that we were going to attach to wasn’t straight and looked as if it had been moving over the years. So instead of attaching to the wall we sunk some posts in the ground and concreted them in. This way the wall can continue to move without pushing or pulling our stairs over.

We filled our holes with epoxy and saw dust mixture to get a colour match and sealed it this time using Timberlife Ultra Care Gold. The Ultra Care Gold has a higher wax content and is suitable for vertical pieces of timber where the sun’s rays are not as direct as the horizontal pieces.

I went back to this client’s house to repair a broken fence and our stairs and balustrade are still as good as they were when we built them. They need to be re-sealed again but otherwise the balau has held up well.

For a free no obligation quote on your outdoor timber construction please call us on 082 496 5444 or use the form below to submit your enquiry.  If it’s just advice you are after, leave a comment in the comments section and I will try to assist you.

← Back

Thank you for your response. ✨


Reducing rot in wooden sun decks

preventing rot in wooden decks

Click to enlarge

This article will focus solely on reducing rot in wooden sun decks rather than a specific article on a job we have completed.
One of the first questions that are asked when planning to build a wooden deck is that of maintenance. Being wood, the deck will always be susceptible to rot and insect infestation, but with the proper care this can be reduced to the absolute minimum and can compare favourably, if not better, to using other materials such as composites, concrete and tiles. Let’s face it when it comes to aesthetics and warmth wood is best, but often people opt for other materials simply because there is a belief that they are easier to maintain and will cost less in the long run.

Rot is caused by a break down in the fibres of the wood. A breakdown in the fibres of the wood is caused by algae being allowed to grow on the timber which in turn is caused by water. Water therefore does not directly cause rot. A piece of wood can live in water all its life and not rot, but if it is not cared for properly then it will cause algae to grow and ultimately rot. CCA Treated timber of course eliminates this because it contains copper which prevents algae from growing. However it is only possible to CCA treat certain timbers such as pine and to a degree Saligna because of the differing densities of the woods. Pine is soft and balau is hard. CCA treatment is done through pressure treating (vacuum) and it is therefore impossible to CCA treat balau as it is too hard for the solution to penetrate the timber.

preventing rot in wooden decks

Click to enlarge

So how does one reduce the chances of balau rotting? Well first of all balau is naturally resistant to rot because it is twice as dense and twice as hard as pine for instance so the water doesn’t penetrate it as easily. Also it contains natural oils and resins which repel water. So it will rot, but it will take longer than other timbers.

A piece of wood, any wood, takes in water largely through the end grain. Very little water is absorbed through the face or side grain. Think of it as a bunch of straws. When the straws get wet on the ends they can take up water, but they can’t take up water through the sides.

So the important areas of your deckboard is of course the ends, or end grain. Where a deck board is cut, there is not much that can be done to stop water ingression except to seal it with a suitable water-repellent sealer after or during installation. When a deckboard comes from the timber yard it is often closed off on the ends with wax. However that board needs to be cut in order to fit into the deck so one end will always be wax free. Also it is not advisable to leave that wax on. In the hot sun the wax starts to melt and leaves unsightly marks on the joins. So it is best to cut the wax off before installation. That leaves two ends exposed which now need to be sealed off as best as possible using sealer. Apply it liberally to the ends and make sure they are re-sealed during maintenance intervals.

The other area that is vulnerable is where the screw hole is drilled through the deckboard to attach to the joist. This leaves a hole where water can penetrate the end grain on two sides. What compounds this problem is that the screw is normally counter sunk which allows water to collect in the hole and be absorbed up and down the end grain. Some deck builders use a stop bit to insert the screw whereby the screw head stops at the surface of the deck. I don’t however use this method for two reasons. Firstly the screw is now not tight up against the bottom of the counter sunk hole so the board may work itself loose over the years. Secondly, there is still a small gap around the screw head for water to get into and move along the end grain. And trust me water will find that hole. You will often see deckboards that have started rotting at the screw holes. Now you know why.

Instead I counter sink the screw hole about 5mm, insert the screw and tighten it until it is tight right up against the bottom of the hole leaving the screw head counter sunk a few millimetres. I then take a clear epoxy, mixed with the sawdust of the same timber to match the colour, and force it into the hole leaving it slightly proud. Try and use a very fine saw dust. It makes mixing the epoxy much easier and it goes in the hole better. Once it is dry, I use a grinder with sanding pad to flat it and then I use a rotex sander to remove the scratch marks left by the grinder. Now it is ready to be sealed and good luck to any water that thinks it can get in there. The epoxy is the only filler that will last. Wood filler will pop out in a few months’ time. Use a clear epoxy as the saw dust will match the colour of the deck. White or grey epoxy will leave a white or grey mark on the surface.

It takes more effort and takes longer to do it this way, but my crew has it done to a T now. And the net effect is a better built deck that will last longer and will cost less to maintain. So there you have it, the warmth of wood without the hassle and without having to settle for alternative materials.

For a free, no obligation quote or for some advice please feel free to contact us on 082 496 5444 or complete the form below and I will contact you. Please also feel free to leave comments below.

← Back

Thank you for your response. ✨

Wooden Sundeck Constructed in Toti Durban

This wooden sundeck we constructed in Durban was a low-level deck which was barely off ground level. We were taking it flush off the level of the floor in the lounge and extending it outwards into the garden. The grass was not growing properly in this area due to large trees that were creating a large shadow so the client wanted to deck it to eliminate this problem.

The biggest challenge when building a wooden deck near or on ground level is to get a support beam underneath the joists where needed. There are two methods one can use. The first is what I call the cleat and beam system whereby a beam is placed underneath the joists to give them their support. We normally use a 38 x 114 joist and a 50 x 228 beam. One needs to span the 38 x 114 to a maximum of 2m but 1.8 is preferable. So every 1.8m to 2m one needs to slot an under beam below so as to support those joists. Posts should be used every 3m on the 50 x 228 beam. With this spec one can save on timber while still providing adequate support so that the deck is structurally sound.

The problem with this system arises because if you have a 228 beam, plus a 114 joist and then a 19mm deckboard on top of that your total height needed above ground level is 361mm. If the deck is too close to ground it will mean excavating soil to be able to drop that beam down enough to still arrive at the original height of your deck. Although this is quite possible and not that too time consuming, it sometimes results in the main beam sitting in soil or it may come into contact with wet soil over time. One must therefore use at least H4 CCA Treated SA Pine as the beam and in fact that whole substructure should be H4, even though the joists aren’t in contact with soil, to ensure that no rot will occur.

The other method is to create a frame, all in the same plane using 38 x 114 and use no under beam. This will result in the deck only being 133mm in height so that no excavation will be needed in order to bring the deck up to the required height. However now that you don’t have a beam to attach posts to, you will need to attach the posts to the joists and fascia beams. Again this is not a problem, but it will require a few more posts than in the first method as you can only span your 38 x 114 to a max of 2m. Hence more posts, more concrete and more labour in digging holes.

We used the joist and beam system here as we had enough space below to set the beam without having to dig too far into wet soil. So our work was made lighter by not having to dig too many holes.

Once the substructure is up, the deckboards can go down. On this wooden deck we used 19 x 68 balau deckboards. We used two deckboards as a fascia to cover our joists and beams, filled our holes with epoxy, sanded and sealed.

For a free no obligation quote or advice on your deck or other outdoor timber construction please call us on 082 496 5444 or use the form below to contact me.

← Back

Thank you for your response. ✨

Wooden Deck Built in Durban North – November 2011

Wooden deck Durban

Click to enlarge

This was a normal wooden deck in the normal cleat, beam and joist system with a cleat attached to the wall on the house side, joists running off that perpendicular to the house and a main beam supporting the joists. This deck was built in the days when I was still sing balau as a substructure which made it relatively expensive. I have since started using at least H3 CCA Pine as a substructure. As mentioned in a previous article there is really no need to use balau as a substructure. Provided one uses the correct Hazard Grade (H grade) of CCA Treated Pine then the manufacturer of the chemicals used in the treatment process will guarantee that timber for up to 50 years. So there is a very strong argument that H3 CCA Pine will actually outlast balau because balau is not treated and will eventually rot although it will take a very long time.

H3 should be used where the timber is exposed to the elements (rain and sun) and H4 where it is buried in the ground or in constant contact with wet soil. H2, which is commonly purchased from your timber yards, should NEVER be used in decking and should only be used as roof trusses or other applications where it will not get wet that often.

Wooden deck Durban

Click to enlarge

The wooden deck was a normal rectangle with a slight deviation towards one side to create a triangle so as to meet flush with the corner of the house. We used 90 x 90 balau posts to support the main beam and resting on top of the concrete surface below. These posts had a 12mm hole drilled from below up into the posts and then a re-bar was inserted with epoxy and the same done into the concrete floor. This prevents the posts from moving sideways. There is no need to dig these posts in as they can rest successfully on the surface of the concrete. A shoe was cut from timber in order to secure the main beam to the wall of the house. It is really just a piece of timber that is notched to accommodate the beam and the shoe is then secured to the wall using sleeve anchors. The beam then rests in this shoe and cannot move sideways or down. The weight of the deck of course prevents it from lifting up plus it is screwed into the shoe.

The balustrade was interesting as it was not the normal picket style you see in most other articles. It was the criss cross design with a box in the middle or Tahitian style as it is often called. We also carried this style of balustrade down the stairs. One can sometimes switch to picket style as one goes down the stairs and return to Tahitian style on the flat surfaces. We needed to adjust the angles slightly as we turned the corner down the stairs in order to get the balustrade in the correct plane.  We also built a gate at the top of the stairs which could be latched closed or even locked.

Wooden deck Durban

Click to enlarge

It was sealed using a Timberlife Satin Wood Base 28/28 product which is a timber preservative that soaks into the timber rather than drying on the surface. Maintenance is therefore easy in that it can never peel or flake as it has soaked in and not dried on the surface. Simply clean it and apply two or three more coats. No more sanding, EVER.

For a free no obligation quote or advice on design of your wooden deck, please complete the form below or call us on 082 496 5444.

← Back

Thank you for your response. ✨