Wooden Balau Deck, Plantations, Hillcrest Durban

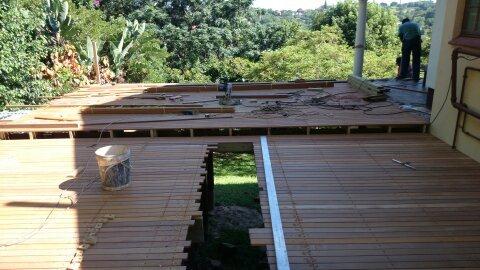
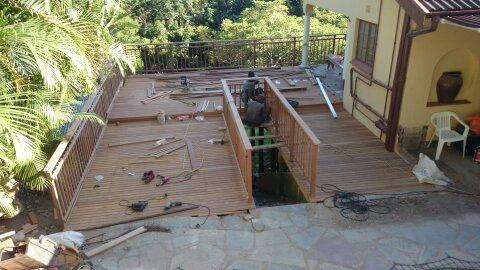
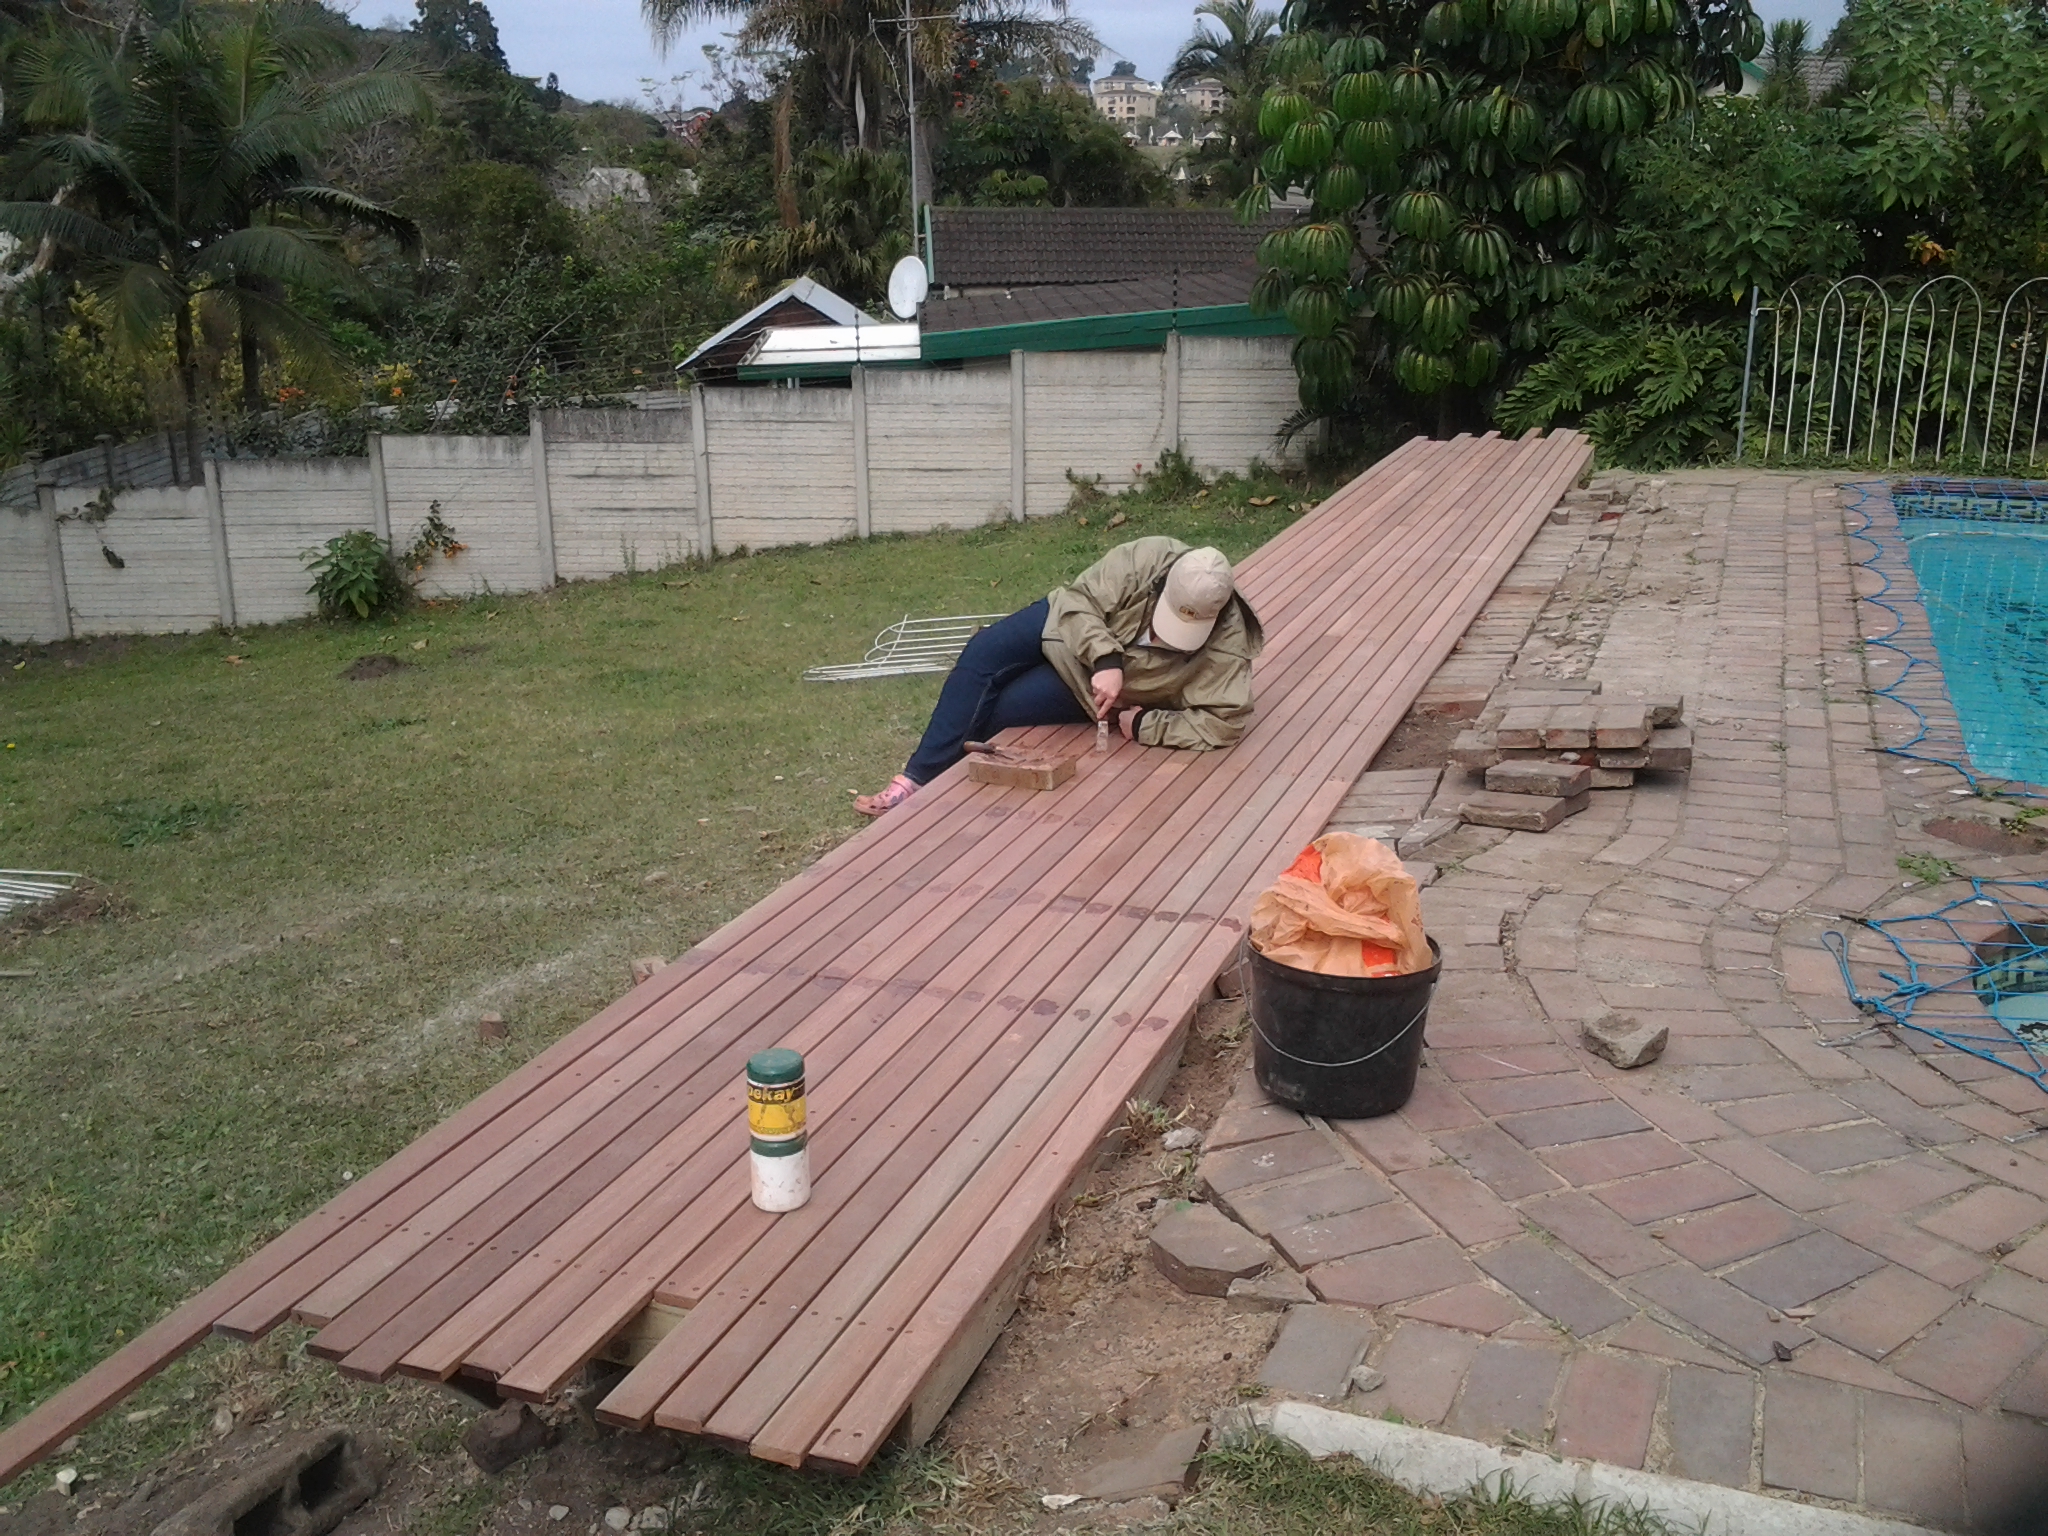
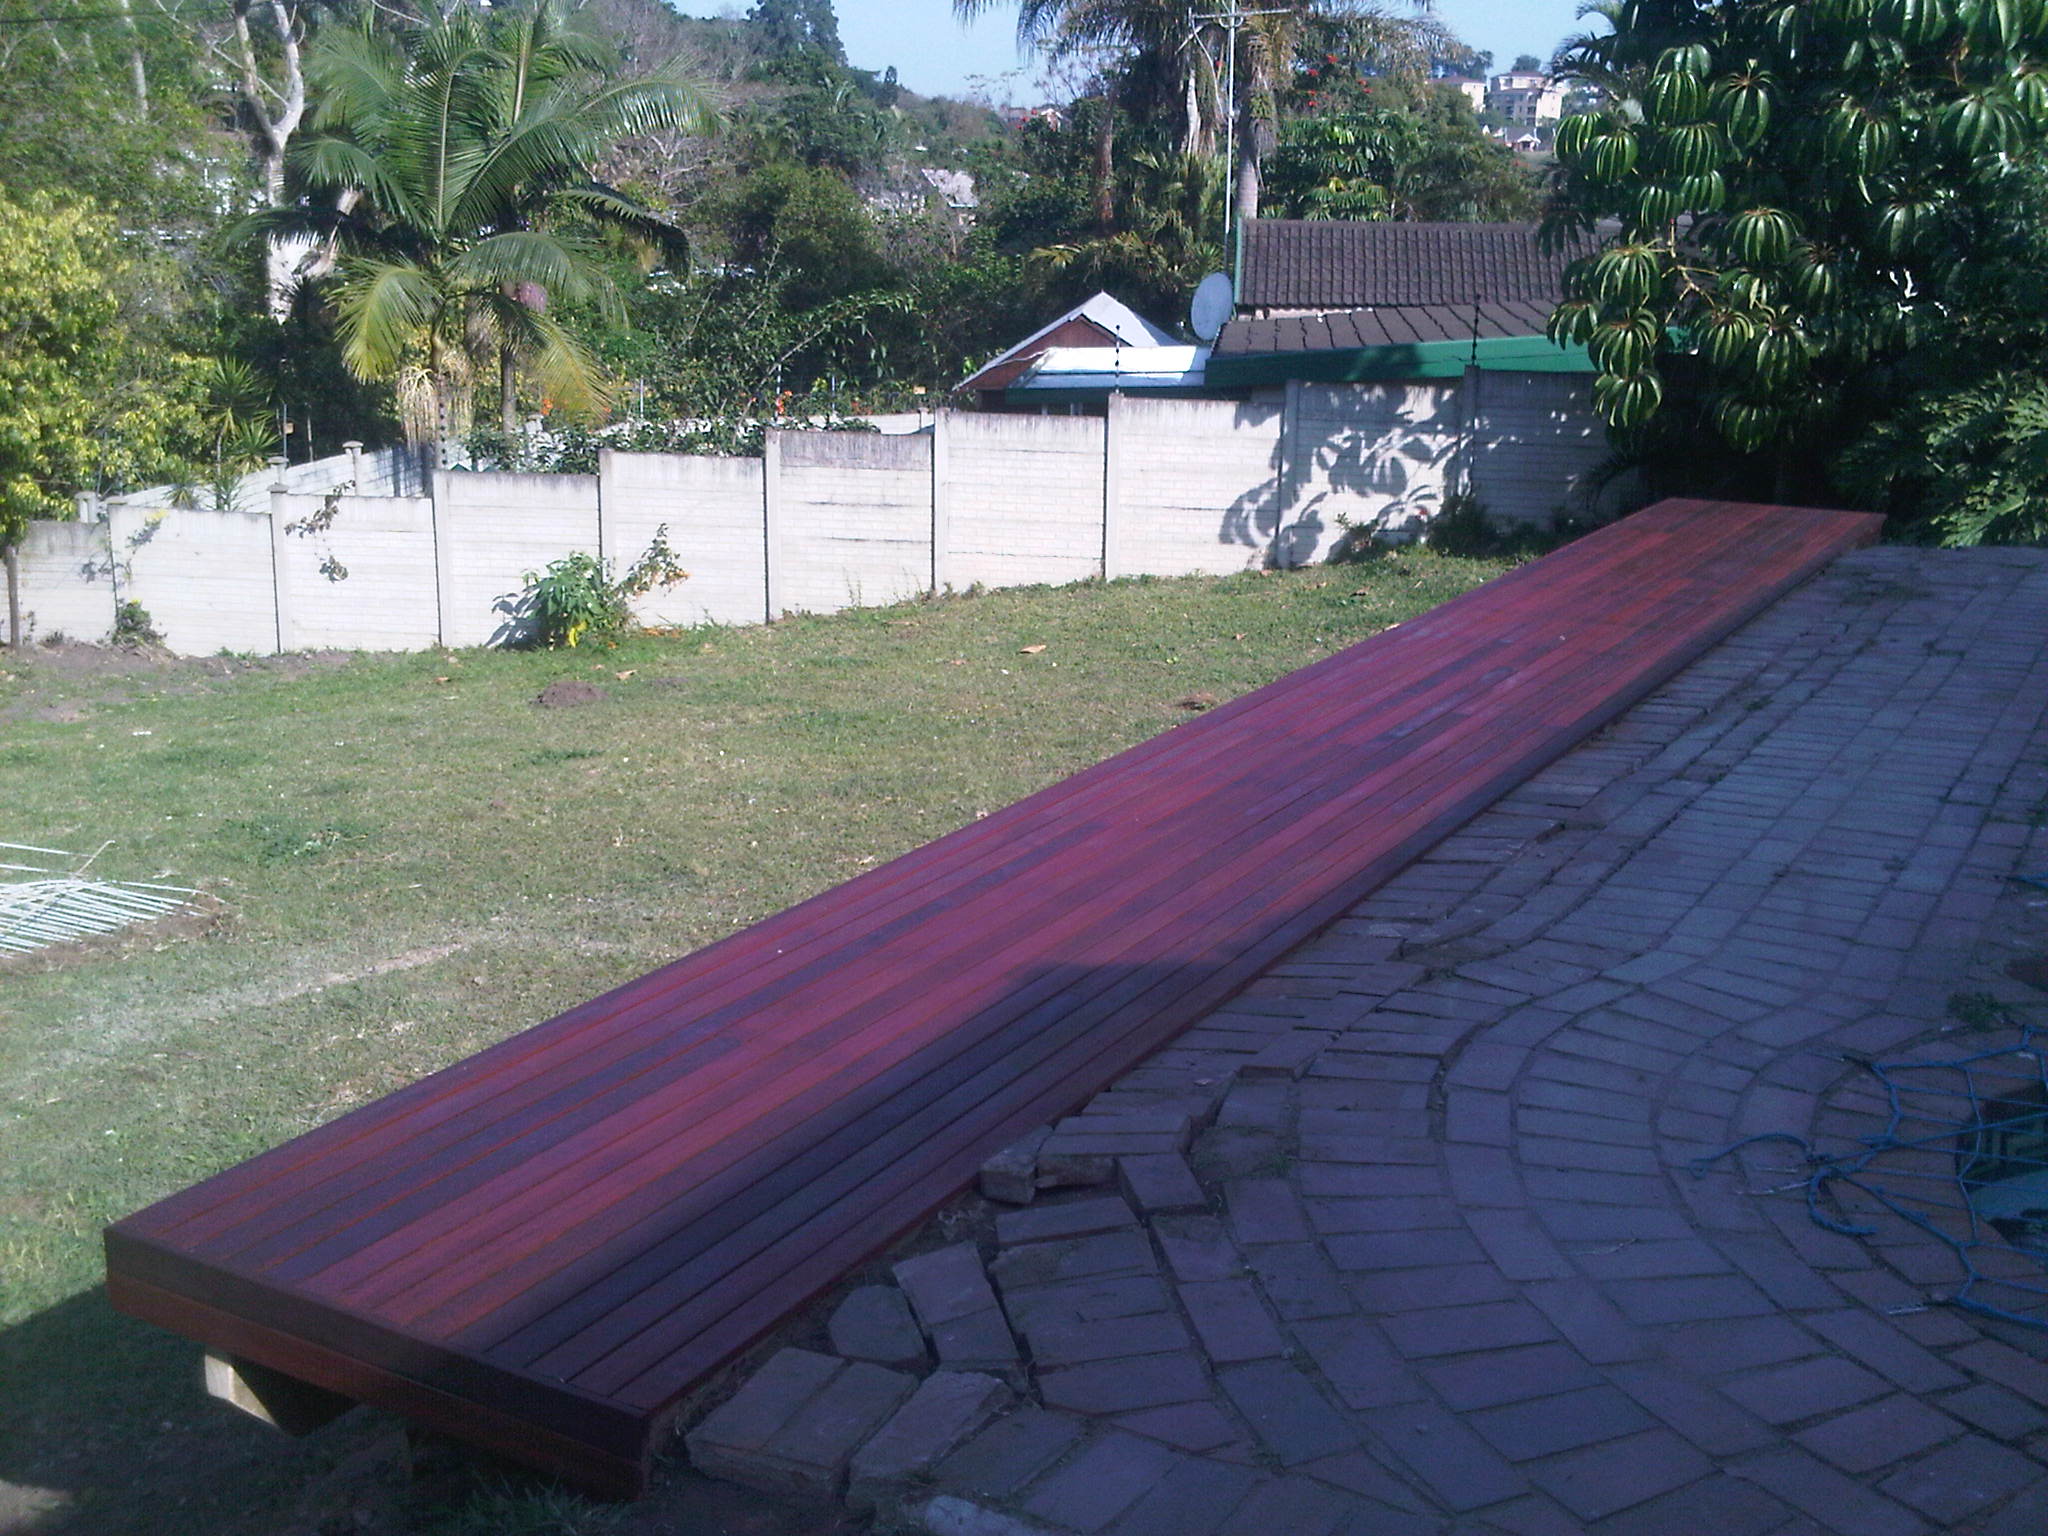
We built this wooden balau deck in Plantations Estate in Hillcrest Durban recently for a client.

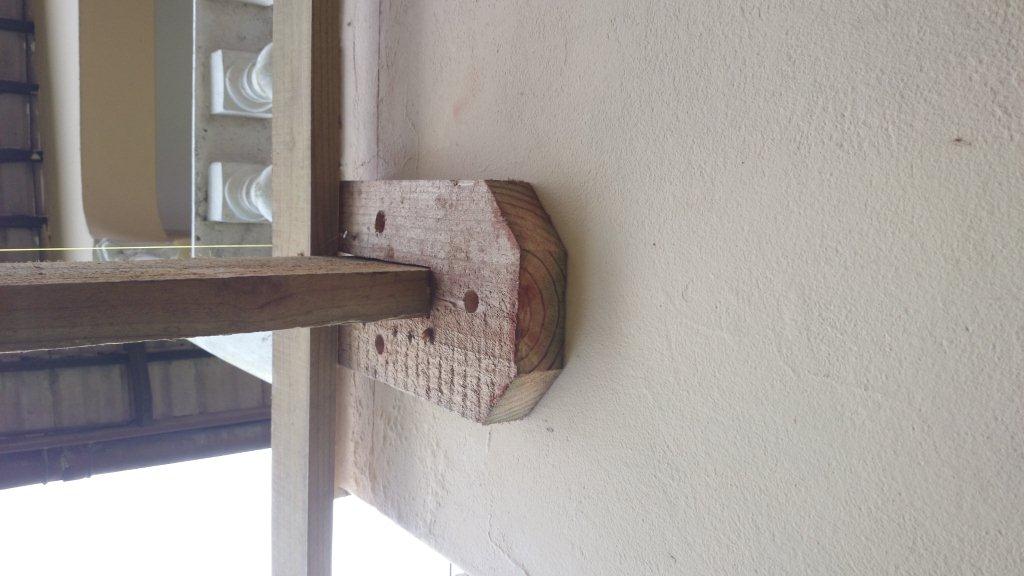
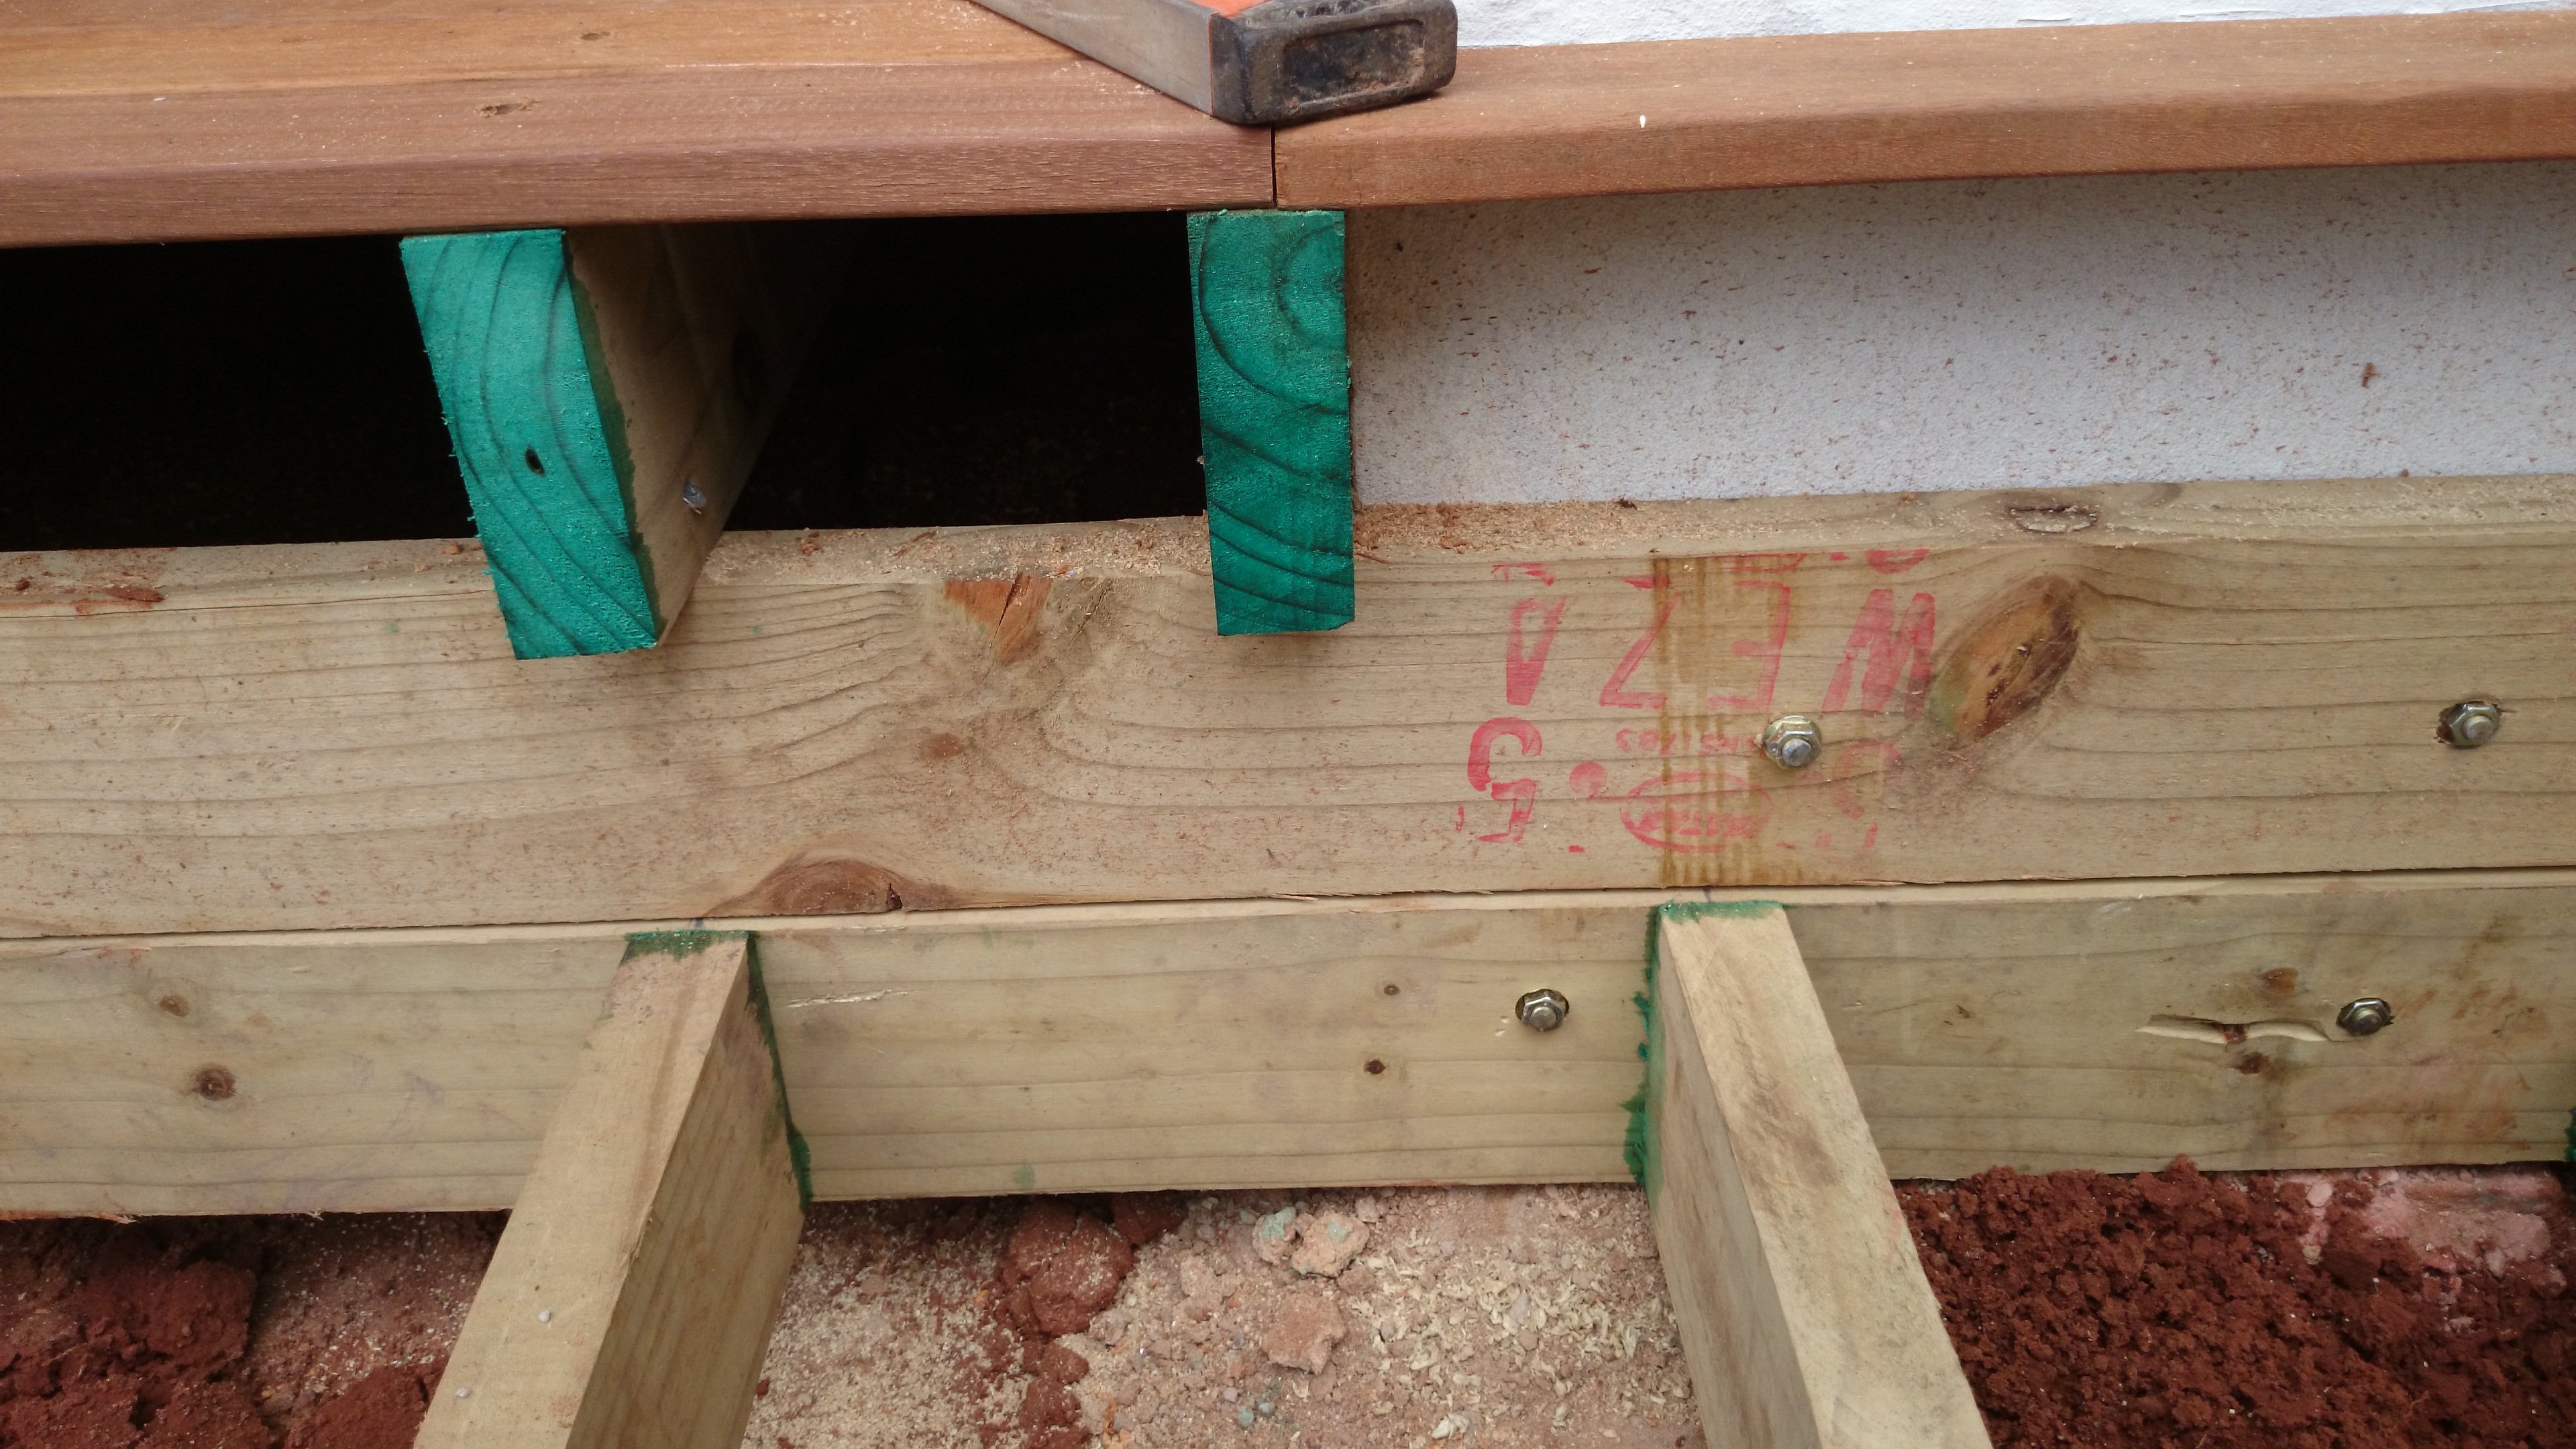
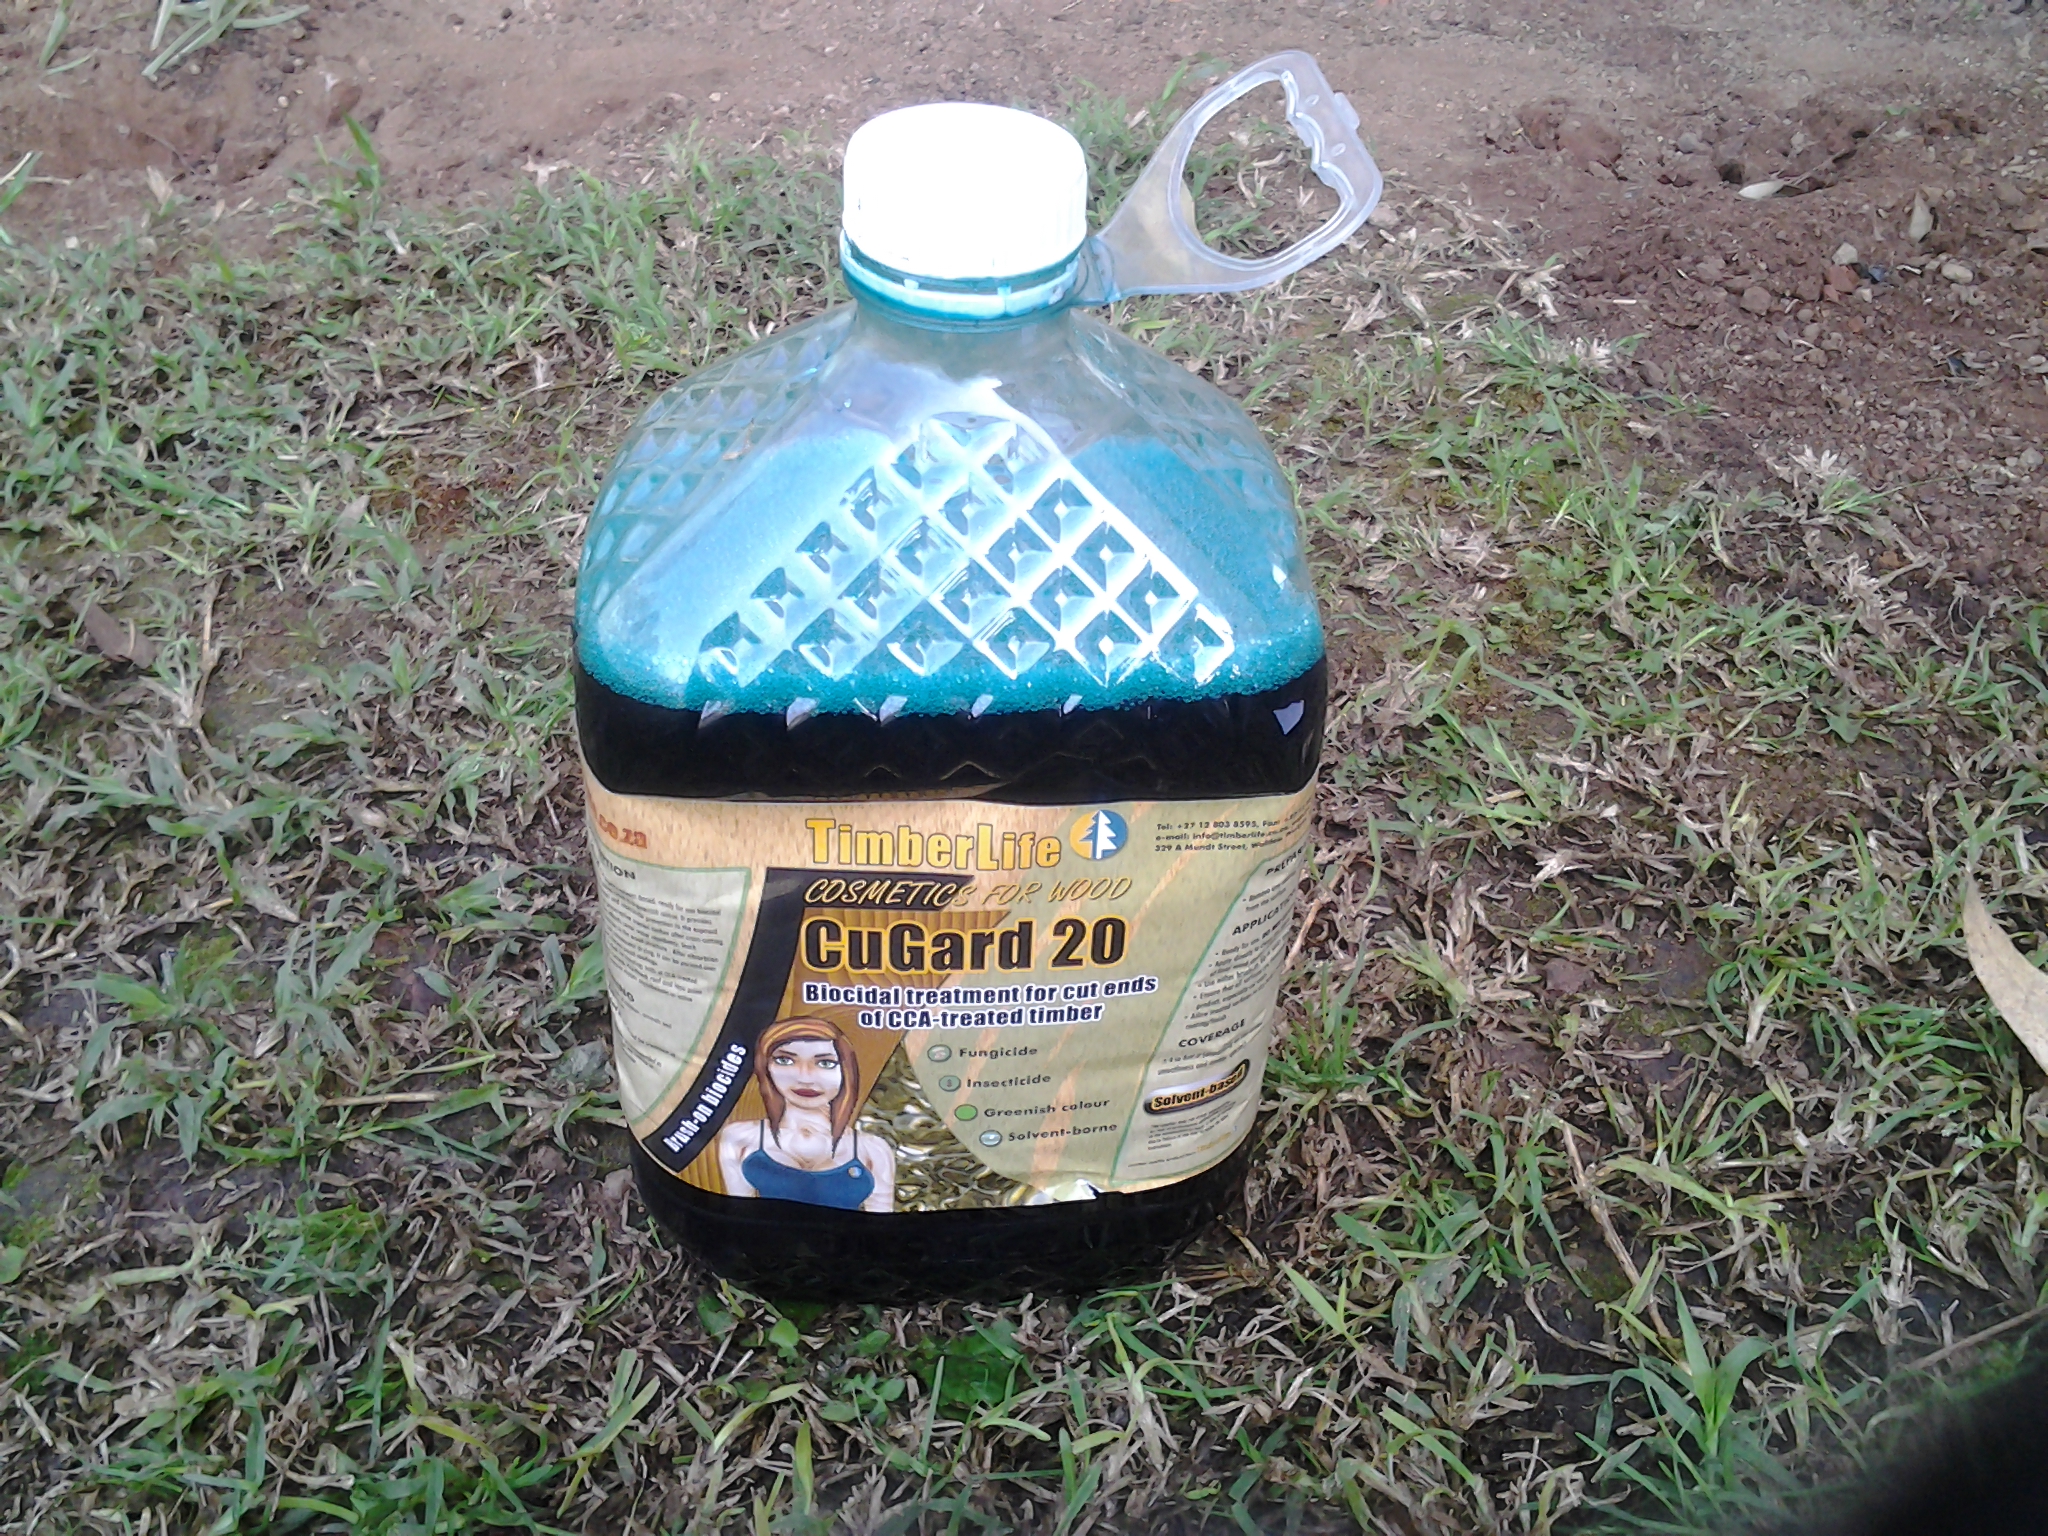
We needed to excavate a few hundred mm down in order to give us enough space in which to install our timber substructure. It is quite important to remove enough soil when building low-level wooden decks on top of soil. This is to give the deck enough space between the bottom of the timber substructure and the top of the soil so that the timber remains relatively dry. It is very important not to allow the timber to touch the wet soil unless it is H4 CCA Treated. CCA Treatment has various Hazard Classifications and each one is associated with specific applications. There are various articles on this site on the topic. You can find them by searching CCA in the search box at the top right of the screen. As a quick summary, H3 is good to go outdoors with periodic wetting and H4 is good to live in the ground in constant contact with wet soil. This is all according to www.sawpa.co.za. So if you are using H3 CCA Treated make sure there is sufficient space below to ensure the wood doesn’t touch the soil. If you are using H4 then it is ok to bury the timber in the ground.

Having said that the more space below the deck the better to allow air movement and keep as much moisture away from the balau deck boards which are not treated. Although balau is a very hardy wood and can withstand a certain amount of wetting, the more moisture around, the quicker the wood will deteriorate.

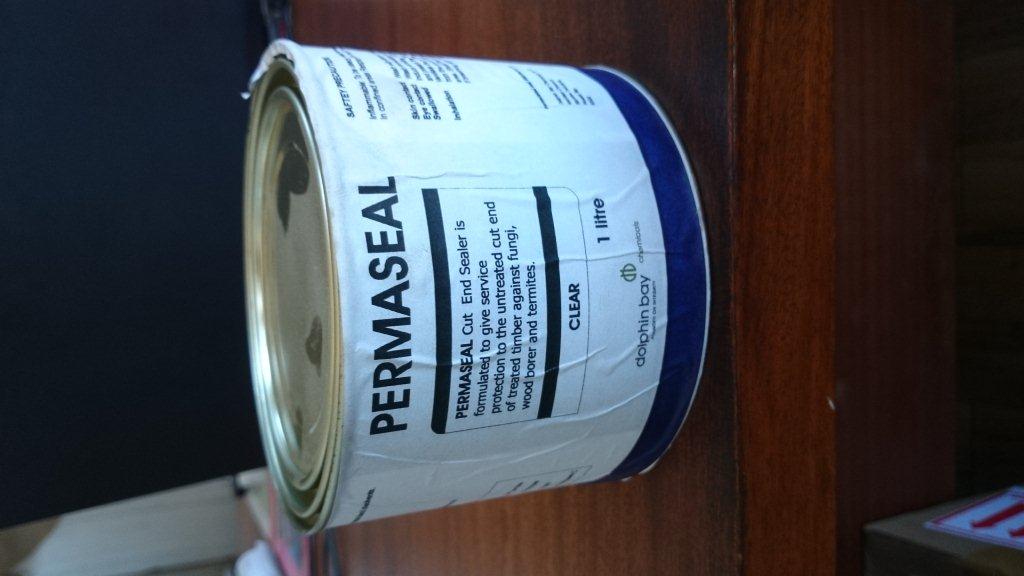
People often ask me about treating the pine before it goes in the ground or before we install deck boards above. There is no need. The pine is all pressure treated to the correct Hazard Classification and therefore no more treatment or sealing is necessary. In fact there is argument that coating it with, for instance bituseal, will in fact allow water in but won’t allow it out. Water will find a way in. A small stone scratching the bituseal off during installation, or a bump here and there, will allow water in and it won’t easily find its way out. Leaving it so the water can flow in and out quickly will result in a drier piece of timber for longer. There’s no need to do anything to your CCA treated timber.

Balau deck boards are then installed on the surface simply because balau is more stable and won’t crack, twist or warp as easily as pine. The cost difference between pine deck boards and balau deck boards is minimal, if anything. If you use pine deck boards you will use twice as much wood and although pine is relatively inexpensive, for deck boards you will need to use S7 (semi clears). The cost of semi clears negates any saving between pine and balau. Stick with balau as a deck board. It’s very stable. As a substructure, it is not cost-effective to use balau and S5 (industrial grade) pine can be used there at a much lower cost that both balau and semi clear pine.

This deck was left to grey naturally by leaving it as is. No oil, no sealer, nothing. Just leave it and periodically pressure wash it to remove any grime or dirt. If you choose to oil your deck then use an oil. Don’t use a product that will dry on the surface. If it dries it will peel and flake.

For a no obligation quote on building your wooden deck please use the contact us form below or you can contact us on 082 496 5444. We also offer a DIY service. We will supply you with all the correct materials you need to build your own deck and can advise on time-saving tips and tricks as well as recommended building practices.

Wooden Deck, Umhlanga, Durban

Here’s a wooden decking project we completed in Hawaan Forest Estate, Umhlanga, Durban. There were two houses right next door to each other so it was a bit easier on the pocket when it came to travel to site. The whole job was quite big too, in excess of 200 square metres of coverage, so it was worth the travel from Home Base in Waterfall, Hillcrest.

House 1 consisted of a fairly large deck of about 80 square metres. It was an interesting deck to build in that it was built flush with the tiled covered patio, extending to the pool, with steps as wide as the deck leading into the garden. It incorporated a fire pit with step benches on three sides set slightly away from the pool. The front of the steps were clad so that beneath the deck was not visible. We met our deck boards at a 45 degree angle on the vertical cladding.

There were various smaller decks around the front of the house and the courtyard consisted of a steel frame and steel gate clad in balau deck boards. There was an interesting deck on the first floor of about 7 square metres that is accessed through a door on to the roof top. It is bordered by three sides of planter boxes surrounded by balau.

The garage doors were 6m wide and 2.7m high. The frame was made of steel and deck boards were used to clad it. It resulted in it being quite heavy but complimented the front of the house by following through with the wood cladding design so typical of Hawaan Forest Estate homes.

Along the front of the first floor are steel sliding screens of 14m x 3.1m high. The decks and courtyard screens were all done in 19 x 68mm balau reeded deck boards whilst the sliding screens on the first floor were done in 19 x 30 balau slat. In order to get a 19 x 30 slat we ripped a normal 19 x 68 deck board in half to 30mm wide. These were then attached to the steel with a 20mm screw from behind so that no screw holes are visible from the front.

Most deck boards are reeded on one side which allows water to dissipate more easily between the deck board and joist, so we had to source non reeded deck boards for this application. If it had been reeded the grooved side would have been visible from either the inside or the outside. Non reeded deck boards are not that common, but they are available, and it is cheaper to rip deck boards to 19 x 30 than to buy 20 x 30mm slats.

House 2 had a much smaller pool deck of about 25 square metres. It was fairly intricate though in that the deck had to be tucked underneath the wall on one side and beneath the tiles of the pool fascia. The patio above the pool had a fall to it to allow water to run off, so the edge of the deck could not be level, otherwise it would have resulted in a stepped join between the wooden deck and the patio. There are also a few smaller decks surrounding this house and it too has a 13m long by 3.1m high sliding screen system in steel with balau 19 x 30 slats.

I will update these pics above once other contractors have completed their areas of work to give you a good idea of what is possible in timber decking and screening.

For a quote, and design, of your wooden decking and screening requirements, please call us on 082 496 5444 or use the contact us form below.

Wooden Sun Decks Durban – Westville

Wooden Sun Decks Durban

Click to enlarge

Wooden Sun Decks Durban

Click to enlarge

This wooden sun deck we built in Westville Durban was designed to try to maximise outdoor space. The house we built it at had very little outdoor space as it was situated on a steep plot. You can see from the pics that before we built the wooden sun deck, the garden had only a small area of about 1m around the pool on the front side of the garden. There was then a steep concrete staircase down the side of the house going to the back garden. The back garden was however not very usable as it was far from any entrance to the house. So the idea here was to build a wooden sun deck that extended from the slasto of the pool area to meet the far side of the house. It was about 48m² in total floor area and was surrounded by a wooden balustrade in a picket design. We left the existing concrete stair case in place and built the wooden sun deck so that one could use this existing stair case. Hence the U Shaped deck.

Wooden Sun Decks Durban

Click to enlarge

We also had to split the wooden sun deck into two levels as the area by the pool was a little lower than the area where it met the existing concrete deck. So we had a split level deck with a small step up of about 180mm. 180mm is always a good step height or riser height.

Wooden Sun Decks Durban

Click to enlarge

The posts beneath had also been lined up so as to avoid being placed in the middle of the stair case. Even though the outer posts were some distance from the bottom of the stairs, if we had placed them where they would normally have gone (i.e. equal distances from either end) then it would have spoilt the line of sight as one was walking down the stairs. So they were shifted slightly left and right to miss the line of the stairs.

We also had a garden shed beneath the front edge of the deck so we had to build around that which had had a new roof built on it and waterproofed. When building over waterproofed structures one cannot drill through the torch on as it will results in leaks beneath. You need to then build on either side of it or use thicker beams and joists to be able to span them further apart.

Wooden Sun Decks Durban

Click to enlarge

Wooden Sun Decks Durban

Click to enlarge

In the pics on this article you can also see the horse shoes we used to support the beams on the walls. Instead of dropping posts to ground you can simply attach the beam to the wall by cutting a horse shoe using the same timber as the beams. The bottoms are always cut to 45° for both neatness and to avoid having sharp corners jutting out. This also applies to the ends of main beams.

We treated our cut ends with Permaseal, an approved end sealer used to stop rot or insect damage to cut ends of CCA treated timber. This was necessary in order for us to activate the 50 year guarantee that the supplier provides on the CCA Treated pine substructure. There are a few articles on this blog that go into detail about this and what is required in order to activate your 50 year guarantee.

For a free no obligation quote on wooden sun decks, wooden floors or wooden fences, please contact us on 082 496 5444 or use the contact us form below.


CCA Treated Substructures in Wooden Sundecks – Durban

Wooden sundecks Durban North

Click to enlarge

As I’ve mentioned in previous articles we use a H3 CCA treated pine substructure which the suppliers offer a 50 year guarantee on. In order to activate that guarantee we need to adhere to best practices and there are a few things that we need to do, and document by way of pics. 

Although all decks we build are built according to best practices, when applying for a guarantee we need to document it. So if you require a guarantee please let us know beforehand so we can collect all the documents we need to process it. These include charge sheets and retention records from the treatment plant to ensure that the chemicals used in the treatment process penetrated the timber properly. The charge sheets also document all sorts of things such as how much solution was added to the chamber, how much wood was in the chamber and how much solution much was left over. From this one can work out what the penetration was and can be verified through the retention records.

When the wood is treated it is placed in a chamber and all the air is sucked out to create a vacuum. Solution is then added to the chamber which now takes up the void or vacuum and the solution is sucked into the timber. They call this pressure treatment.

Wooden decks Durban

Click to enlarge

CCA is an abbreviation for Chromated Copper Arsenate. The copper stops fungus growing on the wood, which in turn causes the fibres of the wood to break down and rot. The arsenate stops insects from eating it and the chrome binds the two so that they don’t leach out of the wood. There are different hazard classes of CCA treated timber. For a full explanation you can visit http://www.sawpa.co.za (South African Wood Preservers Association).

Once this pine has been treated it can now get wet without the fear of it rotting because the fungus cannot grow. It is not water that causes rot, but rather fungus. The water allows the fungus to grow which breaks down the fibres of the wood which causes rot. So now your wood can get wet without rotting.

When the wood is treated, this CCA solution they use penetrates the timber based on the pressure they use and the time it remains in the chamber. The longer the time, the greater the pressure and the stronger the solution, the higher the hazard class and more resistant it is to rot and insect infestation. So timber being used outdoors subject to weathering (rain and sun) needs to be of a higher Hazard Class than timber being used in your roof where it is protected from rain to a large degree.

The depth of the penetration is subject to the density of the timber (pine vs. saligna or gum), and the time in the chamber. These retention records mentioned above are obtained from coring a section of the timber on each batch to ensure that the solution penetrated the timber properly. The charge sheets will outline how long the timber was in the chamber, the strength of the solution etc.

Wooden deck guarantee

Click to enlarge

So once all these documents have been collated, one can apply for a guarantee from the suppliers of the solution used in the treatment process.

One last criterion is that where we cut a piece of timber we need to treat the end grain with an end sealer approved by the supplier. This is because the solution used in the treatment process does not penetrate all the way through the timber. Depending on the density of the wood it will penetrate about 16mm into the timber. With pine, as opposed to saligna, it will obviously penetrate further as the timber is softer. Timber such as balau cannot be successfully treated as it is too dense. However it rarely needs to be treated as it is naturally resistant to insect infestation and rot due to the resins and oils naturally found in the wood.

By following the manufacturers and SAWPA’s guidelines one can successfully use treated pine as suitable outdoor timber for decking.

The pictures alongside show where we have used an approved end sealer to treat the timber on all cut ends.

For a free no obligation quote on your decking and other outdoor requirements please contact us on 082 496 5444 or use the contact form below.

Choosing a Wooden Deck Builder in Durban

Wooden deck builder Durban

Click to enlarge

There are many wooden deck builders in Durban. With a simple search on Google you will find a few companies on page 1. If you trawl the various magazines that advertise home improvement services, you will find many there too. There are also various portals on the net that list these companies. Most of these wooden deck builders can be trusted and will deliver a relatively good quality product at a reasonable price. If however you dig a bit deeper you will find that there are literally hundreds of people in Durban who claim to be wooden deck builders. Again some of these you can trust as they are competent deck builders but have just perhaps not had the opportunity to learn how e-marketing works or the funds to pay for adverts on these portals or in these magazines. There are however many that can’t be trusted for various reasons ranging from running away with your deposit, to not building correctly, taking short cuts and using the wrong timber.

I have come up against a few of them in my career as a wooden deck builder in Durban. I have lost many jobs due to price only to find later that the installer has either not finished the job, has used the wrong materials such as non-treated or incorrectly classified CCA pine in their build, or has built it incorrectly and it is structurally flawed. Needless to say this leads to wasted money and a very unhappy client. The best price is not always the best option to go with because pure economics says that if the price is unrealistically low, then the builder must be taking short cuts in order to earn a living. If you consider that most contractors ask for a 50% or 60% deposit in order to purchase materials, then it makes sense that the profit margins are between 40% and 50% of the job. If one contractor is quoting a very low price he is either shaving his margins or buying sub-standard materials.

Wooden deck builder Durban

Click to enlarge

Be very careful when selecting a contractor. Do your research first and find out about other jobs he has done. Phone his references and get this info first hand from a satisfied client. A contractor will of course not list a reference who will not give him a good reference, so make sure he has provided enough references to ensure that he has at least done a few jobs that his clients have been happy with. Do a little research on the net yourself to find out what materials are available for decking and then ask him questions to test his knowledge of the product he claims to be an expert at.

Here are some questions you should ask a prospective contractor before awarding him your wooden deck build: –

What materials is he going to use? Balau is by far the best for the surface of your deck. There are others and they tend to increase in price, but balau is by far your most cost-effective hard wood. It is quite acceptable to use CCA treated pine as a substructure provided he is sourcing it from a reputable supplier who is regularly tested by SABS to ensure he is conforming to their standards.

Make sure he is using the correct hazard classification (H1 – H5) in his substructure. H2 CCA Pine is good for roofing where it is not subjected to the elements. H3 is good for outdoors in the rain and H4 is good for in the ground or in constant contact with wet soil. H5 is good for in water and H6 is good for in salt water. If he claims to be using balau as a substructure make sure he installs balau when he starts and stop the works if he does not. Many people won’t know the difference between pine and balau especially if he has coated it to make it darker. Meranti too can look very similar to balau. Check the delivery note when the supplier delivers it to your property to make sure it is in fact balau and not meranti or some other unsuitable timber.
Ask him what screws he is using. Kalgard coated screws are good. Stainless steel screws are even better. Ask him if he intends to close the screw hole with epoxy to prevent water getting in thereby increasing the chance of rot at the screw hole.
Check what his maximum spans are on his beams and joists. A piece of wood can only be spanned a certain distance before it breaks. Beams of 50 x 228 should only be spanned a max of 3m and 38 x 114 joists should only be spanned a maximum of 1.8 to 2.0m. Posts should be set in concrete to at least 600mm unless the deck is low-level in which case they can be set at about 300.
By asking a few questions about how he intends to build it and what he intends to use you will quickly learn if he knows what he is talking about or not.

In the picture alongside we built a narrow deck of 9m x 1m to extend the paved area next to the pool.

For a free no obligation quote or just for some advice please feel free to contact us on 082 496 5444 or use the form below.