Wooden Decking Durban

Wooden decking Durban
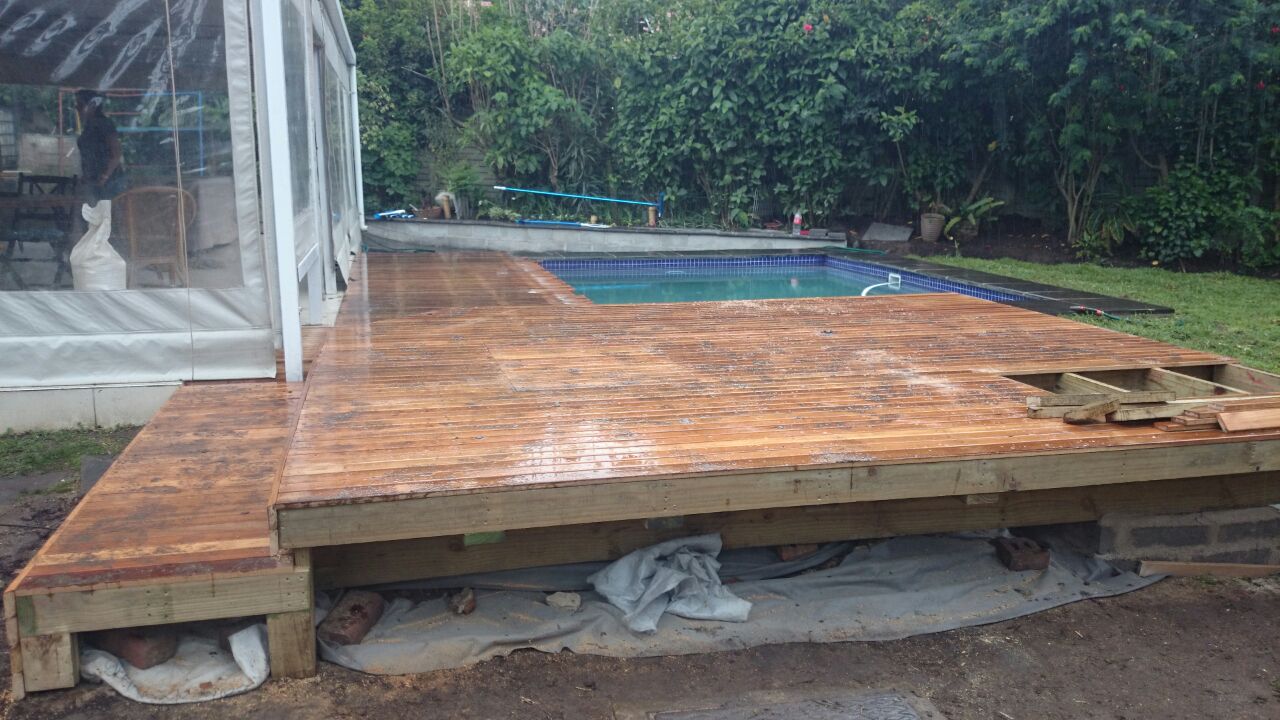
We built this wooden deck in Pinetown, Durban over a well so could not rest any joists on the well lid itself. Normally we would have raised the height of the deck enough to use 50 x 228 as joists. A 50 x 228 piece of wood can be spanned about 3m without any support below which would have solved our problem. However we could not come up that far as that would have resulted in two steps from the raised deck level to the tiled area on the patio.

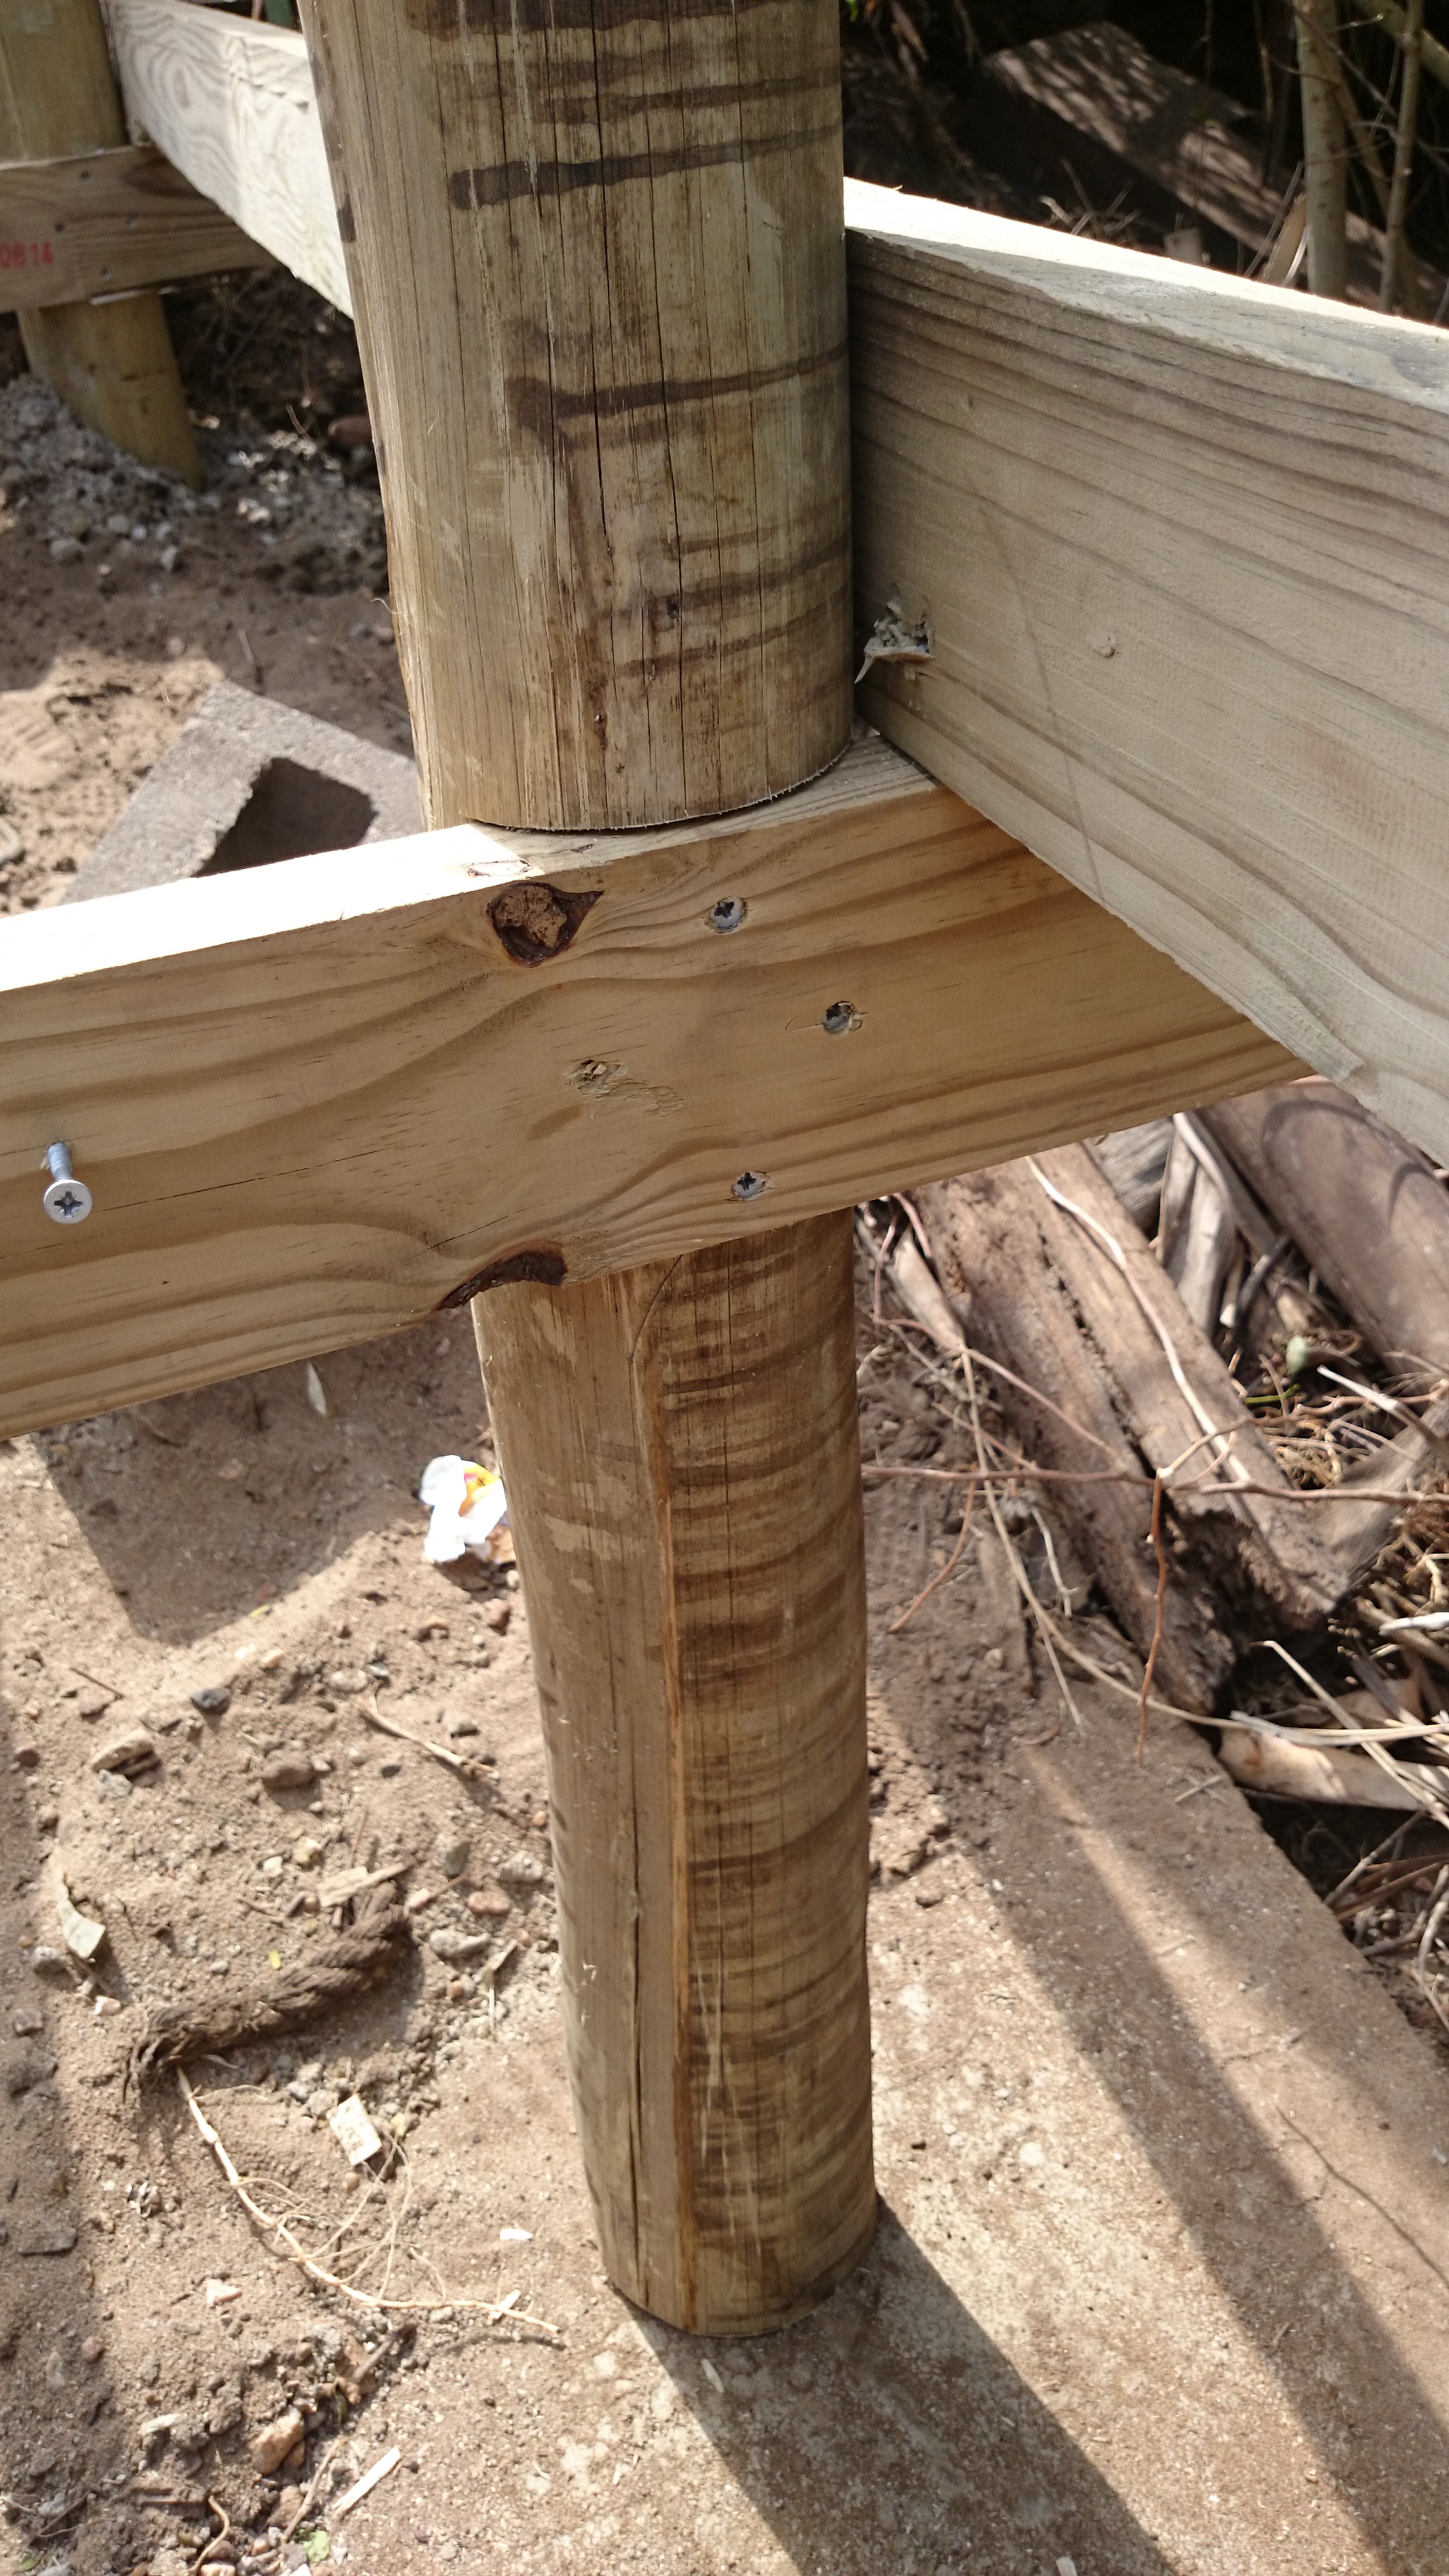
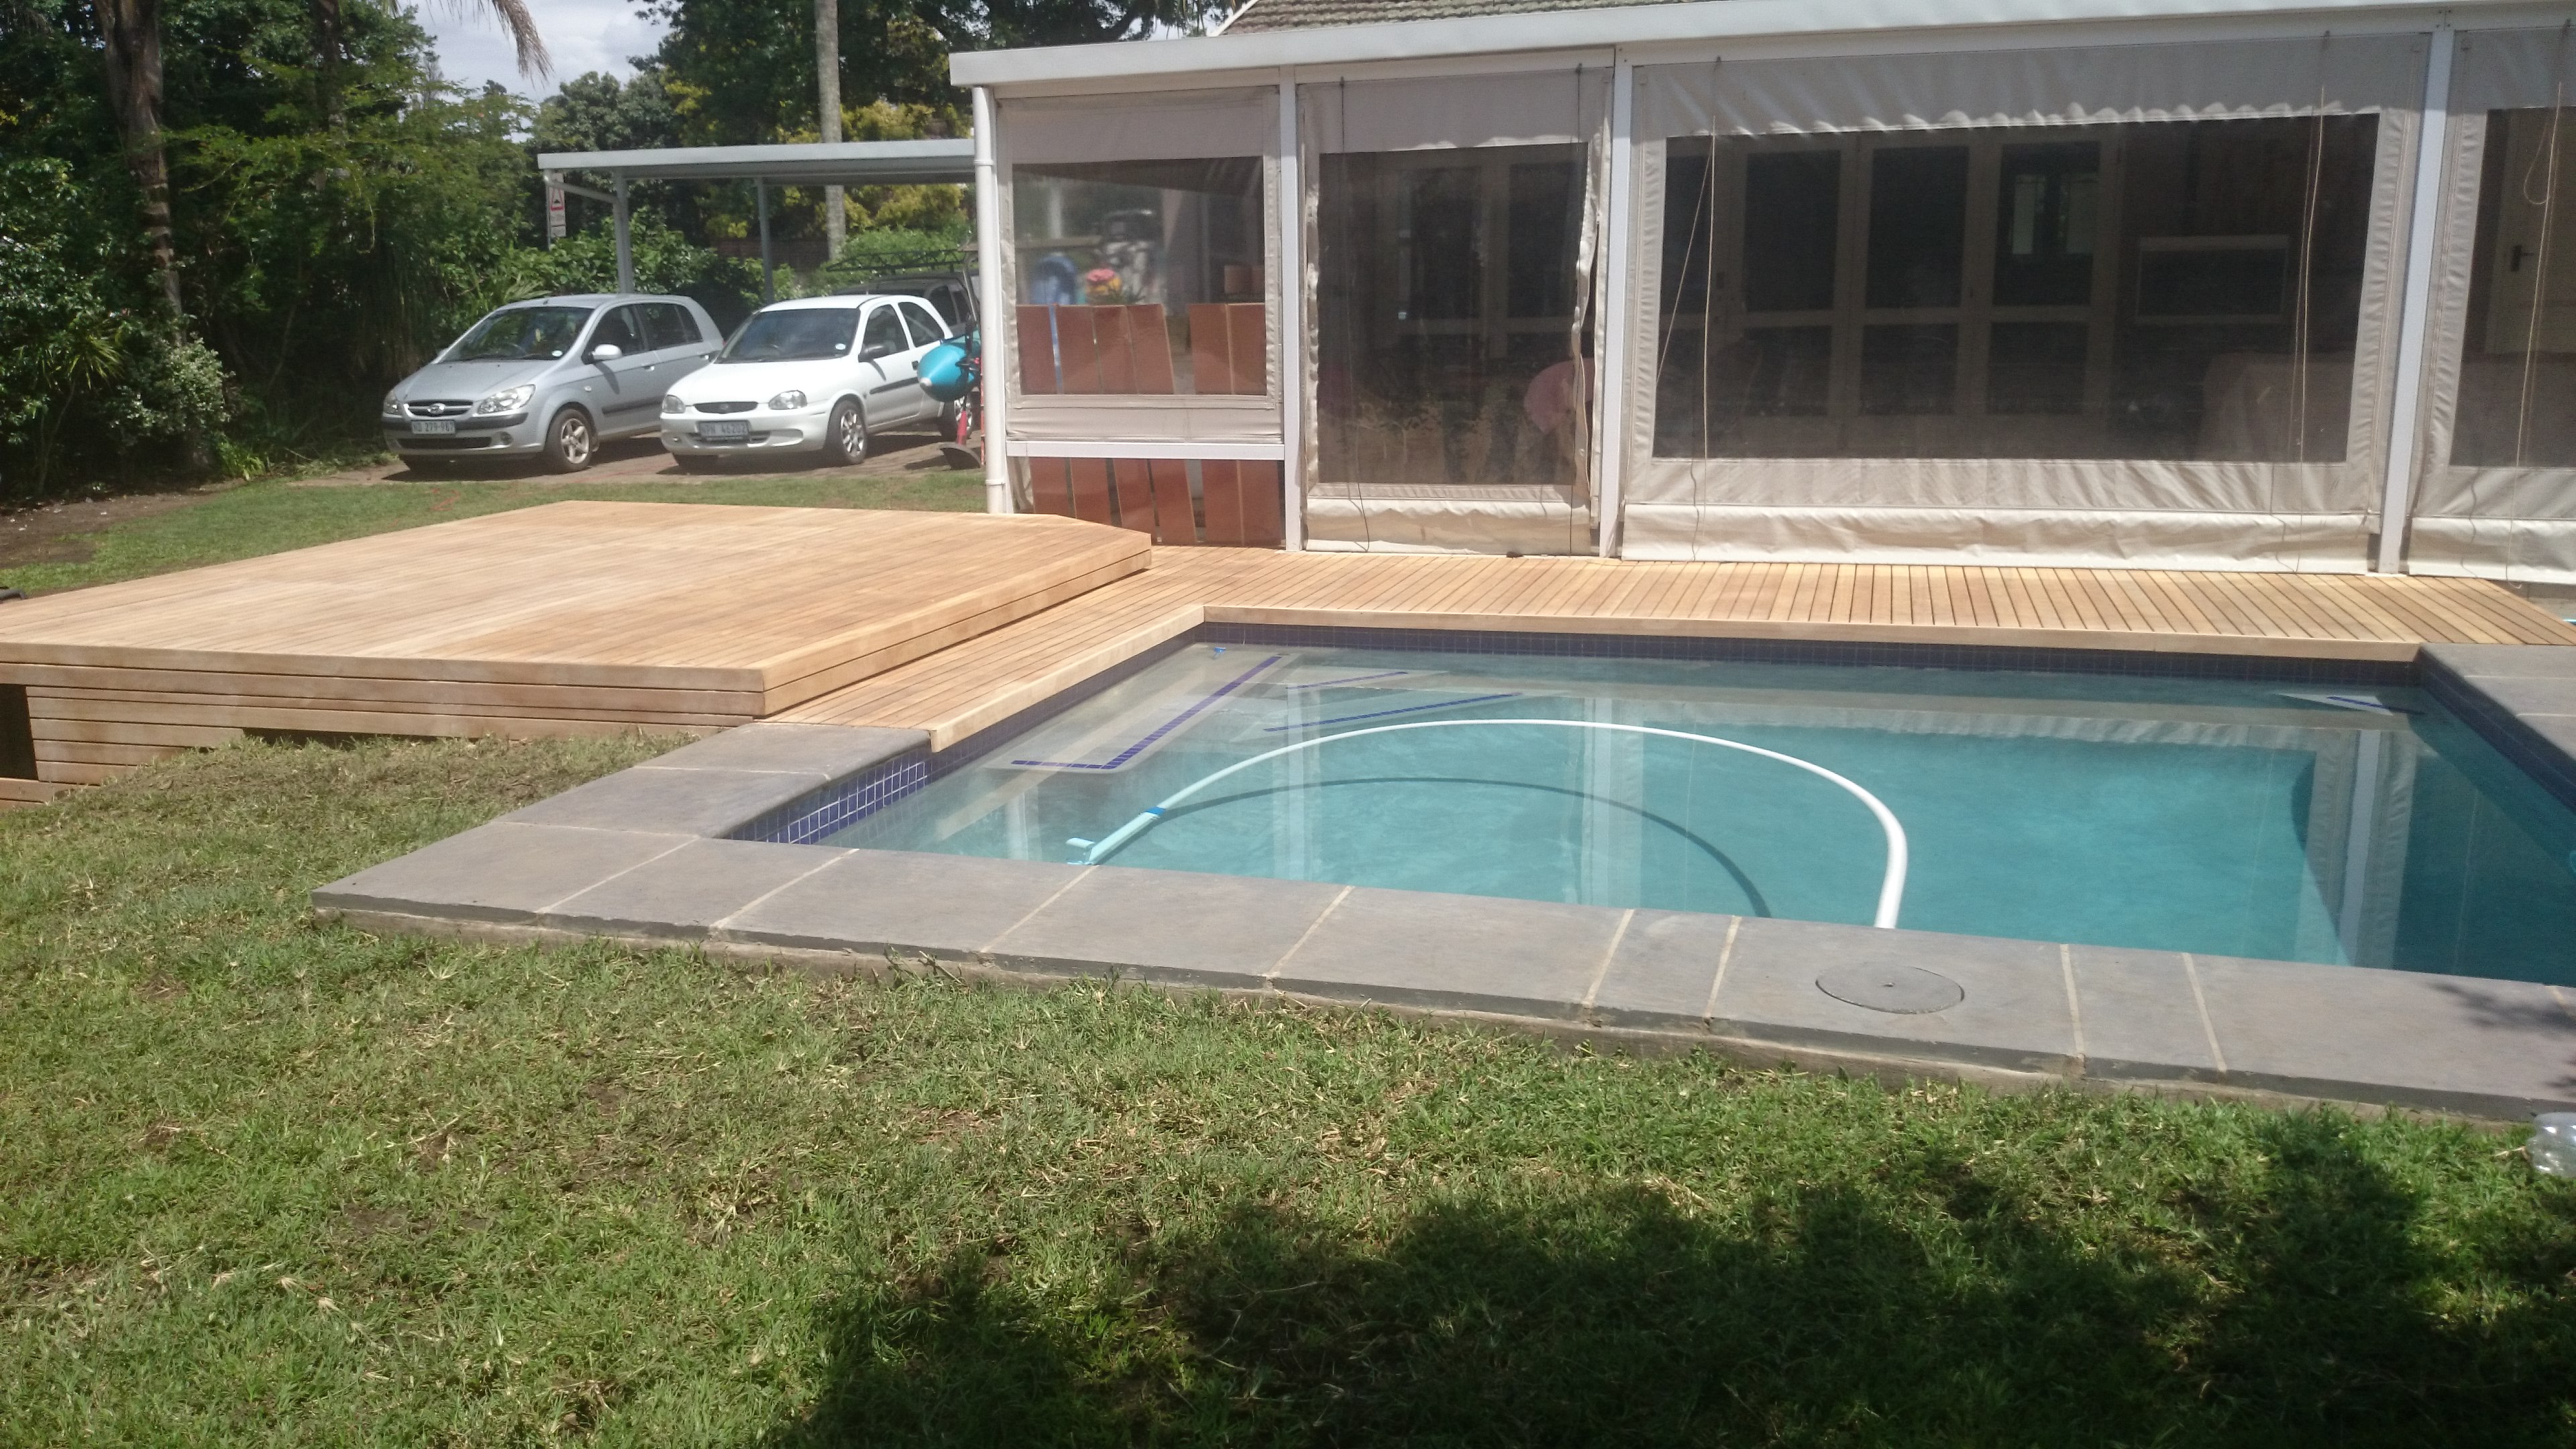
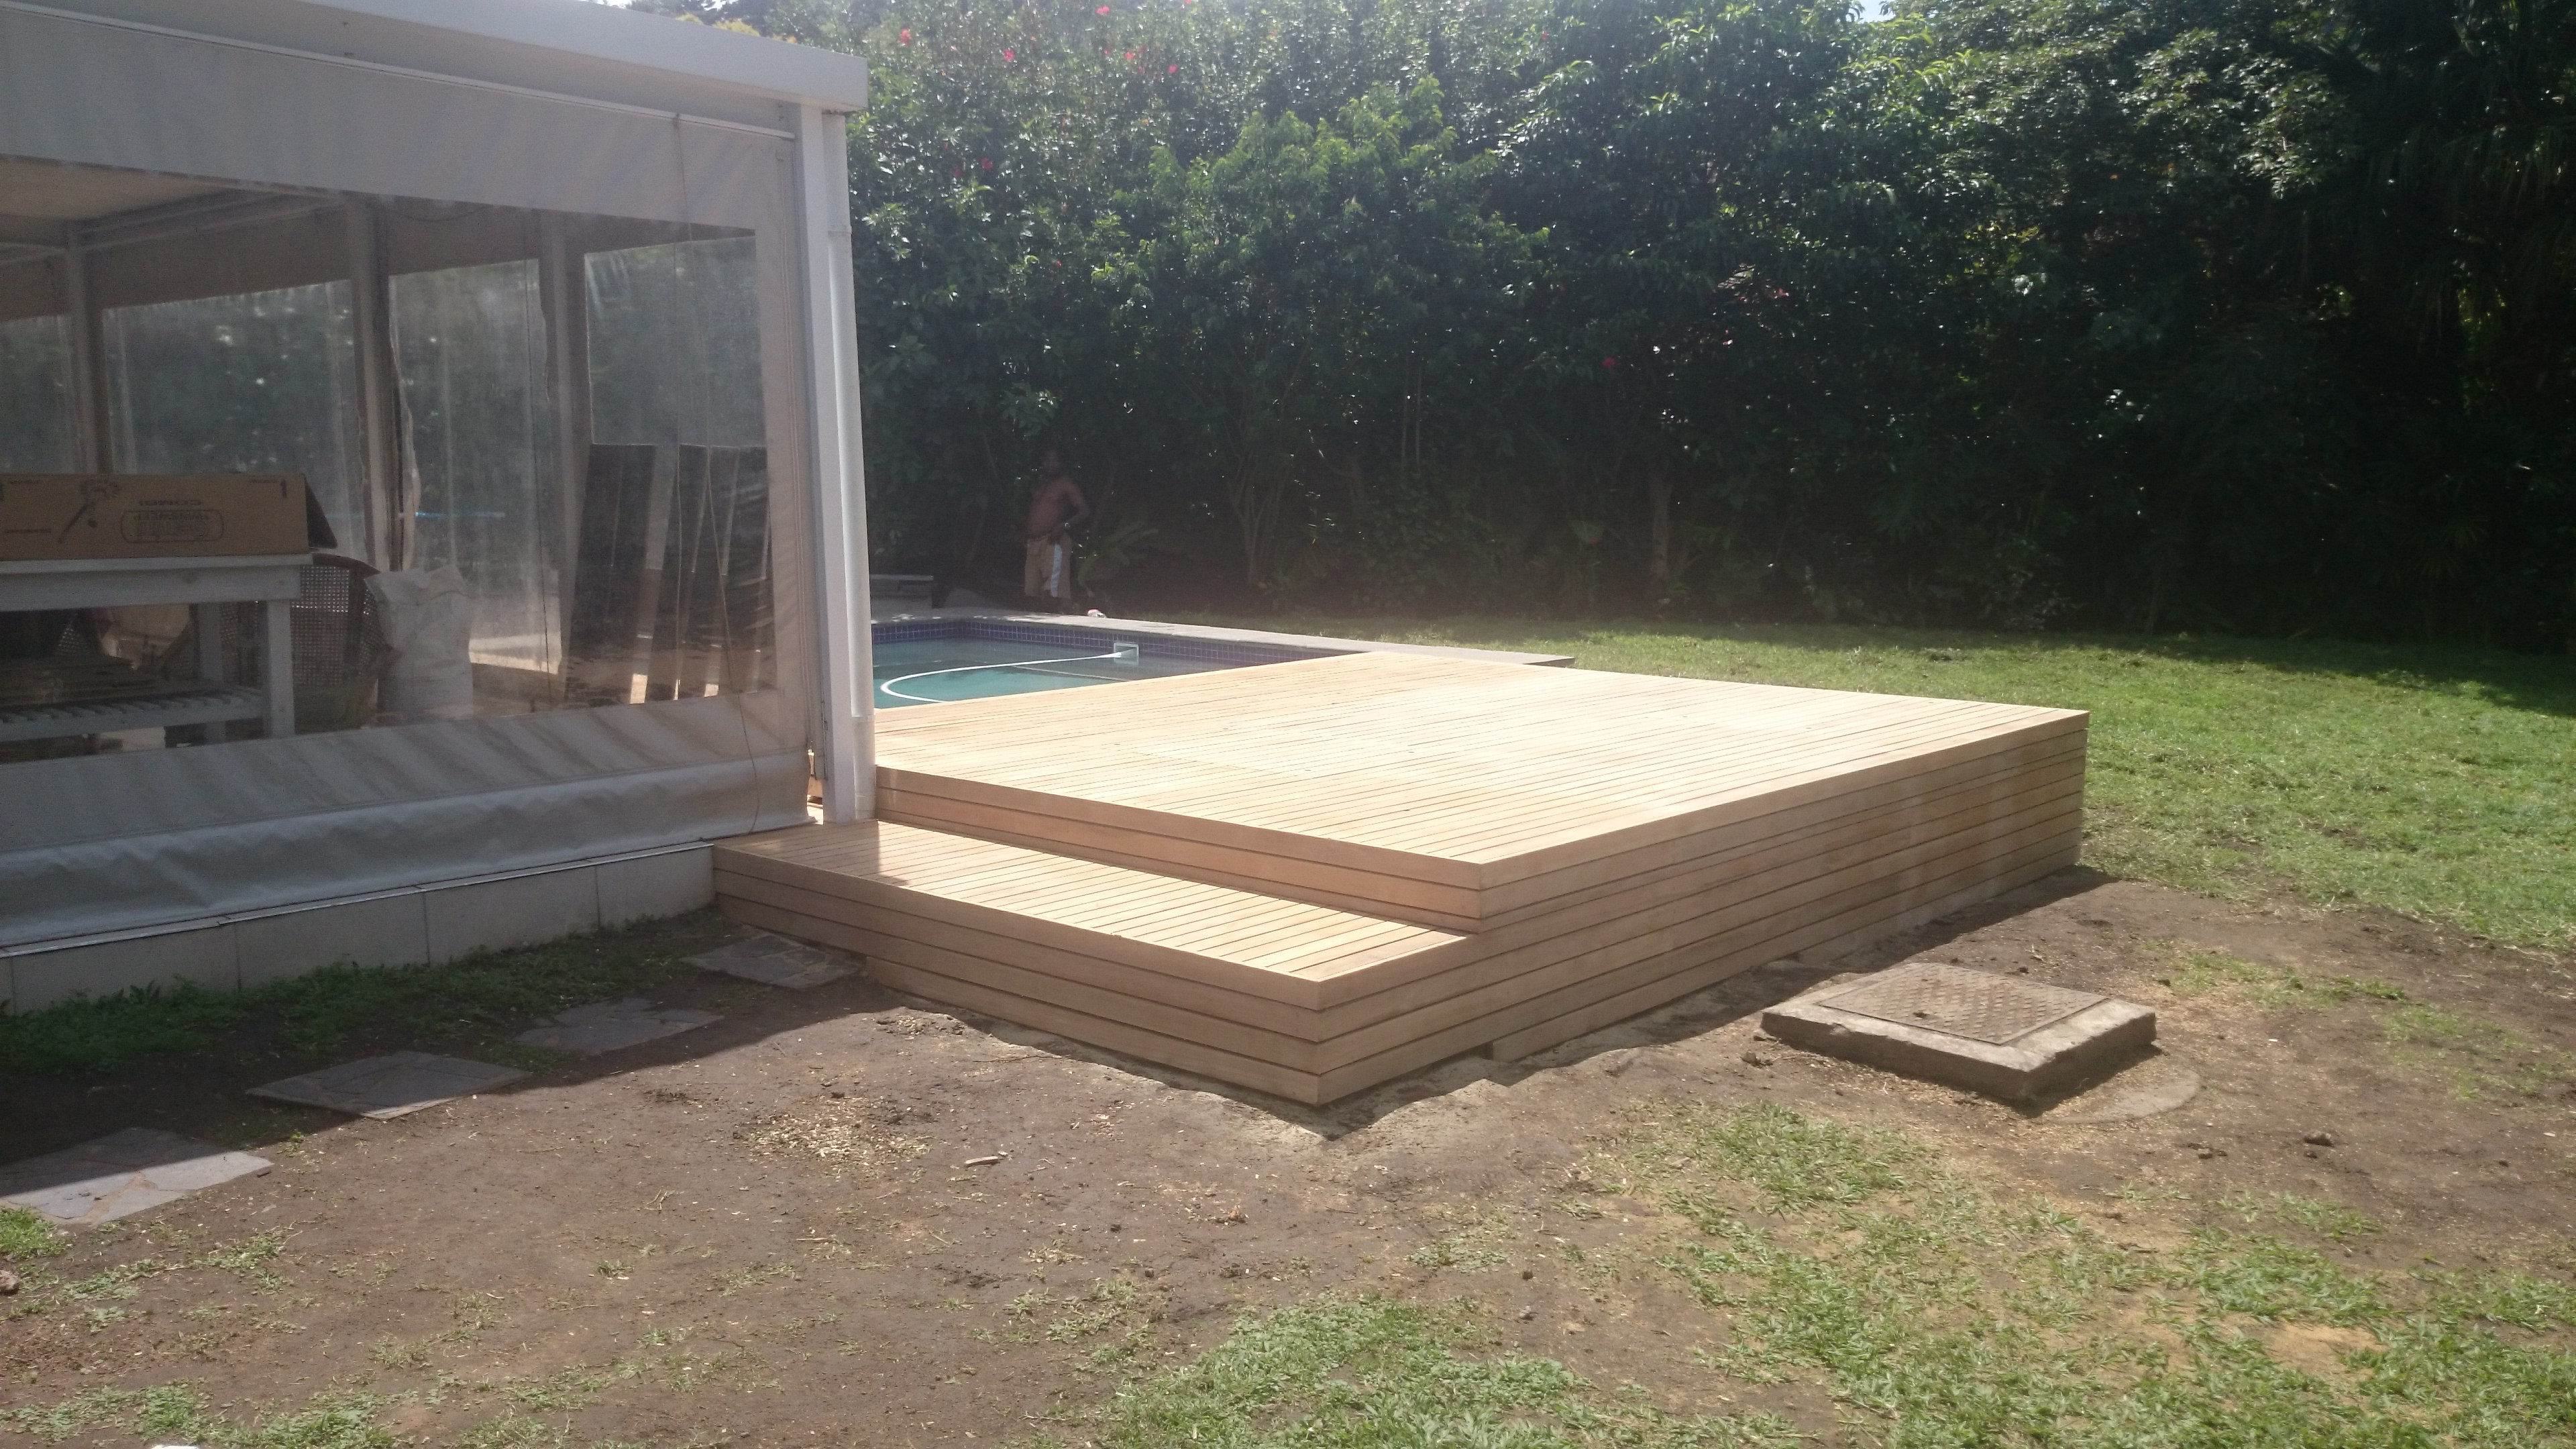
We used 38 x 152 stock as our joist material, compared to the normal 38 x 114 stock which we normally use. This allowed us to span up to about 2.2m which still wasn’t quite far enough to get over the well. We brought the feet of the deck in as close as we could and placed them on top of the side wall of the well. We also braced the deck in other places so as to stop any bouncing which would have occurred otherwise. There was also a corner that we had to cut off so that it created a clear pathway from the lower deck around the awning upright and on to the tiled patio. Half of the Wooden decking Durban
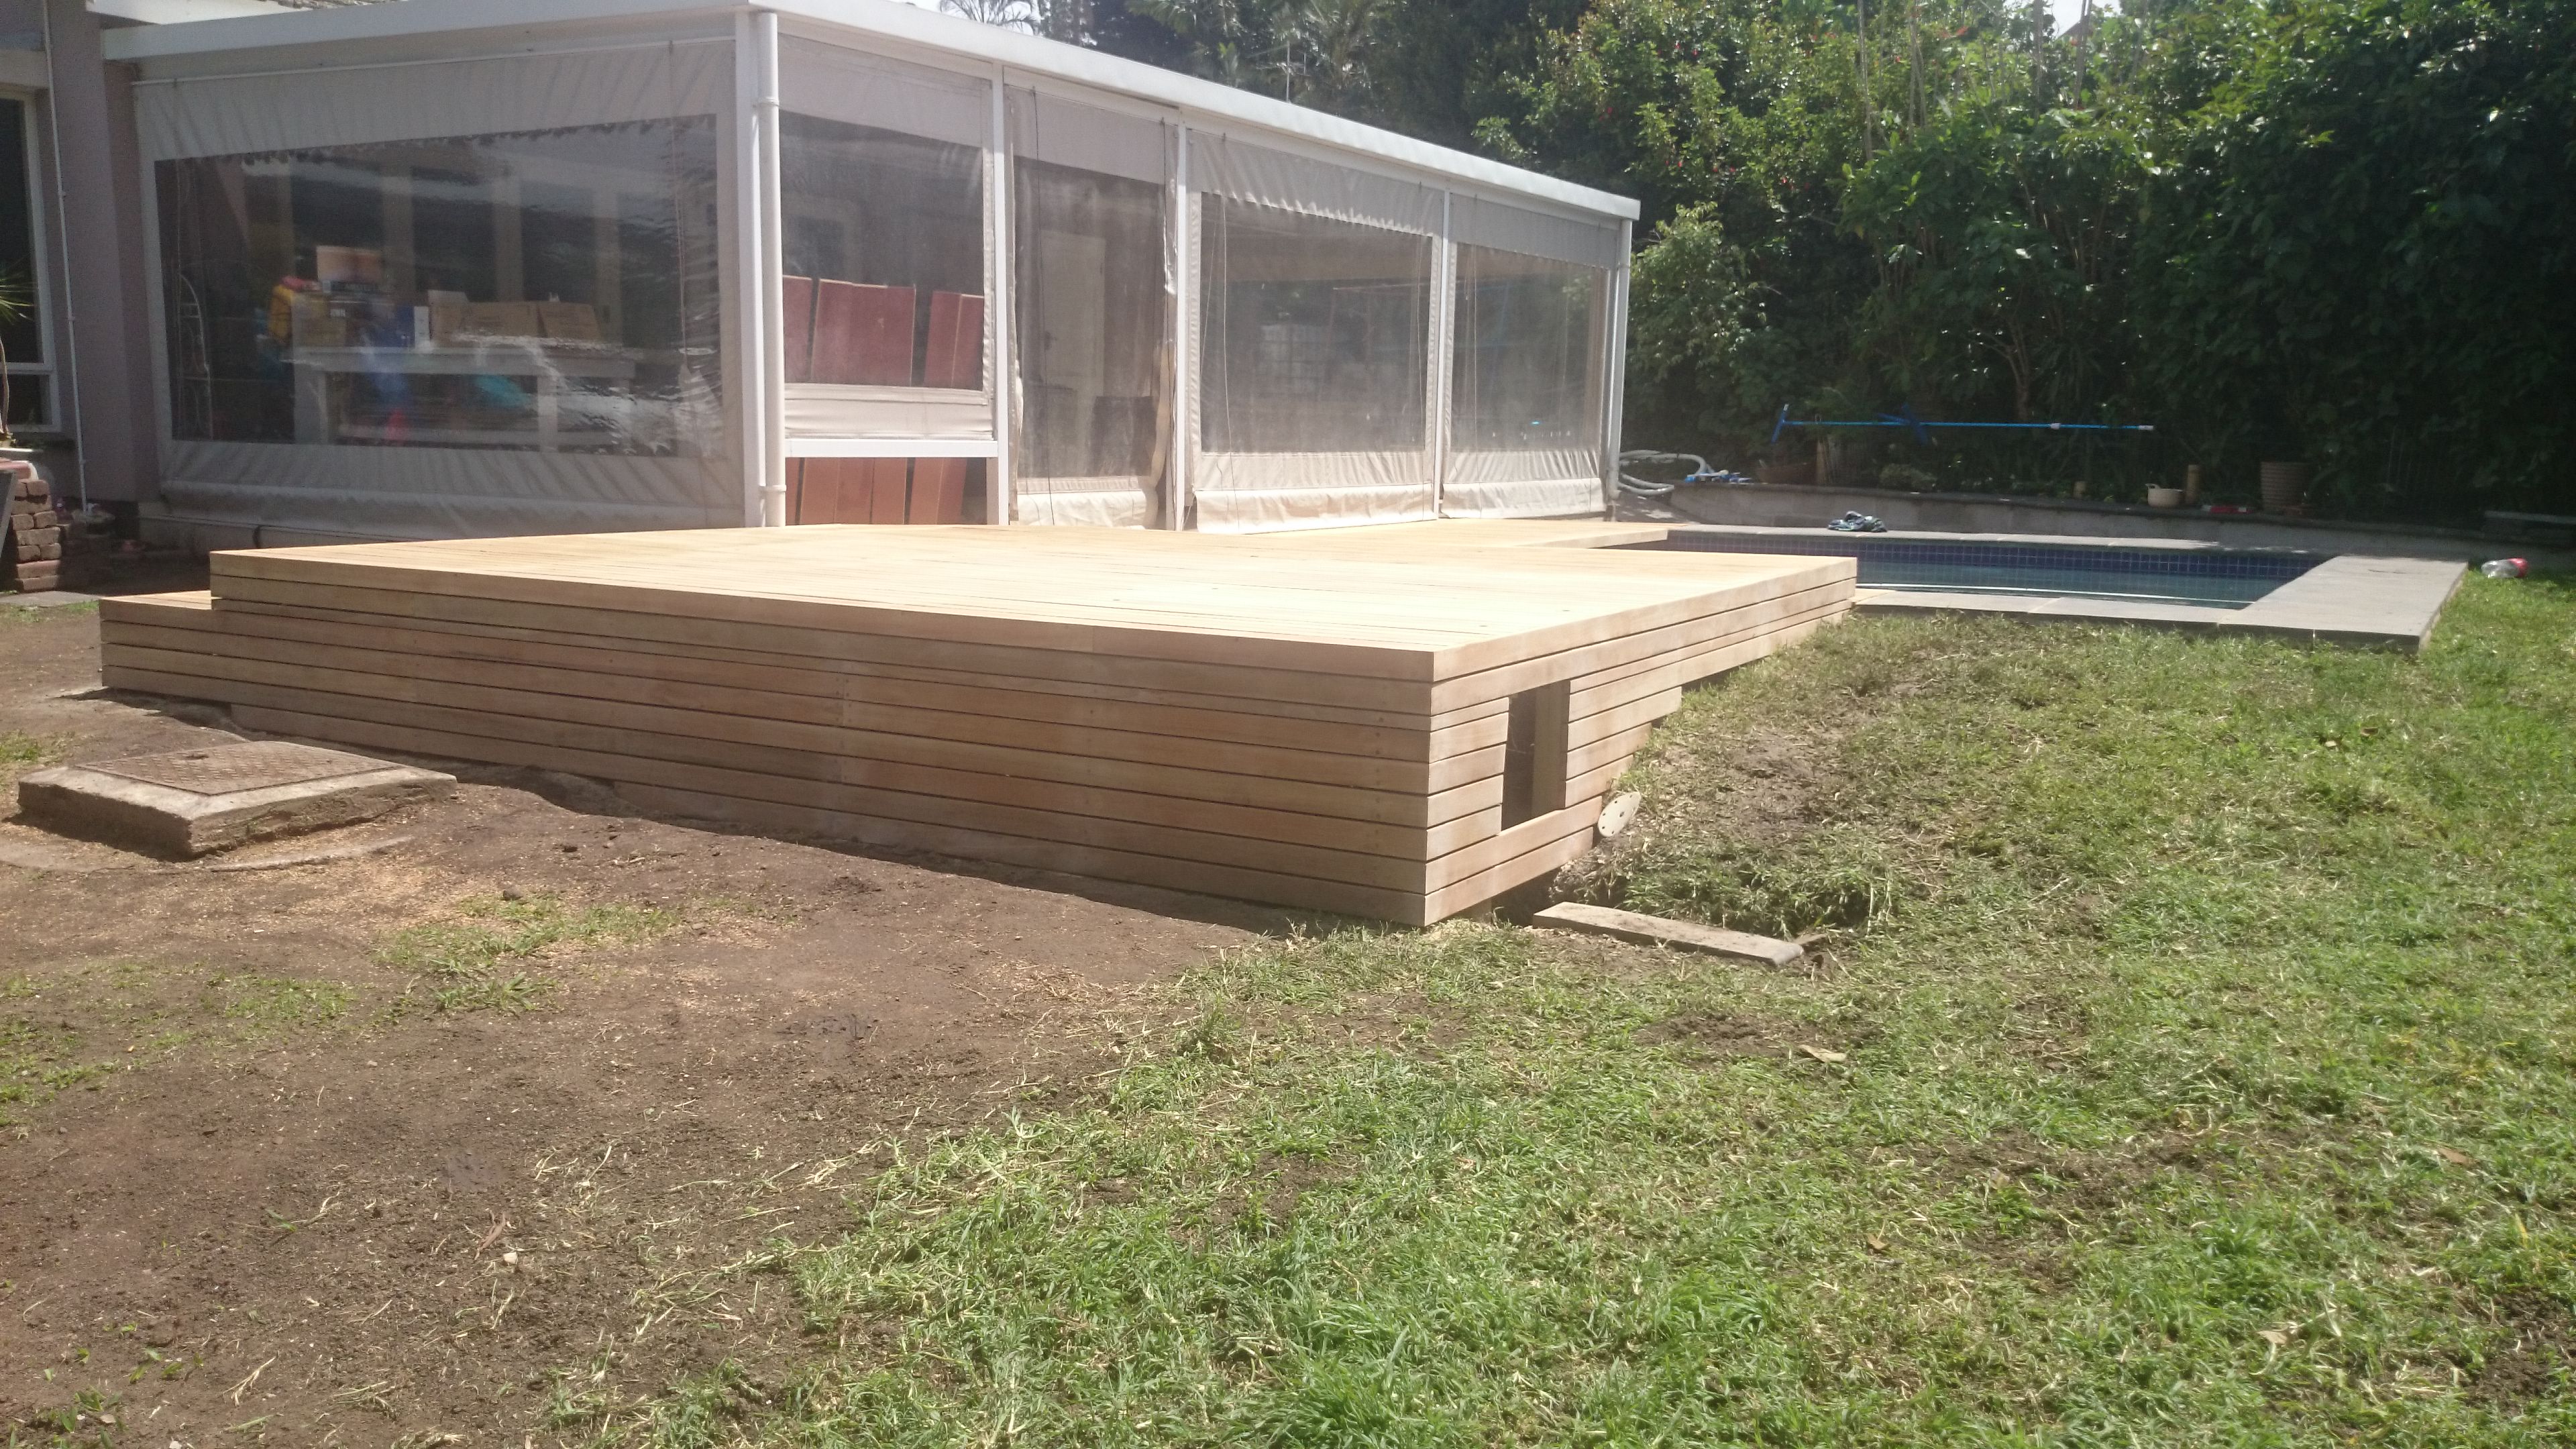
pool was built with pavers or coping stones on the edge of the pool and the other half had wooden decking. So we had to get all our levels right to create a seamless integration between materials. It is quite popular now to mix materials and have a combination of pavers and wood and grass.

The pool pump was installed below the deck on the highest end and some trap doors were built on top of the deck to access the filters etc. We had to build a big enough trap door to allow a person to climb in there to change the sand or do other maintenance if needed.

The sides were clad to block visibility underneath the deck and a full length step was built along the one side for access to the grassed area.
A small opening was created on one side to house the pump DB board and this can later be hinged with a small door if the client wishes.

Wooden decking DurbanThe challenges on building pool decks between a tiled area and the side of a pool is to get the deck boards to fit into the space you have been given to work with. If the side of the pool isn’t 100% parallel to the side of the house, up to which you will deck, then you need to adjust the spaces between deck boards on one or both sides of the deck to either gain or lose space as you lay deck boards. If for instance one side is 20mm wider than the other side, you will need to gain 1mm per row of deck boards in order to bring your deck boards parallel to the house so that you don’t end on a wedge-shaped deck board. At times this can be quite tricky. We are working on one in Hillcrest where the house and the pool paving is 77mm out of parallel. The total distance is only 2.4m. So the space will take approximately 32 deck boards to fill. Which means we need to gain or lose more than 2mm per row of deck boards to bring the last deck board parallel to the side of the house (or pool depending on which side we start decking). What we’re doing there is to increase the gap between deck boards to 6mm one side and reduce it to 4mm on the other side.
Then the last trick is to adjust your deck board spaces so that you don’t end on a half deck board. So once you are parallel you need to either reduce Wooden decking Durban
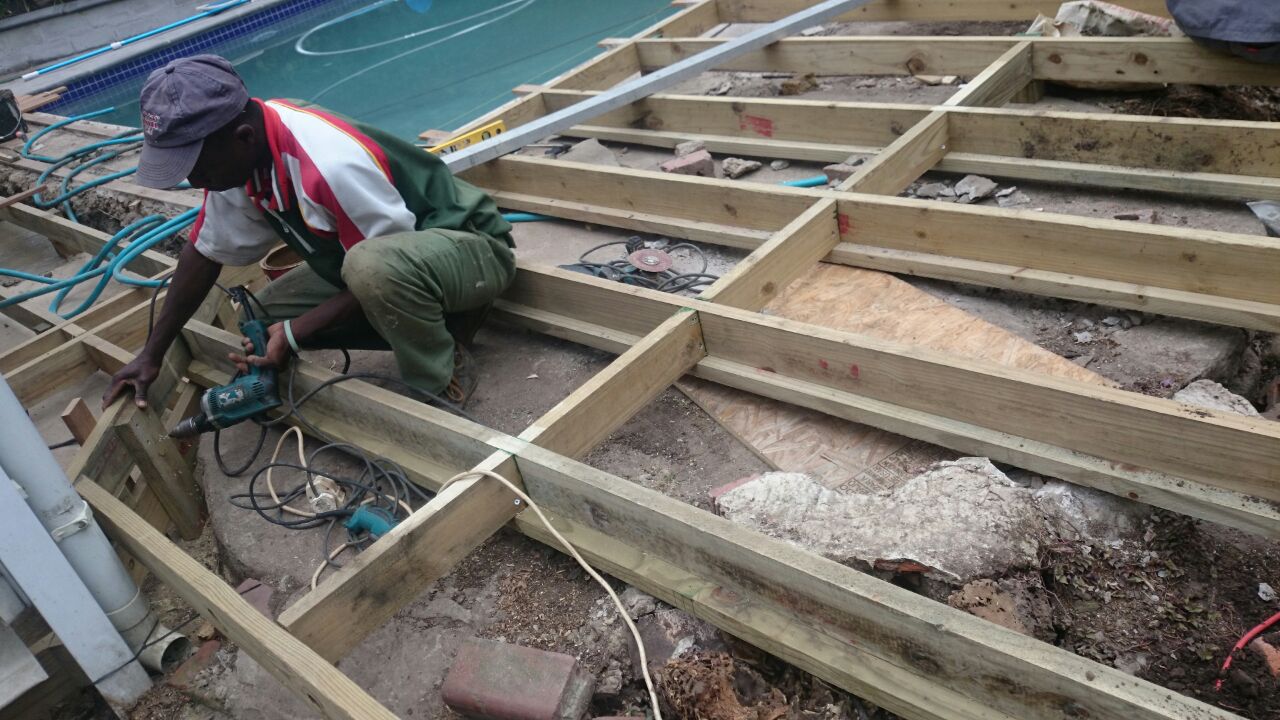
the gap tot 4mm or increase to 6mm to gain or lose space so you end on a full deck board.

For a free no obligation quote on your wooden sun deck, balustrades, walkways, pergolas, screens and other timber construction, please call us on 082 496 5444, or use the contact us form below.

Go back

Your message has been sent

Warning
Warning
Warning
Warning

Warning.

Wooden decks Durban


Wooden decking Durban


Wooden Balau Walkway Umhlanga, Durban

Wooden Balau WalkwayThis wooden balau walkway, or bridge, leading to the beach, needed to be replaced as the old one, although it was nearly 20 years old, had started sinking on one side. It had been built on beach sand so the concrete that had been used to set the upright posts had sunk over time into the soft sand. This problem also occurs on decks that are built on the bluff as the Bluff is essentially one big sand dune, so many parts of it are soft enough to allow a post to sink over time.Wooden Balau Walkway

We overcame this problem by making use of a floating foundation. It is often used in building houses where the soil is very soft. Instead of throwing a concrete foundation beneath the walls and bringing the bricks up and then throwing a slab, the entire foundation is a concrete slab on top of which the bricks are laid. The result being that it creates a much larger foot print in the sand and is of course more difficult to sink than if it was a column of concrete.

This method solved the problem of the posts sinking, but created another problem in that there was no lateral support for our posts which would have resulted in them falling over. This was overcome by throwing a “pad” on every second post and every other post was set 600mm in the ground in concrete. So one post stopped it from sinking and the other gave it lateral support and stopped it from falling over.

The floating “pads” were 600mm x 600mm and 150mm thick with mesh in between to stop the concrete from cracking with the weight of the deck.Wooden Balau Walkway

The pics alongside show the “pad” that the upright posts sits on top of and a post that has been buried in the ground 600mm.

Once our structure was up we installed our joists and decked it using balau deck boards. The width was 1.5m so we installed 4 joists to give us joist centres of 500mm. This is about the maximum one can span a 19mm deck board without it bowing from the weight of a person. Anything bigger than 500mm will result in the deck surface being springy. One should aim for between 450mm and 500mm. This of course applies to a 19mm balau deck board. If another timber is being used, or the board is anything but 19mm thick, then this will vary.Wooden Balau Walkway

We used the uprights, which were 100 / 125, H4 CCA treated gum poles, as our uprights for our balustrade too so as to ensure that they were sturdy. Because our gum poles were between 100mm and 125mm in diameter, we had to use a 38 x 152 H3 CCA Treated pine capping; otherwise the capping would have been narrower than the upright which would have looked odd. We then installed droppers as our pickets and secured these through the top of the capping and from underneath the deck boards.

Our stairs leading from the last section of walkway to the beach were made using H3 CCA treated pine stringers and treads and we then clad the treads with balau to match the walkway surface.

For a free, no obligation quote, on your wooden decks, walkways, bridges, screens, pergolas and other outdoor timber construction, please call us on 082 496 5444 or use the contact us form below.

Go back

Your message has been sent

Warning
Warning
Warning
Warning
Warning

Warning.

Reducing rot in wooden sun decks

preventing rot in wooden decks

Click to enlarge

This article will focus solely on reducing rot in wooden sun decks rather than a specific article on a job we have completed.
One of the first questions that are asked when planning to build a wooden deck is that of maintenance. Being wood, the deck will always be susceptible to rot and insect infestation, but with the proper care this can be reduced to the absolute minimum and can compare favourably, if not better, to using other materials such as composites, concrete and tiles. Let’s face it when it comes to aesthetics and warmth wood is best, but often people opt for other materials simply because there is a belief that they are easier to maintain and will cost less in the long run.

Rot is caused by a break down in the fibres of the wood. A breakdown in the fibres of the wood is caused by algae being allowed to grow on the timber which in turn is caused by water. Water therefore does not directly cause rot. A piece of wood can live in water all its life and not rot, but if it is not cared for properly then it will cause algae to grow and ultimately rot. CCA Treated timber of course eliminates this because it contains copper which prevents algae from growing. However it is only possible to CCA treat certain timbers such as pine and to a degree Saligna because of the differing densities of the woods. Pine is soft and balau is hard. CCA treatment is done through pressure treating (vacuum) and it is therefore impossible to CCA treat balau as it is too hard for the solution to penetrate the timber.

preventing rot in wooden decks

Click to enlarge

So how does one reduce the chances of balau rotting? Well first of all balau is naturally resistant to rot because it is twice as dense and twice as hard as pine for instance so the water doesn’t penetrate it as easily. Also it contains natural oils and resins which repel water. So it will rot, but it will take longer than other timbers.

A piece of wood, any wood, takes in water largely through the end grain. Very little water is absorbed through the face or side grain. Think of it as a bunch of straws. When the straws get wet on the ends they can take up water, but they can’t take up water through the sides.

So the important areas of your deckboard is of course the ends, or end grain. Where a deck board is cut, there is not much that can be done to stop water ingression except to seal it with a suitable water-repellent sealer after or during installation. When a deckboard comes from the timber yard it is often closed off on the ends with wax. However that board needs to be cut in order to fit into the deck so one end will always be wax free. Also it is not advisable to leave that wax on. In the hot sun the wax starts to melt and leaves unsightly marks on the joins. So it is best to cut the wax off before installation. That leaves two ends exposed which now need to be sealed off as best as possible using sealer. Apply it liberally to the ends and make sure they are re-sealed during maintenance intervals.

The other area that is vulnerable is where the screw hole is drilled through the deckboard to attach to the joist. This leaves a hole where water can penetrate the end grain on two sides. What compounds this problem is that the screw is normally counter sunk which allows water to collect in the hole and be absorbed up and down the end grain. Some deck builders use a stop bit to insert the screw whereby the screw head stops at the surface of the deck. I don’t however use this method for two reasons. Firstly the screw is now not tight up against the bottom of the counter sunk hole so the board may work itself loose over the years. Secondly, there is still a small gap around the screw head for water to get into and move along the end grain. And trust me water will find that hole. You will often see deckboards that have started rotting at the screw holes. Now you know why.

Instead I counter sink the screw hole about 5mm, insert the screw and tighten it until it is tight right up against the bottom of the hole leaving the screw head counter sunk a few millimetres. I then take a clear epoxy, mixed with the sawdust of the same timber to match the colour, and force it into the hole leaving it slightly proud. Try and use a very fine saw dust. It makes mixing the epoxy much easier and it goes in the hole better. Once it is dry, I use a grinder with sanding pad to flat it and then I use a rotex sander to remove the scratch marks left by the grinder. Now it is ready to be sealed and good luck to any water that thinks it can get in there. The epoxy is the only filler that will last. Wood filler will pop out in a few months’ time. Use a clear epoxy as the saw dust will match the colour of the deck. White or grey epoxy will leave a white or grey mark on the surface.

It takes more effort and takes longer to do it this way, but my crew has it done to a T now. And the net effect is a better built deck that will last longer and will cost less to maintain. So there you have it, the warmth of wood without the hassle and without having to settle for alternative materials.

For a free, no obligation quote or for some advice please feel free to contact us on 082 496 5444 or complete the form below and I will contact you. Please also feel free to leave comments below.

Go back

Your message has been sent

Warning
Warning
Warning
Warning
Warning

Warning.