Wooden Decks Durban – Bluff

Wooden decks Durban

Click to enlarge

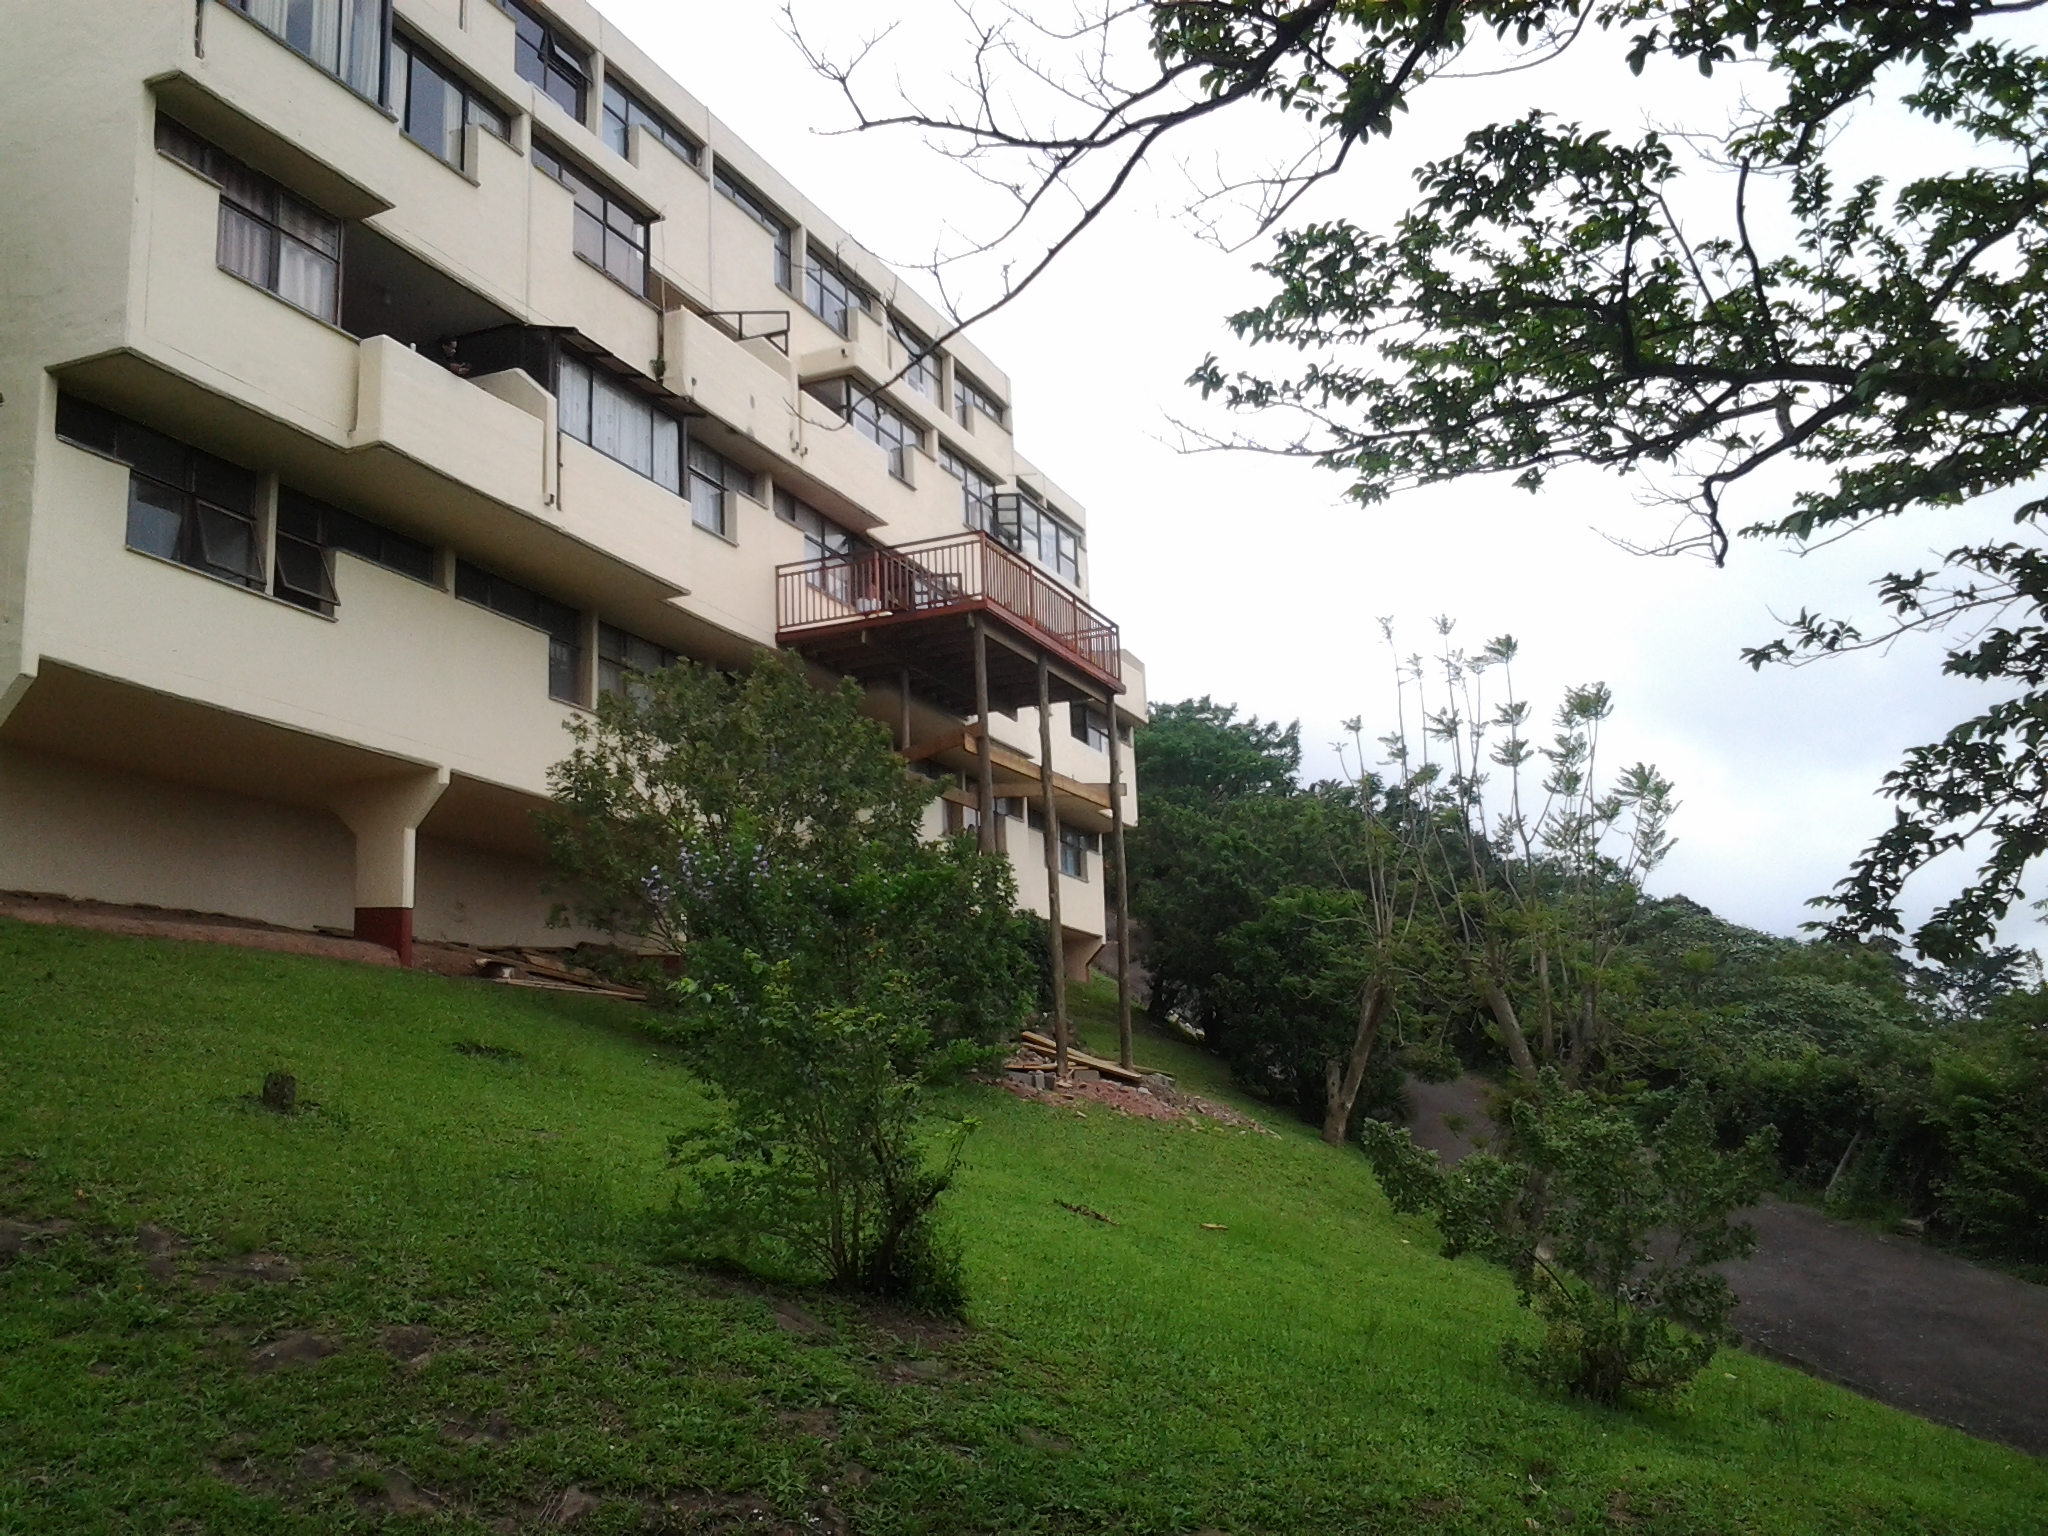
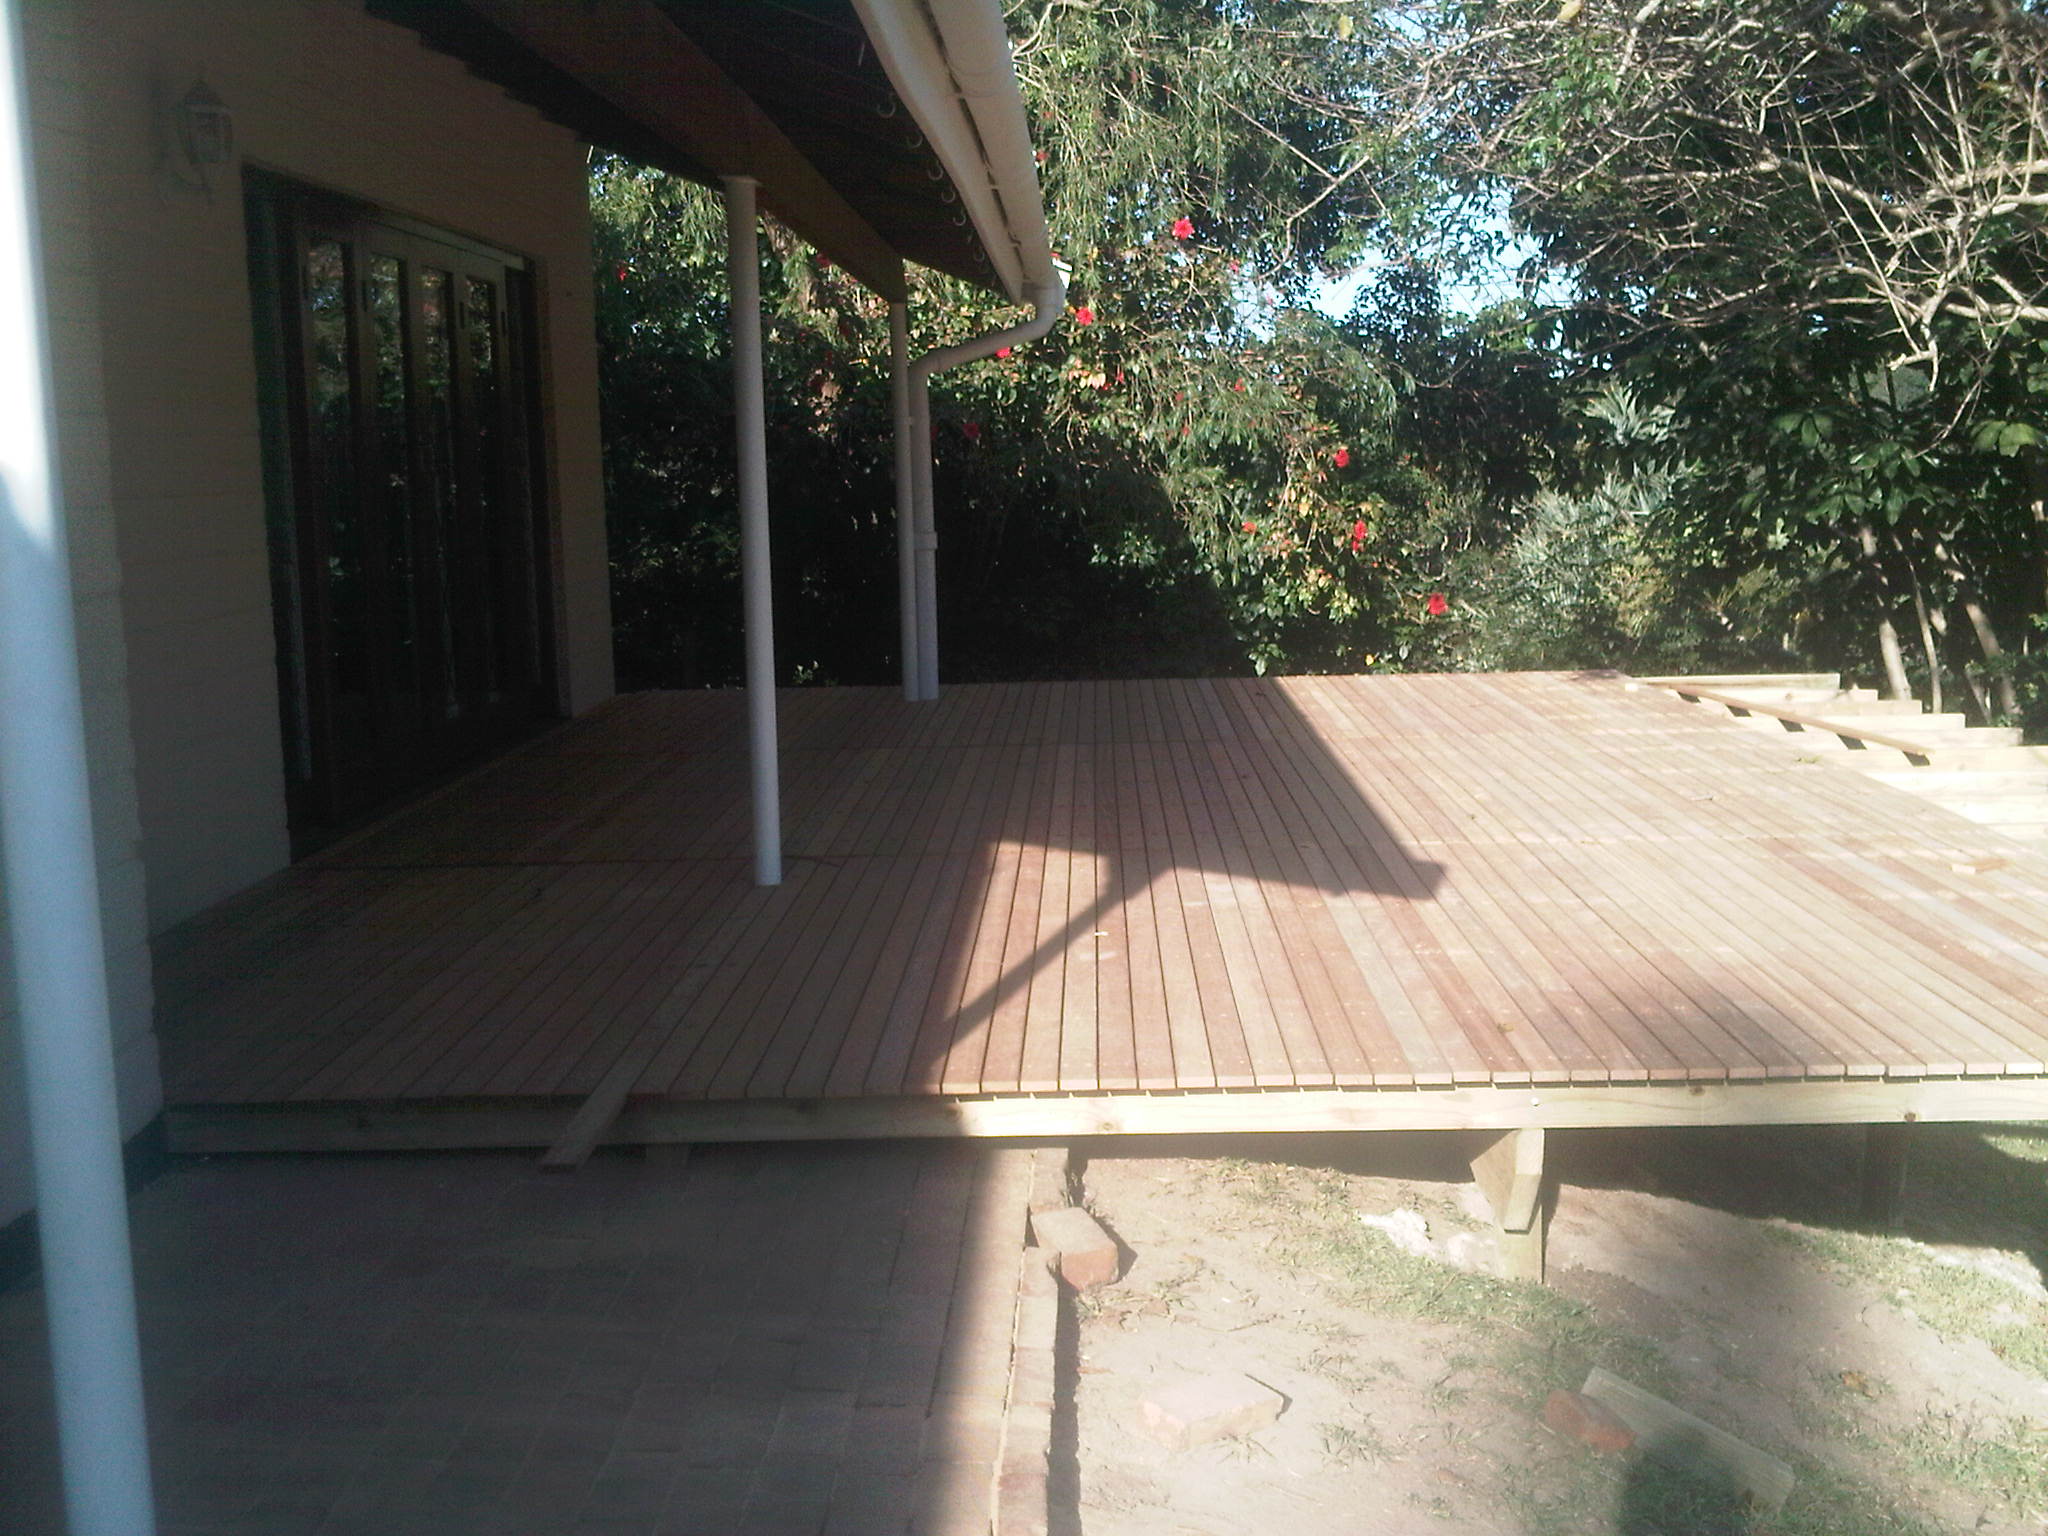
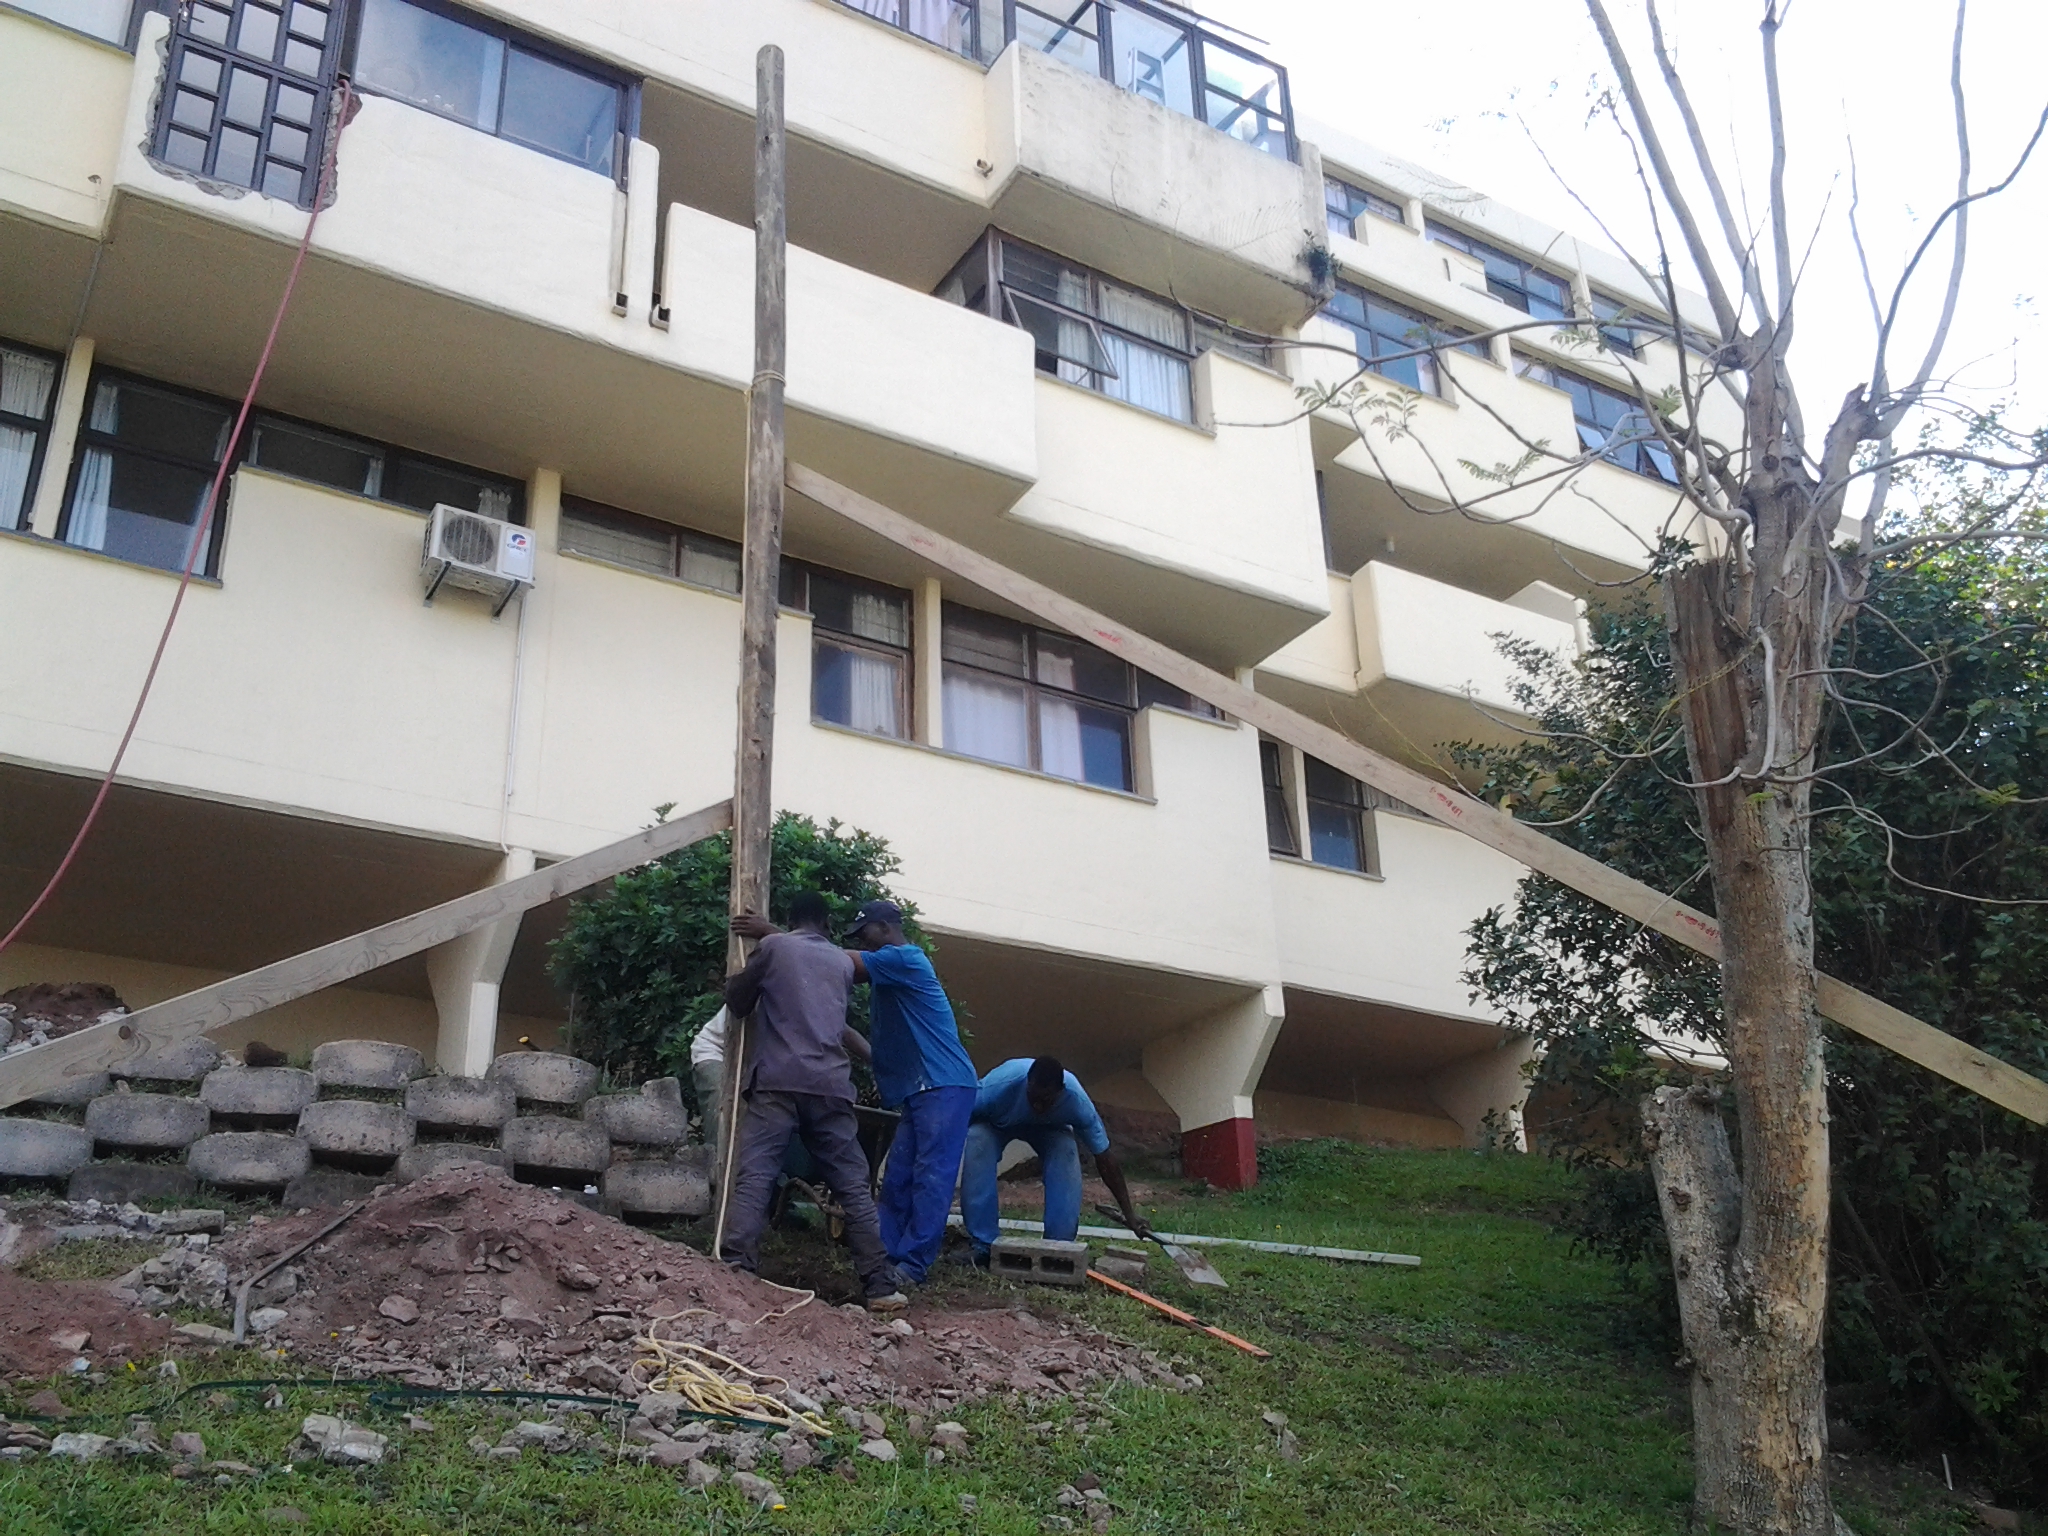
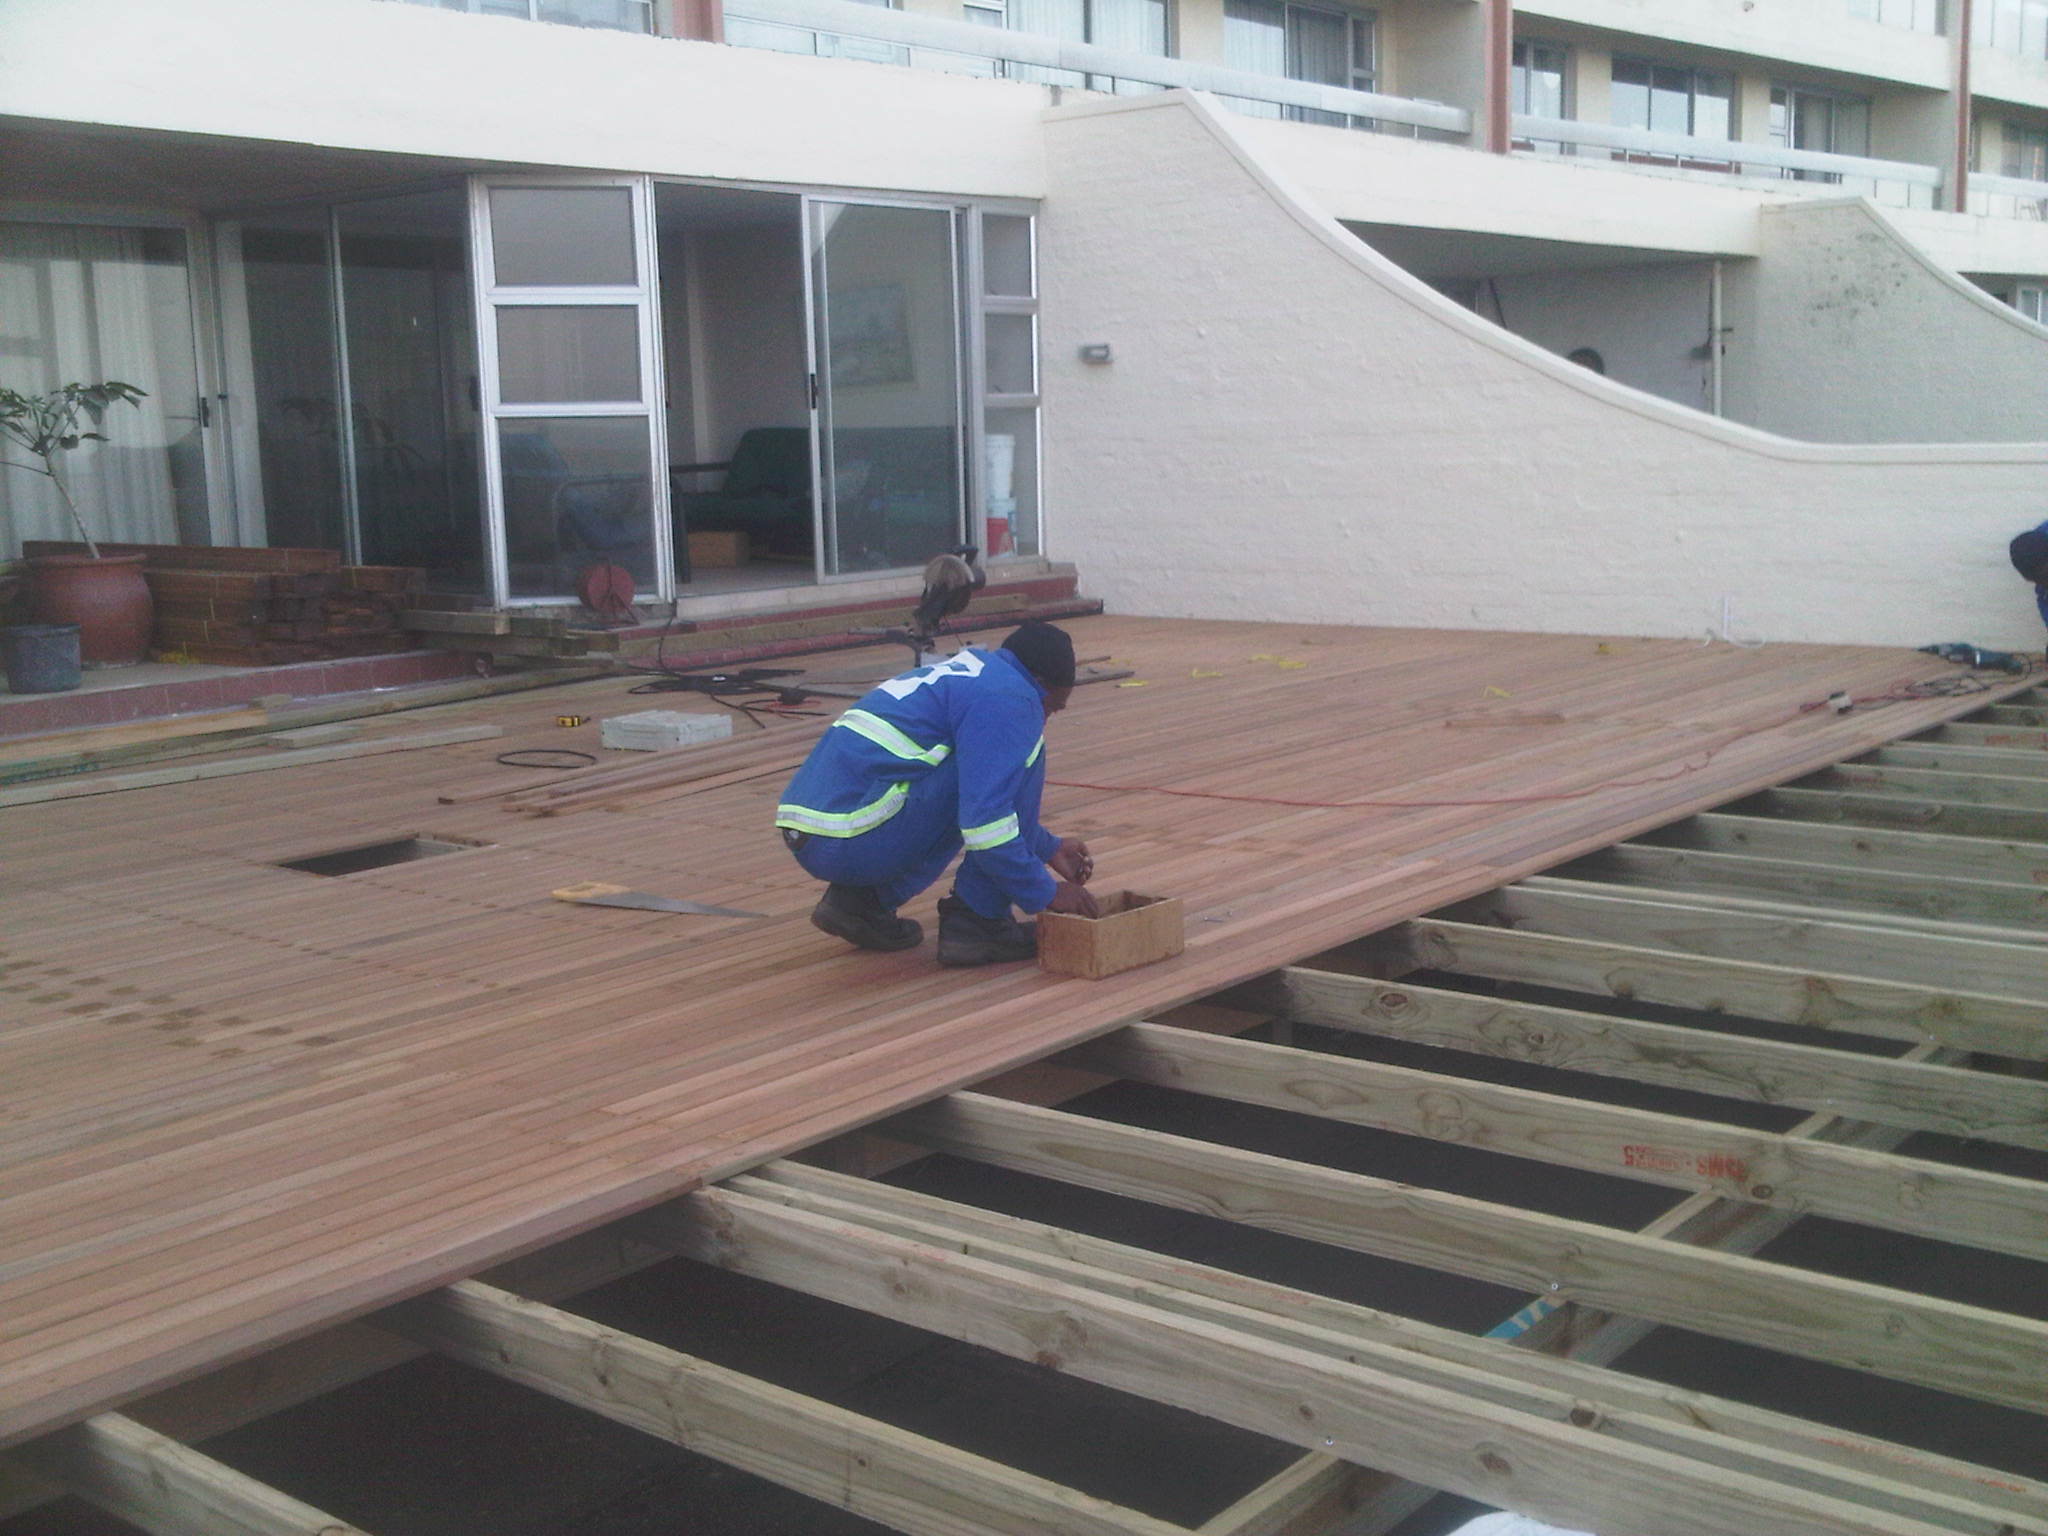
This wooden deck in Durban was the second phase of a job we started at the beginning of the year. We were originally asked to build a deck off the main bedroom. First we had to remove the aluminium window and install an aluminium sliding door. I always suggest that clients do this first so that we can build our wooden decks perfectly flush to the new opening.

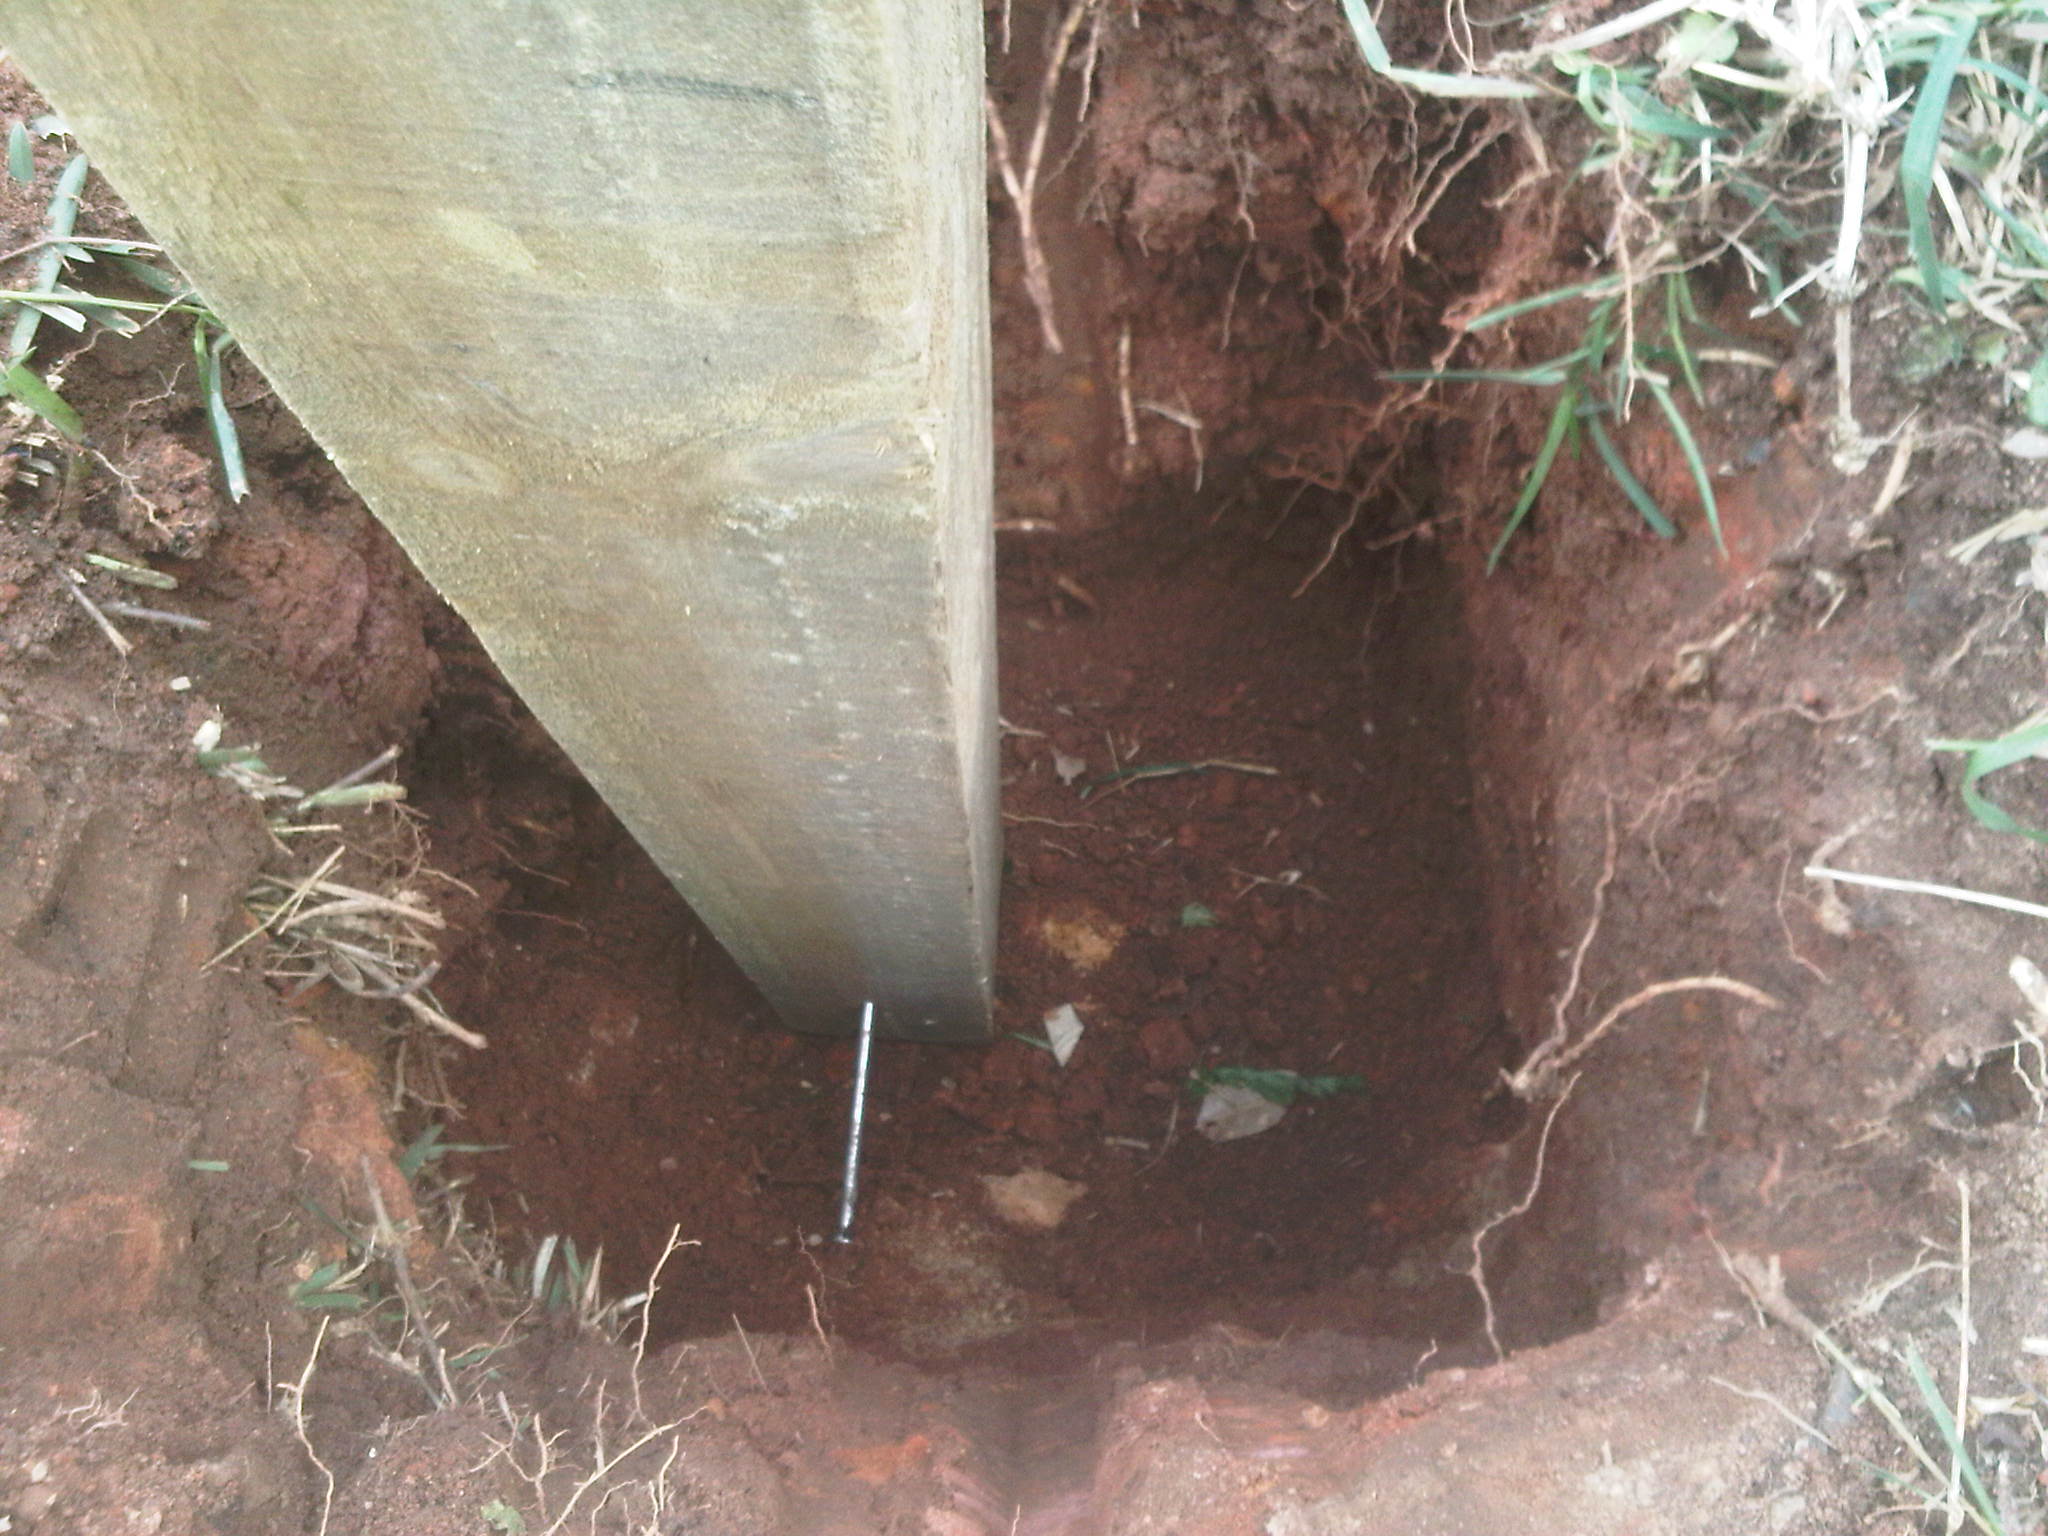
We had various obstacles to overcome. There was a septic tank that we were building on top of so we had to leave sufficient space and a large enough trap door to access all three tanks. We built one large trap door so that the whole thing could be taken off to access these tanks. During our build a new soak away had to be built as the old one had packed up.

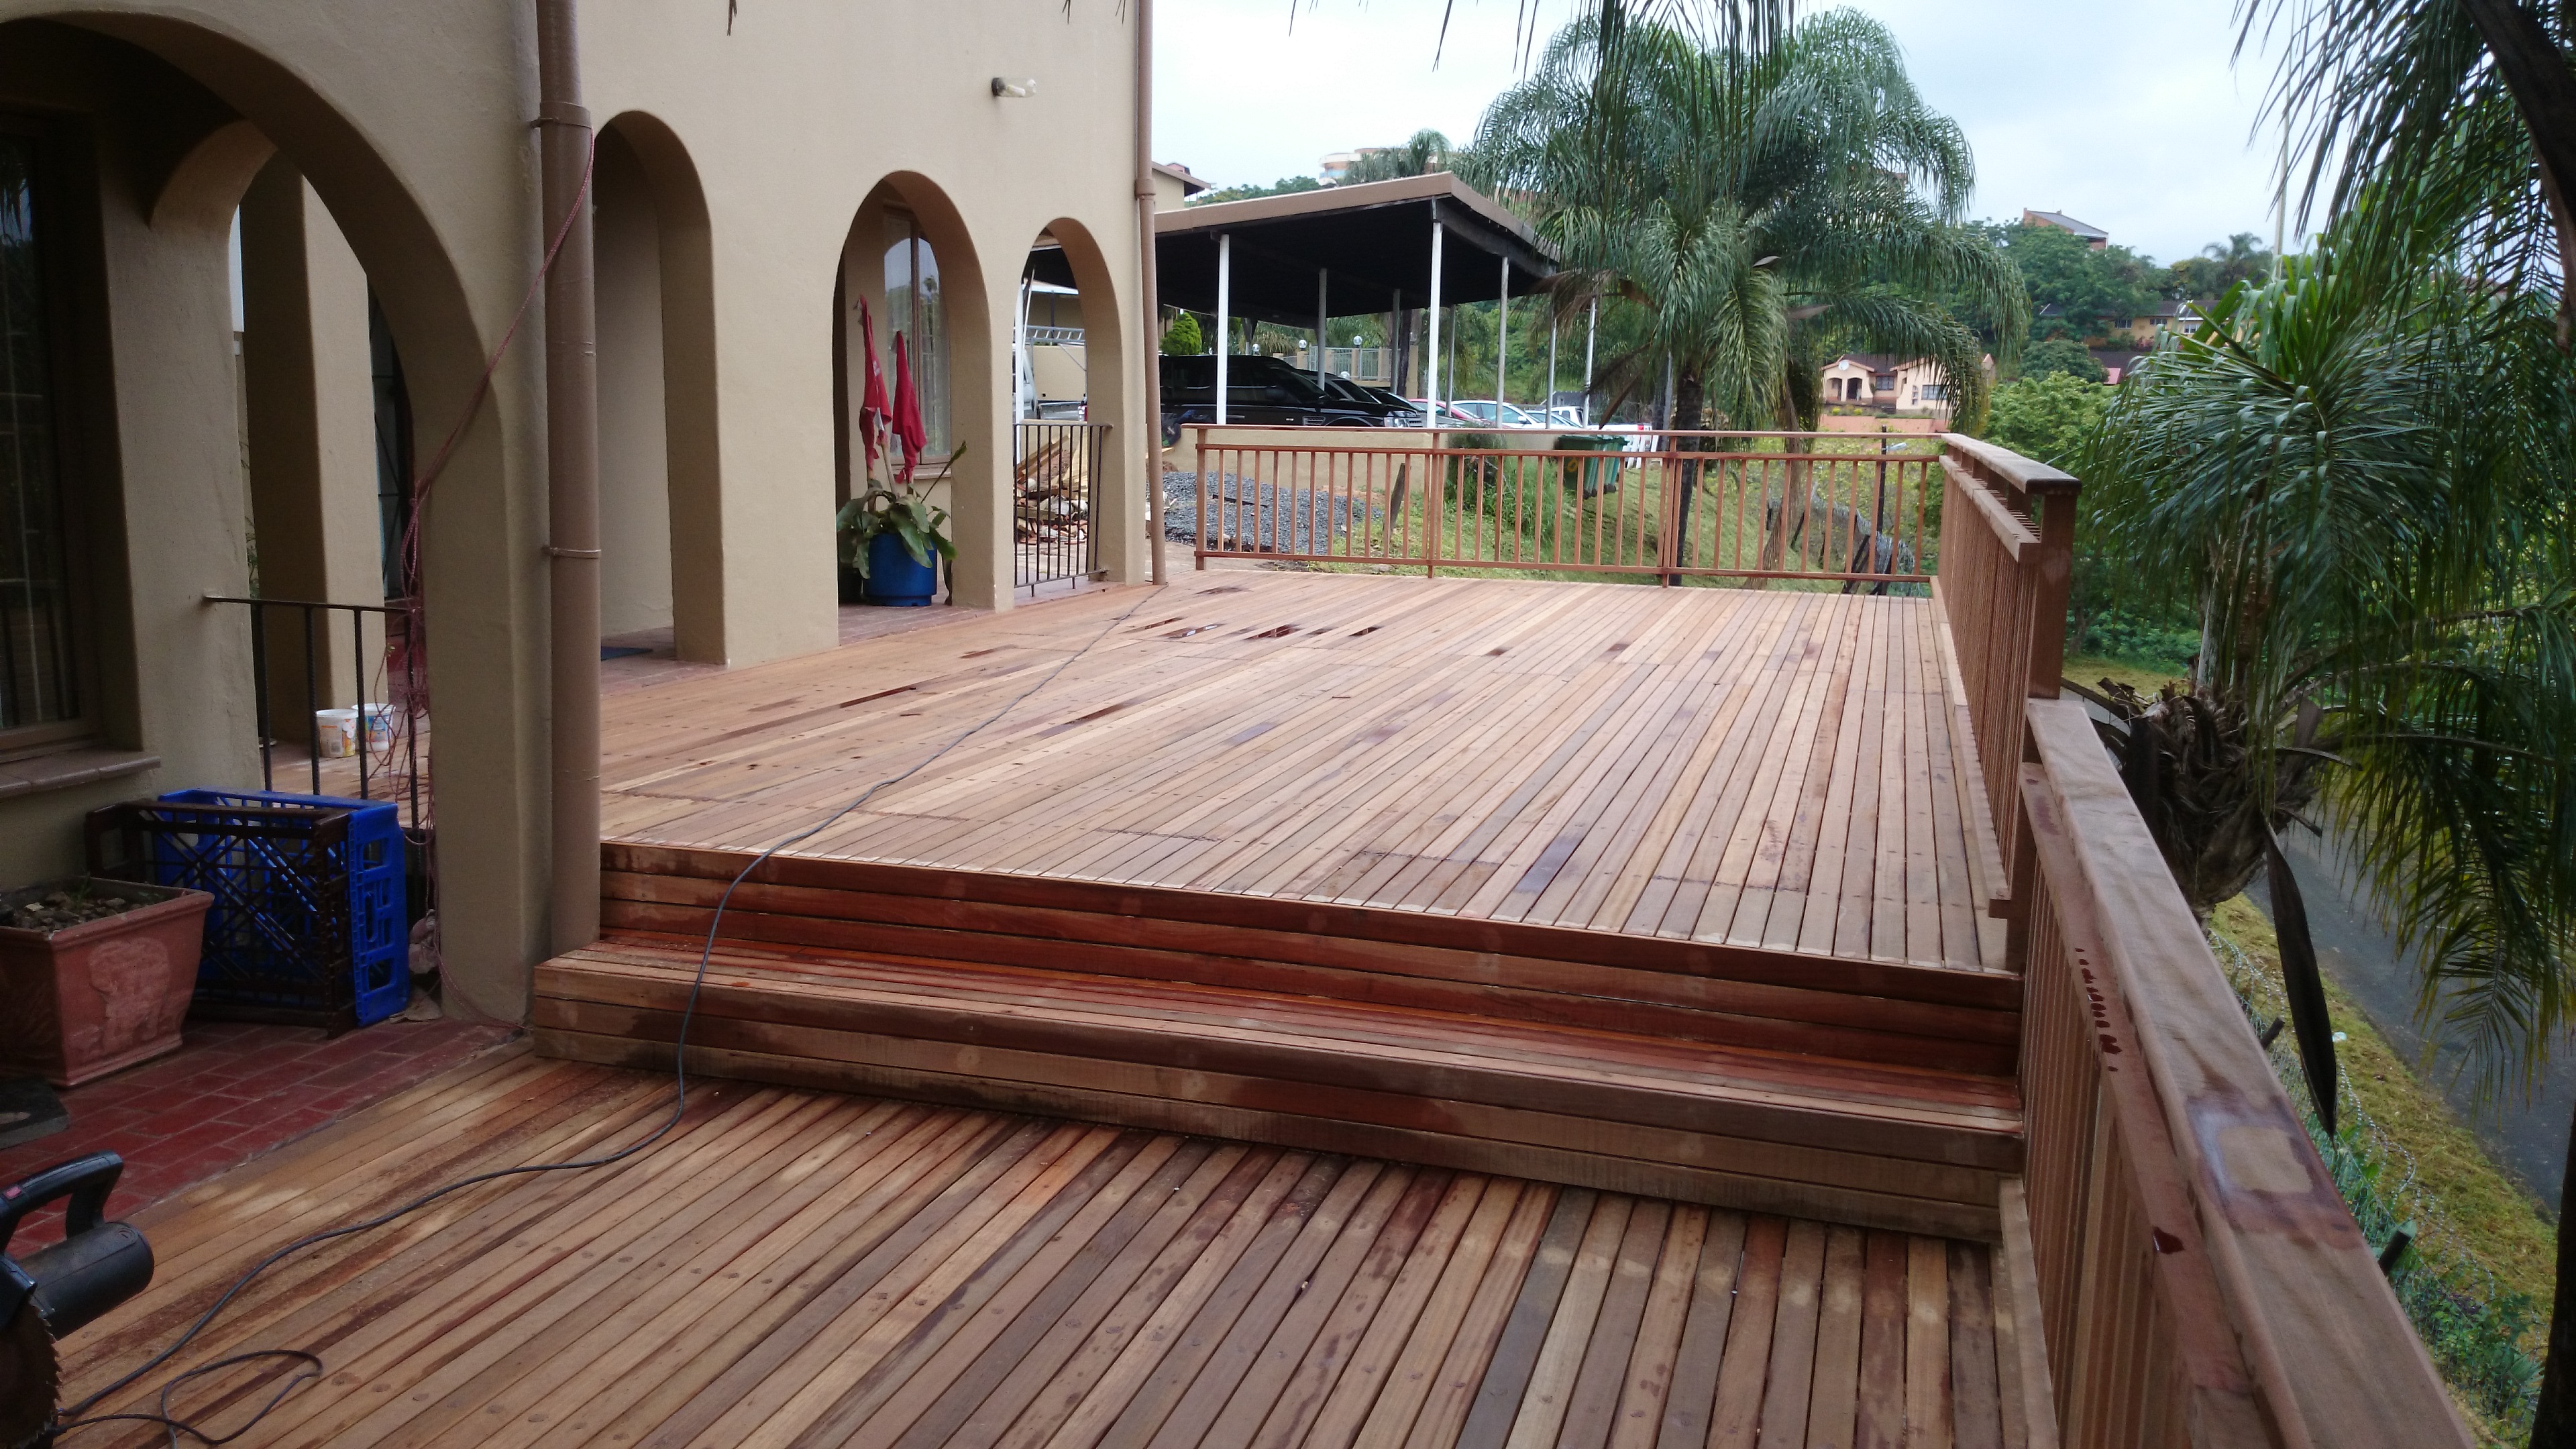
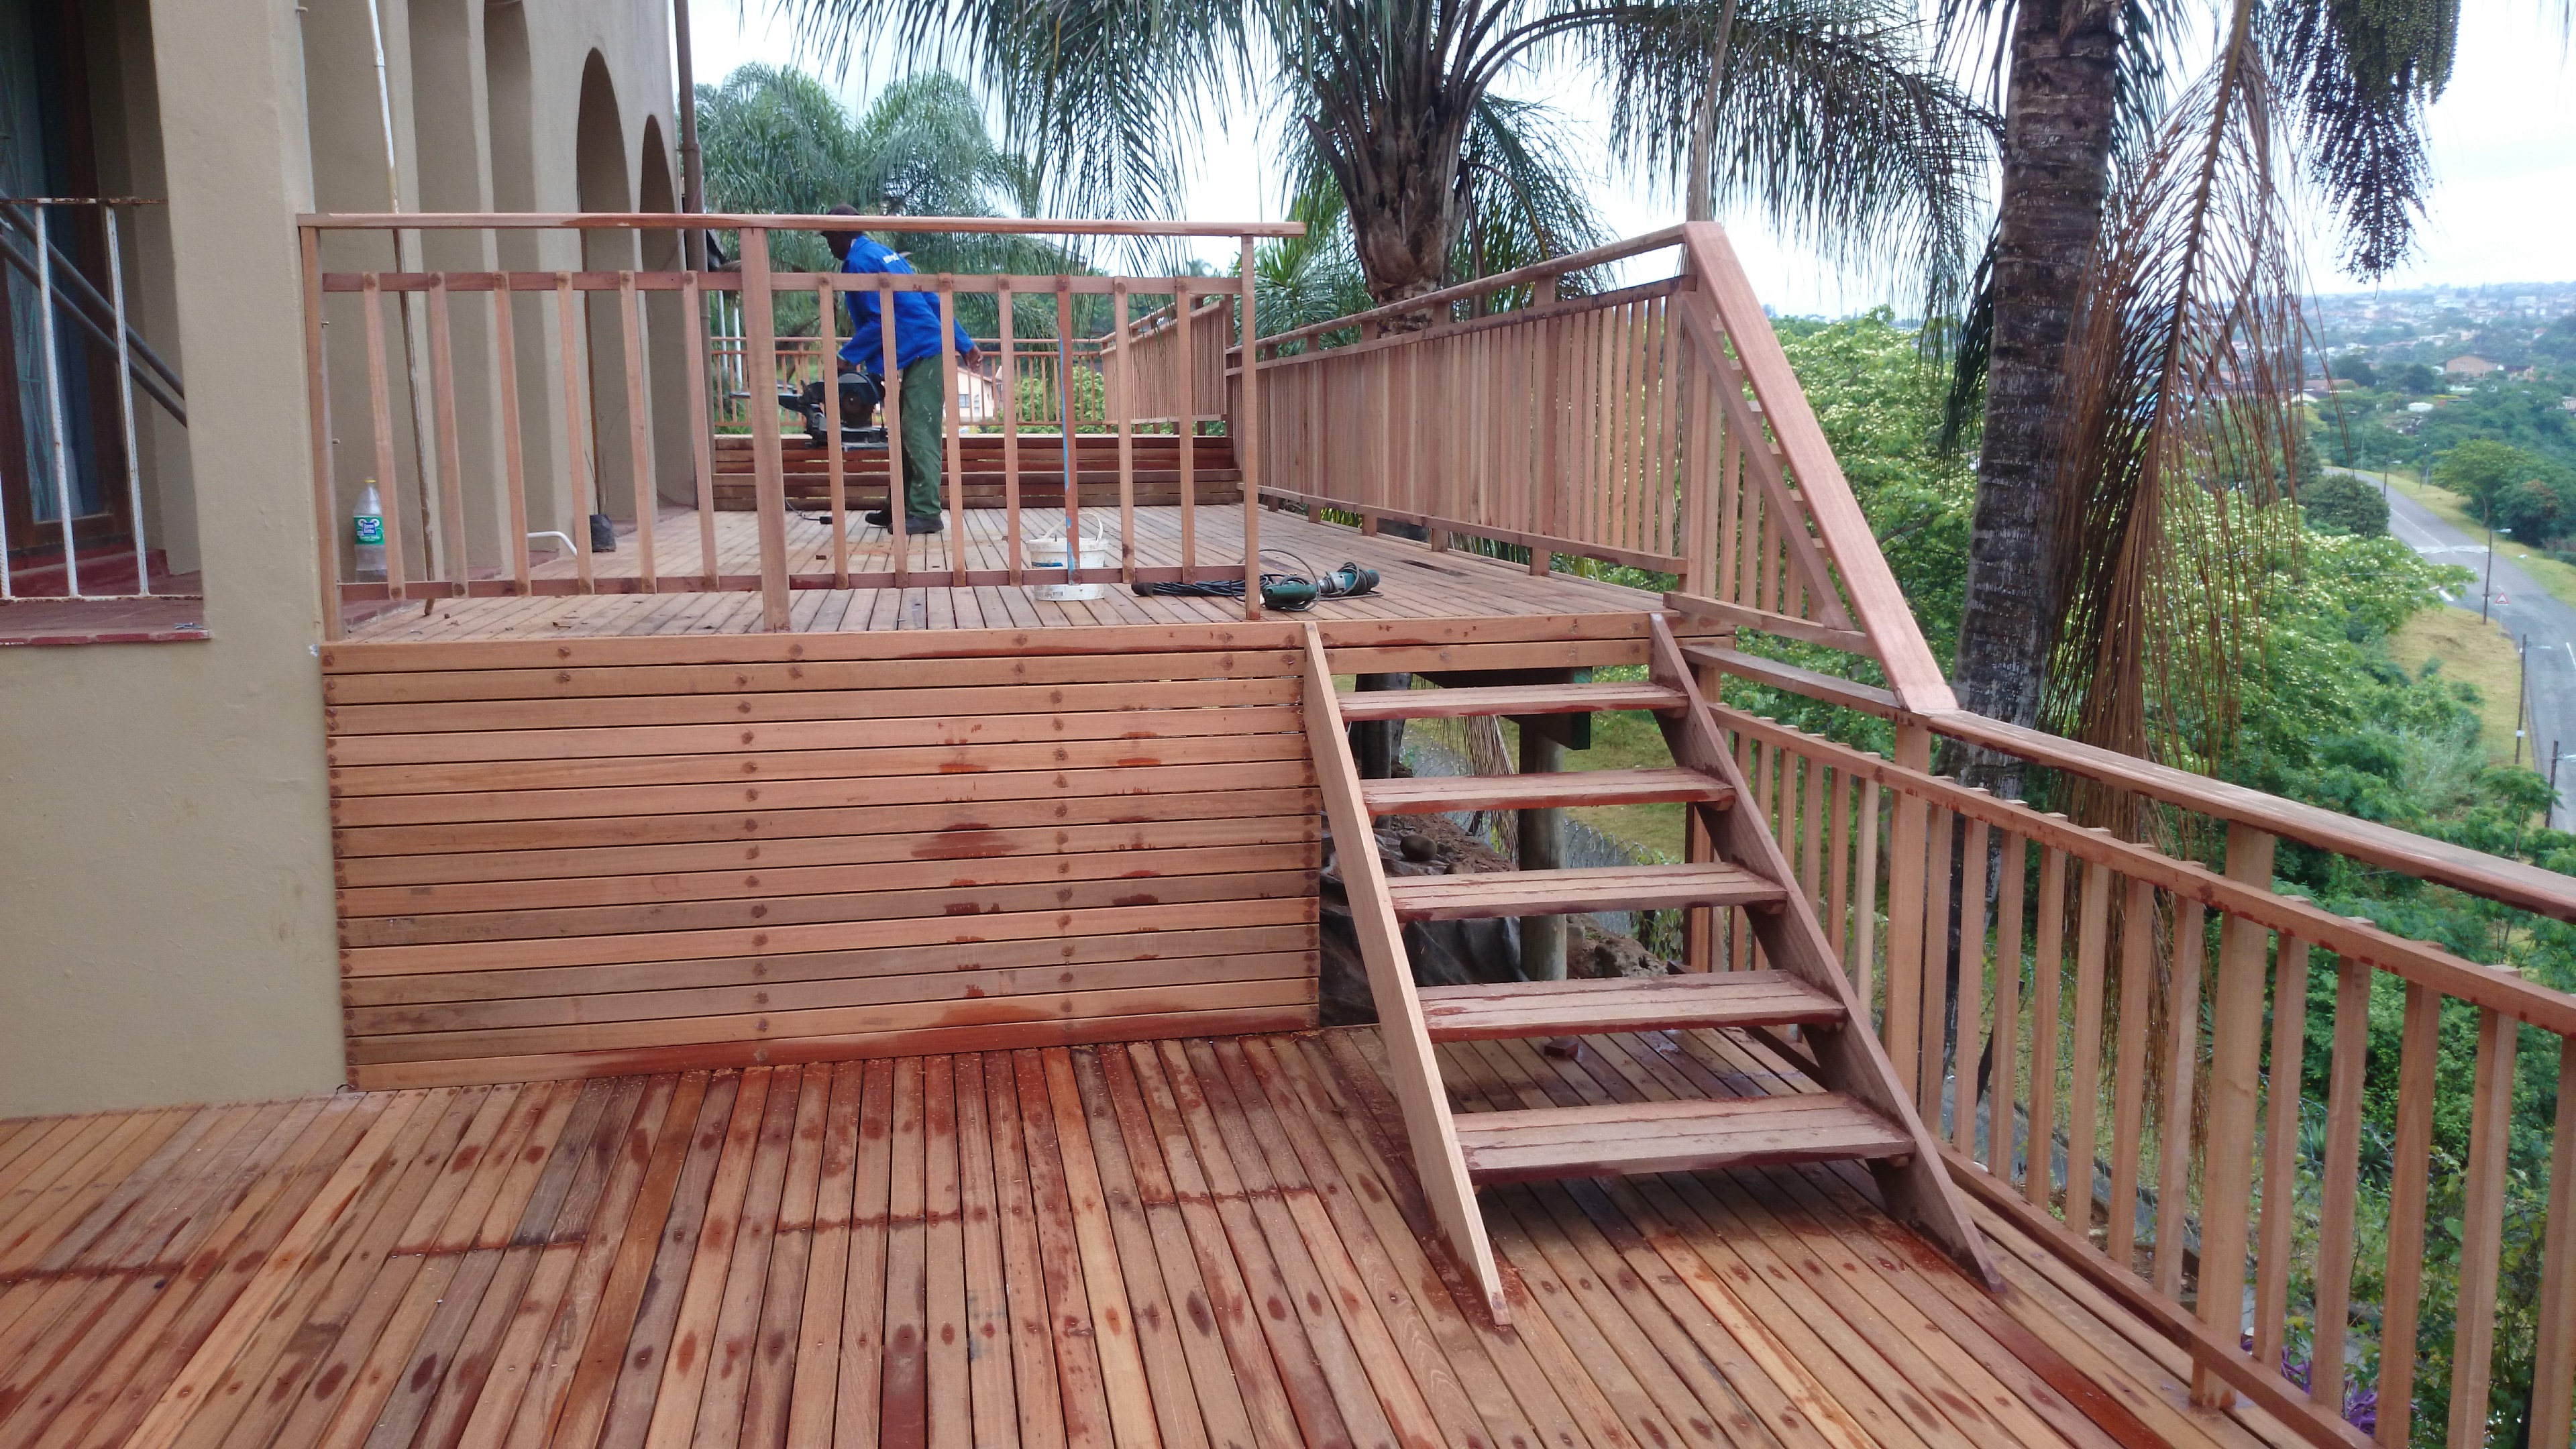
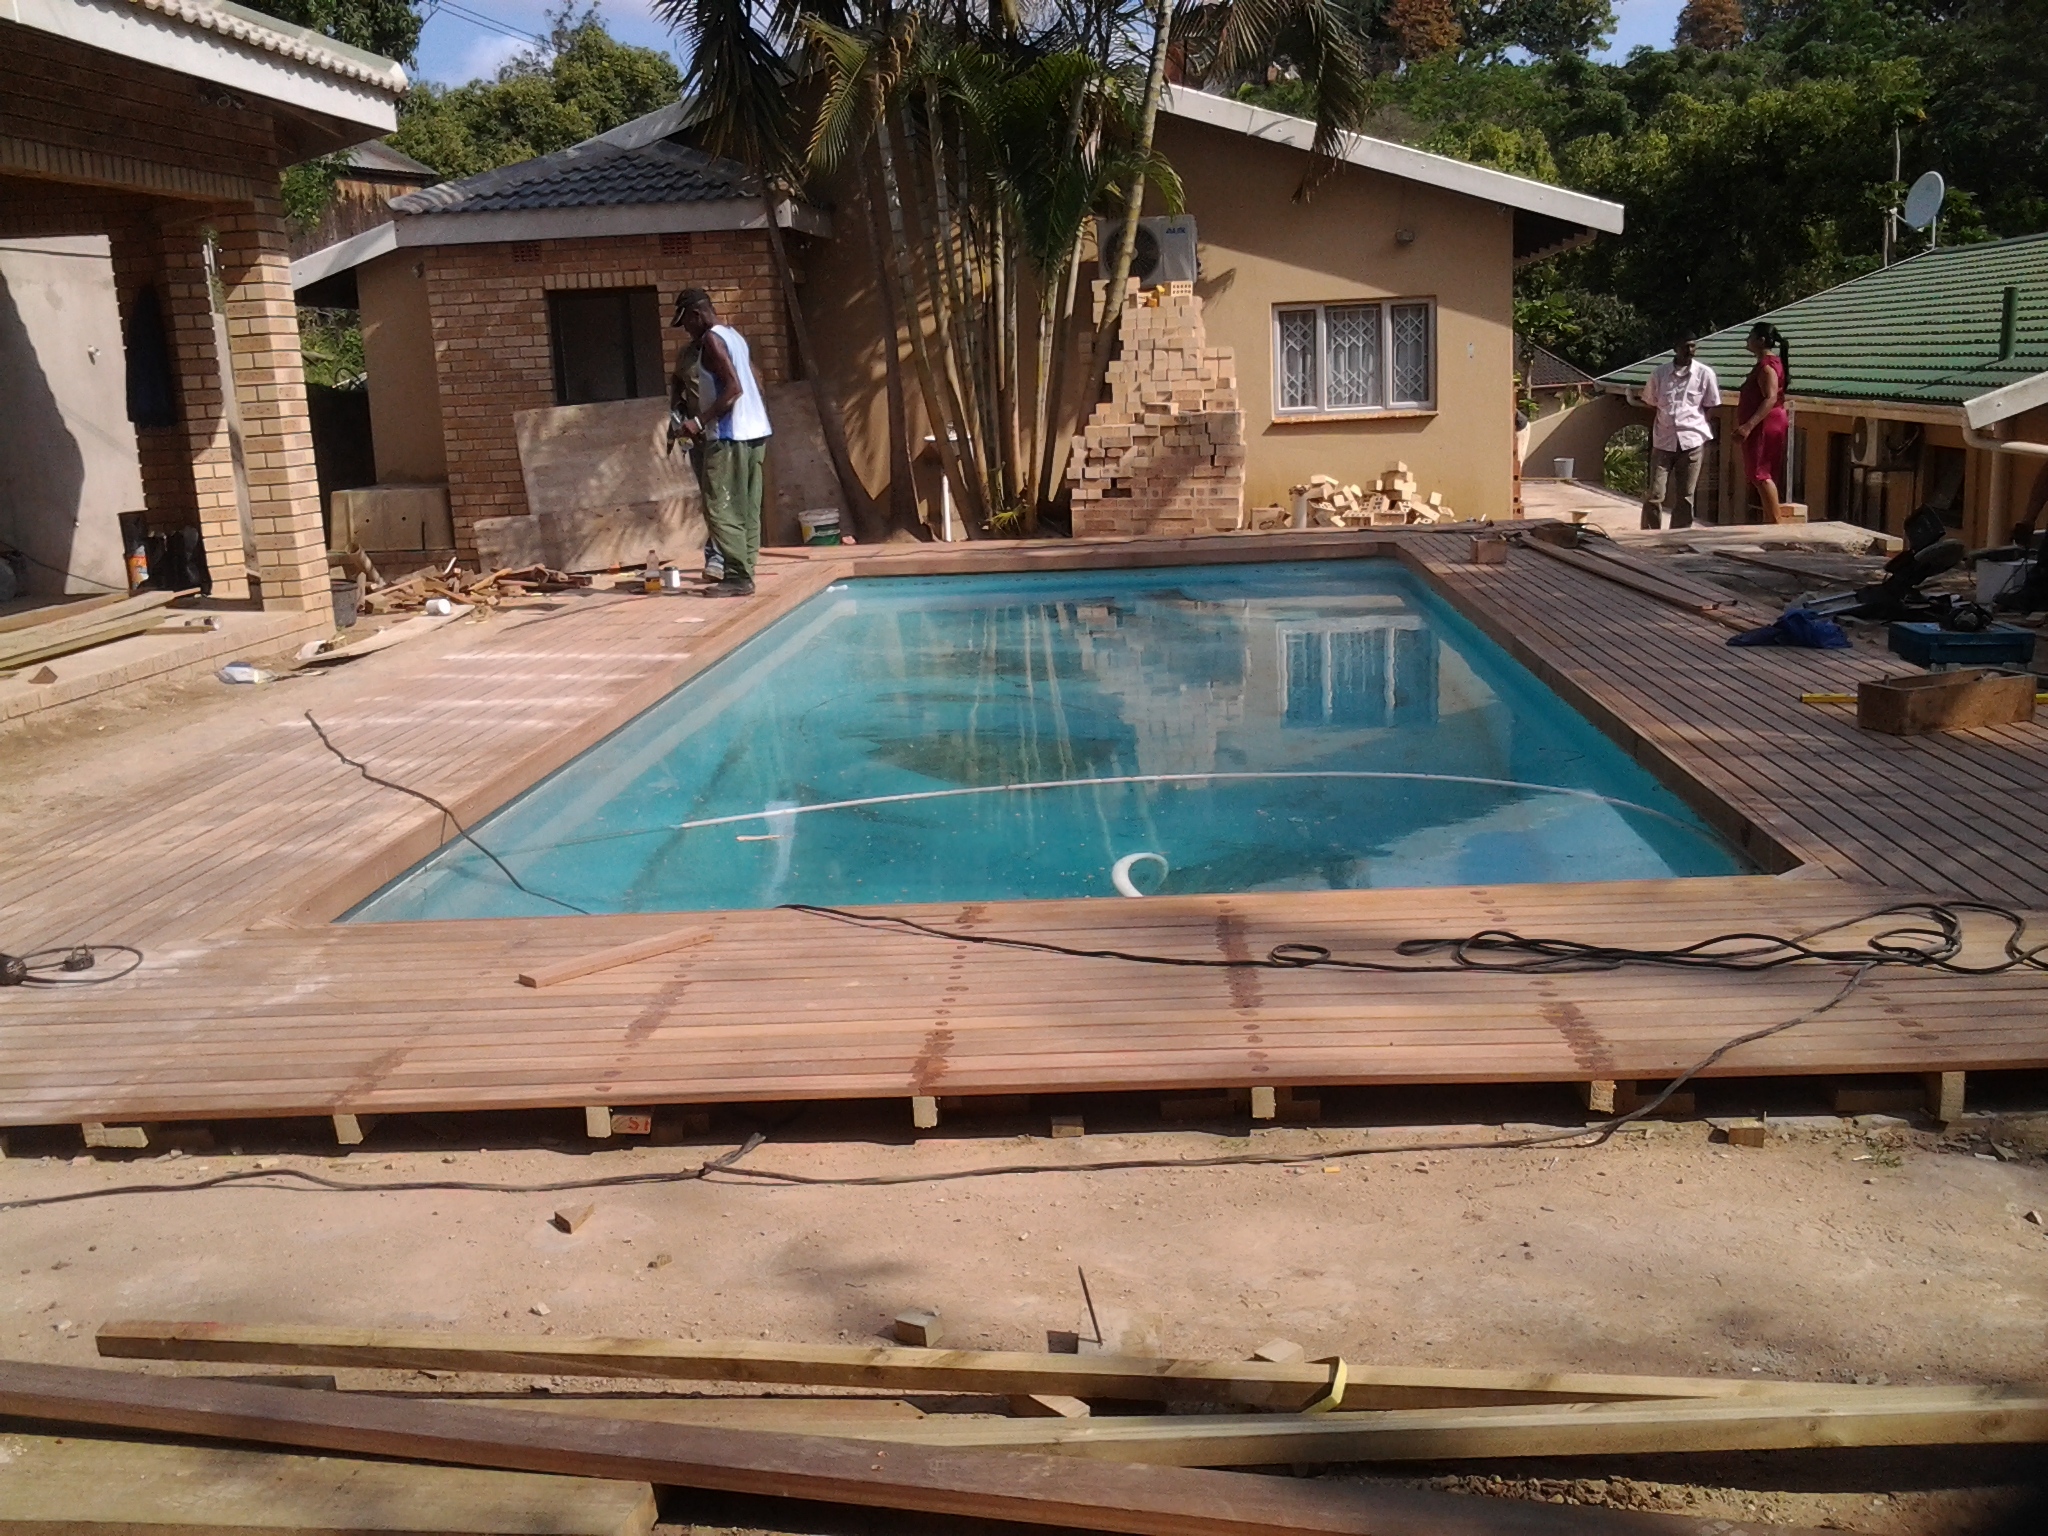
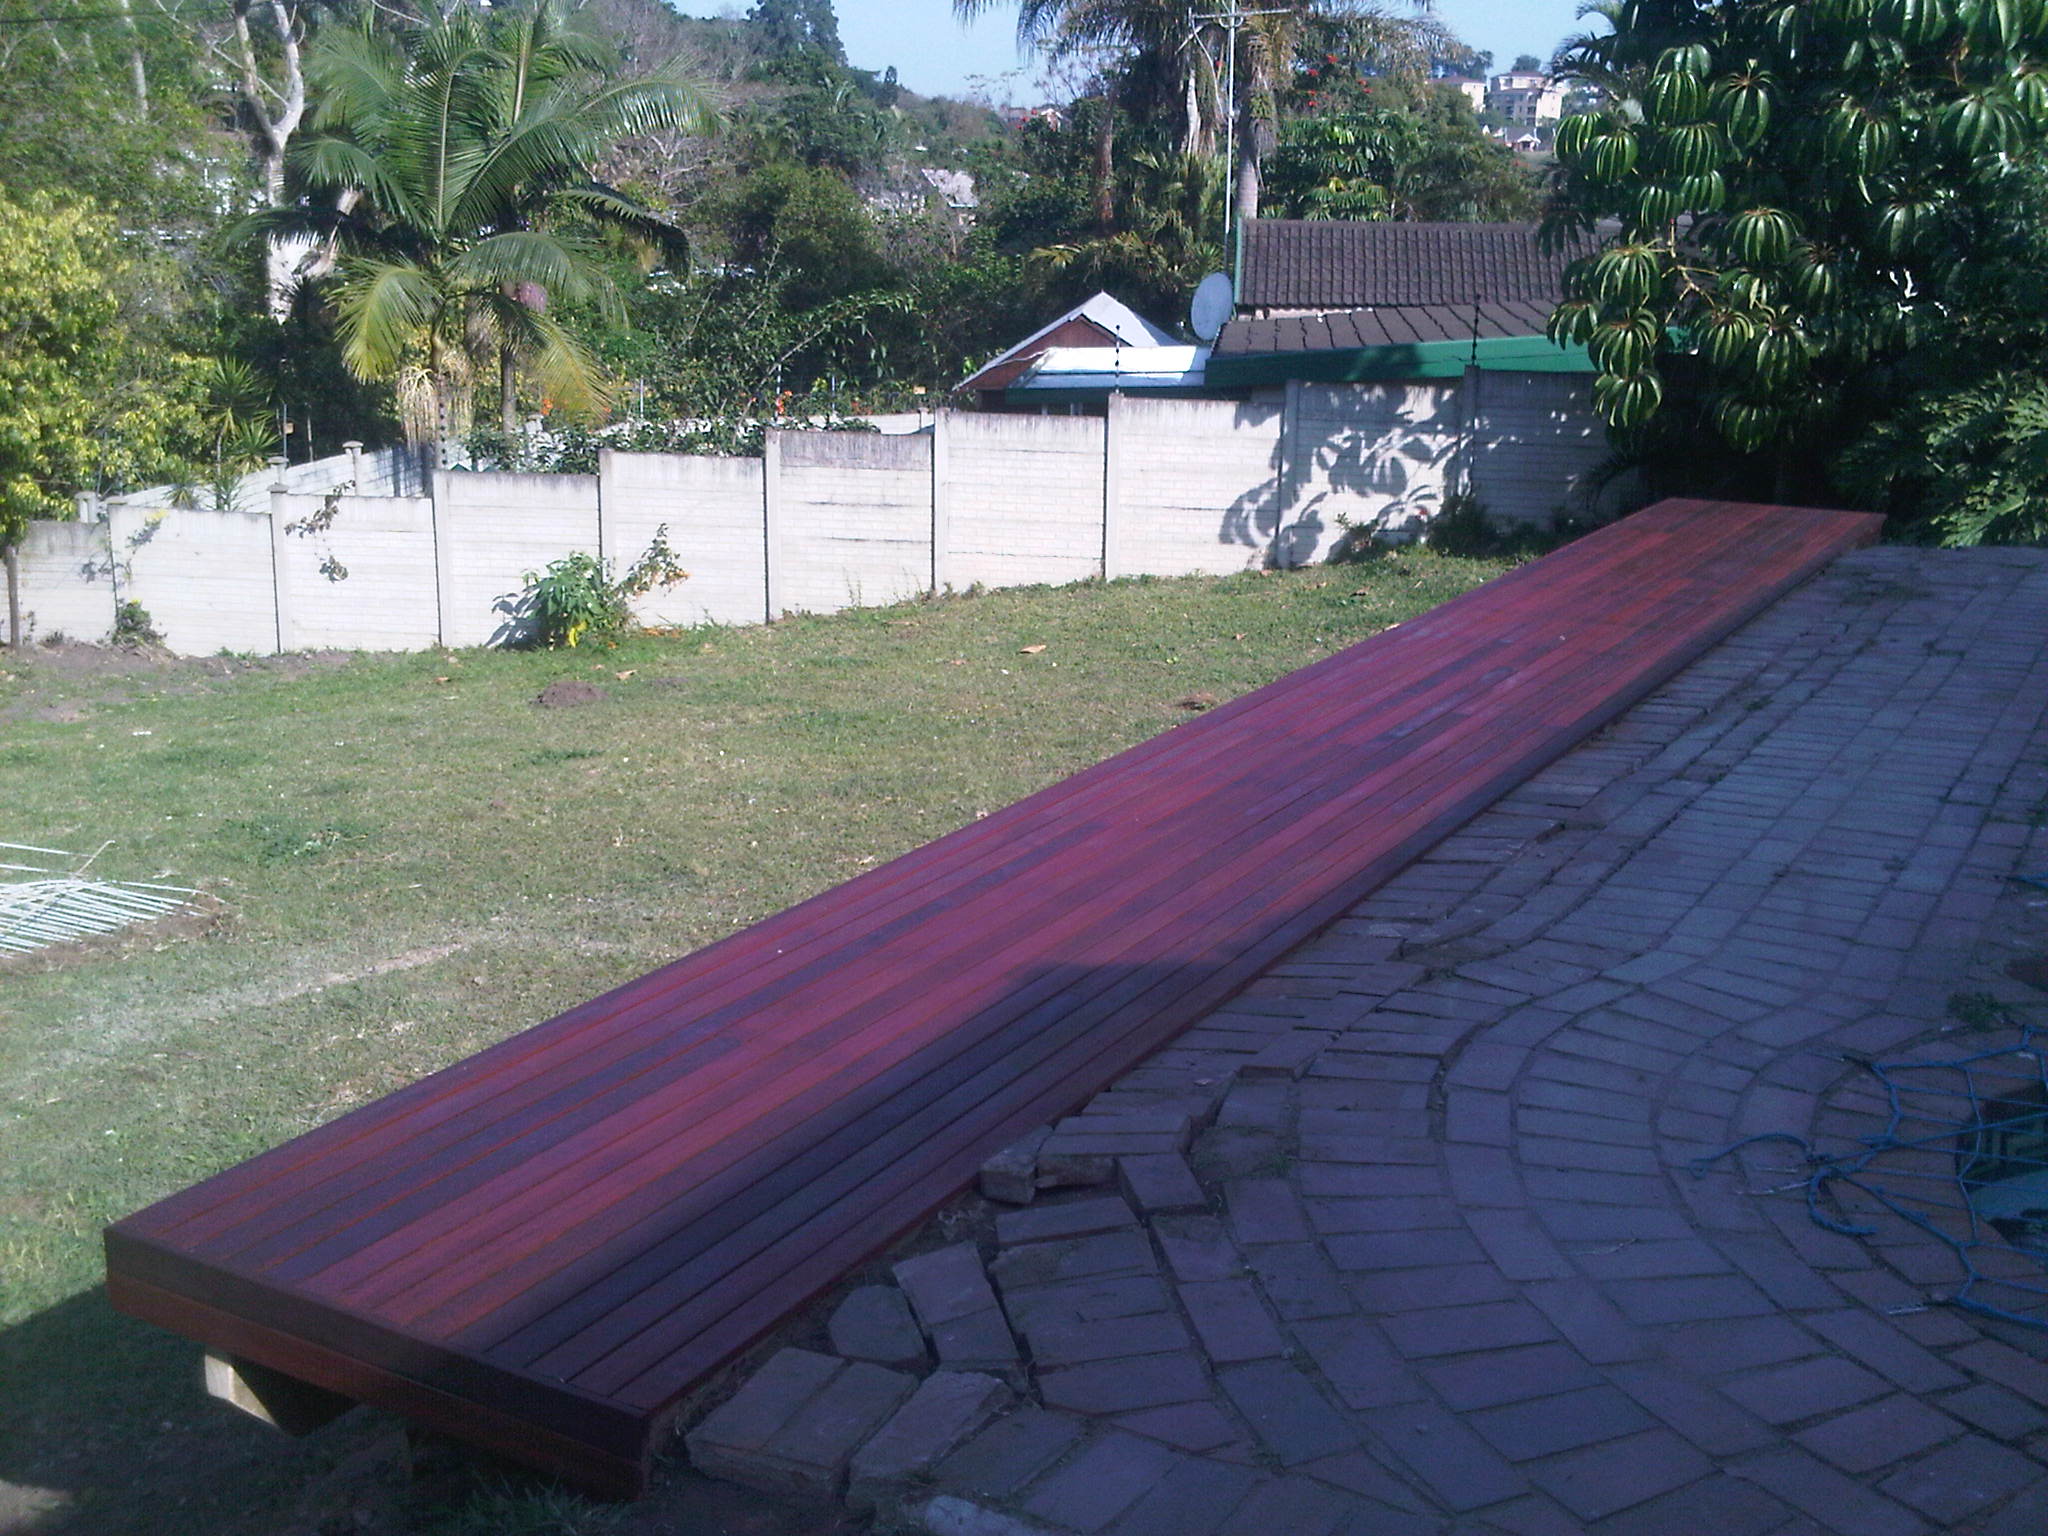
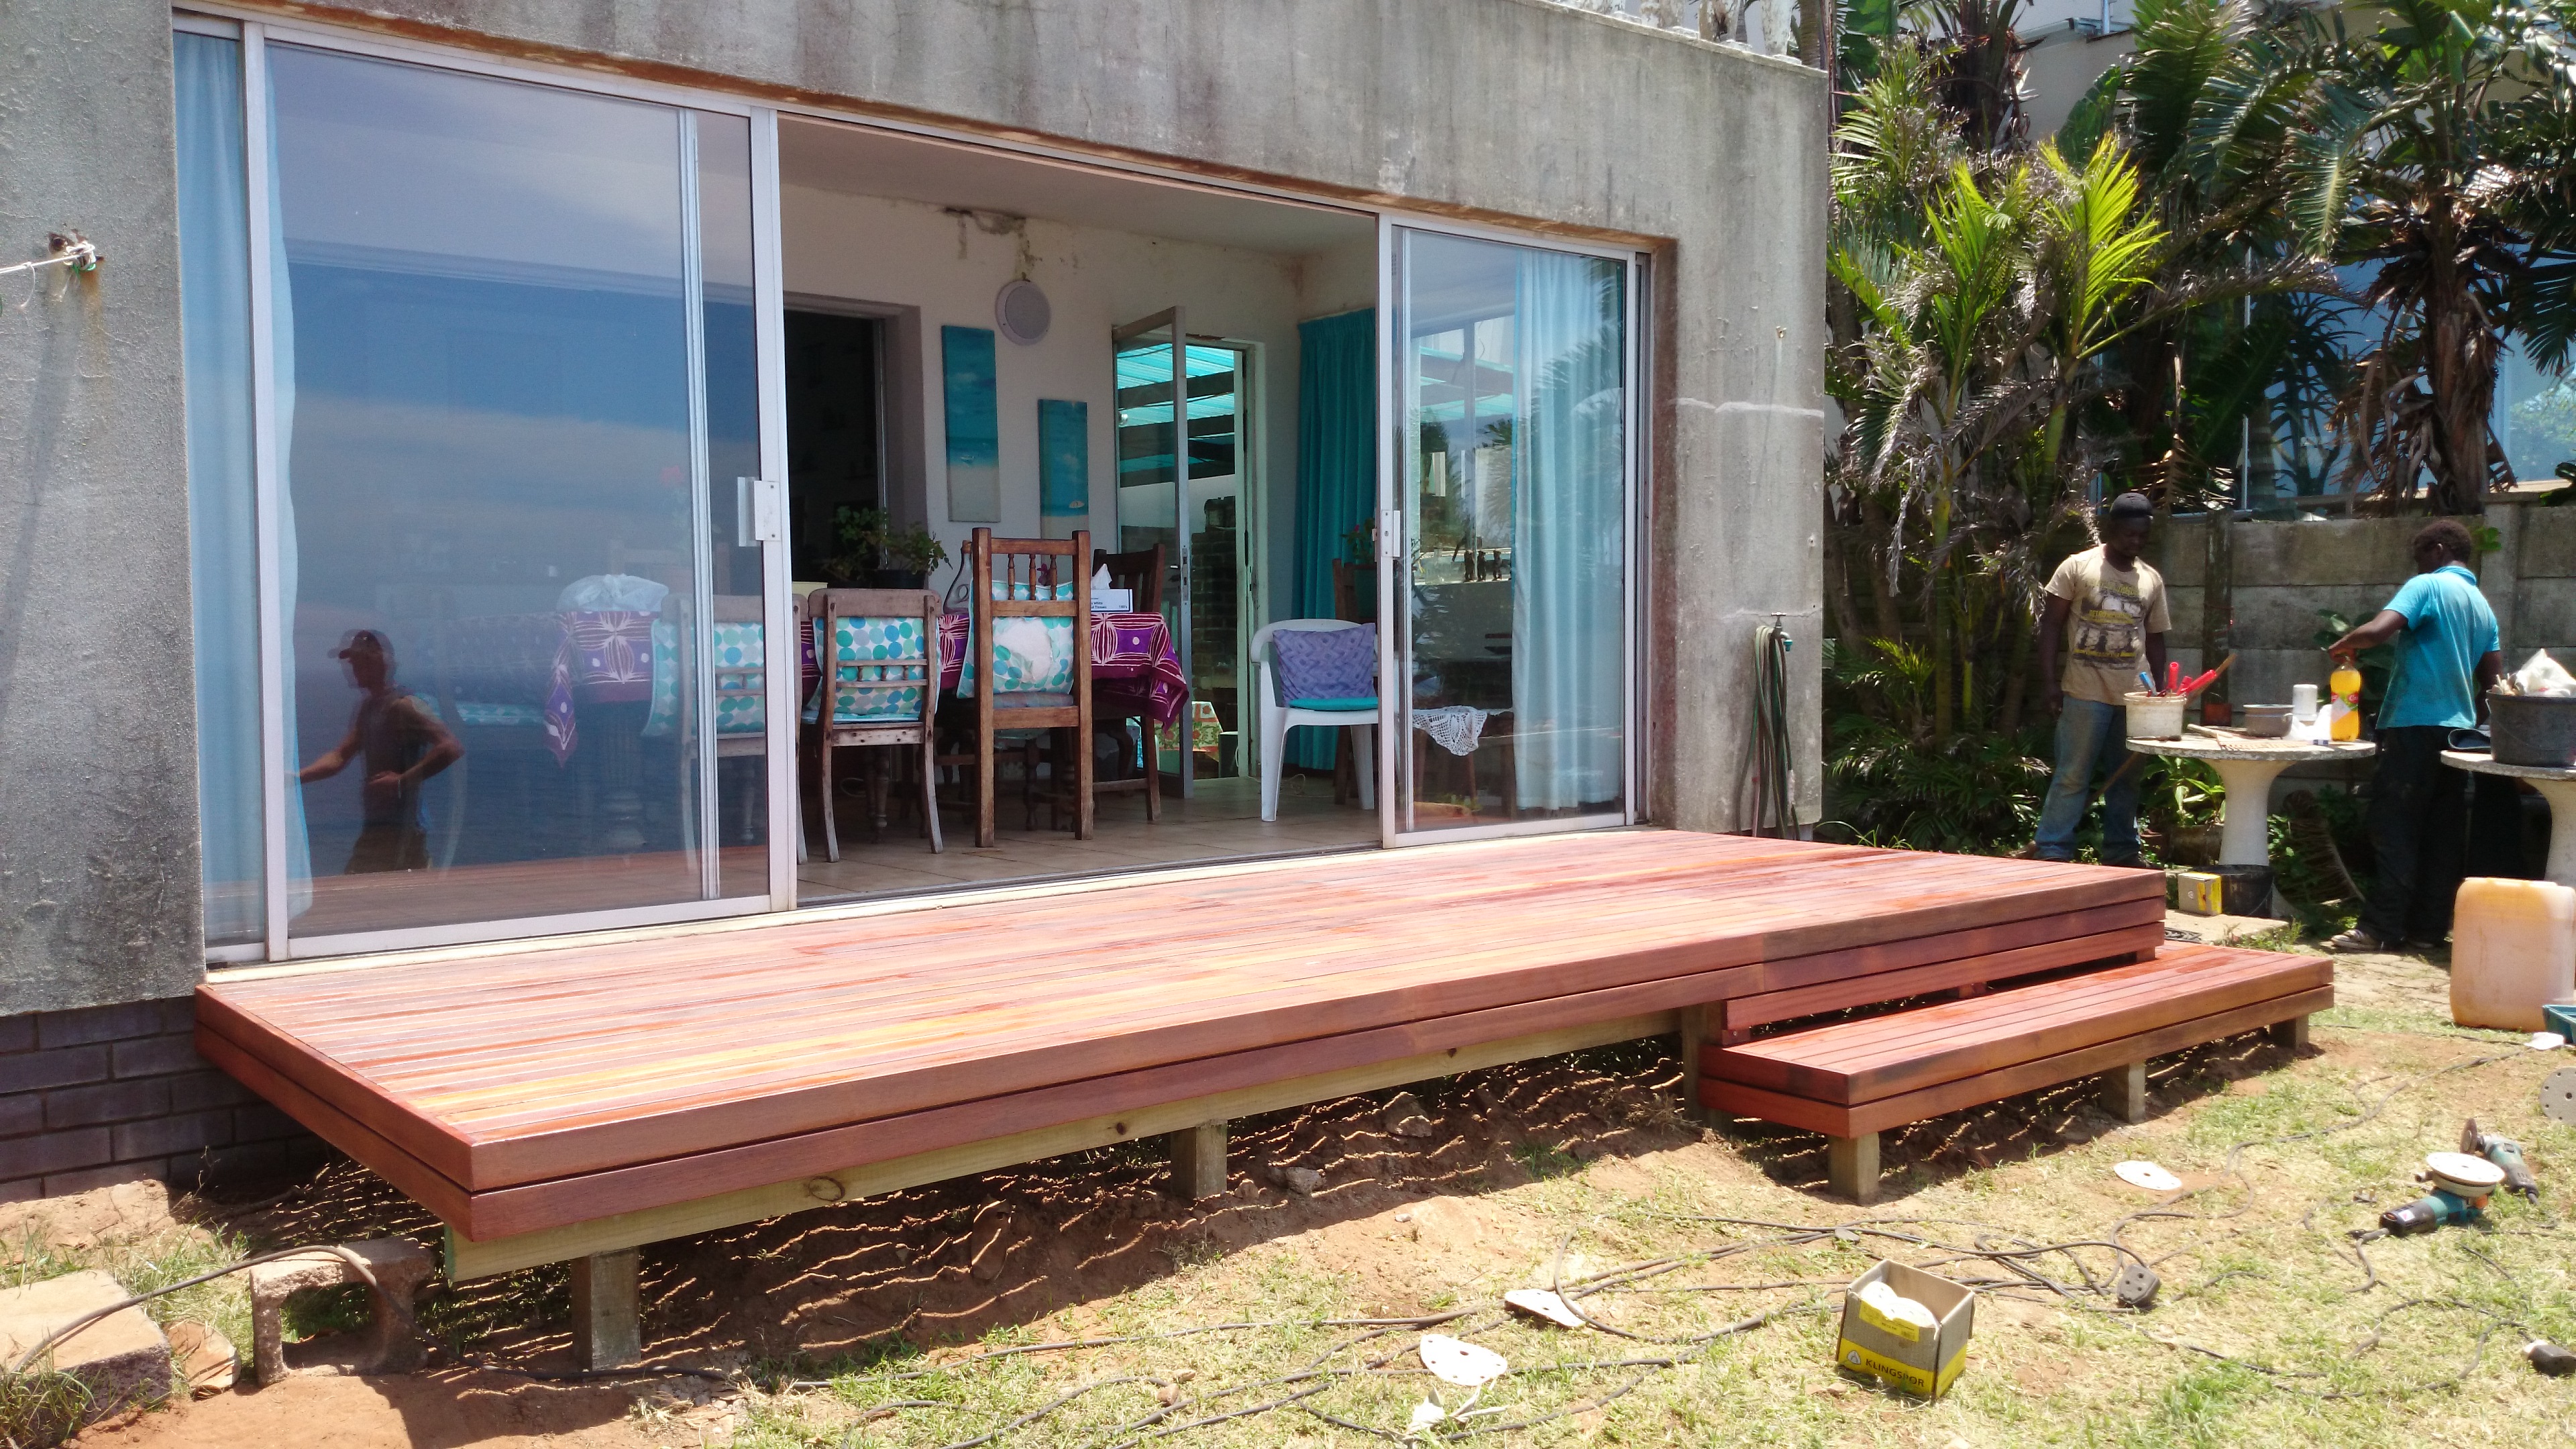
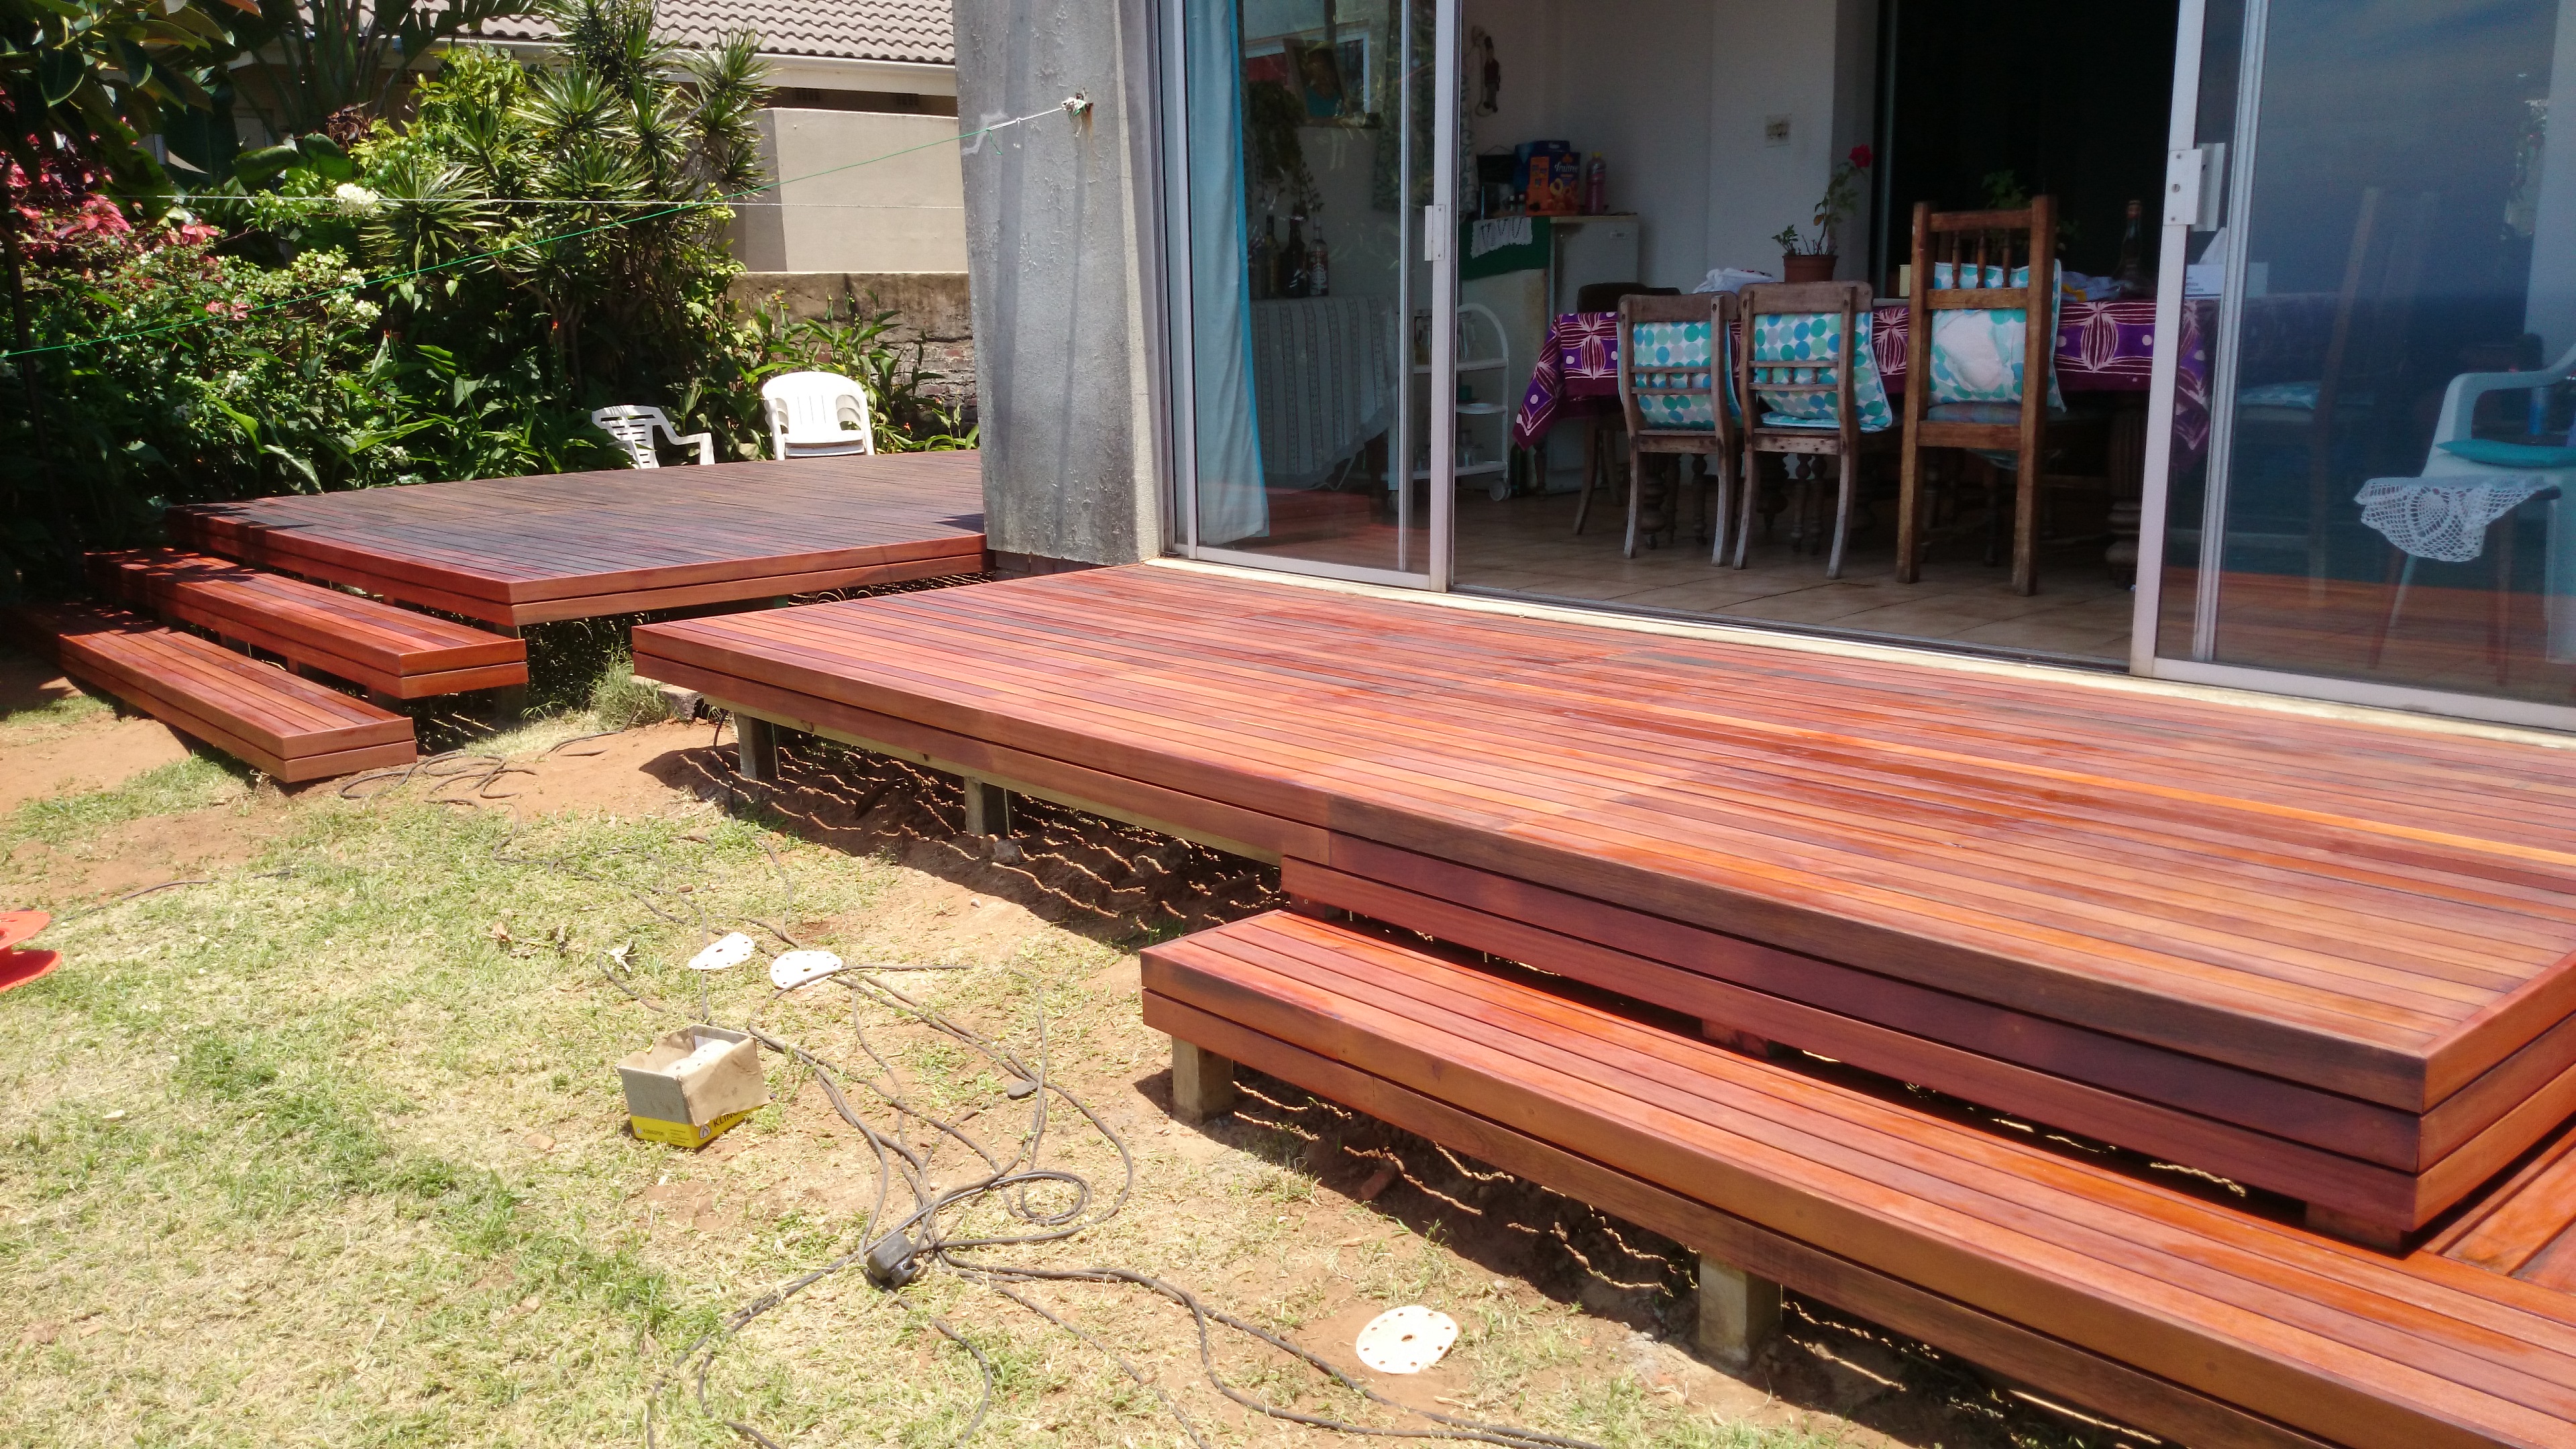
With all of this out-of-the-way, we could continue with phase two which was to complete the main deck with two steps off the front edge leading to the garden and a new second deck in front of the sliding doors to the lounge. This second deck had a corner step similar to the other deck.

Wooden decks Durban

Click to enlarge

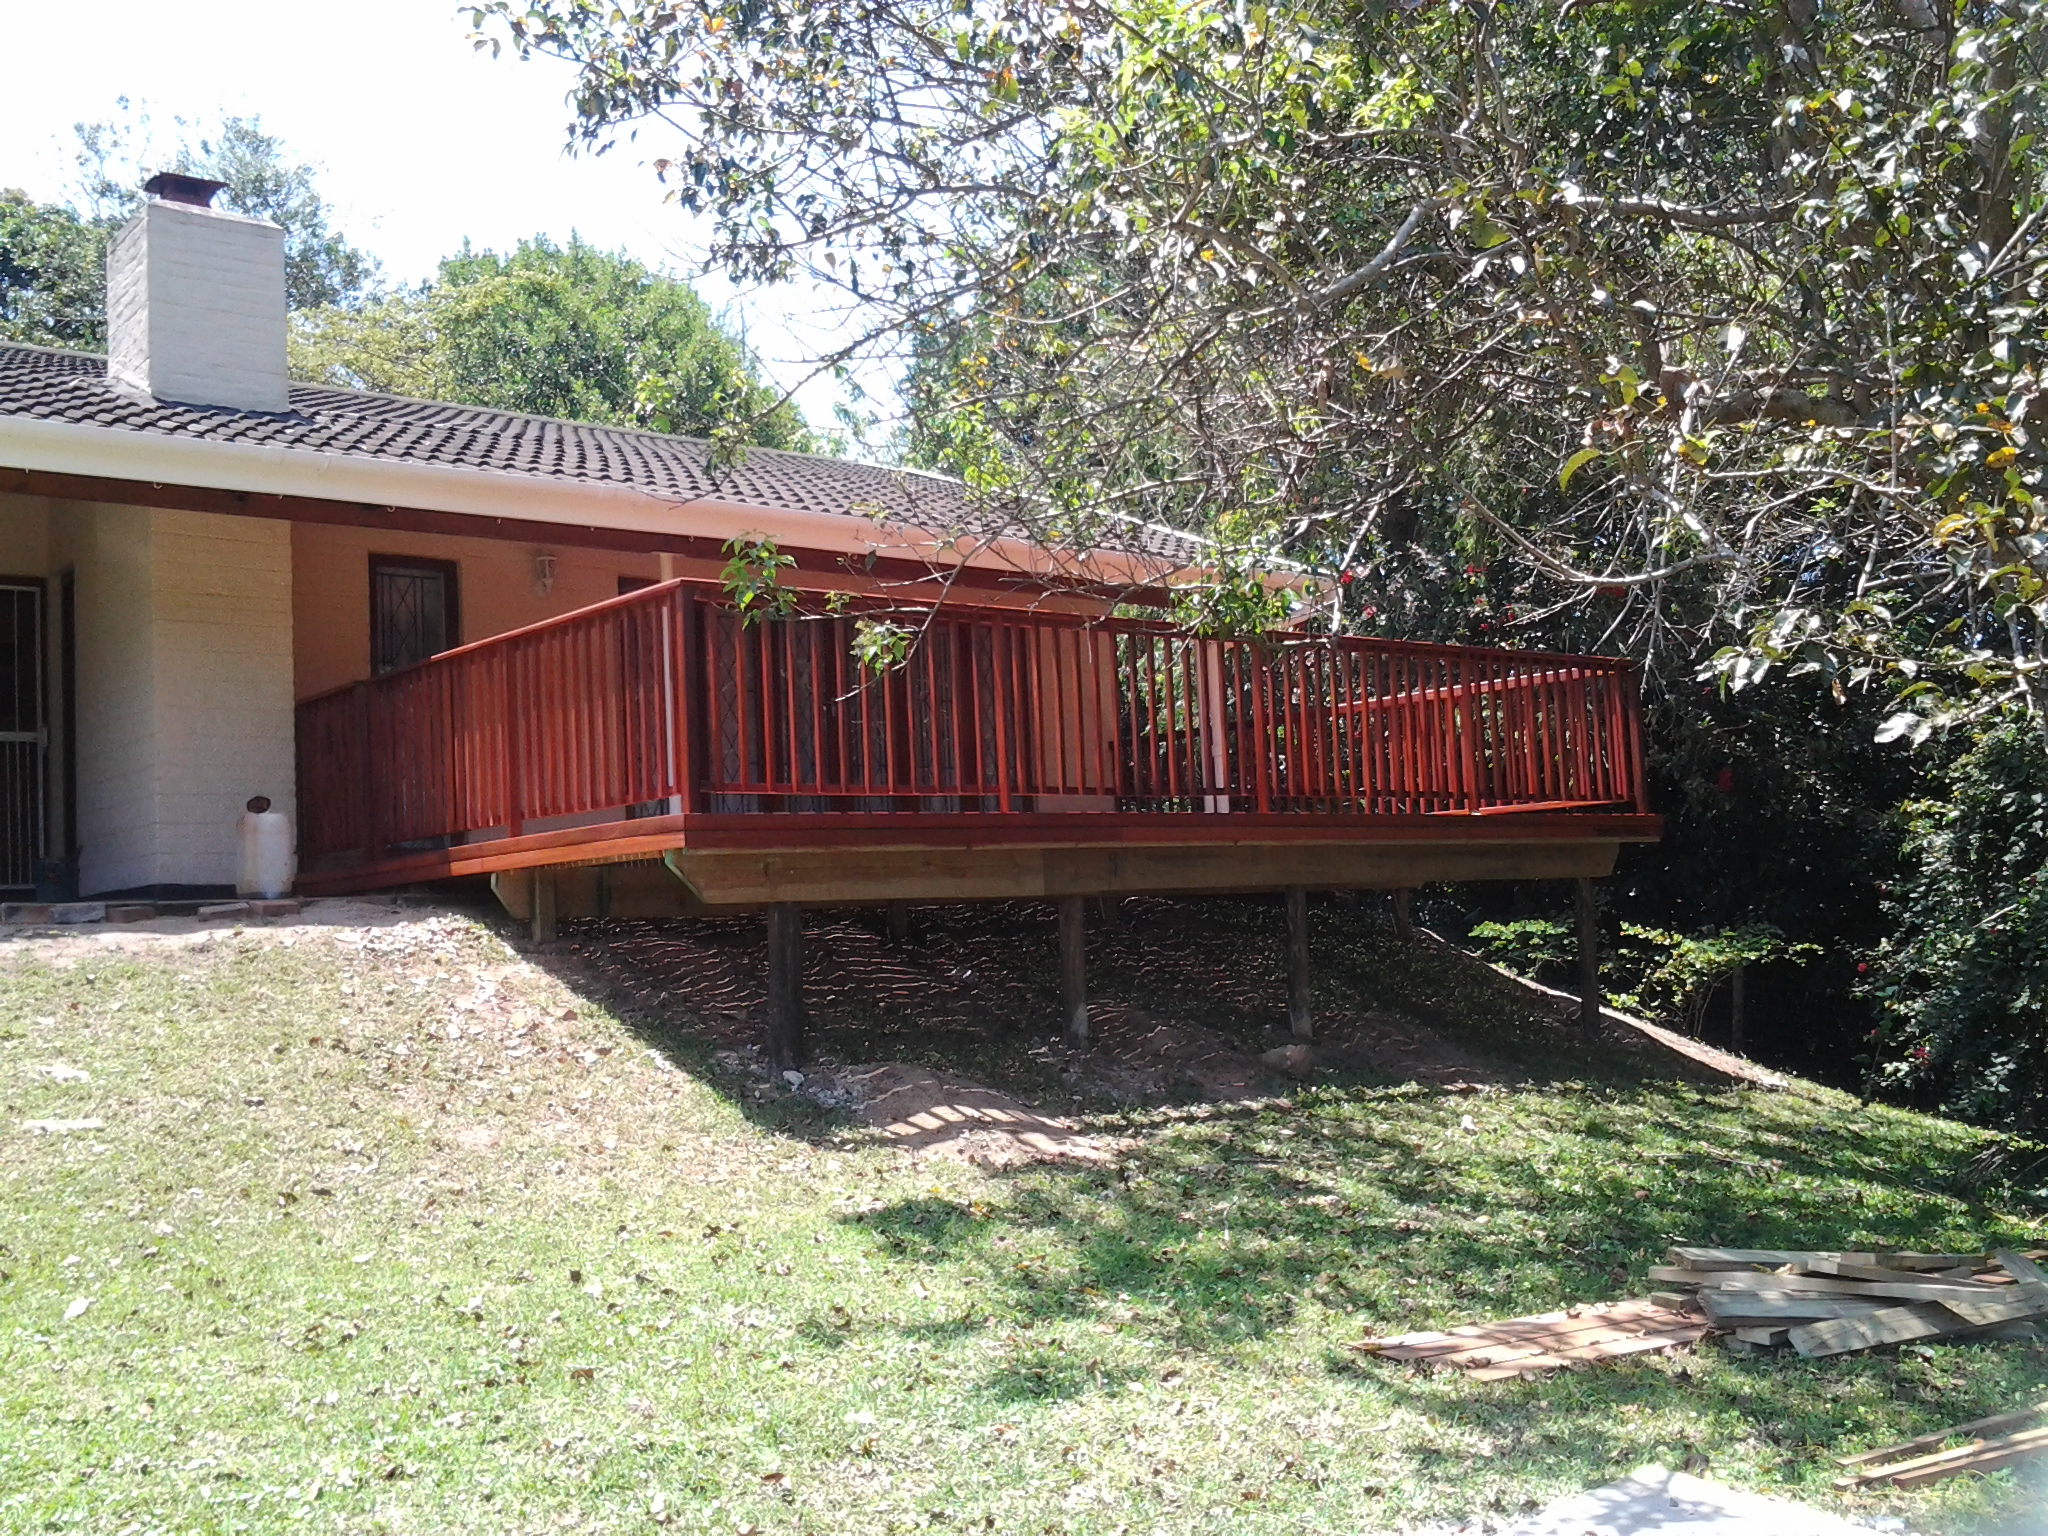
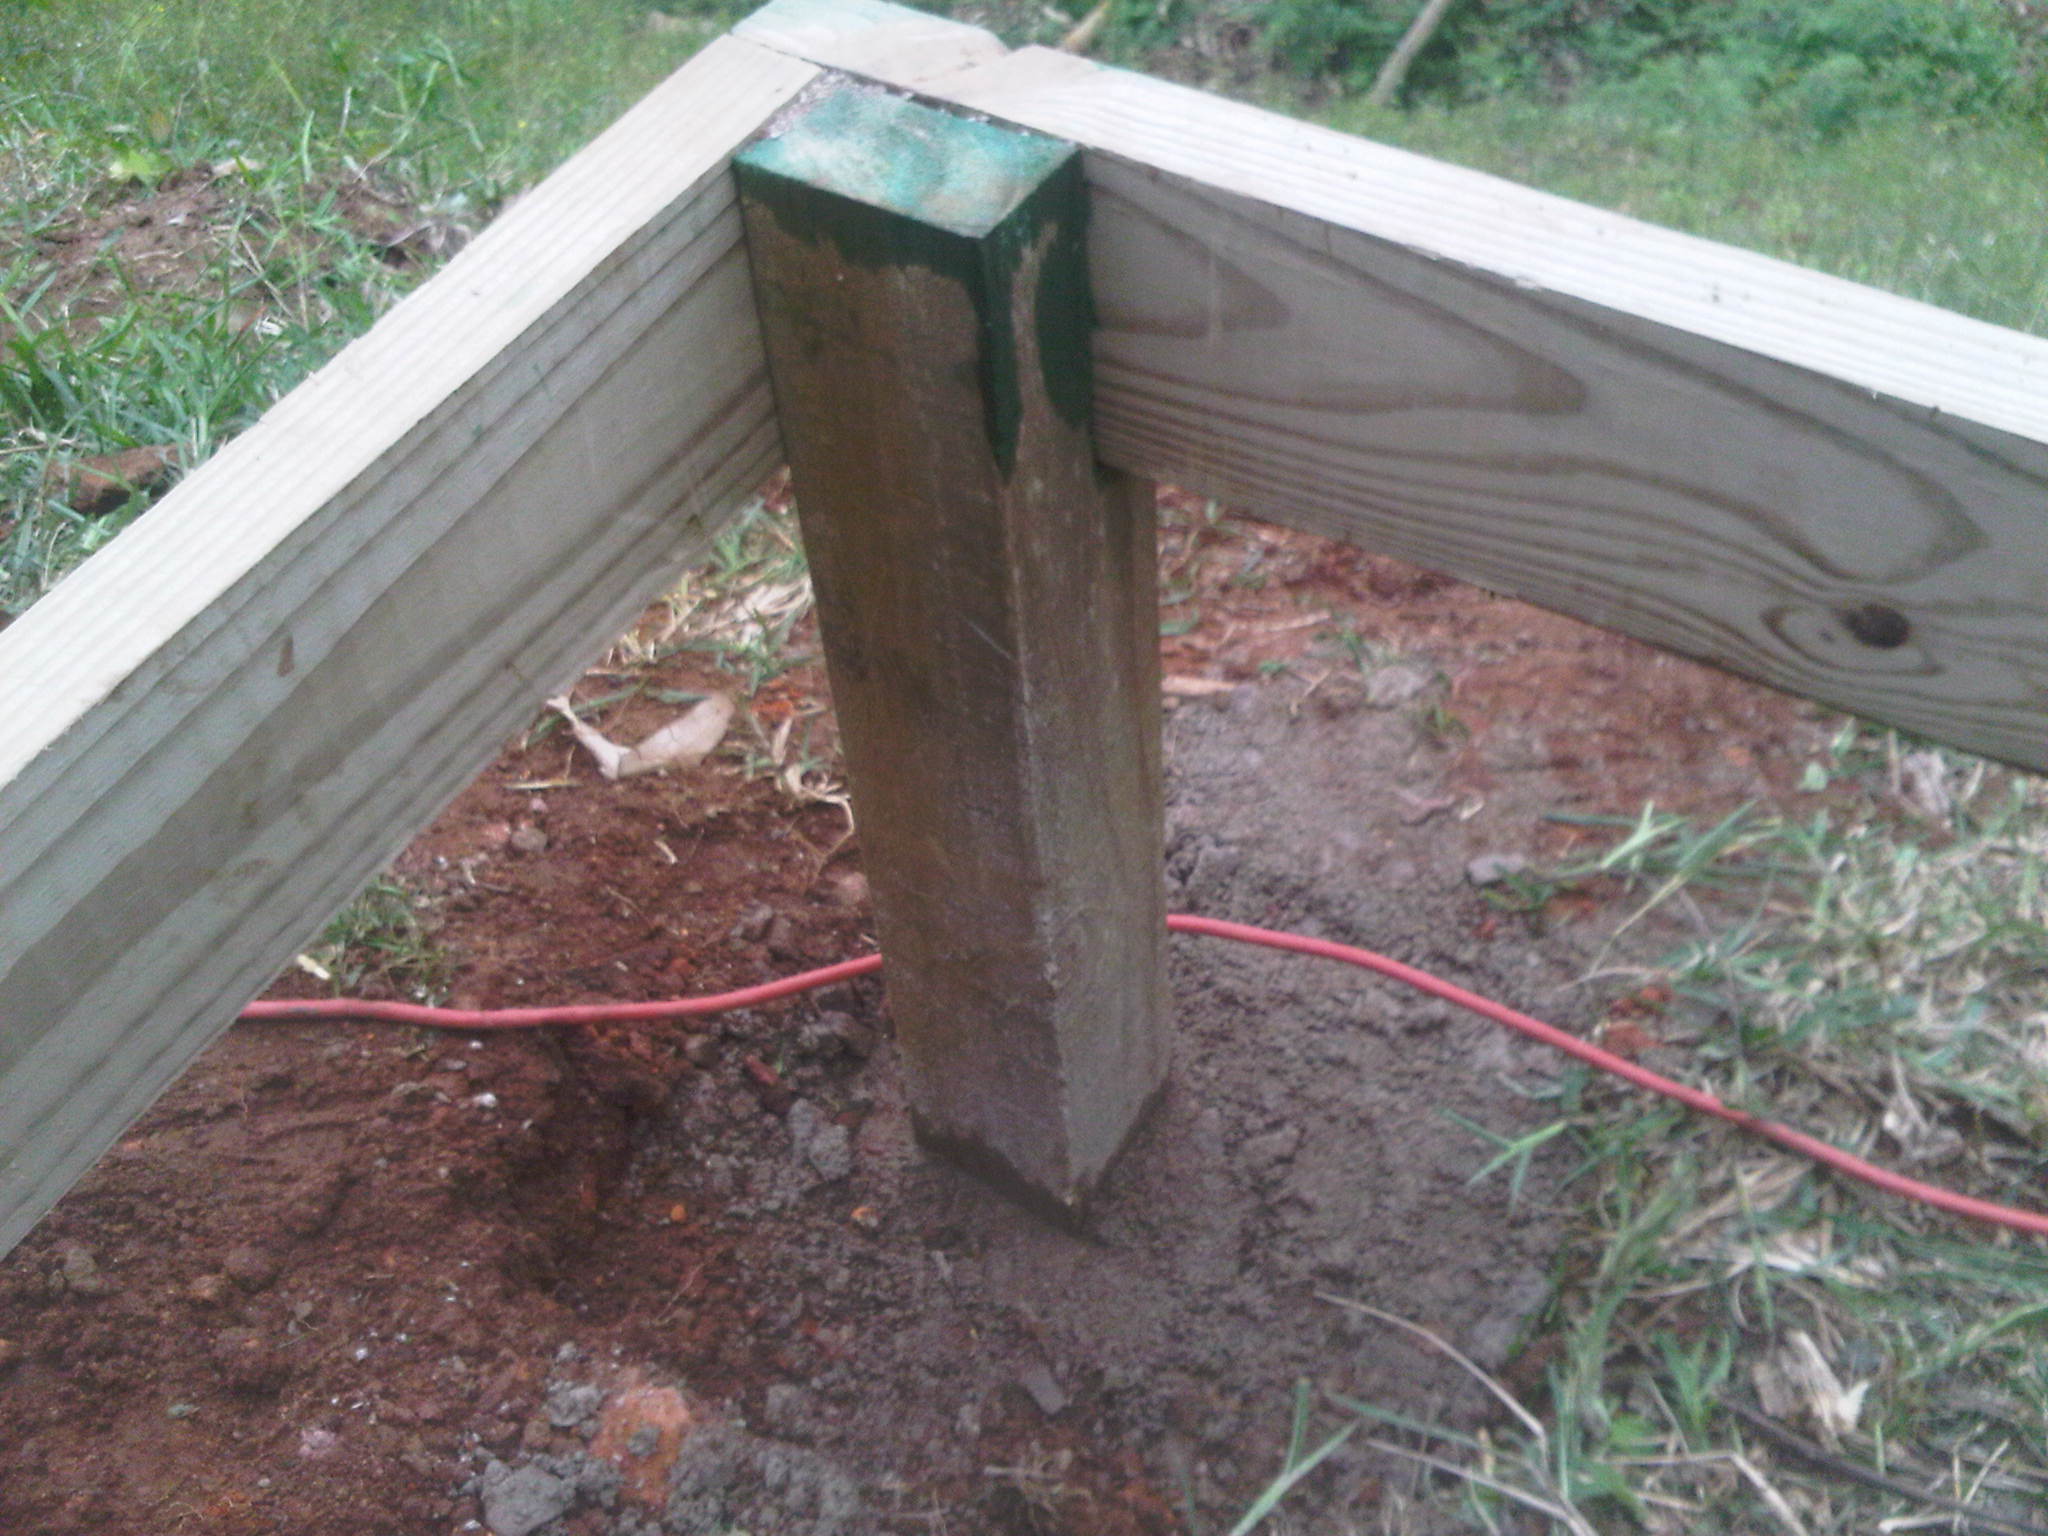
These steps were the full length of the deck and had closed risers and treads. In order to build one of these you must basically build a second substructure in the same way as you build the deck substructure in order to span your deck boards across them. So each tread has two beams and joists and is then clad with deck boards. I can clearly remember building our first one which took ages because we tried to build each joist individually. We’ve since learned that with smaller structures one can build a frame and then pull it into position and attach it to the main structure and then clad it. Much quicker, much easier and a lot more accurate.

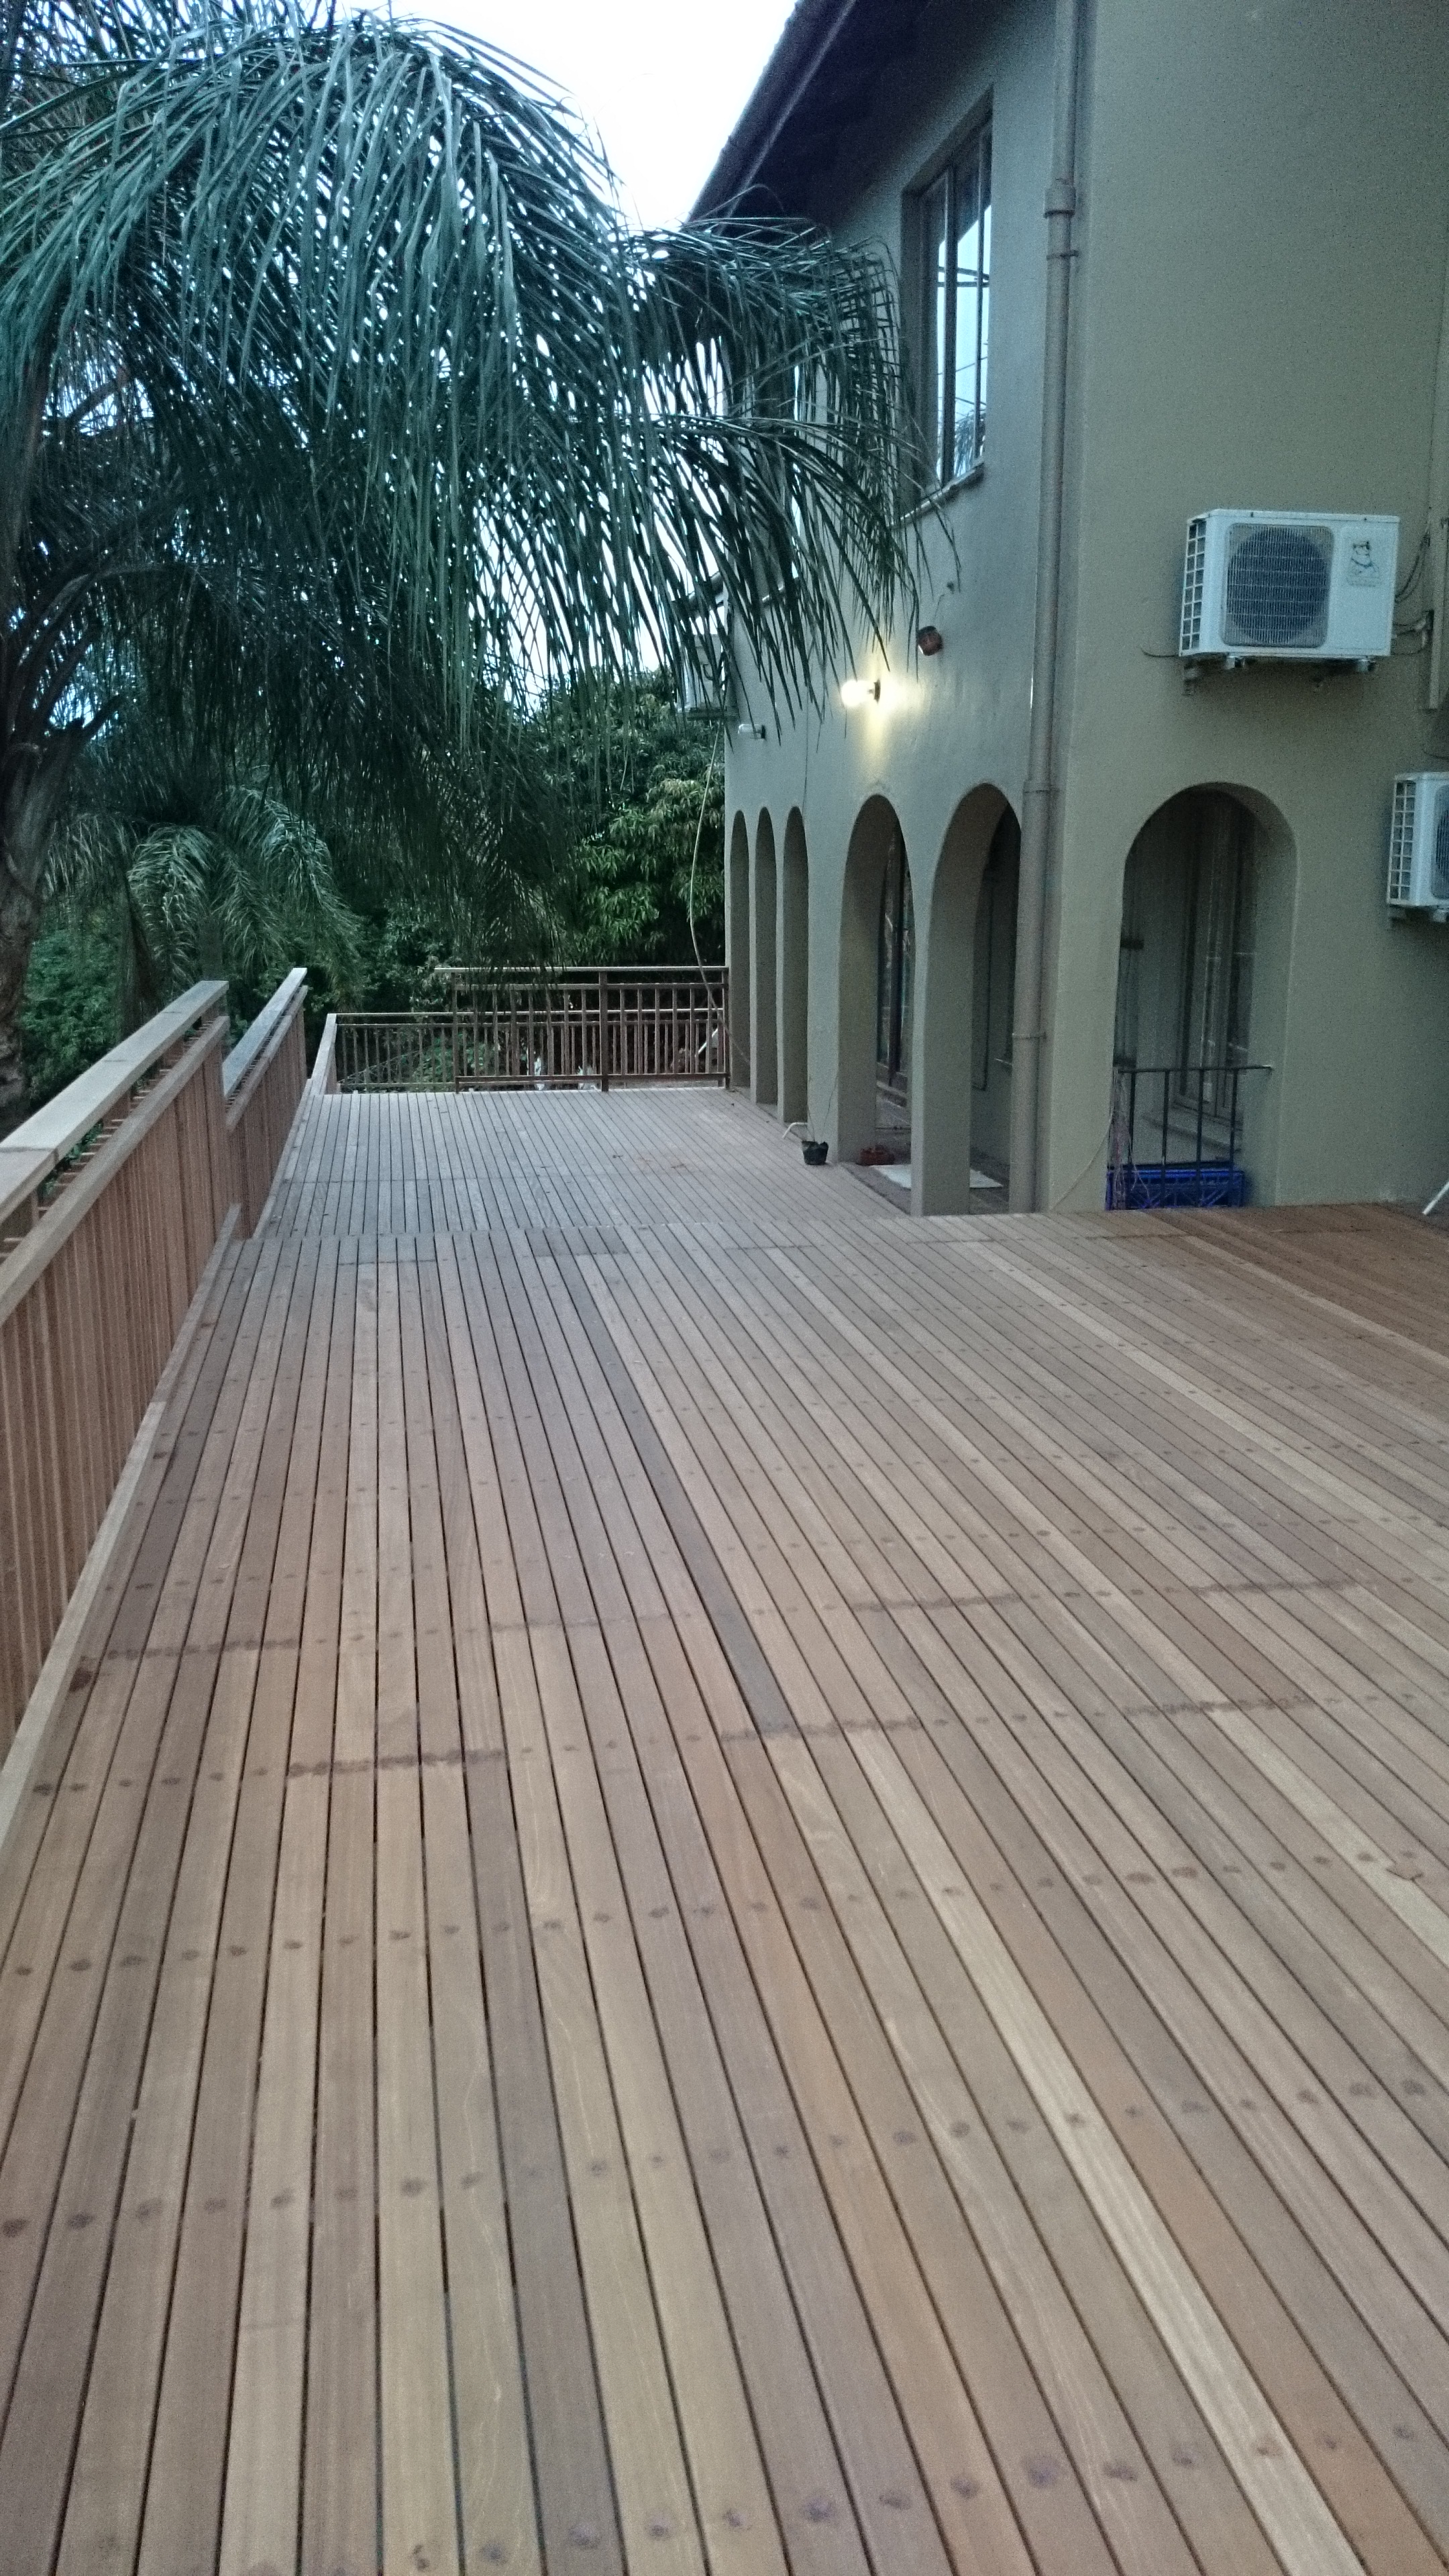
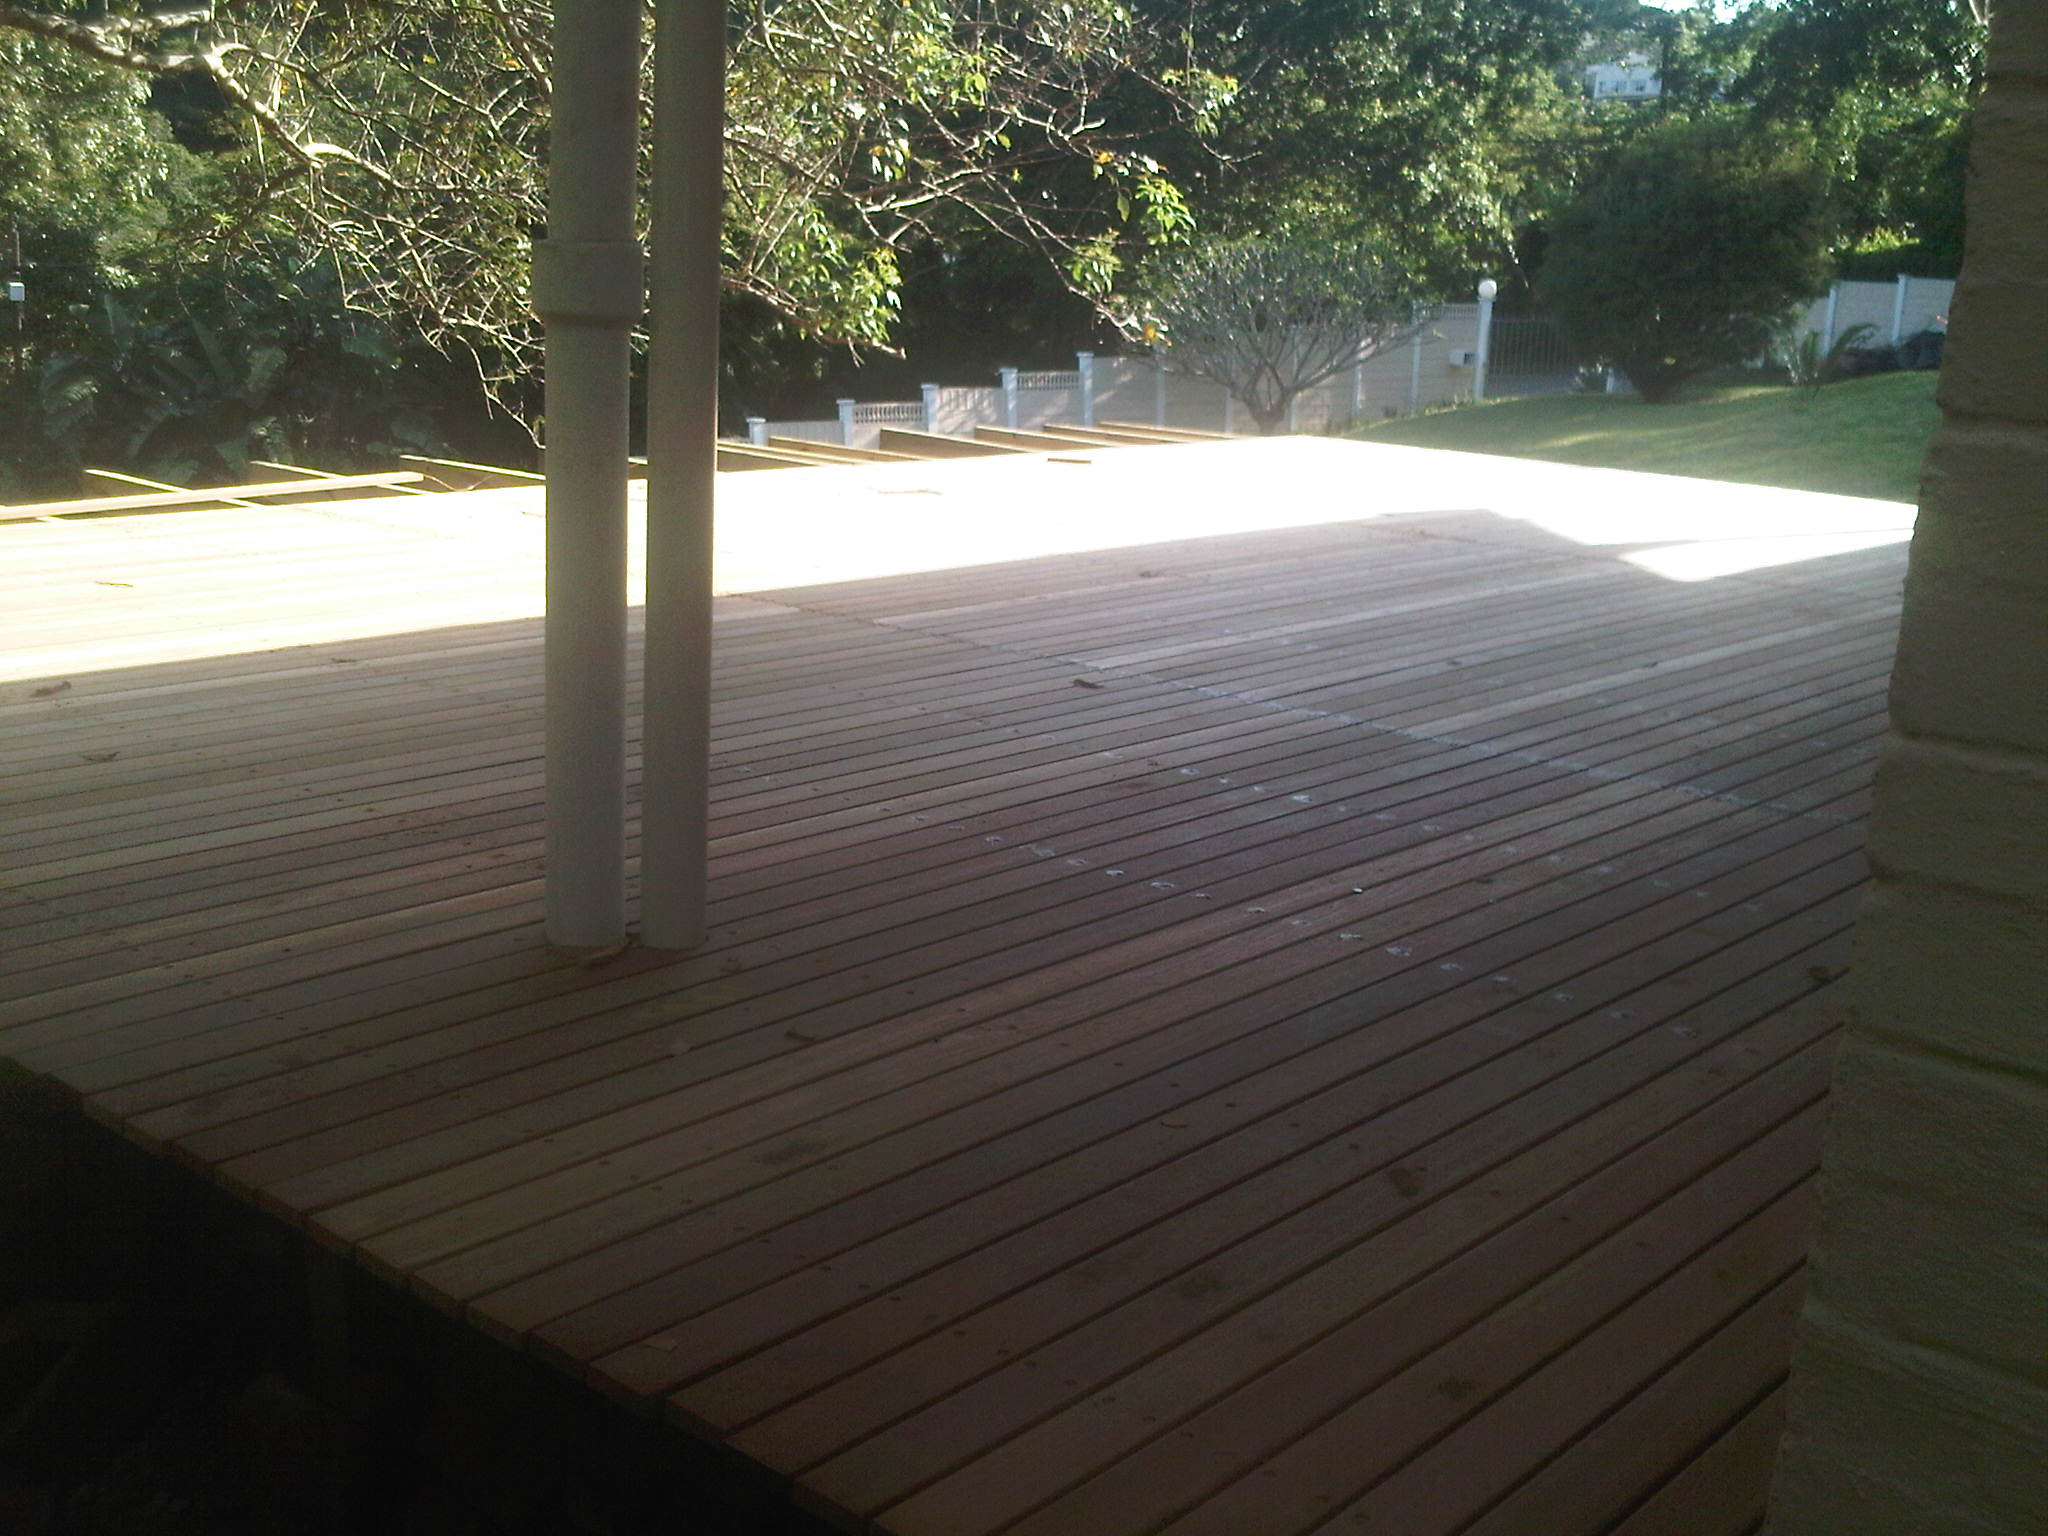
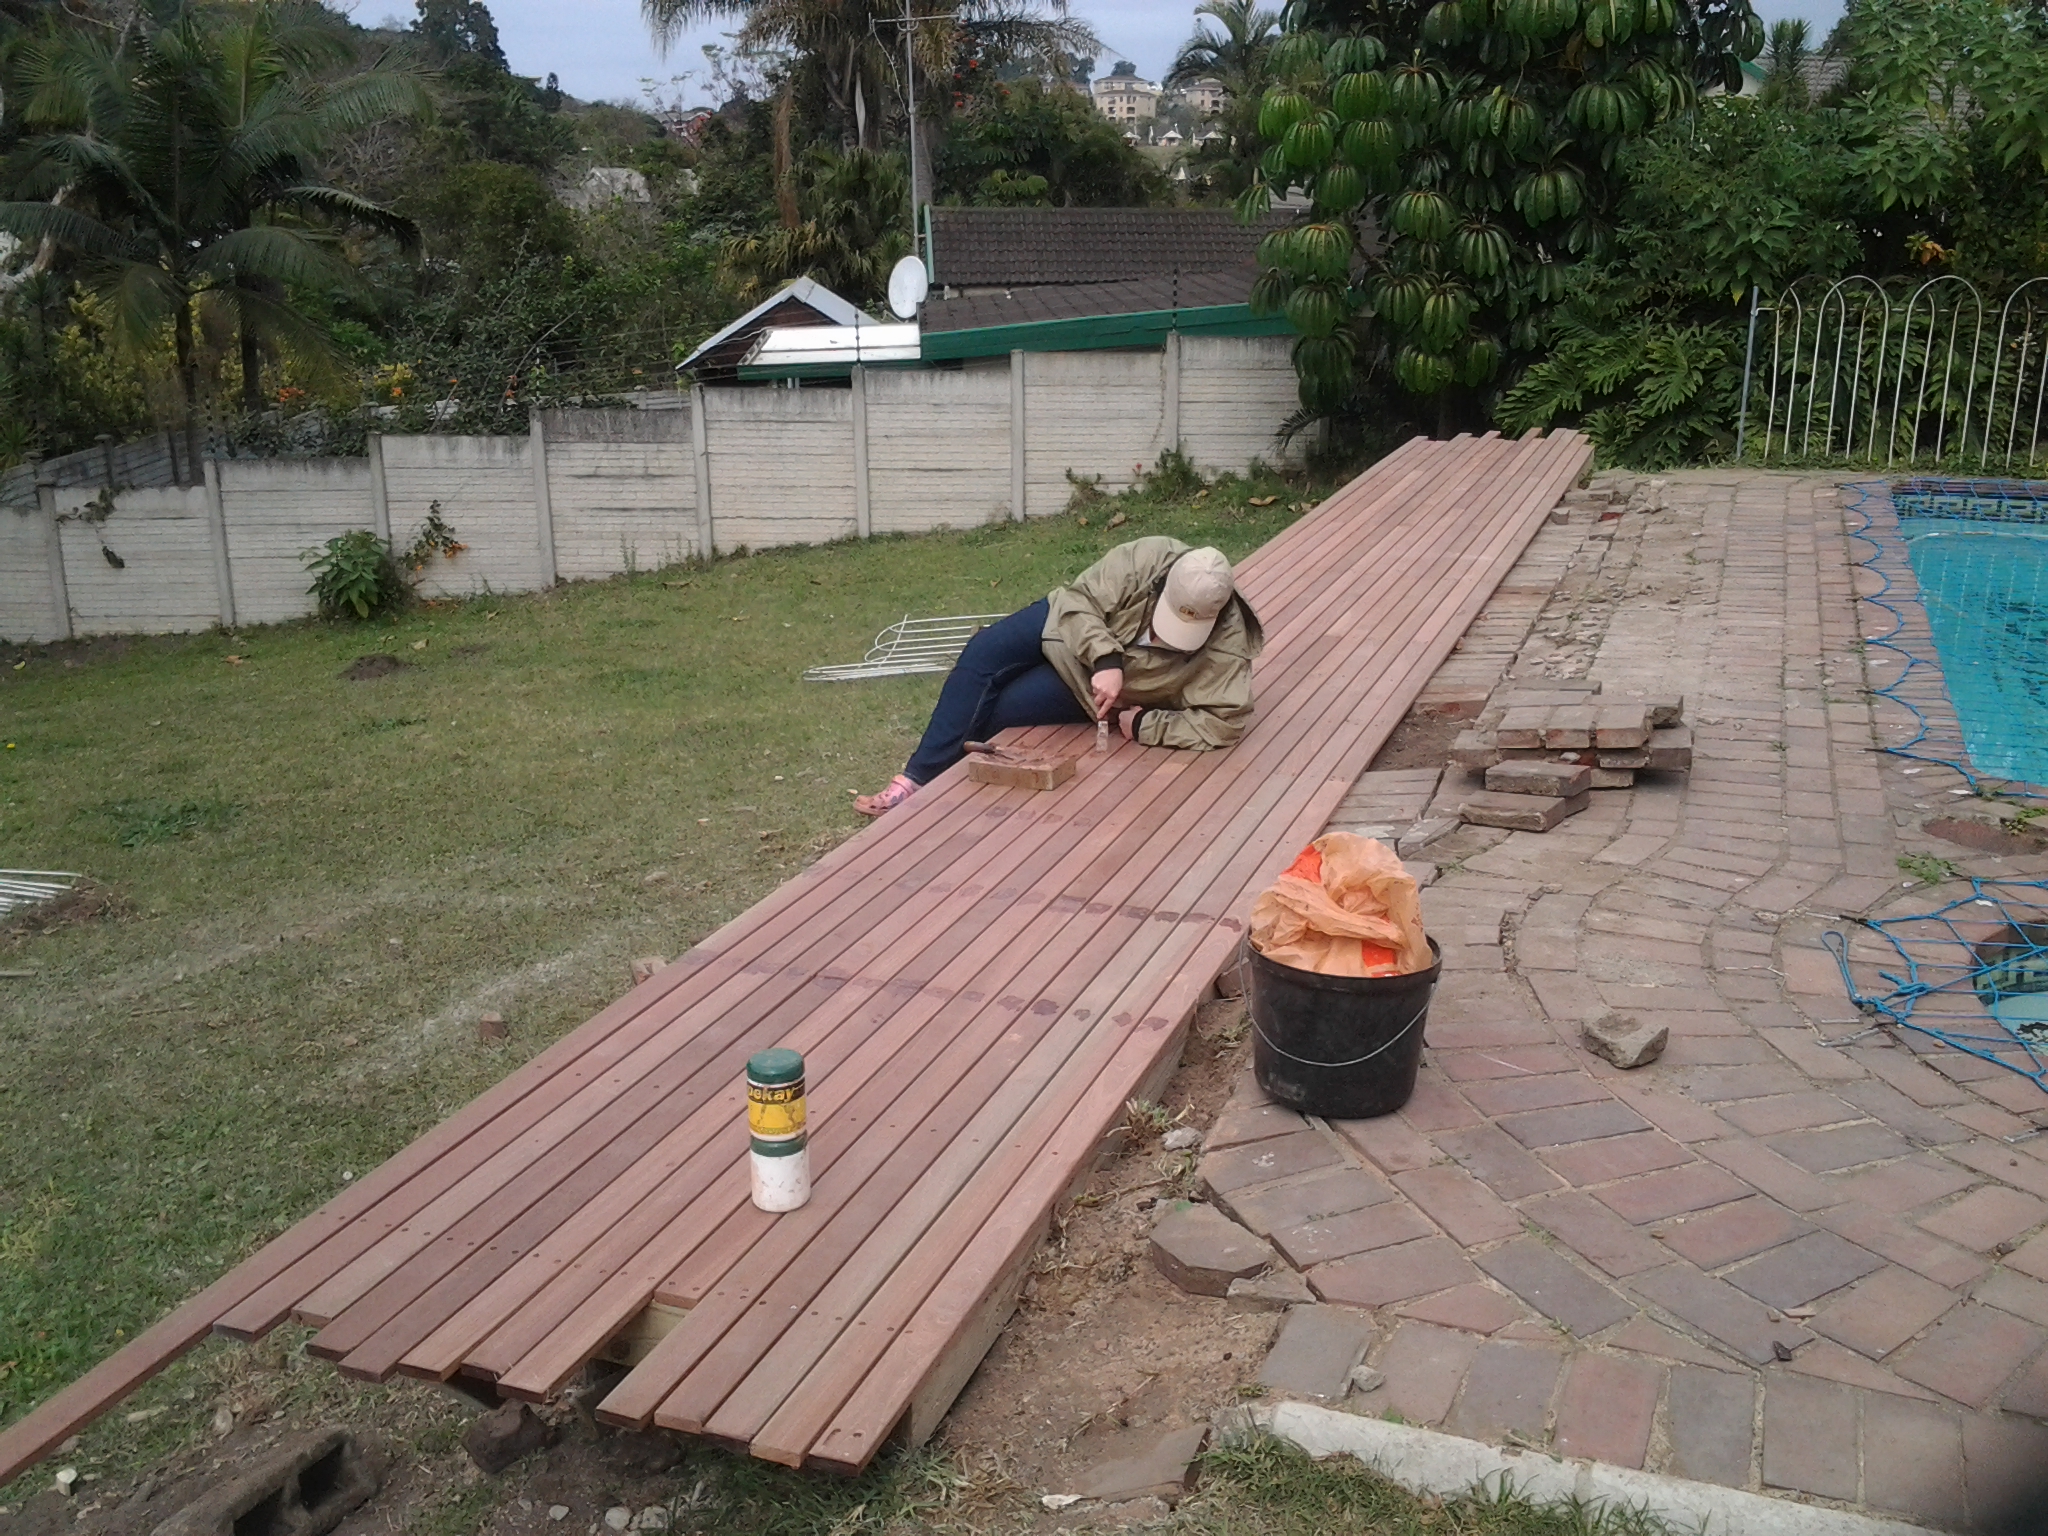
This was our final job for 2013 and we lost one day to rain which set us back a day and we had to spill over into the weekend. We had originally planned to finish on the Friday, but we had to come back on Saturday morning to seal it.

The original deck we built earlier on in the year had greyed already from the sun so we had to sand it quite a bit to get it back to its original colour for the two to match.
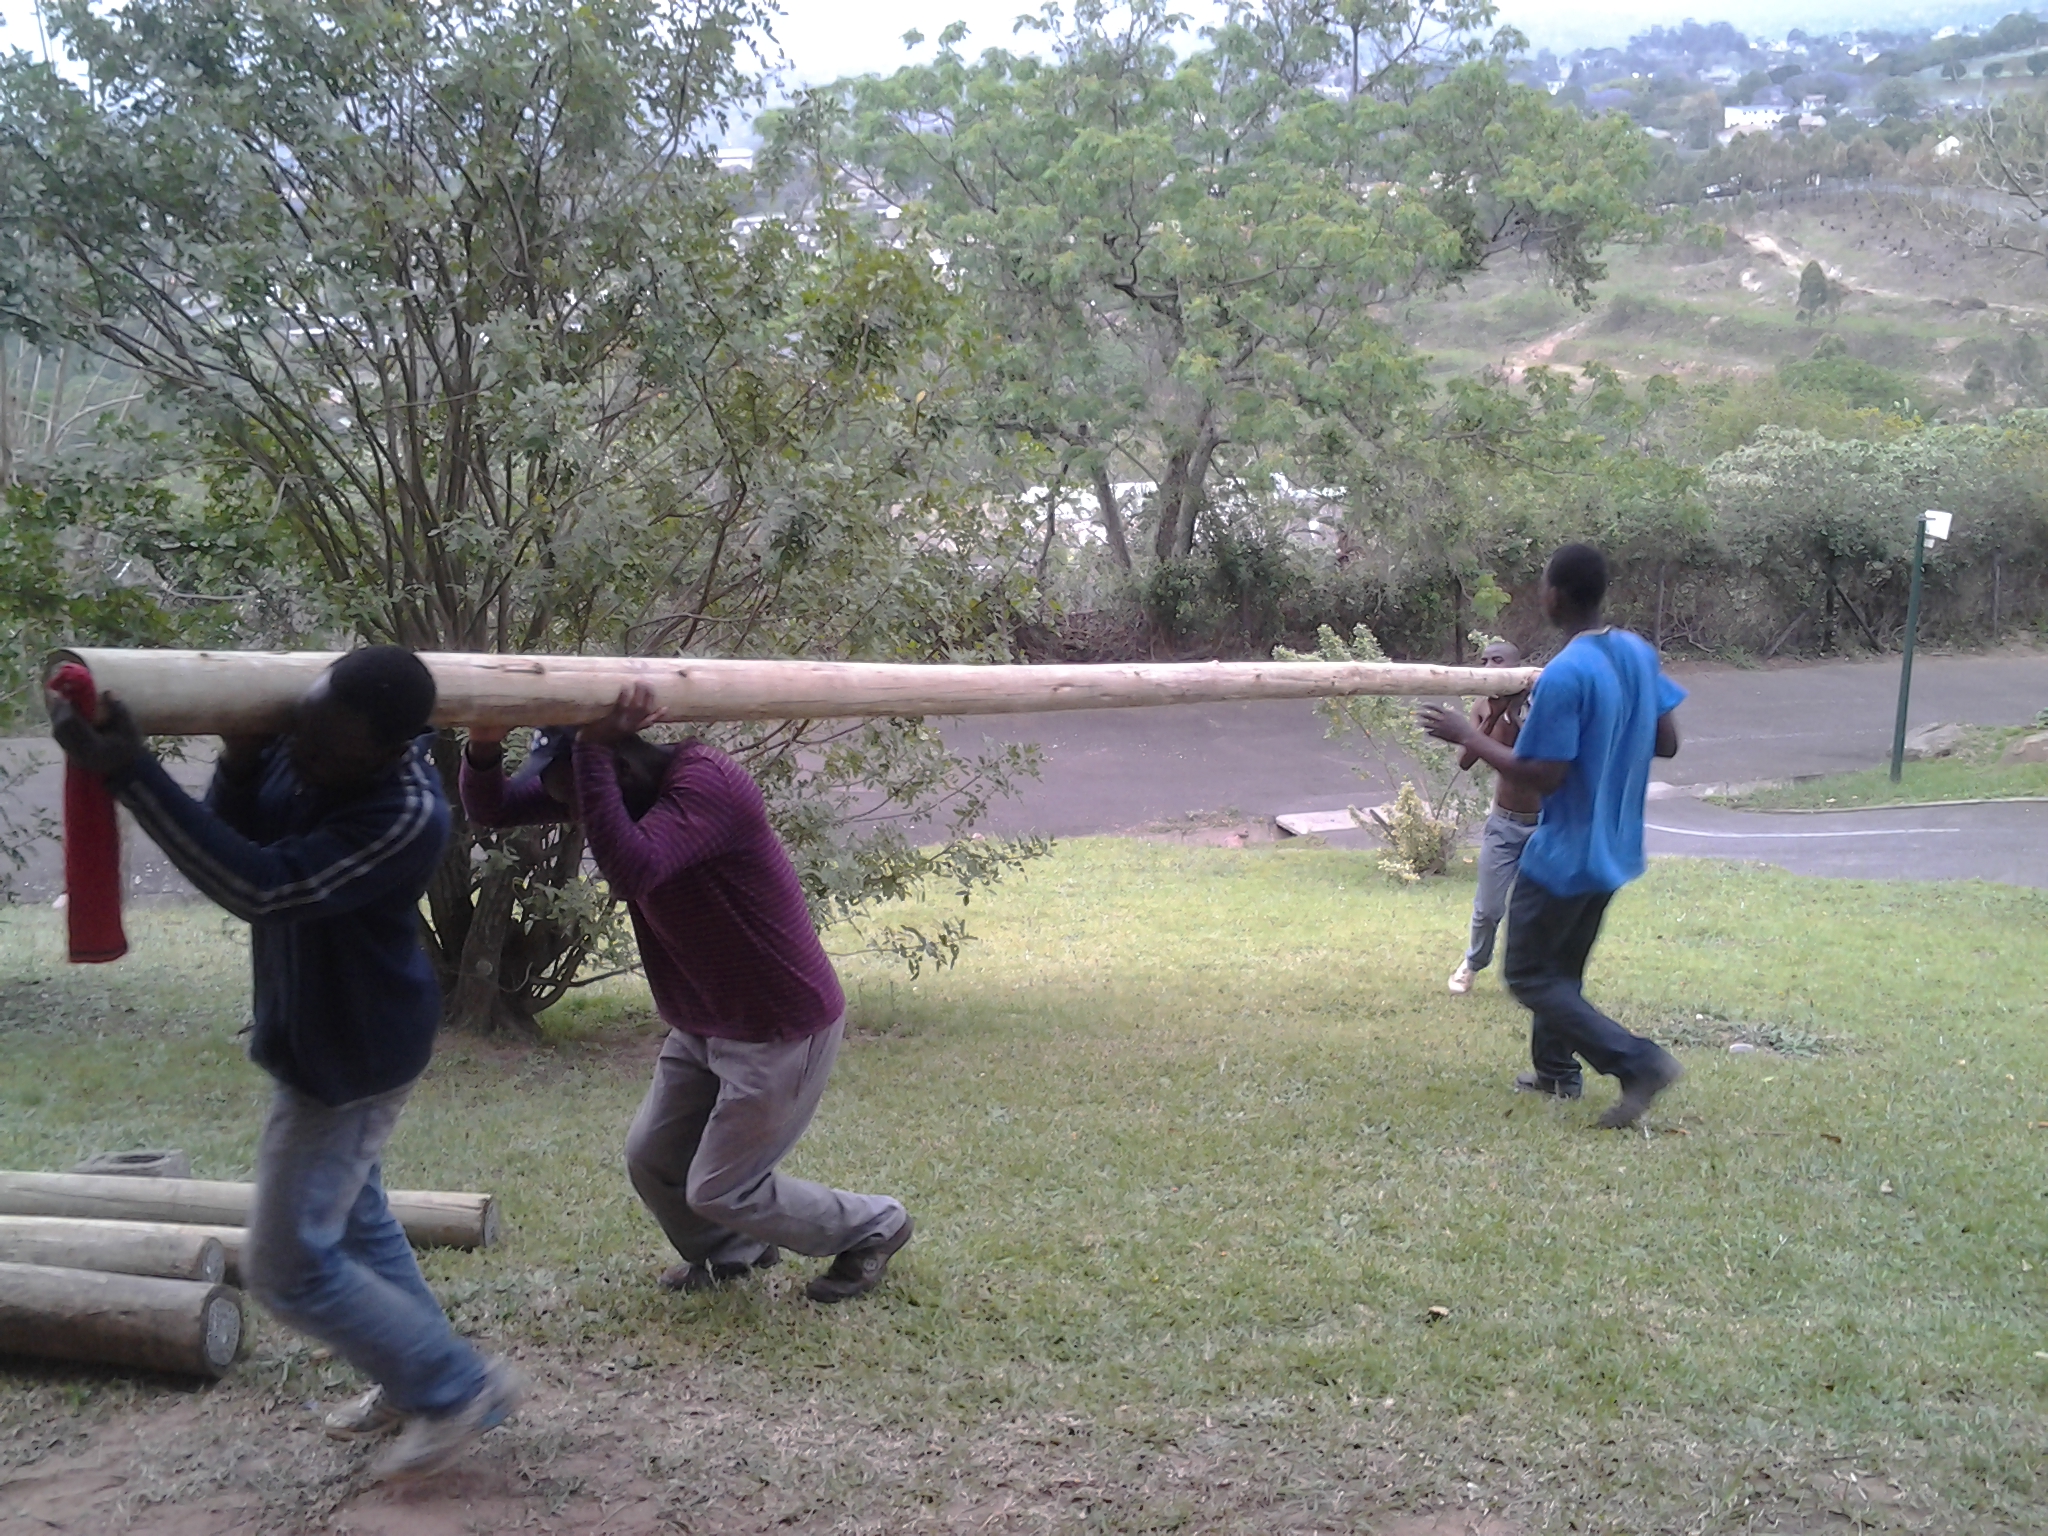
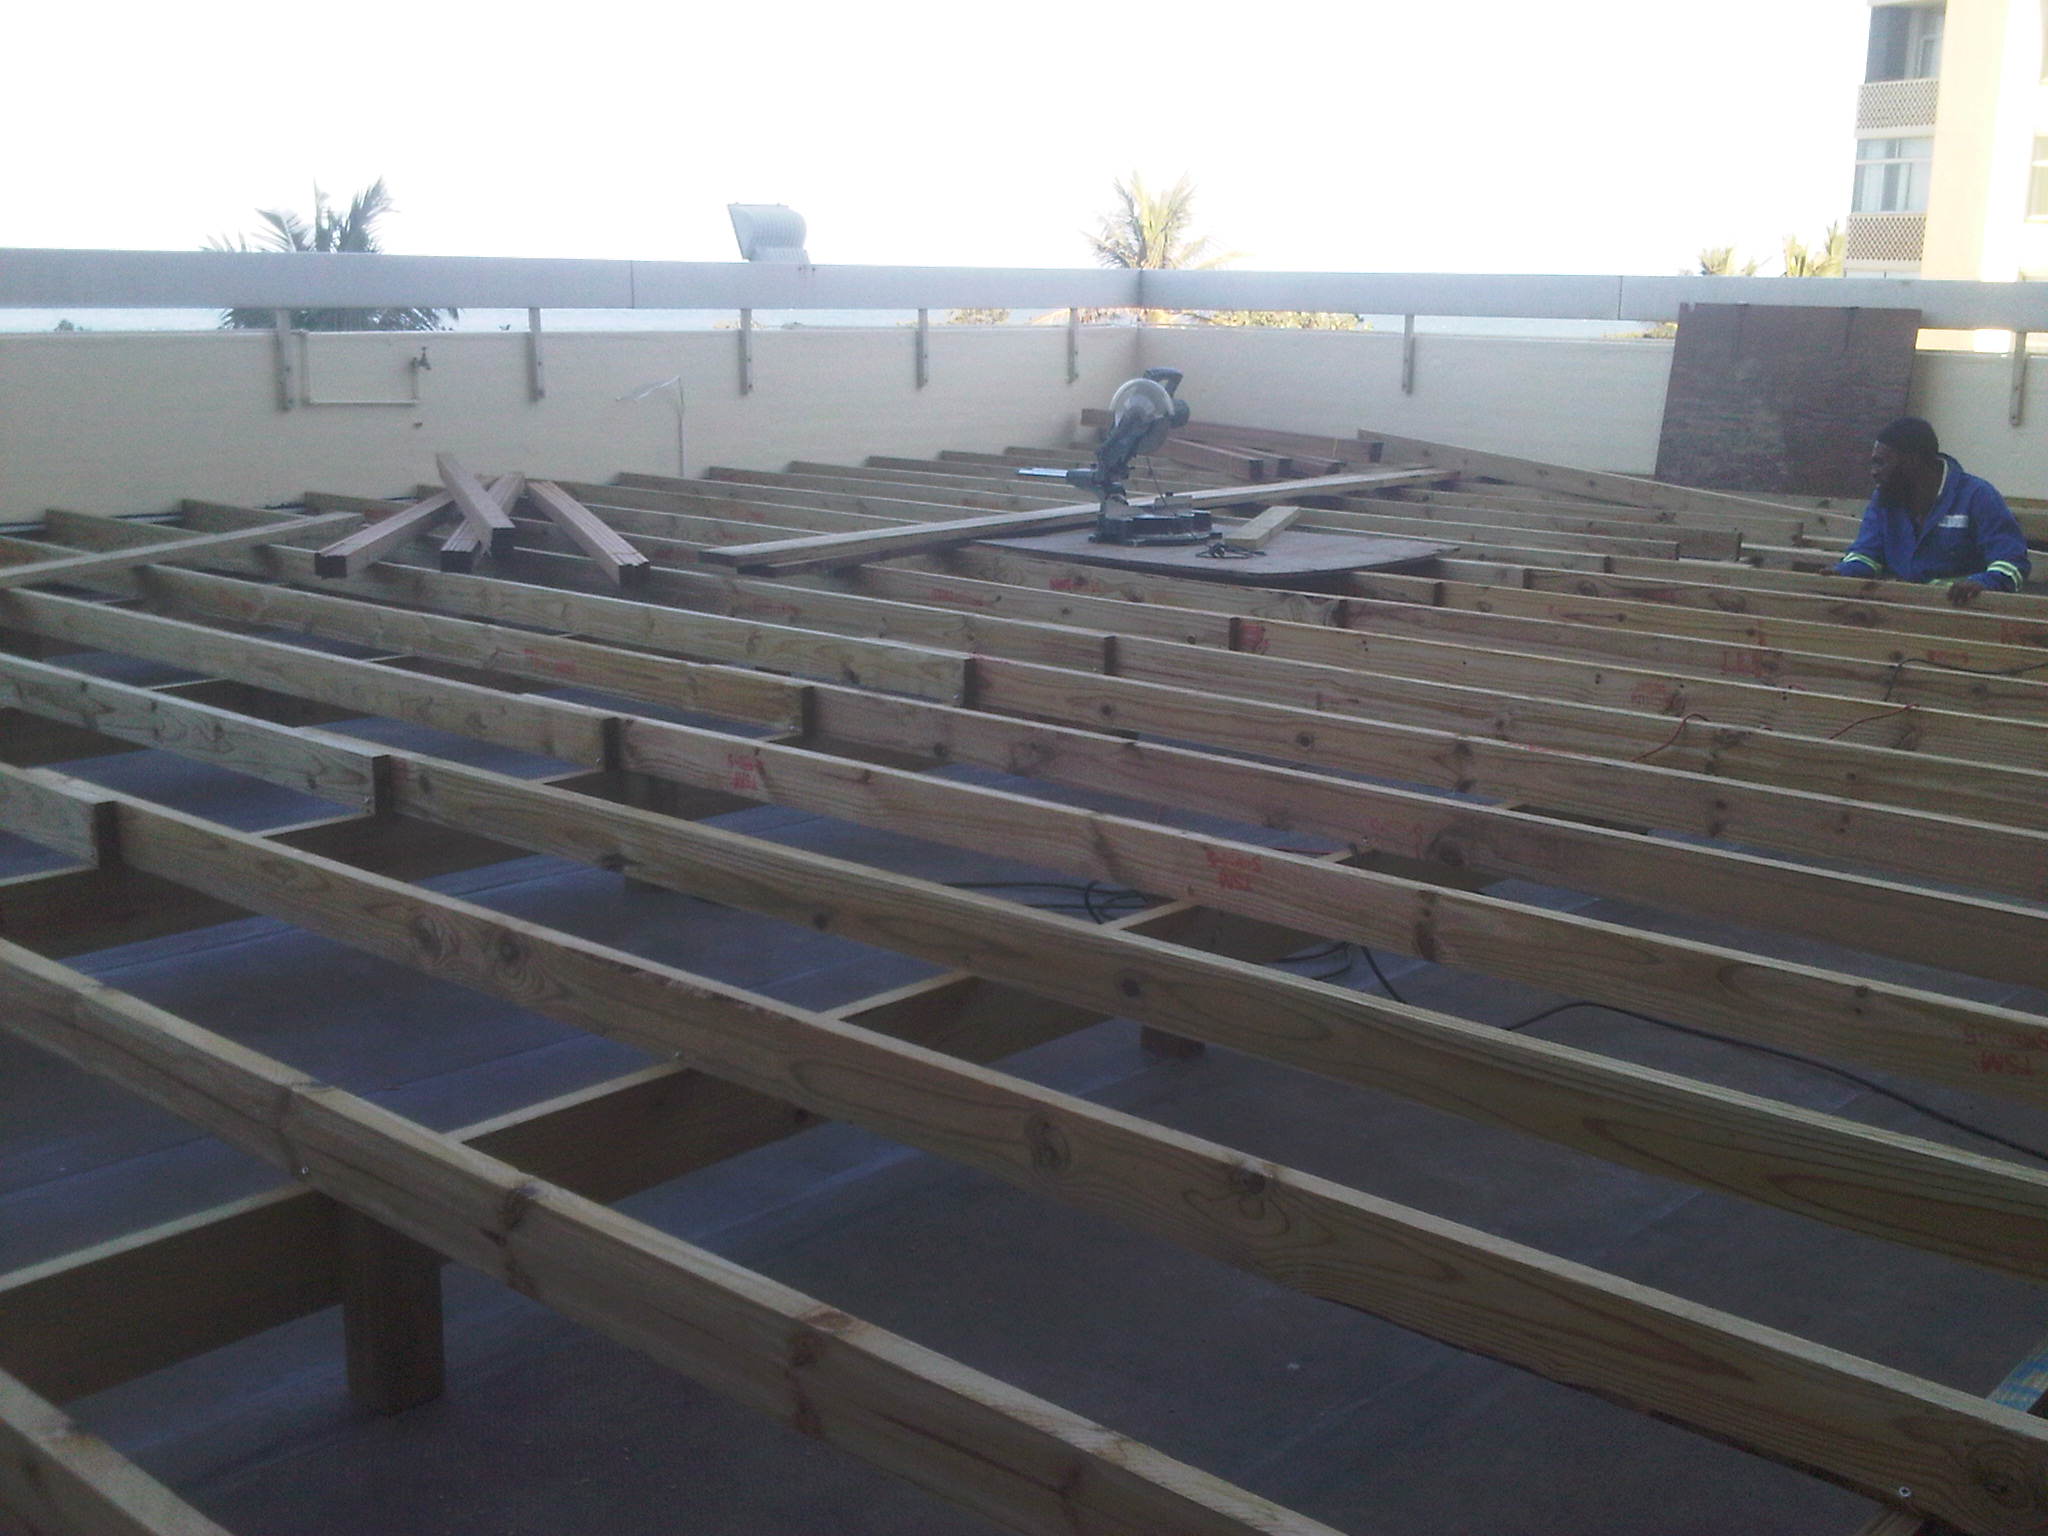
Most of our decks this year have been built using an H3 CCA treated pine substructure. We are able to offer a 50 year guarantee from the supplier for the H3 treated timber and a 30 year guarantee for the H4 treated timber. The cost

Wooden decks Durban

Click to enlarge

difference between balau and CCA pine is huge so we can keep our rates down to our clients and the H3 CCA pine will actually outlast the balau substructure. We still use balau as deck boards and balustrades simply because it is a lot more attractive and more stable so reduces cupping, bowing and checking. In the substructure, because of the size of the timber it is not as important to limit cupping and bowing.

For a free no obligation quote on your wooden decks, pergolas, walkways, balustrades and other outdoor timber construction please contact us on 082 496 5444 or use the contact us form below.

Go back

Your message has been sent

Warning
Warning
Warning
Warning

Warning.

Wooden Decks Durban – Paradise Valley Pinetown

Wooden decks Durban

Click to enlarge

This is a follow-up article on a previous article I wrote about a high level wooden deck we are building at Paradise Valley in Pinetown Durban. Click here for the original article.

The poles proved to be quite a story getting up. We were 5 people on the day. The poles were 9m long and we had to get them in to a hole of 1m deep, secure them and then pour concrete. The difficulty was to get the pole up because with 8m in the air and only 1m in the ground you have no leverage to pull the pole vertically plumb. We got two of them in without having to resort to other methods, but our third and final pole proved a bit more difficult as by now we had stays and ropes all over the place holding the poles in position while the concrete set. So there was nowhere that we could actually move the pole to get it into the hole without disturbing the other poles. We ended up pulling it up (3 of us) from the flat which was about 2 stories up, using ropes, while 2 others pushed the bottom into the hole. The top of the pole kept catching underneath the balcony. We eventually got it up over the balcony edge and could then pull it so the foot of the pole went into the hole. We then nailed a 38 x 114 to the top of the pole and pushed it to vertical. Each hole took about 6 barrows of concrete mix. We were lucky enough to be able to mix right where we

Wooden decks Durban

Click to enlarge

were building. I won’t say “never again”, because if challenged with the same task again I will most certainly attempt it. However, I will use a crane truck to get the poles in the hole. 9m is a bit long to handle by hand and although we did it, it was a bit dangerous at times and we had to continually stop to make sure that no one would get injured. A crane truck for a day will simply make the job a lot easier and much safer.

Wooden decks Durban

Click to enlarge

We built our platform which took us a full day. We used 50 x 228 beams and set the platform below the level of our deck so that we could stand on that platform and build our deck. Once we had the 50 x 228 installed on two sides, we cut the same timber to lengths of just over 2m and nailed them down perpendicular to these main beams to create a platform. Needless to say we have taken perfectly good timber and cut it into 3 pieces to create this platform. At some point I suppose we will use them for stair treads or similar, so it is not a complete waste of money.

We strapped ourselves into harnesses, hired a 10m extension ladder and set about building the deck substructure. We had to resort to our old method of installing the substructure of first setting posts, then cutting and notching posts, then installing beams and finally joists. So it took a fair amount of extra time but there is no other way of doing this at that height. The substructure for 20m² took one day and deck boards another full day. The balustrade will go in on Monday and then it’s just a matter of installing diagonal supports to stop any racking (sideways movement), filling, sanding and sealing. As mentioned above I will attempt another high level deck, but I will cost it more accurately and I will use a

Wooden decks Durban

Click to enlarge

crane truck to get the poles in.

For a free no obligation quote, please call us on 082 496 5444 or use the contact form below.

Go back

Your message has been sent

Warning
Warning
Warning
Warning
Warning

Warning.

w

Wooden Decks Durban – Verulam

Wooden decks Durban

Click to enlarge

We recently had a good run of building wooden decks in Durban. With the arrival of summer and Christmas, wooden decks in Durban become a very popular item for consumers to spend their hard-earned cash. Despite trying to get jobs confirmed earlier on in the year, most of our work was confirmed in November and hence we have been running 2 to 3 sites simultaneously. It’s no easy task with the size of our current crew, but we were lucky enough to have most of them take place north of Durban in Durban North, Umhlanga and this one in Verulam. We rented an old beach cottage near Ballito and stayed there with our full crew for 3 weeks so that we didn’t need to fight traffic in the mornings or afternoons and drop and pick up staff in various different areas. However the traffic in Umhlanga and that whole north of Durban area is beyond ridiculous so it still took us hours to get “home” each day. This coupled with the fact that we had a lot of work to get through, made for very early starts and very late finishes.

Wooden decks Durban

Click to enlarge

Wooden decks Durban

Click to enlarge

The pics alongside are work in progress pic and I will update then once we have sanded and sealed the deck.

This job in Verulam was at a complex and this part of the complex consisted of 6 units. We built 3 wooden deck sections, each of about 45m². There was a wooden balustrade on the front of it and on the two ends or sides. The drop down from the first section of wooden deck was about 450mm so we created a step along the entire width of the deck with closed risers. For these closed riser steps we use a mini substructure and then deck it using the standard 19 x 68 balau deck boards. It then becomes a sort of bench as well as a step down.

Wooden decks Durban

Click to enlarge

The step down from the second wooden deck section to the third was about 1, 100mm so we had to build some wooden stairs with open risers of standard width of 1m and clad the section were there were no stairs. We also clad behind the stairs in order to block of the underneath of the deck completely. These wooden stairs were the straight forward design with stringers on either side, and treads placed inside of the stringers using cleats on each side. Hence the risers are open which is why we clad behind it to block off the underneath of the second section. We used 30mm x 102mm stock to build the stairs as there is no support beneath them over the 1m span. Using 30 x 102 stock with no gaps, as opposed to 30 x 140 stock, results in a tread of 306mm compared to 285 (140 + 140 + 5mm gap). So they are slightly wider (by 21mm) but still very comfortable. Also we get to use our 1m off cuts from the capping on the balustrade thereby reducing our cost which we can pass on to our clients through our reduced selling price.

It was a fairly straightforward build but did take a bit longer than other jobs as the front of the wooden deck was directly in line with where the bank below suddenly dropped off. So it was difficult to work at head height on a very steep slope. Ladders had to be tied off to the posts to climb them and so on.

Wooden decks Durban

Click to enlarge

For a free, no obligation quote, on your wooden deck, pergola, walkways, stairs and other outdoor and indoor timber construction please call us on 082 496 5444 or use the contact us form below.

Go back

Your message has been sent

Warning
Warning
Warning
Warning
Warning

Warning.

Wooden Decks Durban – Westville

Wooden decks Durban

Click to enlarge

This wooden deck built in Westville Durban was built in record time. We have been experimenting with new techniques of building to make the task quicker yet still remain accurate, neat and structurally sound.

It was a 35m² wooden deck with a balustrade on 3 sides and a gate. It was flush with the floor inside the house so we had to be careful to make sure that the door could still open without jamming on the surface of the deck. The first metre or so was built on top of existing paving after which the bank dropped about 1.8m.

We built the frame to take the deck boards first, attached it to the wall of the house using sleeve anchors and then installed temporary posts to get the whole structure level and flat. Once the frame was built, level and flat, we slotted our 50 x 228 main-beam underneath the joists and attached them. So we now had our joists and beam installed being suspended by temporary posts. The beams were in fact now just hanging from the joists with a few screws. We could then see very accurately and quickly were out holes, for our posts, needed to be dug in order to secure our main beam. Holes were dug, posts cut to length, notched, secured to beam and concreted in. Now it is possible to use a wet mix of concrete as there is no danger of the posts moving while working with them. In the past we have done it the other way

Wooden decks Durban

Click to enlarge

around. We have worked out where our posts must go, concreted them in, then cut our posts to length, installed the beam and then the joists. The latter is far more time consuming. By having your frame built one can very quickly see where everything must go. A lot of the cutting is then done on the floor instead of in situ. Using the former method one also needs to make a dry mix of concrete and stamp it in so that you can work with the posts immediately. Pouring wet concrete is much easier and

Wooden decks Durban

Click to enlarge

quicker than working with a dry mix. This part of the job, the complete sub structure, took us one day (35m²).

Day two was spent screwing down deck boards. Again we used a new method of securing each end of the deck boards with our 5mm gap and then coming back to screw the deck boards down in between the ends. See this video for how we did it. 35m² of deck boards went down in one day. The last part of building was the balustrade. It rained that day so we only got a half day in, but the total time to install balustrade was one day. Hence a total of 3 days to build the entire structure, deck it and install balustrade. We still used the old method of installing the balustrade by attaching our rails to posts and then installing pickets. Our new method is to build the rails and pickets on the floor, pick it up and attach it to the posts. This new method will be a lot quicker as everything can be pre-cut to length.

In busy times, as we are experiencing now, techniques that allow us to build quickly and accurately are invaluable and allow us to keep our prices down. Well done to the crew, this wooden deck in Durban was built in record time.

Wooden decks Durban

Click to enlarge

For a free no obligation quote, please call us on 082 496 5444 or use the contact us form below. Please also visit the gallery page on this blog to see other pics of work we have done recently.

Go back

Your message has been sent

Warning
Warning
Warning
Warning

Warning.

High Level Wooden Deck Installed Durban

Wooden decks Durban

Click to enlarge

Now here’s a challenge. We’ve been commissioned to build a deck 5.5m high on the lowest point. The highest point is about 7m off the ground. An engineer and architect have drawn plans and there is a strict spec we need to follow. Our H4 CCA treated gum poles are 9m in length. That’s too long to fit on the top of our vehicles so we have to have them delivered. There are to be 3 of these poles in the front length of the deck measuring 6m long and another 2 mid way across the width of the deck. Each pole is to be buried in the ground in a hole measuring 1m deep to the lowest point and 600mm x 600mm wide.

The two end holes were dug with ease but the middle hole was slap bang in the middle of a rock. So we hired breakers, pulled the generator out and started digging. We dug straight through the middle of the rock. It was only sand stone so went relatively easily, but let me assure you even sand stone is hard enough to test the best of one’s fitness when holding a breaker whilst standing in the hole and still having to remove what you have just broken out the hole.

We will finish on nearly two cubic metres of sand and 2 cubic metres of stone and 14 bags of cement. We’re mixing a wet mix as opposed to our normal dry mix. Each pole is being placed in the hole and secured using 38 x 114 (our joist material) in 6m lengths attached to the post and secured to the ground by digging them in and placing bricks around them. We’ve managed to find a few trees nearby so have used the rope that was used to pull the pole up to tie it off to a tree to secure it while the concrete sets.

Wooden decks Durban

Click to enlarge

We had a little set back in that the deck was to be originally 6m x 2m. However our main beam, and therefore posts below would have ended up on the ridge of the retaining wall you see in the pics. We therefore had to extend the front edge of the deck by 1m. As a result the original poles we bought are too short by about 300mm. We originally bought 7.2m poles but have now had to go up to 9m poles.

Wooden decks Durban

Click to enlarge

Once we’re up with the poles we will need to build a platform of sorts so that we can work at waist height to build our substructure. Or we may opt for scaffolding. Once that is up we can then lay our deck boards and build our balustrade with ease and safely. I’ll post some more pics here of the completed job and work in progress. It’s a daunting task because of the height and we need to ensure that we are working safely and that the budget doesn’t run away from us. It is easy to lose money on a job of this nature due to extra costs.

Already we have had breaker hire for 3 days, one of which I managed to re-coup from the contractor breaking the hole in the wall to install the door. He didn’t realise that the balcony wall was solid concrete. He was probably expecting brick and sent his crew with a four pound hammer. Poles have grown in length and of course cost more. Holes have ended up bigger than planned so more money has been spent on sand and stone and cement.

Wooden decks Durban

Click to enlarge

For a free no obligation quote on your outdoor wooden decks, pergolas, balustrades, walkways etc. contact us on 082 496 5444 or use the form below.

Go back

Your message has been sent

Warning
Warning
Warning
Warning

Warning.

Wooden Deck Installed in Queensburgh, Durban

Wooden deck installer Durban

Click to enlarge

This wooden deck we are installing is almost complete. The pics alongside are work in progress pics. I’ll update it with some others once we are done and you can then get the full feel of the deck. It has been an interesting installation as there are effectively three sections to it and the whole job incorporates three different methods of installing a wooden deck.

The first section is a deck around the pool measuring 1.2m off the side of the pool. The slasto that was there had quite a steep fall from the edge of the pool to the soil to allow water to run away from the pool instead of in to it. We used 38 x 114 joists but had to cut them in a wedge shape to allow them to be level on top but still remain in contact with the slasto as much as possible. There is an easier way of doing this by using 38 x 38 batons with a foot on the side, farthest from the pool, so that the baton remains level on top. This would of course result in a large gap beneath the baton. Being only 38mm in thickness the baton would break as a load is placed on top of it. So one would need to pack the underside of this baton with a suitable material. In the past we have used structural grout simply because of its strength and usability. It is fairly easy to use as it is cementious based. You simply mix it with water and pack the gap. It dries extremely hard, harder than cement, and contains small fibres in it which give it its strength. Both ways are structurally sound, but cutting wedge-shaped joists takes time and they inevitably need to be shimmed to get to a perfect level across all joists. Packing them is easier and just as strong. So next time I will revert to the old tried and tested method of packing them to save time.

We ran our deck boards parallel to the pool on all fours sides, rather than running them all in the same direction. The method we used in this deck is of course the better method. It looks neater and also keeps more water from the pool away from the end grain of the deck boards. Water is absorbed by wood largely through the end grain so this method will result in less rot than running them all the same way where two sides will have end grain facing the pool. However, and a big however, this method is tricky in that if the pool is not perfectly square, the corners of the deck will not run out from the pool at 45°. If a deck board is cut at say 40°, the other deck board that will meet it on that corner will need to be cut at an angle other than 40° if the deck is not square as a result of the pool not being square. And herein lies the problem. The cut ends of each deck board will not be the same

Wooden deck installer Durban

Click to enalrge

length and will not meet up nicely resulting in a stepped joint. Hence the deck MUST be built square regardless of how square the pool is. This brings with it another problem in that it will mean that two ends will overhang the pool and two ends will be flush with the edge of the pool. If the pool is only slightly out of square, then it is not a problem because it won’t be seen. However if the pool is far out of square, then the overhang on the two sides becomes too big. If this is the case then opt for deck boards running all the same way or a gap filler must be placed between the join, so that the eye cannot pick up the difference in lengths of cut ends.

There was small walkway of 1.3m wide by about 4.5m long joining this pool deck to the other deck pictured alongside. There was a small step up to this deck which was enclosed with a balustrade.

So three different style decking systems were used which made it very interesting. One was a baton system on a slasto substrate, the other was a frame system as the walkway and the third was a joist and beam system which was suspended about 2m up.

Tomorrow we will continue sanding and then seal.

For a free no obligation quote, please call us on 082 496 5444, or use the form below. If you call please let me know you found my blog so I can track my marketing.

Go back

Your message has been sent

Warning
Warning
Warning
Warning

Warning.

Wooden Pool Deck Built in Westville, Durban

This slideshow requires JavaScript.

This wooden deck was built in Westville, Durban in September 2013. There are two sections to the wooden deck, one being the deck around the pool and the other being the deck above the pool where the water flows back into the pool and the pot plants are housed.

One way of decking around a pool is to lay all the deck boards the same way. What this results in is two sides of the deck having end grain facing the water and the other two having face grain facing the water. Seeing as water likes to be absorbed through the end grain of wood, it makes sense to try to keep as much end grain away from the water as possible. This will slow down the rotting process to a large degree and you will get many more years use out of your deck. Besides, in my opinion, it looks better this way.

It is more time-consuming however because when you are laying the deck boards you need to run them to the corner at 45º. You also need to make sure that your joists or batons you have laid prior to laying your deck boards are exactly 45º because if this is out then the point in the deck surface where the boards meet will also not be 45º and will result in one side of the deck being wider than the other. So lay your joists very carefully to ensure this problem does not occur because having to re-do work a second time takes a lot longer than planning it correctly the first time. If the substructure is perfect, or near perfect,

then cutting the deck boards for the join will be easy as you can set the saw to 45º and cut. But check as you are going that it is not running out because a slight deviation in the joist will result in the cut needing to be a few degrees bigger or smaller than 45º. If need be shim the side of the joist to keep your join 45º.

The pot plants that you see on the raised deck are actually part of a water feature below the deck and we have decked around them. They do not sit on top and the water flows down the pots back under the deck and into the pool. There is also a rim feature below the front face of the raised deck so that water flows into the pool from under the deck. Trap doors are a necessity in pool decks, as one often needs to gain access to pipes and filters below the deck surface.

There is a rim or fascia board attached to the inside of the joists or deck boards to complete it by covering the gaps below the deck itself. This should always be set as high as possible to avoid as much contact with water as possible, but yet still cover and substructure below the deck boards.

This deck was finished using our normal Timberlife Satin Wood Base 28 with a Mahogany tint, but because the deck boards were a bit lighter in colour to other decks we have done it resulted in a more reddish / orange colouration.

This deck totalled about 50m². It is always deceiving to try to estimate a pool deck size as it always looks a bit smaller than it actually is. It is always a good idea to measure it accurately before starting to avoid a budget over run.

For a free no obligation quote please contact us on 082 496 5444 or use the contact form below.

Go back

Your message has been sent

Warning
Warning
Warning
Warning
Warning

Warning.


Wooden Deck Built with Guarantee in Durban

Wooden deck guarantee

Click to enlarge

As mentioned in some of my other articles we started offering supplier guarantees on our H3 CCA Treated pine substructures. These guarantees can run for up to 50 years from the date of installation. They are guaranteed by the manufacturer of the chemicals used in the treatment process and are underwritten by one of the large insurance companies. Provided certain building techniques are adhered to and the company treating the timber has treated it correctly, the manufacturer of the chemicals is willing to guarantee the timber against various forms of rot and various types of insect infestation for up to 50 years.

One of the conditions is that the end-user, being you the client, needs to register the build with the manufacturer within 60 days of completion of the build. The registering of the build needs to be done in a certain format and details such as when the timber was purchased, where it was purchased from, ERF number etc. needs to be submitted to them together with proof, in the form of photographs, of the building methods we used whilst building the wooden deck.

We need to treat the cut ends of the timber with an approved end sealer, we need to ensure that we are using H3 for timber above ground and H4 for timber in ground or in constant contact with wet soil and we have to show that we have planted our posts according to the recommended method.

Wooden deck guarantee

Click to enlarge

We at The Wood Joint offer to facilitate this process for you, for a small admin fee, so that you may activate the guarantee with them. We take pictures of what we are doing to prove that we have used end sealer and adhered to their criteria. Once the build is finished we compile the report that will be sent to them, by you, to register the build and activate you guarantee. We can also assist in submitting it on your behalf.

In the pictures alongside you can see the end sealer we are using which is a diluted version of the same chemical that is used in the treatment process. This applies to all cut ends and drilled holes. The greenish colour is due to the copper in the solution which prevents algae growing on the timber which can cause rot.

We also take pictures of us planting the posts or poles so that it is clear we have planted them correctly. When one plants a post, it should always be placed on top of soil and then concrete placed around the post. If you wish to place it on top of concrete than that concrete should be allowed to set completely before placing the post and setting it in concrete. This is to allow any water that does get into the post to escape through the bottom of the post. If a post is set on top of wet concrete it will slow the escape of water through the pole and this will speed up the rotting process from within the posts. I’m sure you’ve seen some gum poles that have rotted from the inside out. This is because they have probably been set on top of wet concrete.

Wooden deck guarantee

Click to enlarge

We also take pictures of the red SABS / SANS stamps on the timber so that it can be proved that the correct Hazard Level was used for the correct application, H3 for above ground and H4 for in the ground.

Both SABS and the company manufacturing the chemicals regularly, and unannounced, check on them and run test to ensure that their timber is being treated correctly. Pine cannot be treated in the same chamber as saligna (poles) for instance as the absorption rates of each timber are different. The timber needs to be treated at a certain pressure and the solution needs to be of a certain strength to arrive at the different H levels. This is tested by coring a section of the timber out, after treatment, and measuring the amount of timber the chemical has penetrated. They also use a dye to determine if the solution was of the correct strength. So it is important that this CCA treated timber is purchased from a reputable supplier.

Over and above this info we need to report on where the timber was purchased, when it was purchased, who treated it and so on. With all this information on hand, you the client, can register your build with the manufacturer and be rest assured that you substructure is safe for 50 years.

For a free no obligation quote on your wooden decking needs, please contact us on 082 496 5444 or use Wooden deck guarantee

Click to enlargethe contact form below.

Go back

Your message has been sent

Warning
Warning
Warning
Warning
Warning

Warning.


Choosing a Wooden Deck Builder in Durban

Wooden deck builder Durban

Click to enlarge

There are many wooden deck builders in Durban. With a simple search on Google you will find a few companies on page 1. If you trawl the various magazines that advertise home improvement services, you will find many there too. There are also various portals on the net that list these companies. Most of these wooden deck builders can be trusted and will deliver a relatively good quality product at a reasonable price. If however you dig a bit deeper you will find that there are literally hundreds of people in Durban who claim to be wooden deck builders. Again some of these you can trust as they are competent deck builders but have just perhaps not had the opportunity to learn how e-marketing works or the funds to pay for adverts on these portals or in these magazines. There are however many that can’t be trusted for various reasons ranging from running away with your deposit, to not building correctly, taking short cuts and using the wrong timber.

I have come up against a few of them in my career as a wooden deck builder in Durban. I have lost many jobs due to price only to find later that the installer has either not finished the job, has used the wrong materials such as non-treated or incorrectly classified CCA pine in their build, or has built it incorrectly and it is structurally flawed. Needless to say this leads to wasted money and a very unhappy client. The best price is not always the best option to go with because pure economics says that if the price is unrealistically low, then the builder must be taking short cuts in order to earn a living. If you consider that most contractors ask for a 50% or 60% deposit in order to purchase materials, then it makes sense that the profit margins are between 40% and 50% of the job. If one contractor is quoting a very low price he is either shaving his margins or buying sub-standard materials.

Wooden deck builder Durban

Click to enlarge

Be very careful when selecting a contractor. Do your research first and find out about other jobs he has done. Phone his references and get this info first hand from a satisfied client. A contractor will of course not list a reference who will not give him a good reference, so make sure he has provided enough references to ensure that he has at least done a few jobs that his clients have been happy with. Do a little research on the net yourself to find out what materials are available for decking and then ask him questions to test his knowledge of the product he claims to be an expert at.

Here are some questions you should ask a prospective contractor before awarding him your wooden deck build: –

What materials is he going to use? Balau is by far the best for the surface of your deck. There are others and they tend to increase in price, but balau is by far your most cost-effective hard wood. It is quite acceptable to use CCA treated pine as a substructure provided he is sourcing it from a reputable supplier who is regularly tested by SABS to ensure he is conforming to their standards.

Make sure he is using the correct hazard classification (H1 – H5) in his substructure. H2 CCA Pine is good for roofing where it is not subjected to the elements. H3 is good for outdoors in the rain and H4 is good for in the ground or in constant contact with wet soil. H5 is good for in water and H6 is good for in salt water. If he claims to be using balau as a substructure make sure he installs balau when he starts and stop the works if he does not. Many people won’t know the difference between pine and balau especially if he has coated it to make it darker. Meranti too can look very similar to balau. Check the delivery note when the supplier delivers it to your property to make sure it is in fact balau and not meranti or some other unsuitable timber.
Ask him what screws he is using. Kalgard coated screws are good. Stainless steel screws are even better. Ask him if he intends to close the screw hole with epoxy to prevent water getting in thereby increasing the chance of rot at the screw hole.
Check what his maximum spans are on his beams and joists. A piece of wood can only be spanned a certain distance before it breaks. Beams of 50 x 228 should only be spanned a max of 3m and 38 x 114 joists should only be spanned a maximum of 1.8 to 2.0m. Posts should be set in concrete to at least 600mm unless the deck is low-level in which case they can be set at about 300.
By asking a few questions about how he intends to build it and what he intends to use you will quickly learn if he knows what he is talking about or not.

In the picture alongside we built a narrow deck of 9m x 1m to extend the paved area next to the pool.

For a free no obligation quote or just for some advice please feel free to contact us on 082 496 5444 or use the form below.

Go back

Your message has been sent

Warning
Warning
Warning
Warning
Warning

Warning.


Wooden Decking Durban

Wooden decking Durban

Click to enlarge

I haven’t written or posted an article on wooden decking in Durban here for a while. The main reason is that we have been extremely busy building wooden sundecks in Durban. It is quite odd to be this busy in the middle of winter. Normally people want their sundecks built-in summer and winter is traditionally quiet in this industry for both builders and suppliers. I can only think it is because we have had quite a mild winter in Durban and as a result people have been installing sundecks rather than fire places. This coupled with the fact that we lowered our prices in about April 2013 after implementing a few cost saving techniques and securing our timber at very reasonable rates without affecting the quality. I hope this continues into the summer and carries us right up to the end of the year with flat-out building jobs.

We were awarded a 90m² wooden sundeck in Toti recently. It was to be installed on top of an existing concrete slab that doubled up as the roof of the parking area beneath. The concrete had just been waterproofed using Torch On so we could not secure our batons, or joists to the surface by drilling. We brought the level of the deck up so that the existing balustrade would be 1m above the surface of the deck. The existing concrete slab was about 1.4m below the top of the balustrade so we had about 400mm to raise it which allowed us enough space to build a super structure with 38 x 152 beams and 38 x 114 joists with a 19mm deckboard on top. This allowed us to keep the beams and joists off the surface and we installed 76 x 76 square posts to the beams to support it. Because we were using 38 x 152 beams we had to install posts more often as opposed to the 38 x 228 beams where the posts can be installed less frequently. The posts sat on top of some 3mm closed cell insertion rubber cut to 100mm x 100mm squares to stop the posts from cutting into the waterproofing over time. This system allowed us to suspend the superstructure as a sort of floating structure without having to secure anything to the concrete surface so that we didn’t need to damage the waterproofing. Again we used an H3 CCA Treated Pine substructure and balau deckboards.

Wooden decking Durban

Click to enlarge

This time around we spaced our joists perfectly so that we only had to waste a small amount of deckboards as off cuts. We did this by slotting an extra deckboard in where we had to, to prevent having an off cut of 400mm or so. We calculated that we would have about R5, 000-00 worth of 400mm off cuts if we had cut these. So it made sense to rather spend the money on a few extra joists than the off cuts.

We sprayed this deck with sealer rather than using a brush. We brushed the edges as it can often make a mess against the wall spraying it on and then sprayed the entire surface. Because we are using oil based sealer there is no chance of runs or streaks so it is quite safe to spray it on and we saved at least a day or two. Our biggest time consumer on this job was getting our timber up to the first floor. The service lift was big enough to take our deckboards from corner to corner, but was out-of-order on the day, so we carried them up two flights of stairs. The longer pieces had to be hauled 6m up the side of the building using ropes attached to each side of the timber. In hindsight we should have hauled the deckboards up that way too.

Wooden decking Durban

Click to enlarge

For a free no obligation quote or just to ask some advice on building your wooden deck, please contact me using the form below or you can call us on 082 496 5444.

Go back

Your message has been sent

Warning
Warning
Warning
Warning
Warning

Warning.