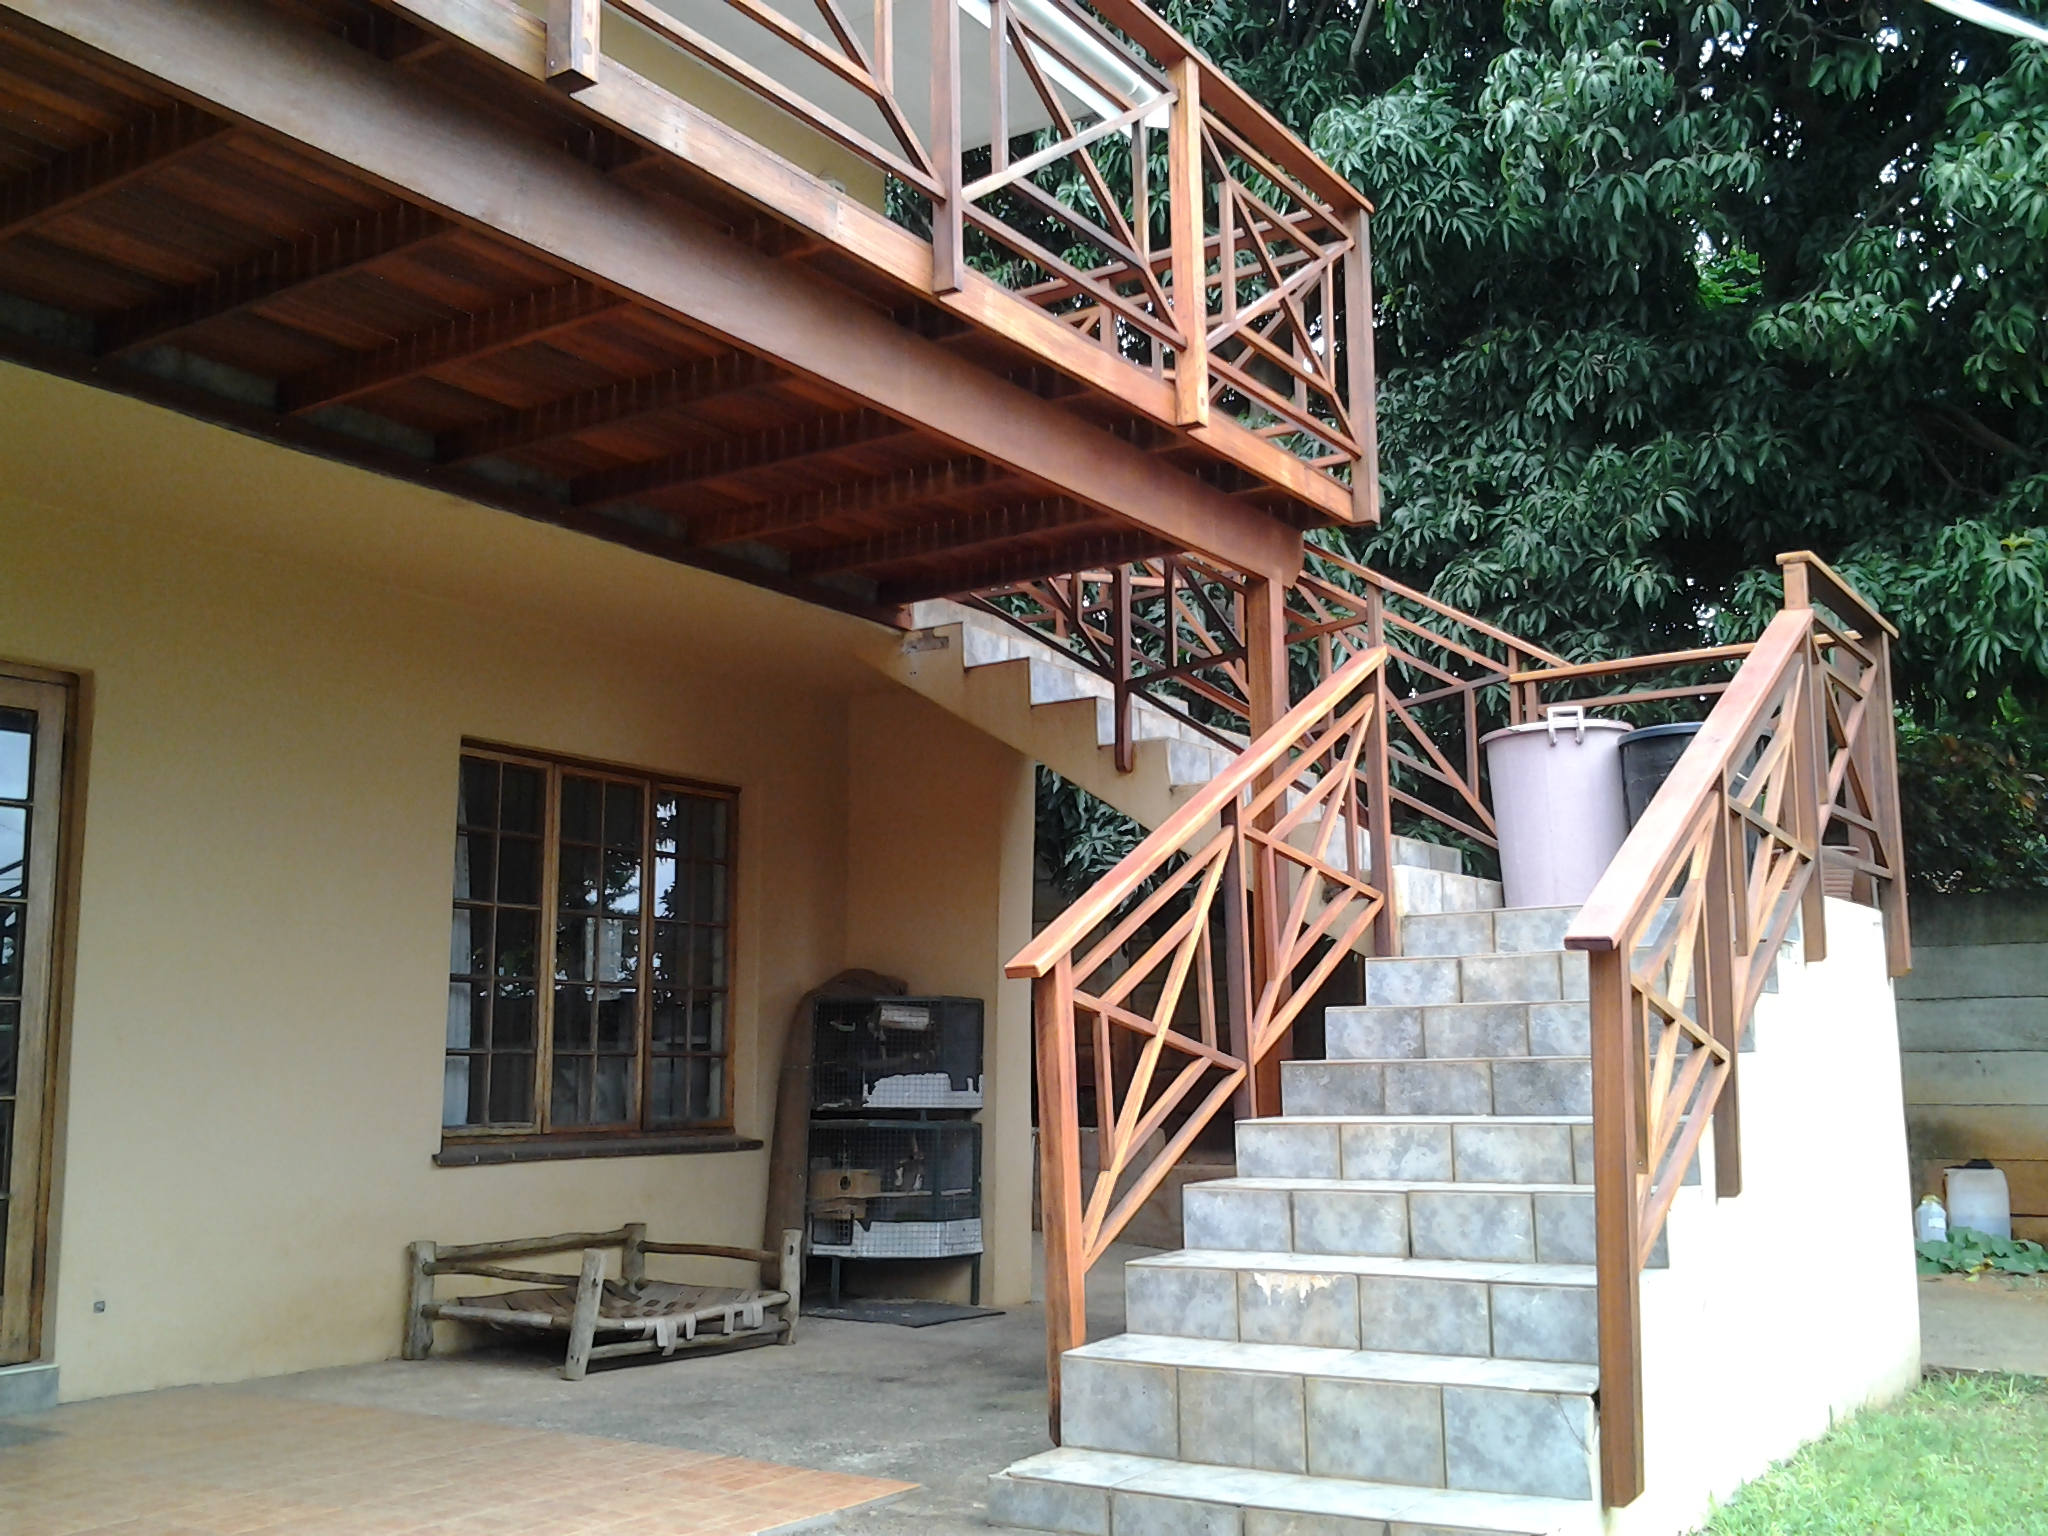
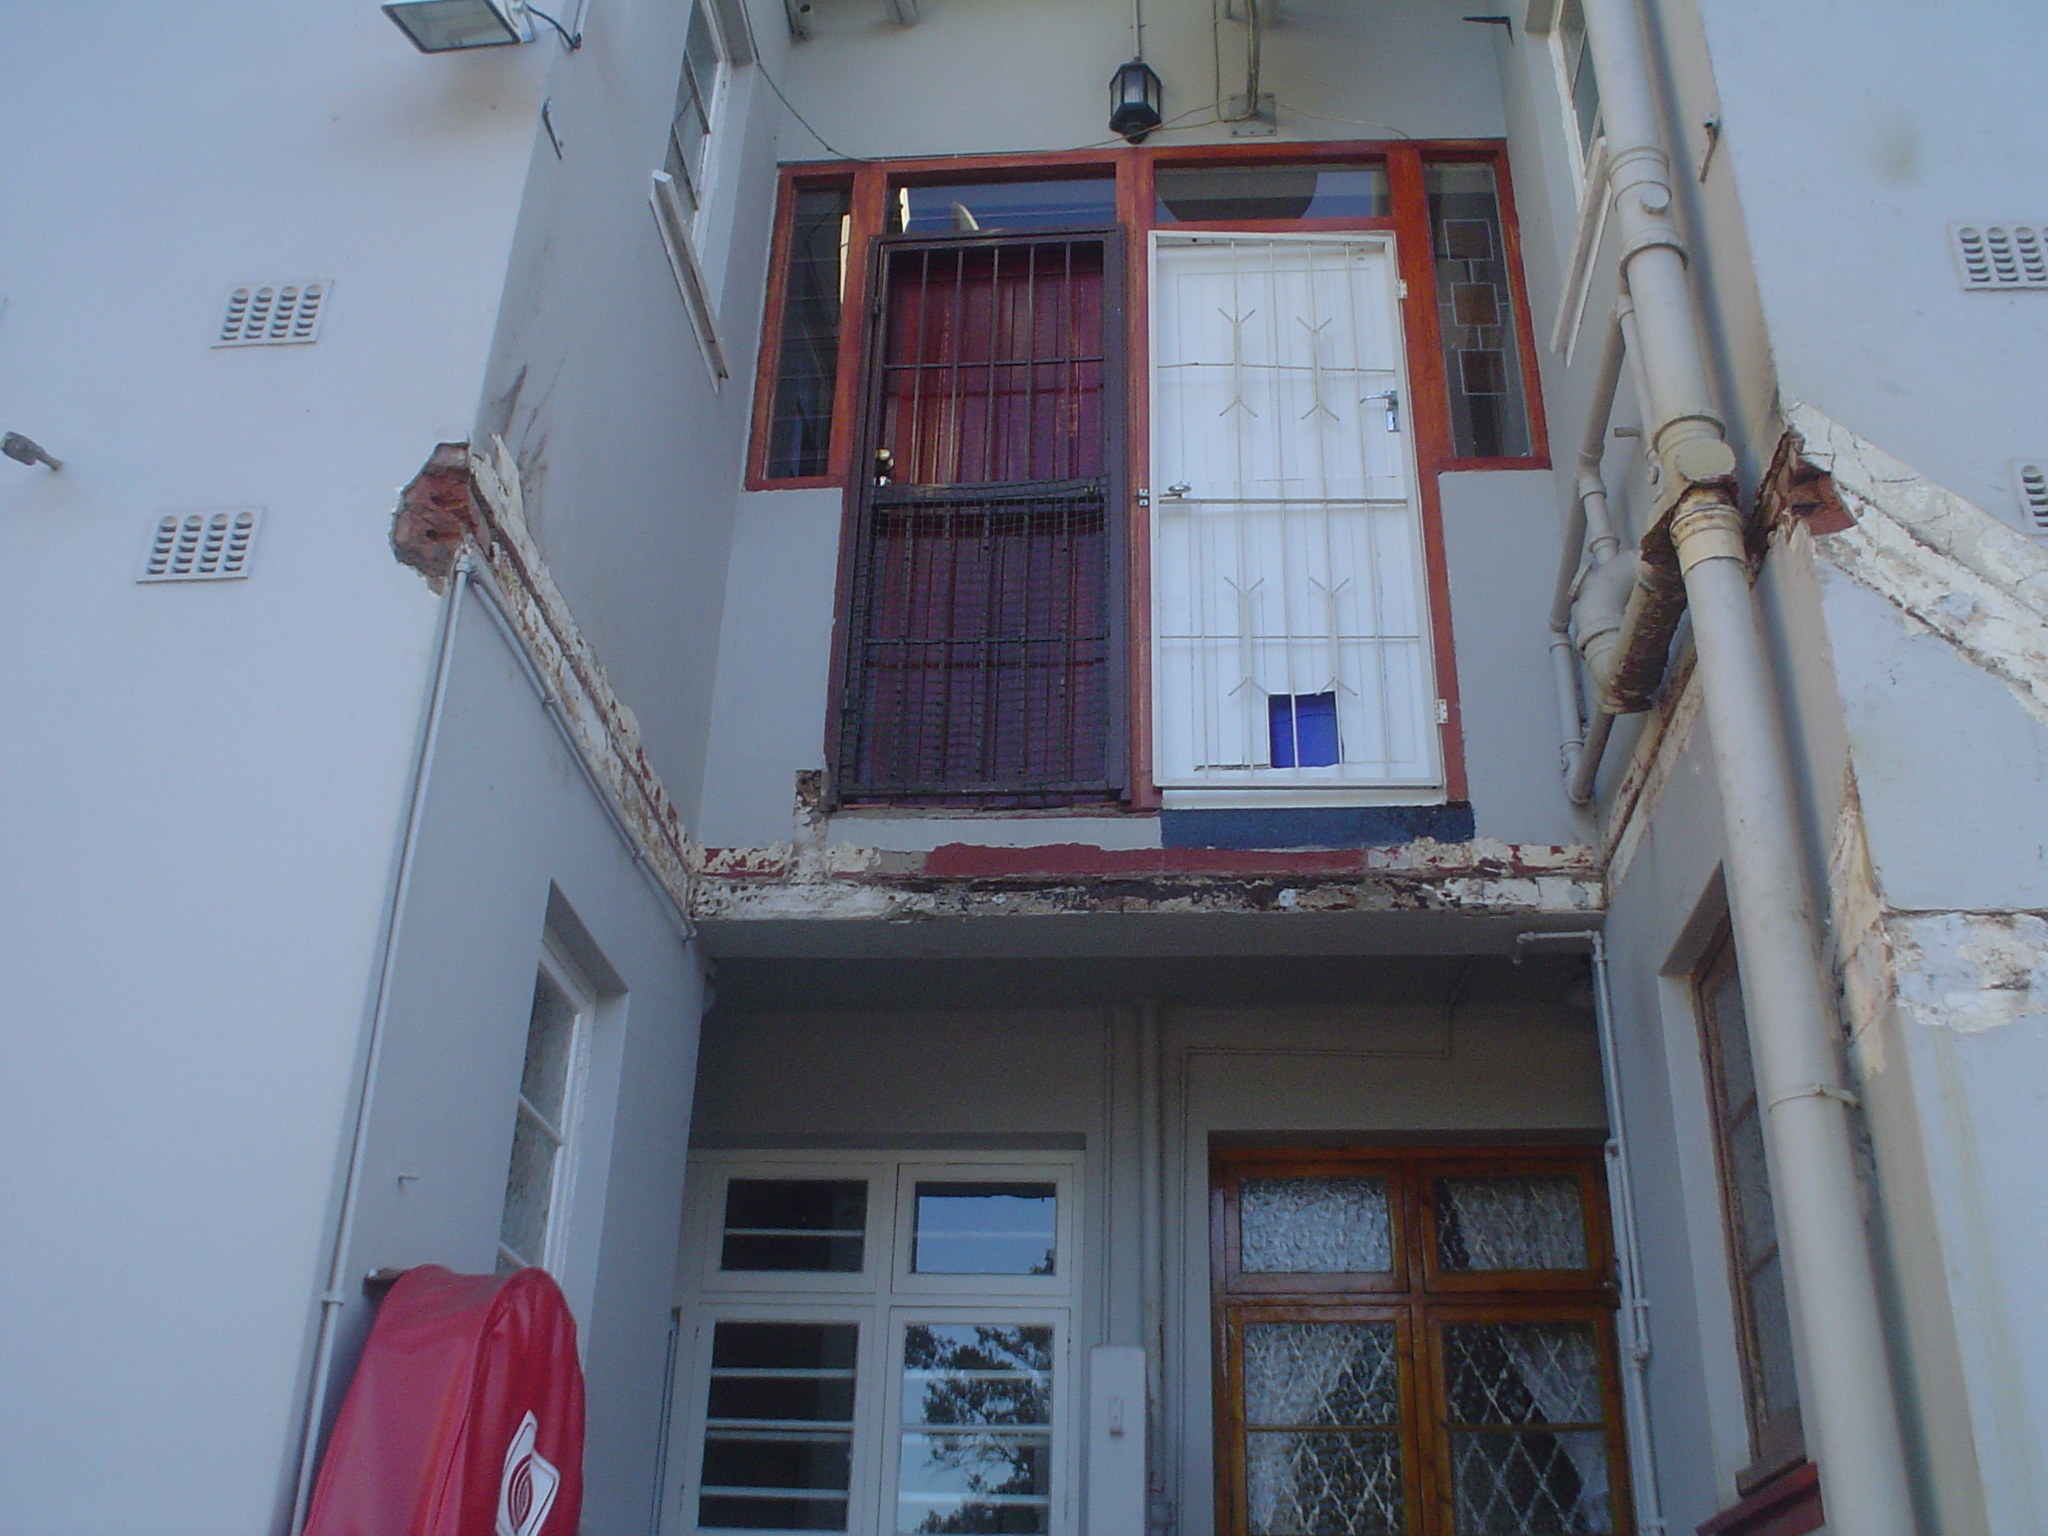
Balau Screening in Cotswold Downs – June 2013

Balau or timber screening

Click to enlarge

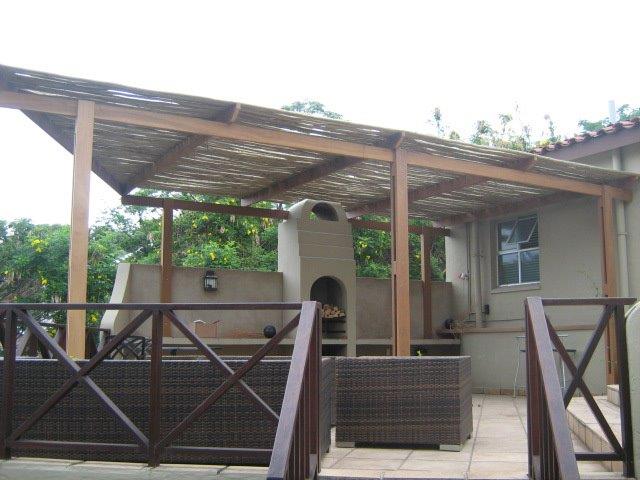
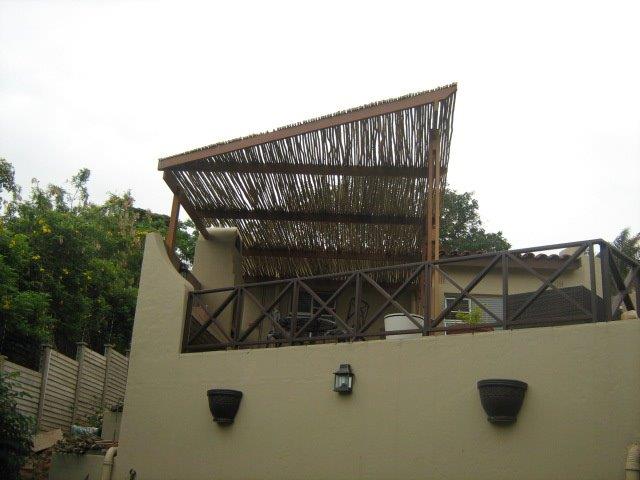
We were called upon to quote on some balau screening in the Hillcrest, Durban area at a new development called Cotswold Downs.

There were various aircons, heat pumps and gas bottles that needed to be clad or screened so as to conceal them.

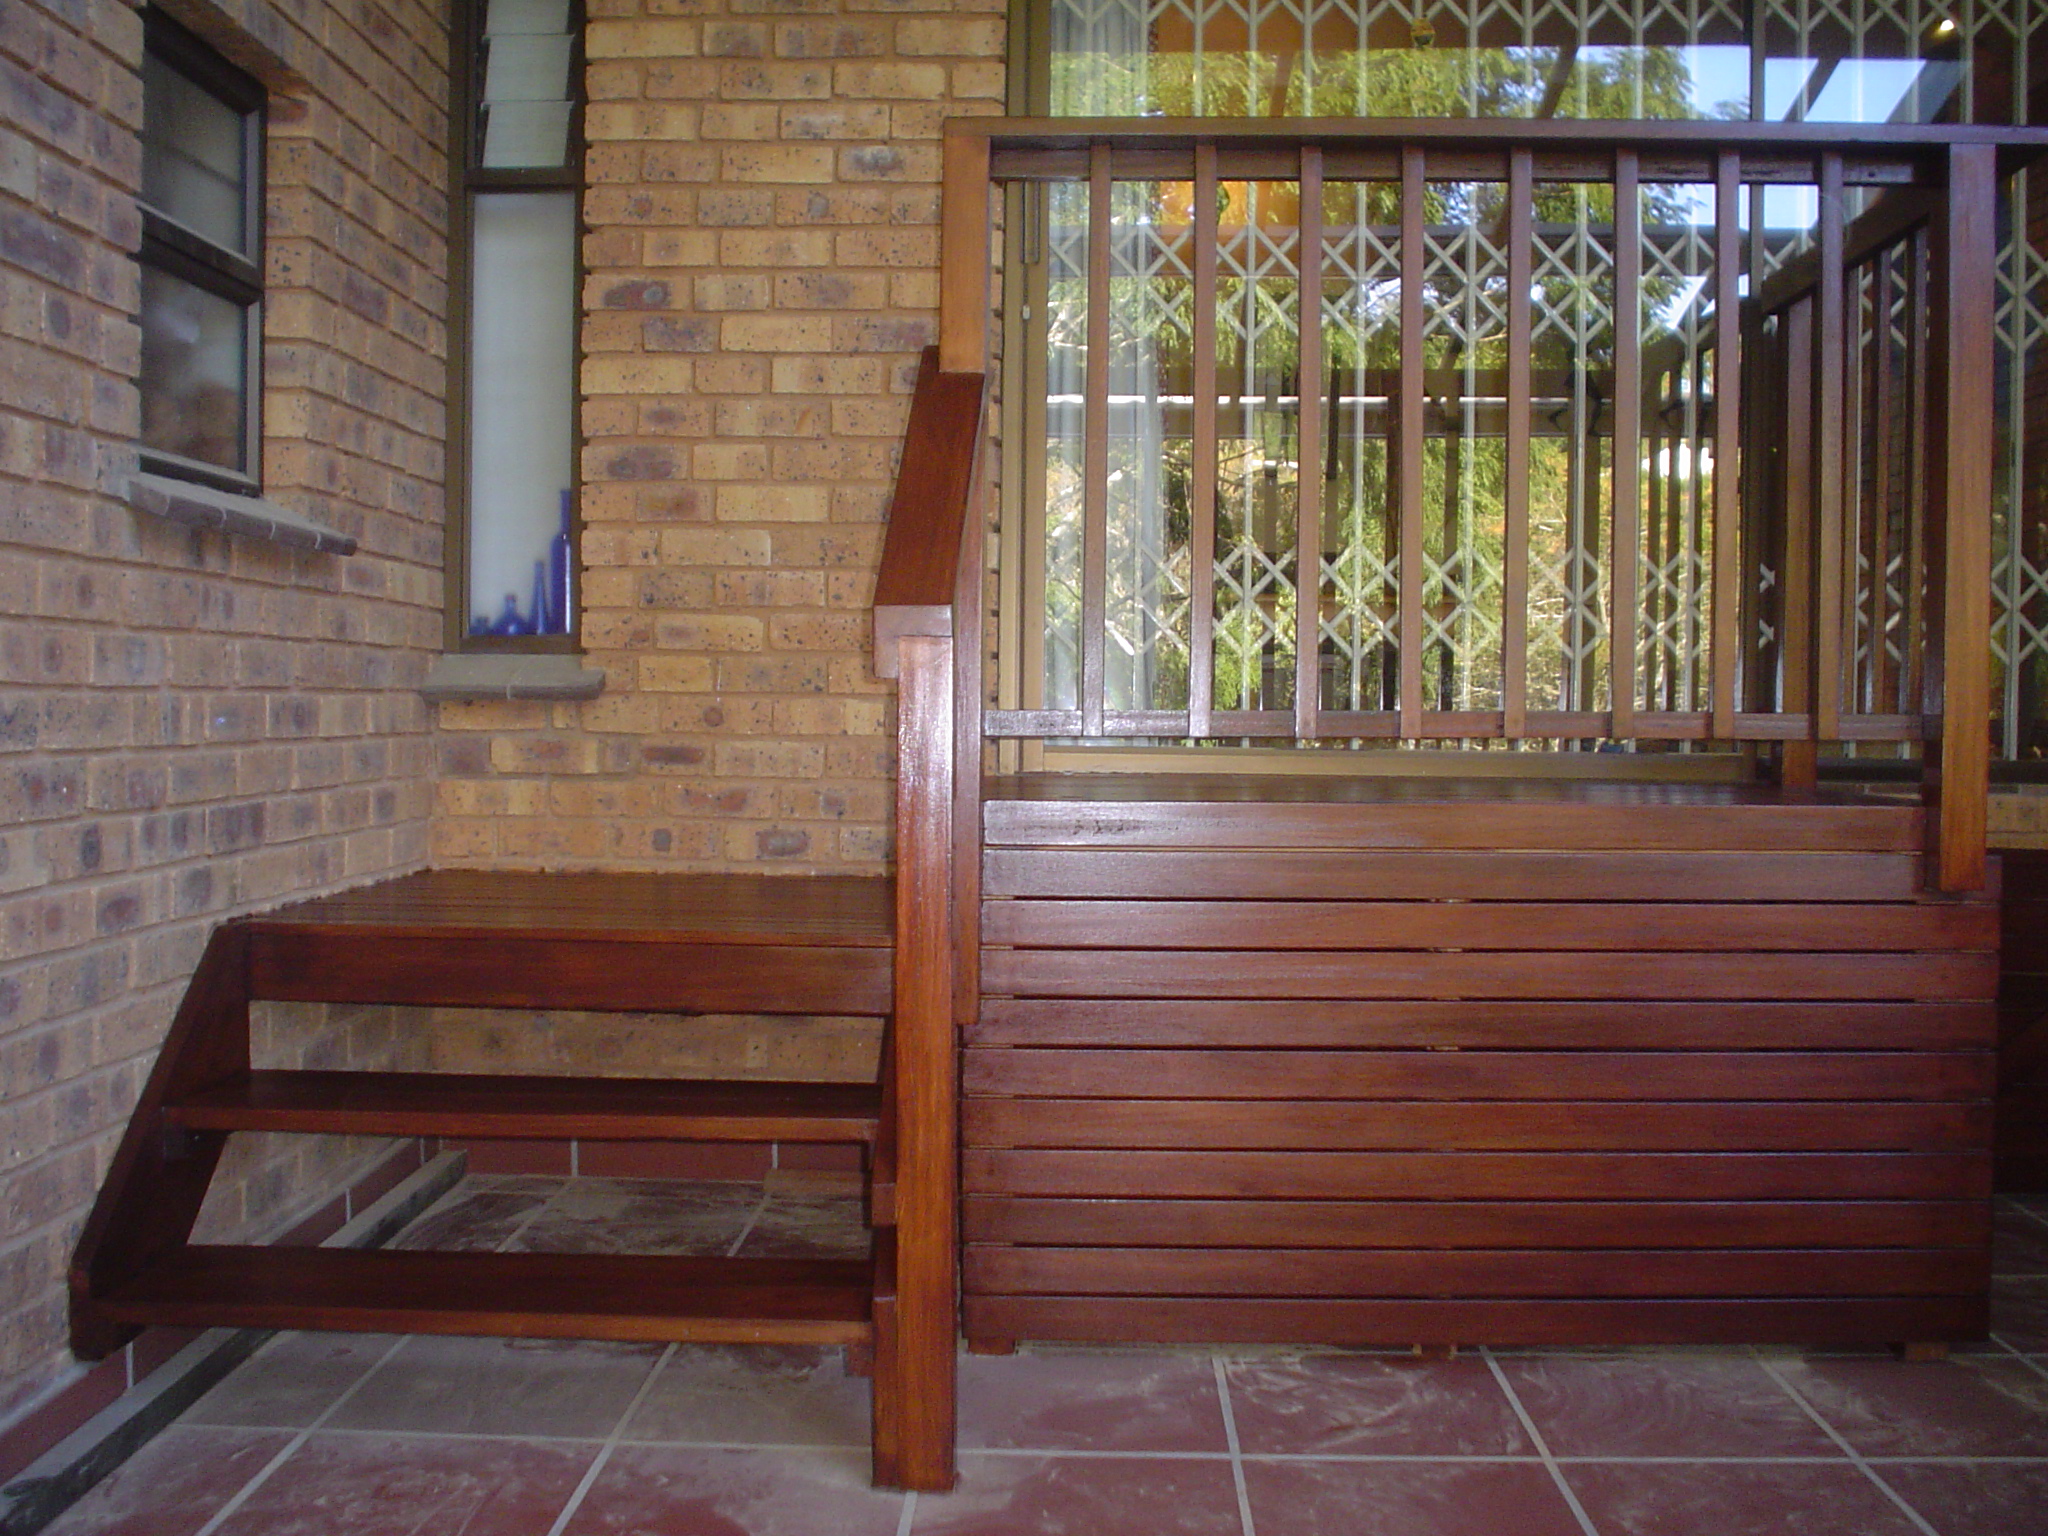
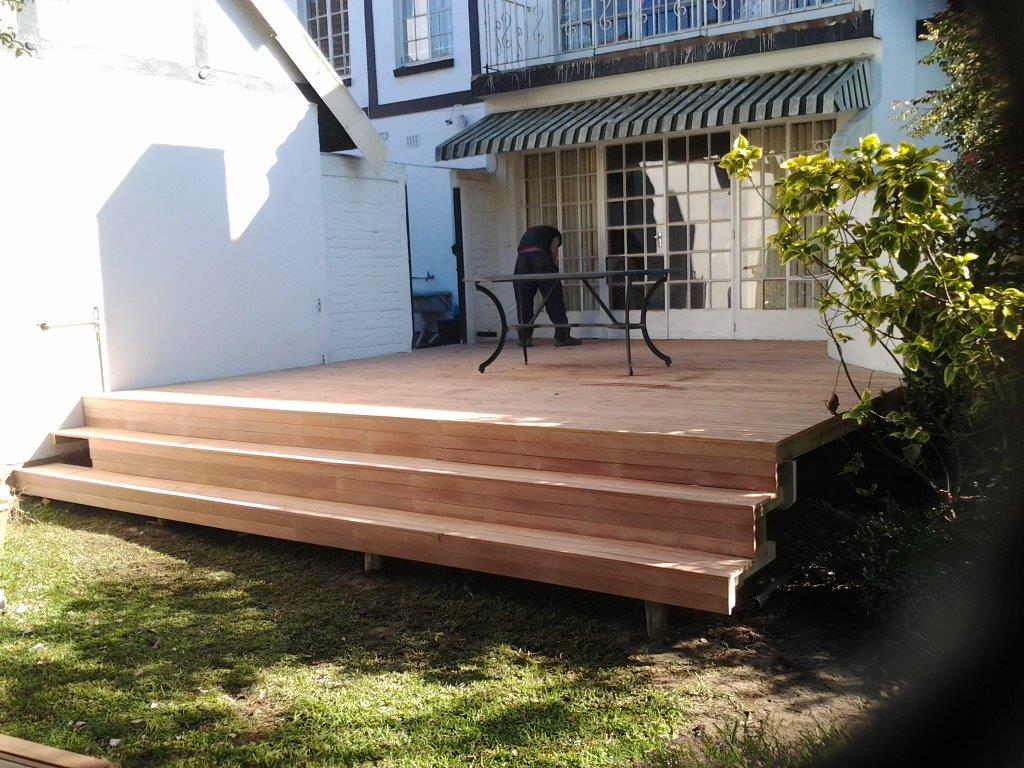
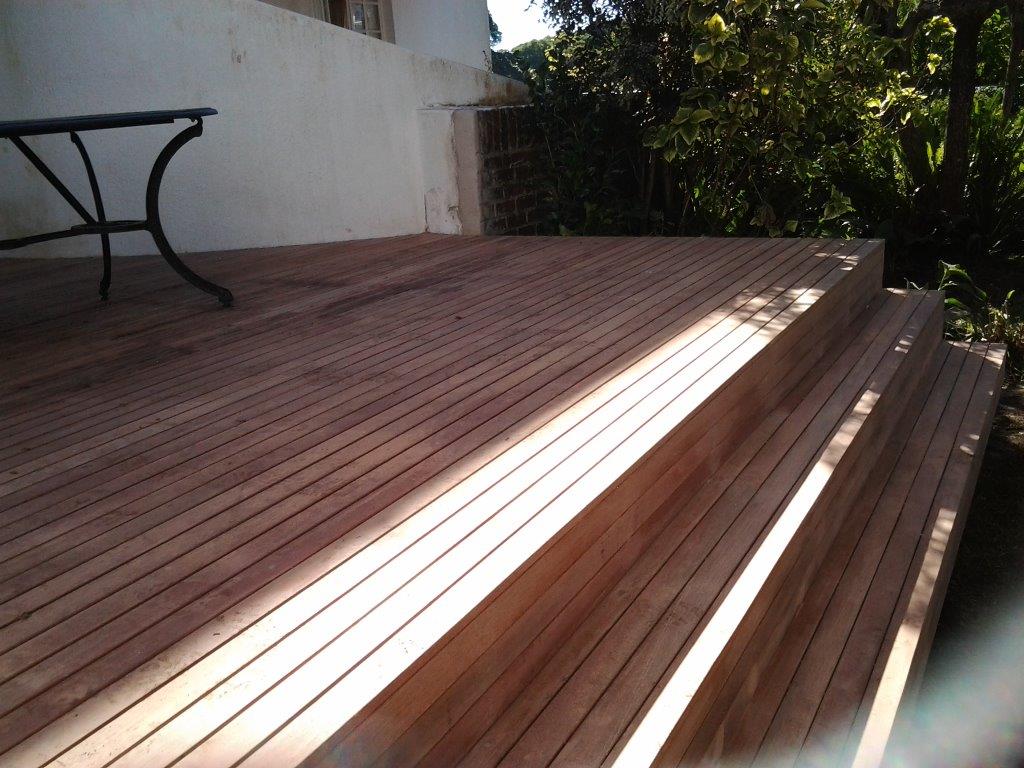
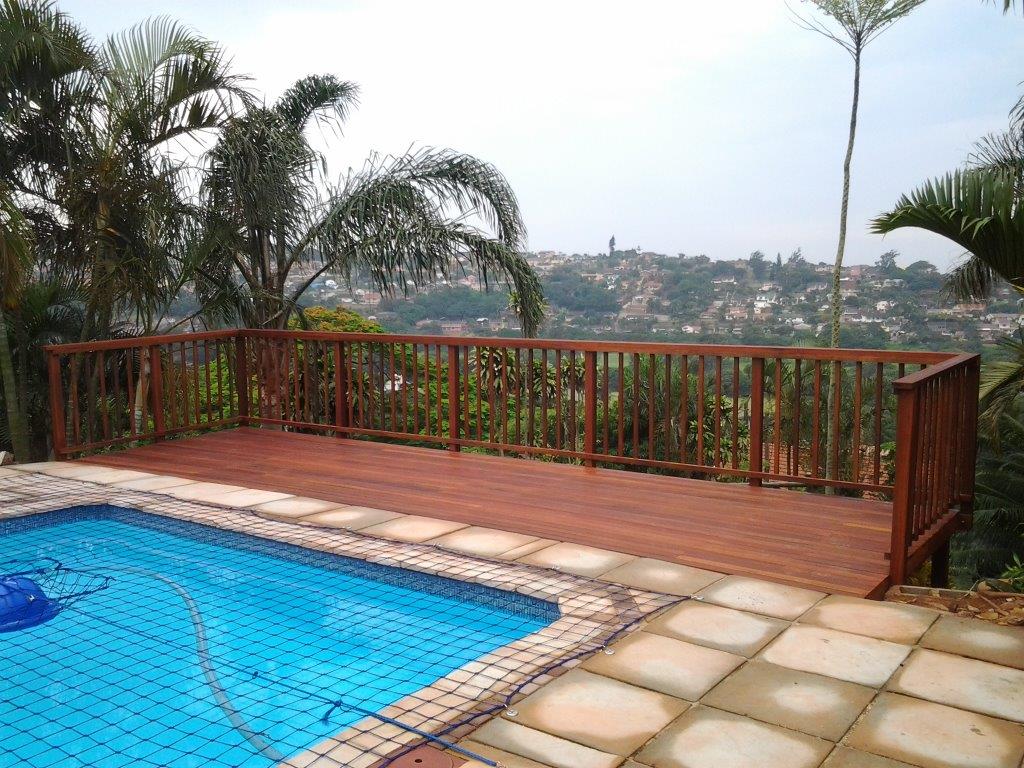
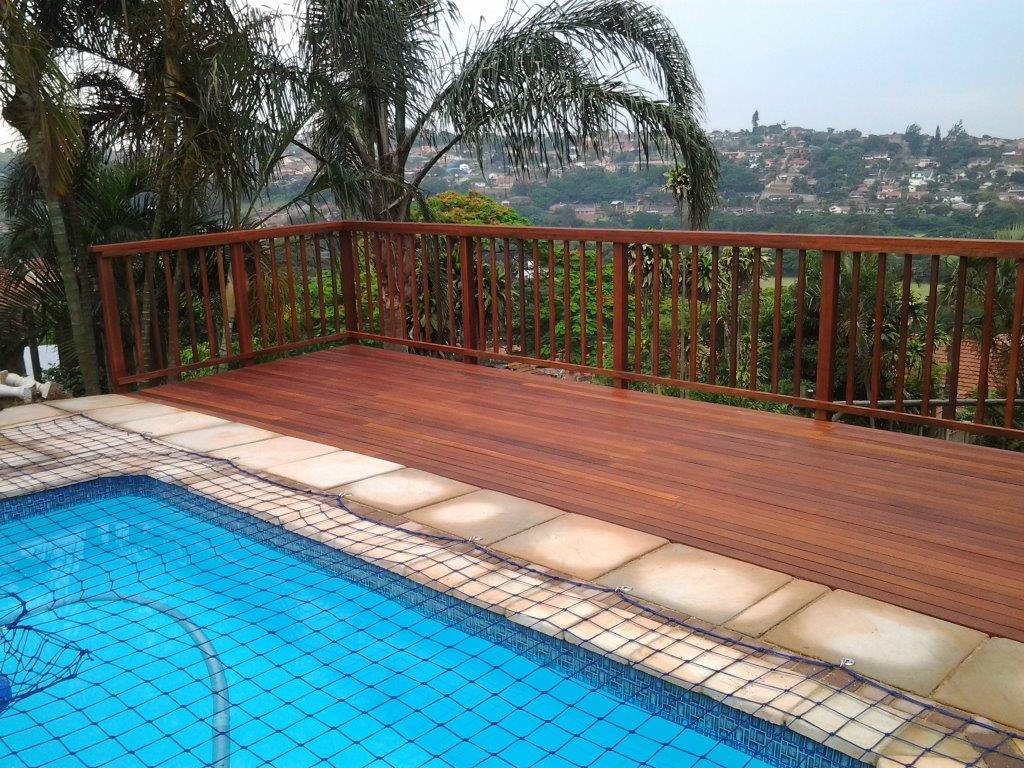
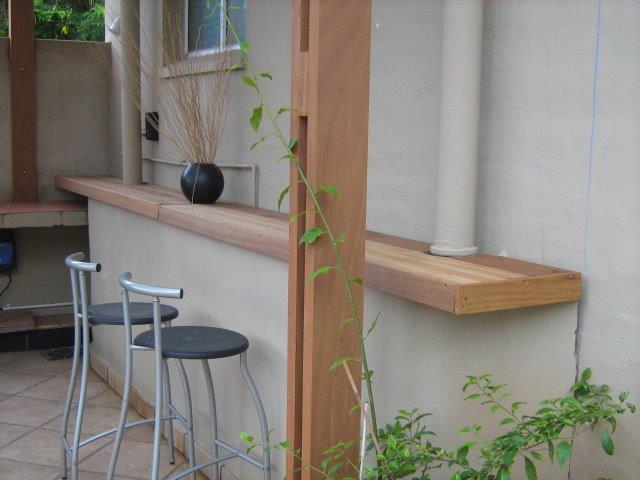
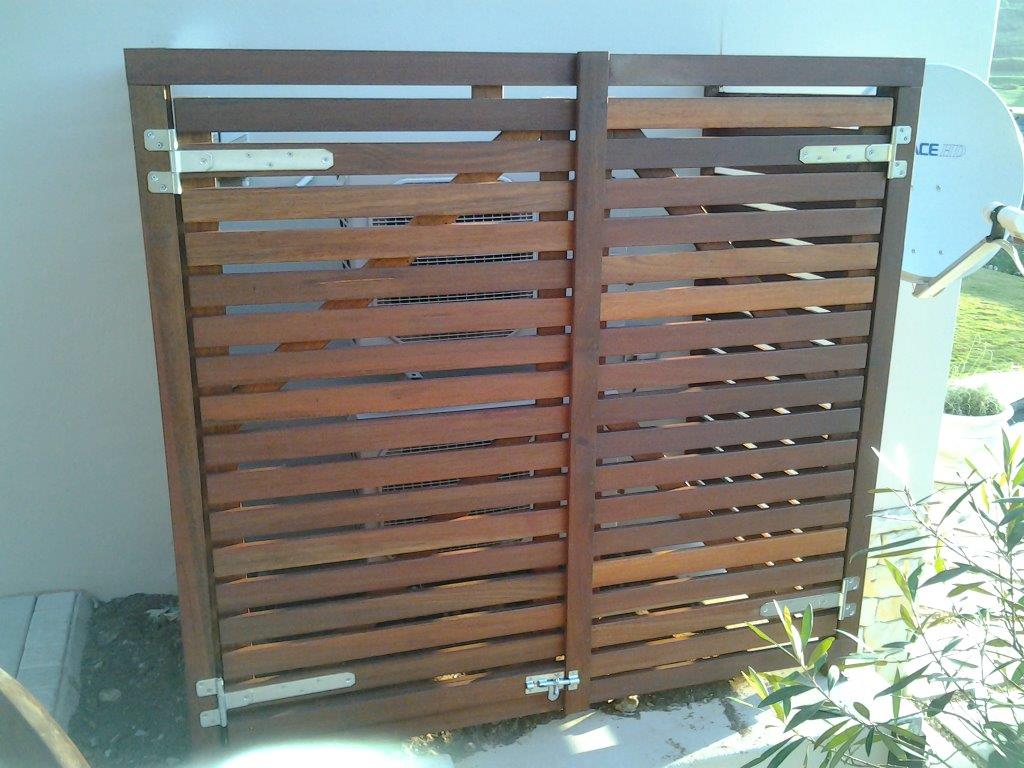
We used balau 30 x 40 struts or cleats attached to the walls. In some instances we used hiltis as there was not much load on the cleat.   In other instances we used 10mm x 100mm sleeve anchors.  We built a frame using the 30 x 40 balau and then clad it using a standard deck board of 19 x 68 with a 19mm space between. The 19mm space is standard in screening or cladding as it provides enough coverage without being too tight in its appearance. A gap of 5mm, which is standard in building a deck, would be far too close and would give it an odd appearance.

Most of the structures we built here were simple enough with either two or three sides and a removable lid so that access could be gained to change gas bottles or service aircons. Some of them had to have fronts
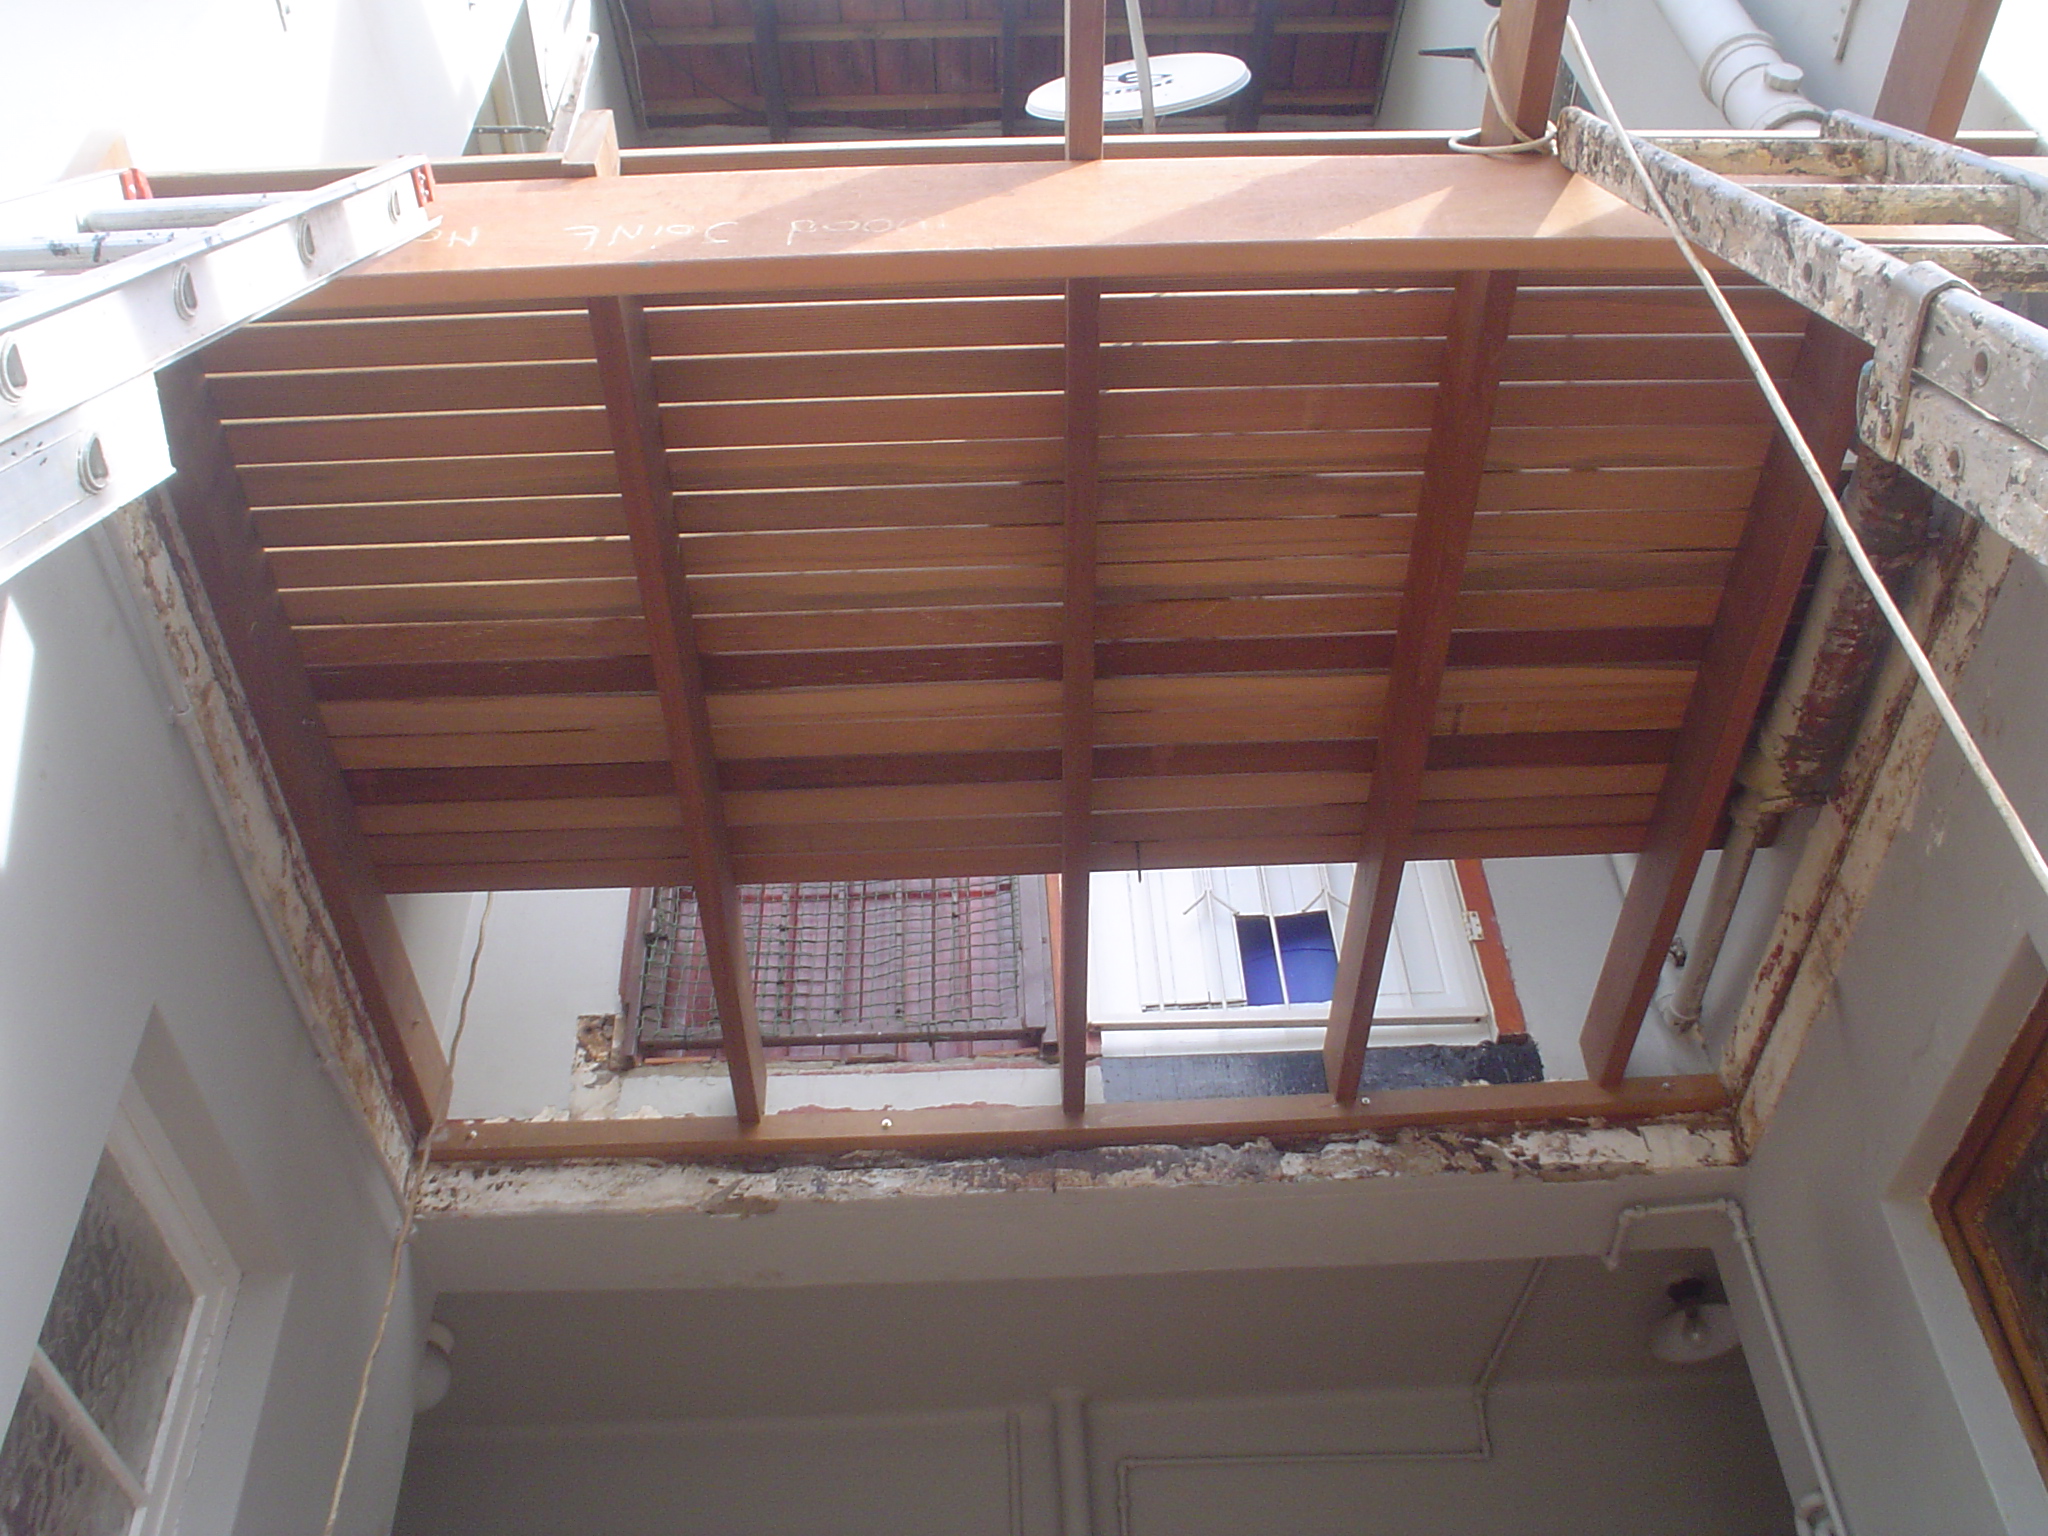
Balau or timber screening

Click to enlarge

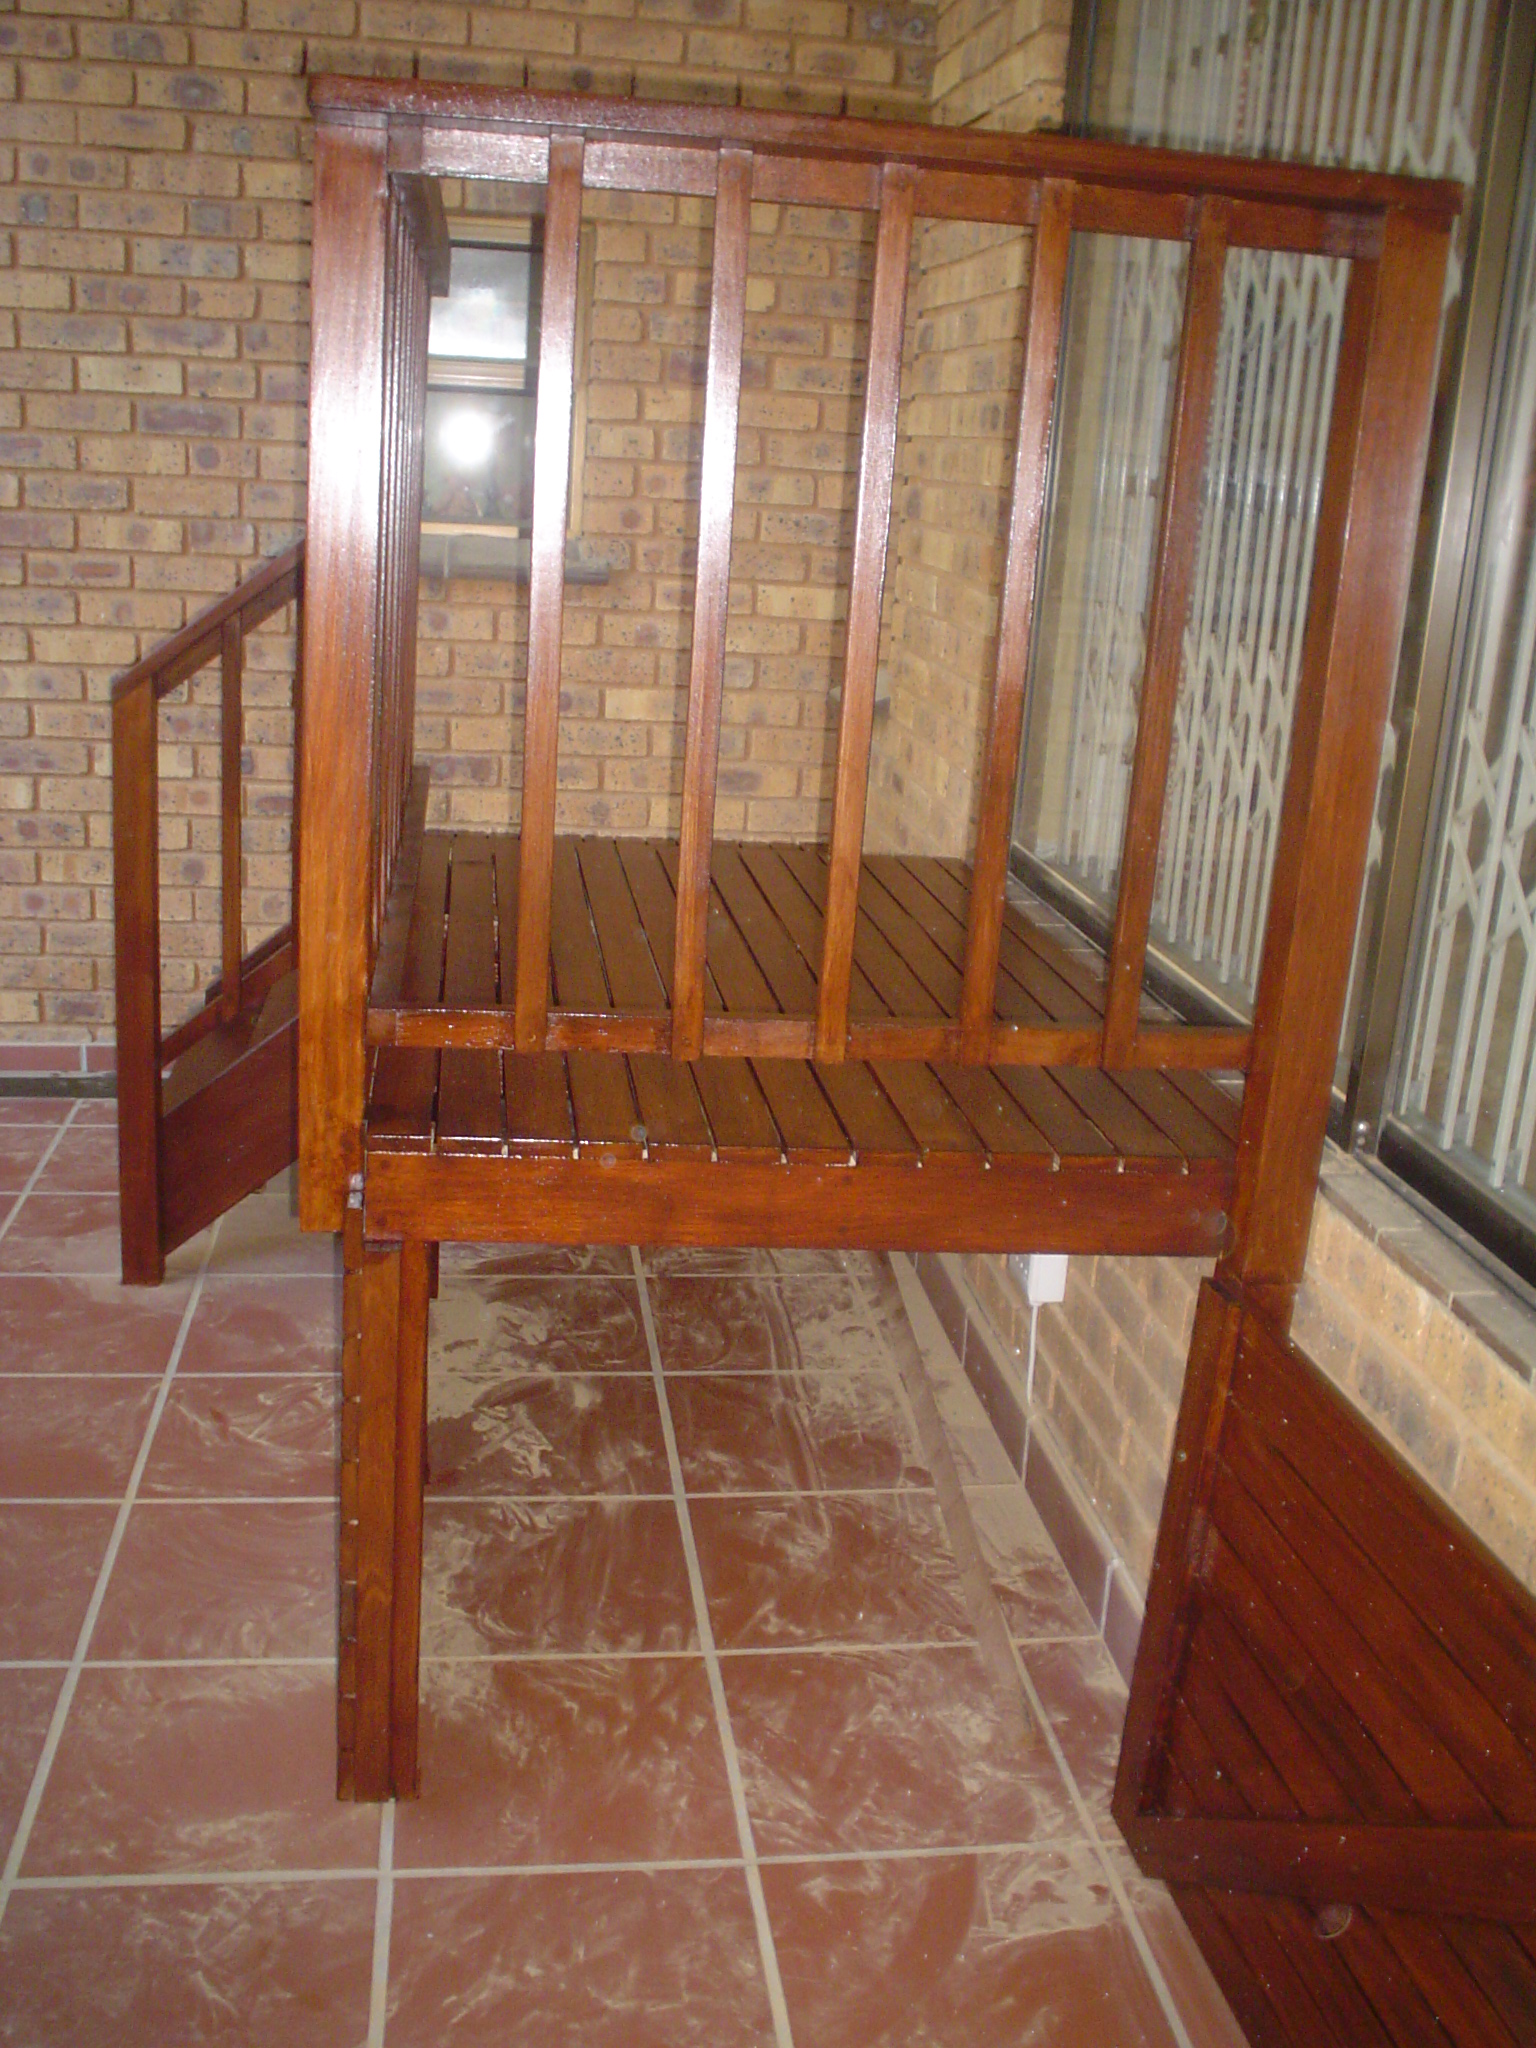
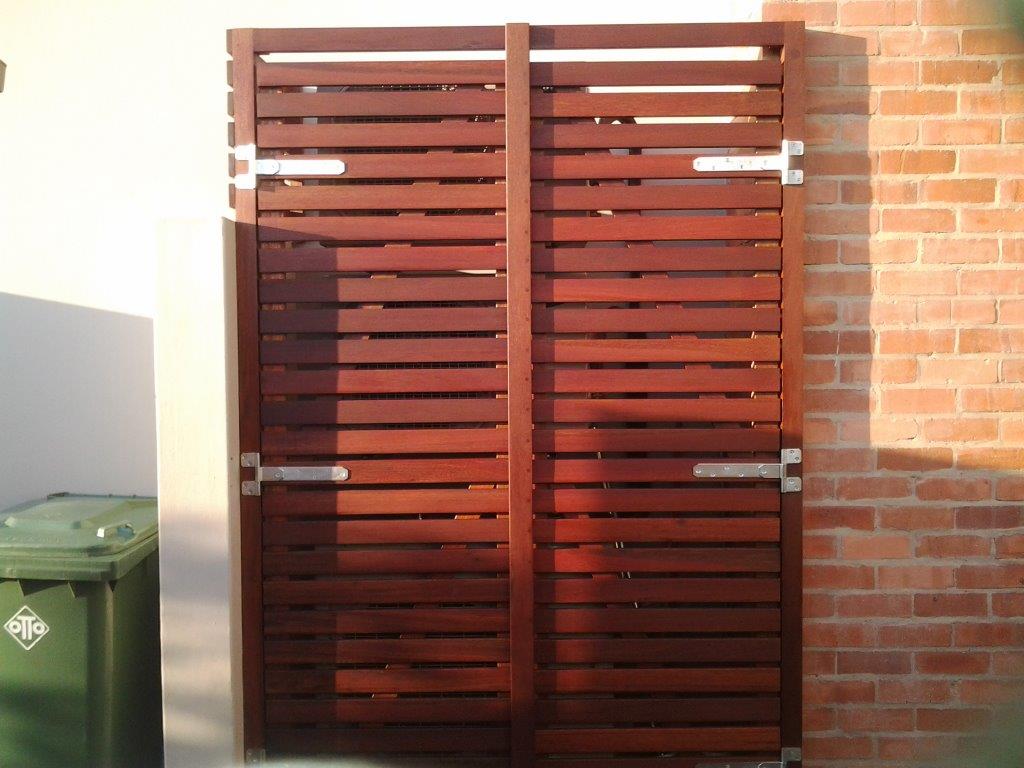
that were removable as well as tops so that access could be gained from above or from the front. Some were removable lids and fronts and some were hinged. One needs to be careful which hinges you chose as they need to be strong enough and weather resistant. Solid brass hinges are expensive and with the weight of the balau can be problematic. Solid stainless hinges with bearings are best if the weight of the door is quite large. On the smaller door we used aluminium hinges as the door wasn’t too heavy and the aluminium will stand up the weather.

There were two doors we made which measured 2.5m high and 750mm wide each. That size door in balau is quite heavy and we used three galvanised strap hinges on either side. The only problem with strap hinges is that they need to be placed on the side of the door that opens, so they were visible on the outside. Some may say it adds character to the door, but sometimes you don’t want to see them. Being galvanised steel they are difficult to paint but can be painted with a Hammerite product specially designed for galvanised steel.  The only other alternative to these were to use the galvanised strap hinges that have a bent arm and slot into another piece attached to the frame. However these would have resulted in a large gap between the frame and the door or gate. Normal butt hinges wouldn’t have been strong enough to hold the door due to the sheer weight of them in balau.
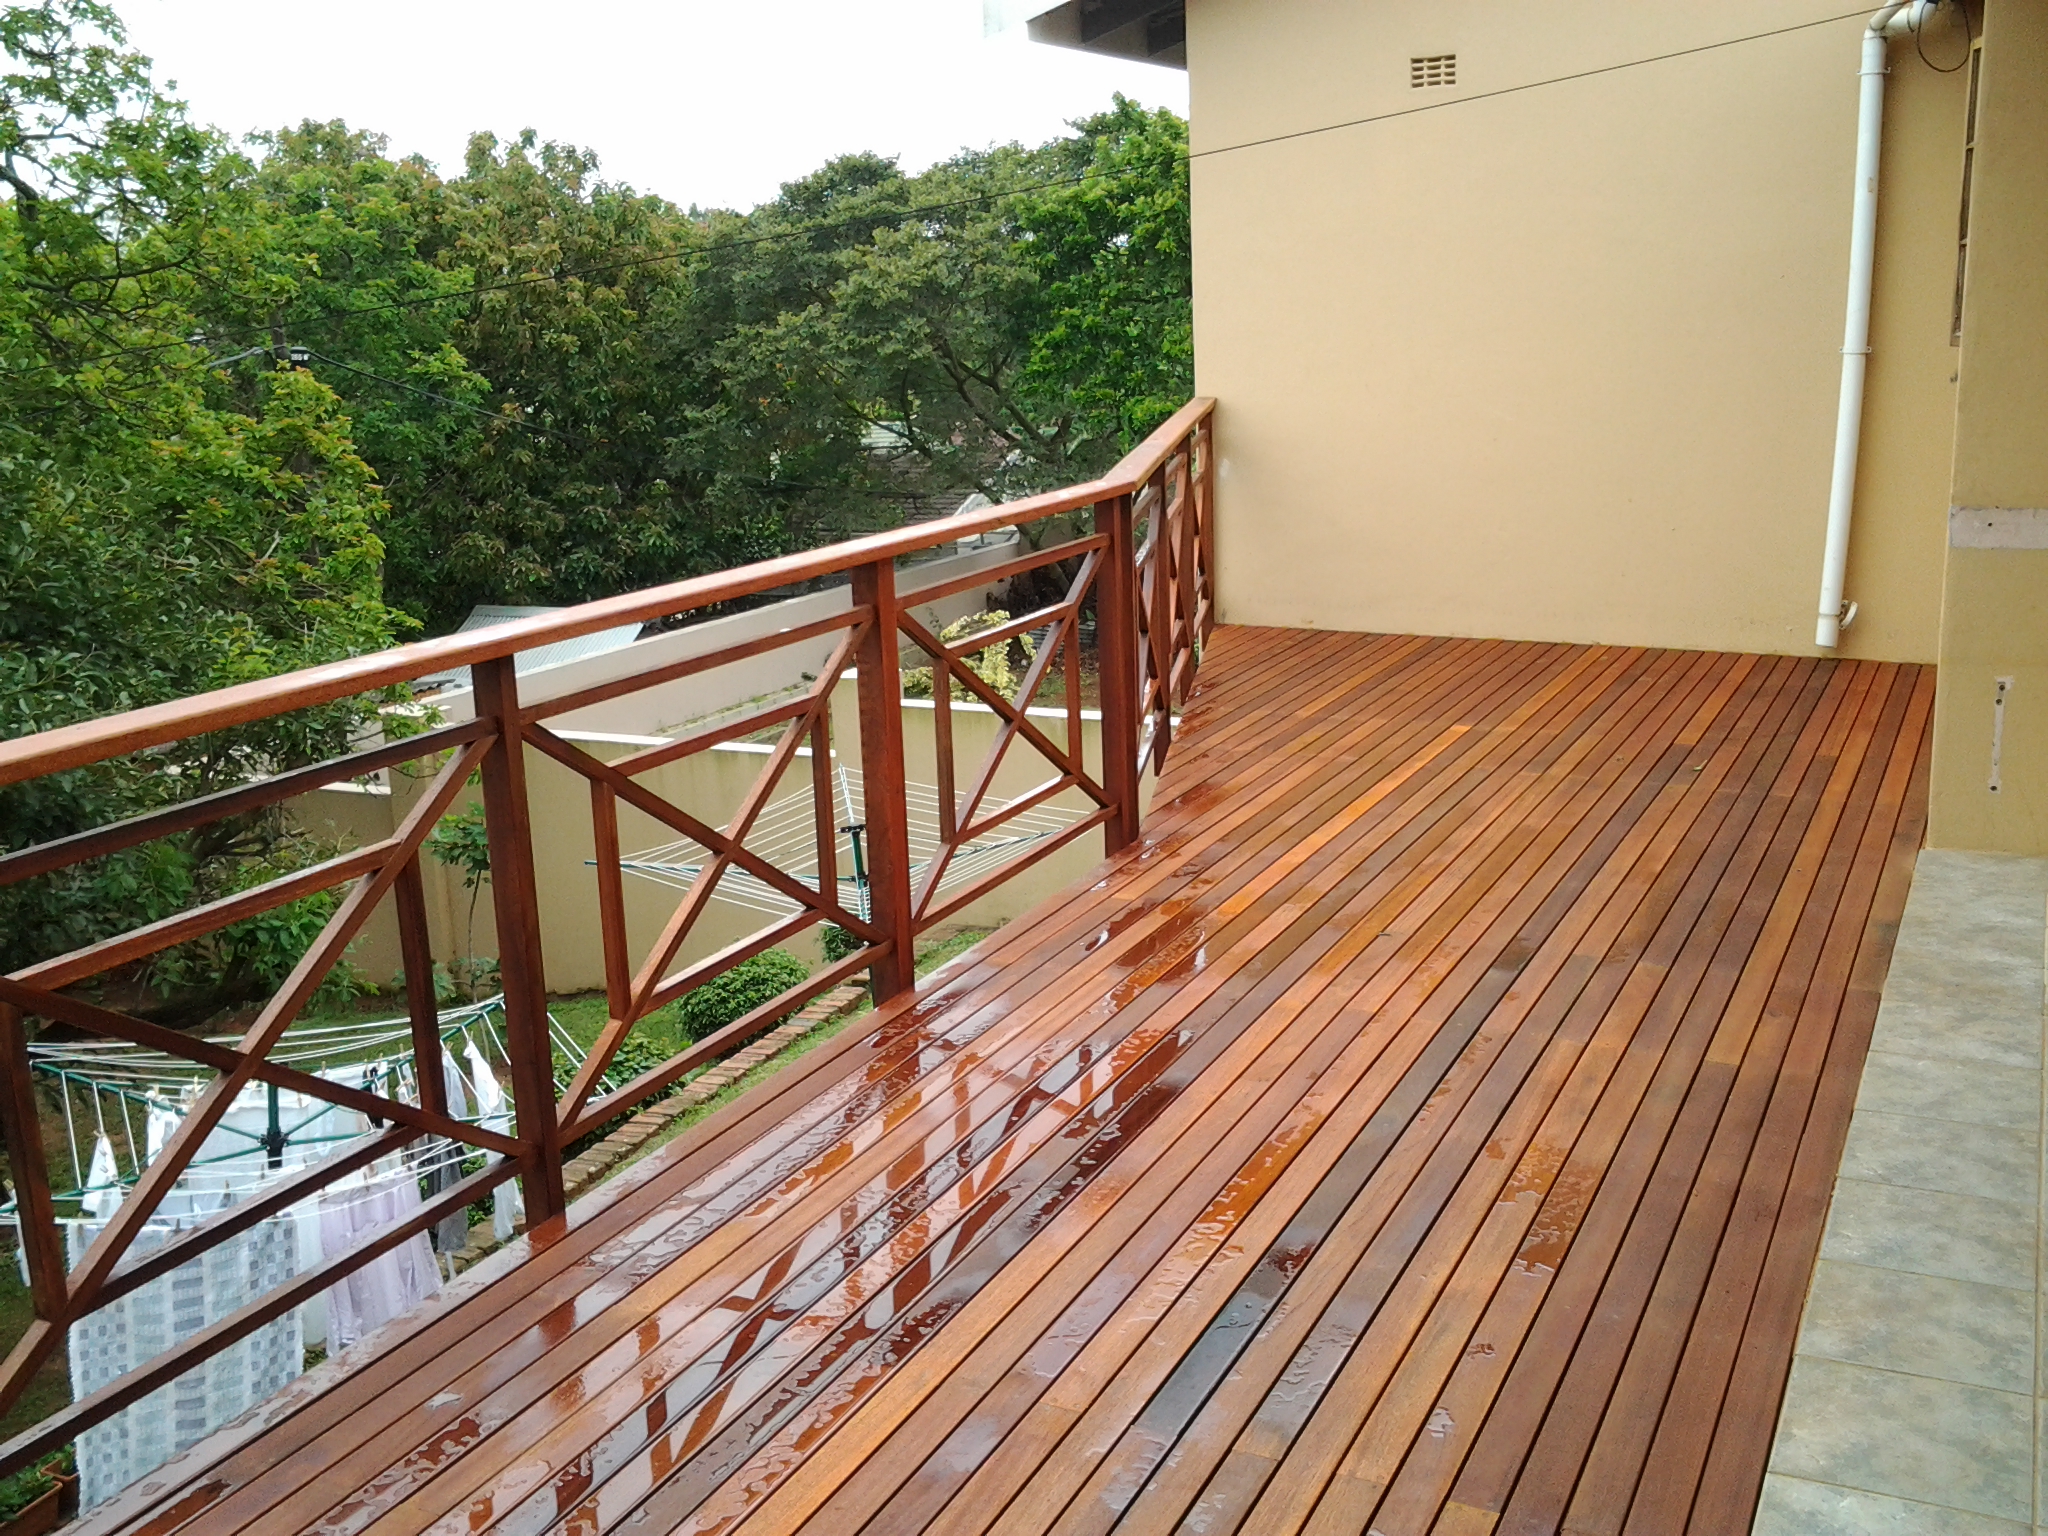
Balau or timber screening

Click to enlarge

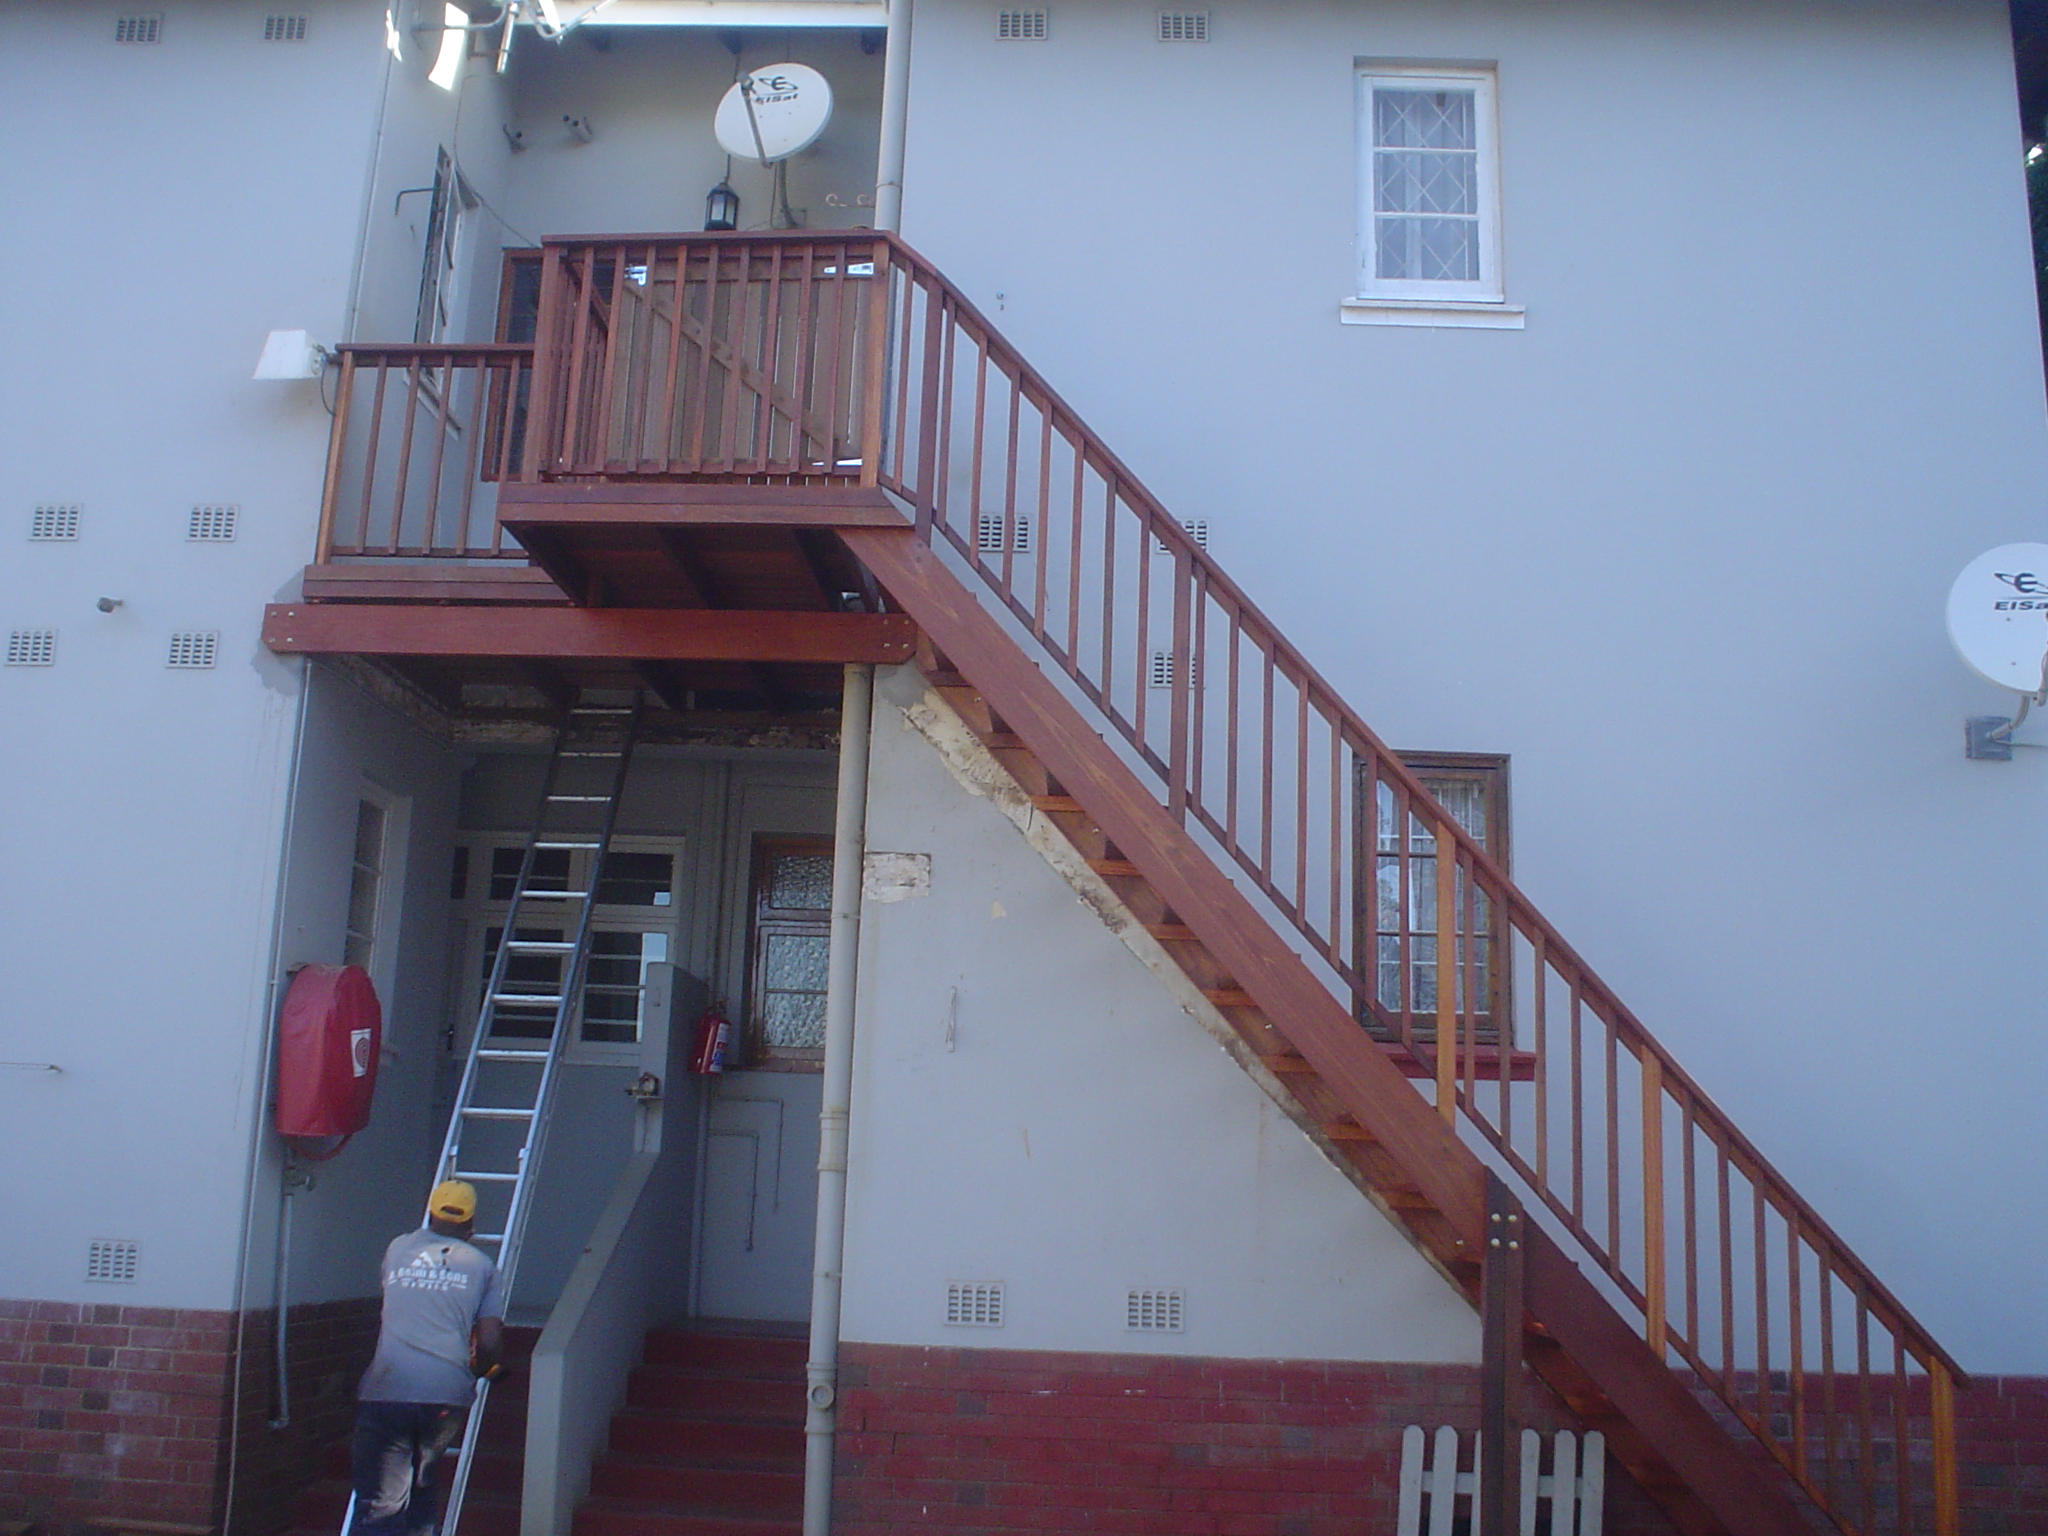
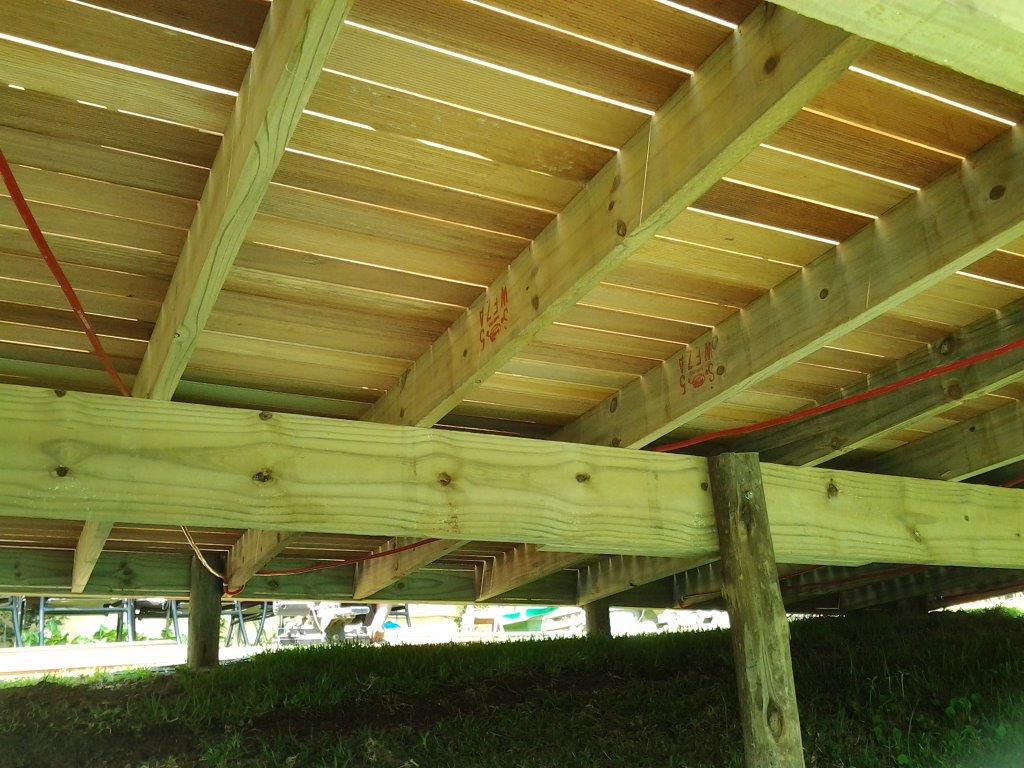
When building this type of structure it is often easier to try to build the whole thing in situ. So a frame goes up first, then you set the braces at the back to the correct length and then start adding deckboards, leaving one side long which can be cut afterwards.  If it is quite large then the door needs to be built on the ground, leaving the ends long and hung, then cut in situ.

They are unlike a normal door in that they can’t be successfully planned to fit the frame because the end grain is on the side.

We finished them off by filling holes with epoxy, sanding flat and sealing with Timberlife Satin Wood Base 28 in a mahogany tint.

For a free no obligation quote or advice on your decking or screening requirements please complete the form below and I will contact you, or you can call us on 082 496 5444.

Go back

Your message has been sent

Warning
Warning
Warning
Warning
Warning

Warning.

Wooden Stairs Built in Cowies Hill, Durban

Wooden stairs Durban

Click to enlarge

These wooden stairs we built in were quite interesting because the client had a dining room which was raised about 600 from the patio outside. He wanted to be able to access the dining room through the new sliding doors. So we designed a small landing and some stairs to fit snugly in on one side so as to not take up too much space on the patio yet still allow a safe passage down the stairs. There were only a total of two treads plus the landing. It not only added value by creating an access point but also added charm with wood.

We built the entire landing on the ground from balau, screwed it all together and then lifted it into place and attached it to two walls of the house using sleeve anchors. This method also kept the whole landing in the same plane i.e. no cleat and joist system but rather a joist and fascia beam system. Each method has their own applications. If it is a fairly large deck where it would be impossible to attach each joist to the beam and then lift it into place, then one would need to use a cleat, beam and joist system. However where it is possible to attach each joist to the beam or fascia beam then it can be semi pre assembled and lifted into place. This can also successfully be done with a deck that is quite close to ground as the ends of the joists can be supported quite easily while the other ends are attached to the fascia beam which is then attached to the wall. However a deck that is raised off the ground would pose problems in trying to support each joist individually while attaching them and then lifting the entire structure up. The fascia beam system also allows one to keep the structure in the same plane and if space beneath the deck is limited then this is a better option.

Wooden stairs Durban

Click to enlarge

We clad or screened the underside of this landing to create a storage area with a hinged door on one side so that it could be closed and locked.

This one we finished with Timberlife Ultra Care Gold as it was not exposed to direct sunlight. The Timberlife Satin Wood Base 28/28 has a much lower wax content so tends not to blemish that easily in direct sunlight. The Ultra Care Gold however has a much higher wax content and the UV in the sunlight tends to make it go a bit blotchy which can result in you having to sand it all off when it comes to maintenance. The key to low maintenance in wooden decks is to apply the correct finish correctly. To sand an entire deck back to wood and remove all traces of finish is almost impossible and at times I have thought it would be cheaper to simply replace the entire deck.

This was a small day which took us a day to complete. We also added a small gate for him on the existing deck, so in total it was a two-day job with sanding and sealing.

For a free no obligation quote on stairs or other wooden structure please complete the form below and we will contact you or you can call us on 082 496 5444.

Go back

Your message has been sent

Warning
Warning
Warning
Warning
Warning

Warning.

Wooden Deck Built in Durban North – November 2011

Wooden deck Durban

Click to enlarge

This was a normal wooden deck in the normal cleat, beam and joist system with a cleat attached to the wall on the house side, joists running off that perpendicular to the house and a main beam supporting the joists. This deck was built in the days when I was still sing balau as a substructure which made it relatively expensive. I have since started using at least H3 CCA Pine as a substructure. As mentioned in a previous article there is really no need to use balau as a substructure. Provided one uses the correct Hazard Grade (H grade) of CCA Treated Pine then the manufacturer of the chemicals used in the treatment process will guarantee that timber for up to 50 years. So there is a very strong argument that H3 CCA Pine will actually outlast balau because balau is not treated and will eventually rot although it will take a very long time.

H3 should be used where the timber is exposed to the elements (rain and sun) and H4 where it is buried in the ground or in constant contact with wet soil. H2, which is commonly purchased from your timber yards, should NEVER be used in decking and should only be used as roof trusses or other applications where it will not get wet that often.

Wooden deck Durban

Click to enlarge

The wooden deck was a normal rectangle with a slight deviation towards one side to create a triangle so as to meet flush with the corner of the house. We used 90 x 90 balau posts to support the main beam and resting on top of the concrete surface below. These posts had a 12mm hole drilled from below up into the posts and then a re-bar was inserted with epoxy and the same done into the concrete floor. This prevents the posts from moving sideways. There is no need to dig these posts in as they can rest successfully on the surface of the concrete. A shoe was cut from timber in order to secure the main beam to the wall of the house. It is really just a piece of timber that is notched to accommodate the beam and the shoe is then secured to the wall using sleeve anchors. The beam then rests in this shoe and cannot move sideways or down. The weight of the deck of course prevents it from lifting up plus it is screwed into the shoe.

The balustrade was interesting as it was not the normal picket style you see in most other articles. It was the criss cross design with a box in the middle or Tahitian style as it is often called. We also carried this style of balustrade down the stairs. One can sometimes switch to picket style as one goes down the stairs and return to Tahitian style on the flat surfaces. We needed to adjust the angles slightly as we turned the corner down the stairs in order to get the balustrade in the correct plane.  We also built a gate at the top of the stairs which could be latched closed or even locked.

Wooden deck Durban

Click to enlarge

It was sealed using a Timberlife Satin Wood Base 28/28 product which is a timber preservative that soaks into the timber rather than drying on the surface. Maintenance is therefore easy in that it can never peel or flake as it has soaked in and not dried on the surface. Simply clean it and apply two or three more coats. No more sanding, EVER.

For a free no obligation quote or advice on design of your wooden deck, please complete the form below or call us on 082 496 5444.

Go back

Your message has been sent

Warning
Warning
Warning
Warning
Warning

Warning.

Wooden Stair Case Build Durban

Wooden stair builder

Click to enlarge

This wooden stair case build by The Wood Joint in Durban was a tricky one. The client was a committee member on the body corporate for a small block of flats in Durban. There were about 4 units in the block and the existing steel fire escape had rusted to a point where it was unsafe. So first we had to remove the steel structure. With a little help from my friends, we came in and chemical anchored stainless eyes into the wall on both sides above the steel platform you see in the pics. From there we rigged up some climbing equipment to be safe and started cutting sections out of the steel structure and lowering them slowly to the ground. We had to cut small sections as the steel was 10mm thick and we didn’t want to damage the walls, windows or doors on the way down. We managed to get most of it down in one day with a small piece remaining for day two. We battled slightly in getting the main support off as the sewage pipes had been installed after the steel so we had to cut the steel out around the pipes so as not to damage the pipes. In removing it we inadvertently damaged a corner of the wall as the rawl bolts there were quite large, rusted and pretty much part of the building by now. We patched that using structural grout which was hard and strong enough to support our main beam to.

Wooden stair builder

Click to enlarge

With the steel gone, we set out to build a wooden stair case and landing that could act as a fire escape. The small landing part was easier enough and we canter levered it so as to keep our posts out of the way below for parking. In these smaller blocks of flats in Durban space is very limited so posts need to be kept well out the way of parking space. Because we were canter levering it we needed to use 30 x 140 joists of balau rather than our normal 30 x 102 joists.

The stringers for the stairs were also tricky as we had to follow the original line of the stringers because there was a window beneath that we couldn’t cover and we could only protrude to the end of the wall without obstructing the driveway. This resulted in our stringers being placed at 45 degrees which resulted in our risers being of equal length to our runs or treads. It is not ideal as it makes the stairs very steep but we had no option due to space and height. We were a total of about 4m in the air to the landing.

The treads went on alright, the balustrade too and we had to join the stringer on the outside with two independent posts to ground to support it as the timber we could get wasn’t long enough to run the full length of the stringer.

Wooden stair builder

Click to enlarge

We went back there a year or two later as one of the treads had popped a screw. Sometimes the timber moves more than one wants it to and breaks the screw off. We do however put additional back up screws in each piece we secure so they are safe in the event that one screw does break.

For a free no obligations quote on wooden stairs or any other outdoor timber construction please complete the form below or you can call us on 082 496 5444.

Wooden stair builder

Click to enlarge

Wooden stair builder

Click to enlarge

Go back

Your message has been sent

Warning
Warning
Warning
Warning
Warning

Warning.

Jacuzzi Cladding – Umhlanga, Durban

Jacuzzi Cladding Umhlanga, Durban

Click to enlarge

Jacuzzi cladding is a nice job to get hold of because it allows one to use up a lot of off cuts that would otherwise be useless in building say, a 20 square metre deck, as most of them are less than 1m in length. A lot of wood is wasted when erecting a wooden deck because one will order a 3.3m piece of timber and only 3m or 2.9 will be required. Or the lengths required are not available from the supplier so a longer piece needs to be bought. Cladding Jacuzzis allows one to use these off cuts in the substructure and thereby recover some of the cost of the waste. The timber is still new and is not compromised and would need to be cut to that length anyway (so sorry no discounts because of this).

This Jacuzzi cladding was fairly simple in that there was an existing structure there that had deteriorated and was therefore removed and replaced with exactly the same shape structure. So there was no thinking involved really, we simply made sure that the existing structure was correct in its dimensions and then we replicated what was there.

When constructing these types of decks or cladding structures it is best to try to keep the deckboards running in the same direction. To make the deck boards all run parallel or perpendicular to the pool or Jacuzzi would be very tricky and may result in errors. Having said that we are busy with a wooden deck now in Westville where we have kept the deckboards parallel to the pool on all sides for various reasons. I will update you once that is finished, with pics.

Jacuzzi Cladding Umhlanga, Durban

Click to enlarge

The structure of this cladding went on well and we then clad it with normal standard deckboards. We created a 1m² step or landing so that once people had finished in the Jacuzzi they could dry off on this landing without having to try to balance on the edge. It provided a nice platform that remains relatively dry. The shelf or step on the side of the Jacuzzi provided a nice ledge to climb in and out of the Jacuzzi with and to place drinks or snacks on while relaxing.

All screw holes were plugged with a mixture of clear epoxy and saw dust (to match the colour as closely as possible) and then sanded flat. It was sealed using Timberlife Satin Wood Base 28, an outdoor wood sealer suitable for woods of low porosity. Maintenance is therefore kept to a minimum as this product penetrates the timber and does not dry on the top as do most shop bought sealers. The timber can be left unsealed but it will turn grey and any sealing thereafter needs to be done carefully by bleaching the timber first to get it back to its natural colour.

I haven’t done many Jacuzzi cladding jobs, but as mentioned above it is a useful way to get rid of off cuts that would otherwise be useless in a larger wooden deck. Our other use for off cuts is shower duckboards and pot plant holders, for the much smaller pieces. They keep the pot plants off the deck which prevents that piece of the deck being exposed to excessive or continual wet. The duckboards are useful for getting in and out of the shower. We sell those at the cost of timber in an effort to recover a bit on the waste.

For a free quote or advice on your wooden deck or Jacuzzi cladding please complete the form below and we will contact you.  Or you can call us on 082 496 5444.

Go back

Your message has been sent

Warning
Warning
Warning
Warning
Warning

Warning.

Wooden Sundeck Built in Gillitts – April 2013

Timber deck builder Durban

Click to enlarge

This was our second deck we built in Durban using CCA pine as a substructure. I can confirm that there is a substantial cost saving using pine as a substructure and provided it is CCA treated to the correct Hazard Level (H level), then it is guaranteed by the supplier and manufacturer against rot and insect infestation for up to 50 years. So at least H3 must be used which is good for outdoors, exposed to the elements and if there are parts of it that are making contact with ground then H4 is better. In fact the cost difference between H3 and H4 is so slight that I am tending to just use H4 throughout as a matter of course to err on the side of caution.

This deck extended from the house outwards about 5m. Half of that 5m length was on existing tiles and concrete so we placed batons of 38 x 76 and the rest of it dropped down about a metre onto soil. We chose 76mm as our width of baton because it brought us up to exactly where we wanted to be in terms of height of the deck in order to clear the bottom of the door. We therefore had very little space between joist and the tiles so there was very little packing to do. When we place batons on the ground as joists, we fix them using a hilti. The hilti is really just to stop the joist moving sideways and not really up or down as once the deck is built the weight of it keeps it from lifting up. However the hilti provides enough fixing power in both directions so sleeve anchors are not necessary. Often the ground on which you are fixing these batons / joists to, is not completely flat and in order to get the surface of the deck level, one needs to shim one end of the baton or joist. This results in one end being higher than the concrete ground level and as such a gap exists between the baton and the ground. Because these batons are relatively thin (between 38mm and 76mm) they are not strong enough in their width to support the deck. They therefore need to be packed with structural grout or a building sand / cement mixture to take up the gap between the baton and the ground.

Timber deck builder Durban

Click to enlarge

The rest of the deck was elevated about 1m off the ground so from that point we installed 38 x 114 joists with a main beam running the width of the deck (parallel to the stairs in the picture). We set that back 300mm so that our span between beam and wall was only 1.9m which is the maximum I am happy to go with a 38 x 114 joist.  The rest of the deck was therefore cantilevered by about 300mm.

Deckboards went on without a problem, and we then built the stairs that you can see in the picture. We took a different approach to the stairs that we normally do, or have done in the past. In the past we have secured a beam all the way along the front of each riser. In this case we built treads and risers in line with each joist and then only on the front riser we fixed a fascia beam which was then secured to posts that had been set in concrete in the ground. It was much quicker than, and just as stable as our previous method. The structure that we built can be seen on one of the pics alongside.  The client wanted to leave the sides open as he is planting some indigenous plants alongside to cover the gap thus allowing his access beneath the deck if need be, but once the plants grow they will cover the sides.

Timber deck builder Durban

Click to enlarge

This deck was left unsealed as the client wanted the greying effect. I will re-visit it in a few months’ time and if the client is agreeable we can bleach it and high pressure clean it in order to bring it back to its natural colour.

For a free, no obligation quote please complete the form below and I will contact you.  Or you can call us on 082 496 5444.

Go back

Your message has been sent

Warning
Warning
Warning
Warning
Warning

Warning.

Wooden Sundeck, Toti, Durban

Wooden Sundeck Installer Durban

Click to enlarge

We built this wooden sundeck in Toti using CCA Pine, for the first time, as our substructure and decked it using balau deckboards. For a long time I have been using only balau as a substructure. But after some careful investigation I have accepted that a CCA treated pine substructure is as good if not better than a balau one.

The manufacturers of the solution that is used to pressure treat the timber guarantee their product for between 30 to 50 years depending on which manufacturer you use. Provided the company doing the pressure treatment treats it correctly and provided the correct Hazard Level (H level) is used in the correct application, the timber will be guaranteed against rot and insect infestation by the manufacturer of the solution. I will write another more detailed article on CCA pressure treatments, but for the purpose of this article you will need to know what it broadly means.

Wooden Sundeck Installer Durban

Click to enlarge

H2 CCA Treated pine is good for roof trusses where it is not exposed to the elements such as rain. H3 treated is good for outdoors such as decks and H4 is good for in the ground or in contact with wet soil. H5 is good for in salty water and is normally a combination of CCA and creosote treatment. H2 is commonly sold off the shelf at most timber yards. H3 and H4 is more specialised so one needs to find a supplier who is regularly treating to H3 or H4. Under no circumstances should H2 be used as a substitute. It will rot within a few years. Simple. Do not use it in decks, keep it for the roof.

Wooden Sundeck Installer Durban

Click to enlarge

In order to activate a guarantee against the manufacturer one would need to take photos of the deck going up ensuring that the correct H level is used, an audit process would need to be completed on the company treating the timber and the build would probably need to be registered with the manufacturer and possibly inspections conducted during the build. So although it is possible to activate a guarantee, it is not really practical as the substructure will go up in 2 days and the deck will be done in 5 days. However, if the manufacturer is willing to offer this sort of guarantee, then we can safely assume that the timber we are using will hold up to its promise. In a nutshell, H3 or H4 treated CCA Pine is suitable for a substructure for a deck and may very well outlast a balau substructure. I would not be too keen to use it as deckboards for two reasons. Although it won’t rot or get eaten by ants, it will expand and contract a lot more than balau which will result in checking, cracking, warping, bowing etc. over time. The second reason is that because it is half as dense, one needs to use a 32mm thick deckboard as opposed to a 19mm deckboard in balau. So twice as much timber is used and the cost is actually slightly more in pine per square metre than balau. So why not use balau in the surface? It is much better looking and much more stable (i.e. it remains flat for many more years).

Wooden Sundeck Installer Durban

Click to enlarge

The cost saving in using CCA pine vs. balau in the substructure is great and this allows me to keep my prices low whilst still providing a quality product. The CCA Pine will last as long if not longer than the balau substructure if the correct H grade of CCA pine is used.

All areas that have pine exposed are clad with deckboards so that the pine is not visible. Balustrades remain full balau.

For a no obligation quote on wooden decks, balustrades, pergolas and any other outdoor timber construction, please complete the form below and I will get back to you.  Or you can call us on 082 496 5444.

Go back

Your message has been sent

Warning
Warning
Warning
Warning
Warning

Warning.

Wooden Sundeck Installed – Oriel Place, Bluff, Durban

Wooden sundeck Durban

Click to enlarge

This sundeck we installed in Durban was a relatively simple one to build. The client wanted to extend the area around the pool to create more space. It was a simple cleat, beam and joist system with a fascia beam on the front to attach the balustrade uprights to. There was one challenge in that the retaining wall that runs below the paving next to the pool was not parallel to the paving and as such not parallel to the edge of the deck. A bit of fancy timber work was required with supports, small posts and sleeve anchors which created a substructure that became parallel to the pool, paving and resulted in the sundeck being parallel too.

Many of the properties in the Bluff are on situated on steep slopes and decking allows the home owner to reclaim a lot land that would not have been utilised. Terracing the garden is one option and decking over those can add extra space to one’s garden and therefore value to one’s property. I’m not sure if you have noticed, but a garden that has even a few stairs tends not be used as much as a garden that flows on the same level. It is important therefore to design the deck in such a way that you try to keep it all to one plane or the same level. This will result in more of the garden being used. If stairs are necessary one should consider staggering it over a longer length rather than 1m wide stairs.

Wooden sundeck Durban

Click to enlarge

On this build posts had to be set again in the cavities of the loffelstein retaining wall. It was a relatively small deck and only took a few days to complete. I am sure the owners are now enjoying it through the last two summers and it has created a lot more space that they can now use in their garden.

It was sealed using a Timberlife Satin Wood Base 28 sealer with a mahogany tint. This sealer soaks into the timber rather than leaving a varnish type finish on the surface. There are two types of this sealer, one for woods of high porosity (pine) and one of timbers of low porosity (balau). Be careful to select the correct one. It is relatively low in wax content compared to their other products which is better for the horizontal surfaces that tend to get hammered by the hot African sun. The higher wax content sealers are good for vertical surfaces such as balustrades, screens, cladding etc. It is very easy to apply as it is very viscous and because it doesn’t dry on the surface, brush marks and runs are impossible to achieve. It simply soaks in. 2 to 3 coats are recommended and in the first year of the decks life it will be necessary to reseal it every 3 to 4 months. As time goes by the maintenance intervals will become longer as the timber is continually being nourished with this sealer.

It is inexpensive and is easy to use so re-sealing every 3 or 4 months in the first year is also inexpensive. There is no need to sand the deck before each application. Simply clean it, high pressures clean it if you wish, and re-seal. I will go into more detail in another article on sealing decks and maintaining them as it is a subject that warrants its own platform. Since writing this I have written and article on deck sealing which can be found here.

For a free no obligation quote or to discuss the design of your deck, please complete the form below and we will contact you.  Or you can call us on 082 496 5444.

Go back

Your message has been sent

Warning
Warning
Warning
Warning
Warning
Warning

Warning.

Sundeck Installed in Durban Bluff

Wooden sundecks Durban

Click to enlarge

This sundeck I installed in Durban I actually subbed out because I had too many new builds on the go at the same time to be able to do it quickly enough. I use a very good subbie who charges reasonable rates, has his own transport and tools and skilled labour. He has actually been building sundecks in Durban for a lot longer than me and I can therefore leave him to his own devices and let him get on with the job. We follow him to fill sand and seal the deck after he has constructed it.

This deck was built off the bar area and canter levered over the retaining wall above the pool. It went around the corner to a braai area and had a set of stairs for access. An awning was first installed by an awning company and we then decked around the posts of this awning.

It was installed flush with the entrance to the bar which only allowed us about 150mm between the top of the deck and the existing concrete slab on which we were installing it. As a result there was not enough space for any under beams and we employed a slightly different method to a deck on the first floor.

Wooden decks Durban

Click to enlarge

The substructure is first built on the ground and is then attached to the wall using sleeve anchors. It results in the entire substructure being flat and in the same plane. This as opposed to a beam that supports a joist sitting on top of it. So to start with a 30 x 102 is cut to length to fit the length of the building to which it will be attached. Joists, at 550 centres, are then T’ed off this and secured from behind using two kalgard screws. A last fascia beam is secured in the same way resulting in a grid type substructure which is then lifted into place, chocked if need be, and secured to the wall using sleeve anchors. The front edge is then supported by short legs which rested directly onto the concrete. There was no need to dig through the concrete as it was solid enough to support the weight of the deck. On the front edge where we have canter levered it we had to drop longer posts down onto the retaining wall and concrete these into the retaining blocks.

The balustrade was an unconventional balustrade as can be seen from the pic. Because the client didn’t want to obstruct his view when in a seated position, we reduced the height of the balustrade to 500mm instead of the normal 1m. We also left the balustrade open and no pickets or cross pieces were installed resulting in a very simple straight lined balustrade. It worked well and looked quite neat afterwards.

Stairs were installed at 1m wide with the same style balustrade or hand rail running up each side.
This deck was intentionally left unsealed so that it would weather. When balau weathers it turns a very attractive grey colour. It’s a personal preference I suppose. Some like it, some don’t. It looks more rustic without looking too tatty. It must be noted though that if one decides to seal it afterwards, then it must be bleached and prepared properly otherwise it will turn very dark, almost black. The greying is actually black algae that grows on the surface of the wood and although it won’t necessarily result in rot, needs to be bleached and removed with a high pressure cleaner before sealing. This is also applicable to decks that have been sealed and are now to be re-sealed and have started greying.

For a free no obligation quote to construct your sundeck please complete the form below and I will get in touch with you.  Or you can call us on 082 496 5444.

Go back

Your message has been sent

Warning
Warning
Warning
Warning

Warning.

Wooden Pergola La Lucia – Durban

Wooden Pergola Durban

Click to enlarge

Wooden Pergola, Durban

This pergola was built for a client of mine in La Lucia, Durban. They were on of my first clients and have since continued to come back to me for other work ranging from sundecks to doors, bars etc. Their pergola is still in good condition and we have since been back to install corrugated roof sheeting on top to block the rain out but still allow light through. We used a translucent bronze roof sheeting from Safintra.

The pergola was drawn by a draftsman and we quoted based on that. With all due respect to engineers, draftsmen and architects, they do tend to over spec when it comes to using balau. Perhaps it is building regulations that force them to spec it the way they do. Balau is twice as dense as SA Pine, twice as heavy and far stronger. I have seen a deck 3.5m in the air being held up with 60 x 60 posts which had been joined with a half check in the middle. Although I wouldn’t build like that, it bears testimony to the strength of balau and its stability. That deck was at least 15 years old and the posts were still straight and had not bowed under the weight of the deck.

Wooden Pergola Durban

Click to enlarge

Nevertheless we built according to the spec and used two 40 x 140 pieces of balau as the posts with a spacer in between. So we had a split post which measured a total of 120 x 140 with a gap in between. These were secured to pre fabricated galvanised steel feet that kept the wood of the ground and were secured to the concrete patio using sleeve anchors.

From there we built a structure up to the desired height and built it around an existing braai chimney. It was secured to the chimney on both sides to give the effect of the joists or rafters moving through the brick work of the chimney. There was an angled front to it and we fixed a fascia beam to that front edge.

The top was clad with thatching laths to give it a rustic look and feel. It kept the sun out and provided the shade they wanted, but the rain obviously still came through.  Bolts were used to secure the posts together through the spacers.

2 years later they asked me to come back and place bronze translucent roof sheeting on the top and clad the sides using the same thatching laths. Now it keeps the sun out and the rain but still retains its rustic look and feel.

Wooden Pergola Durban

Click to enlarge

The roof was completed easily enough by attaching some rafters and purlins at the correct spacing and then attaching the roof sheets using self-drilling Tek roofing screws. The front end of the roof sheeting had to be cut as the front edge of the pergola was angled. Cutting plastic roof sheeting can be tricky as it tends to burn and melt with the heat generated from the angle grinder disk. It was therefore better to use a non-abrasive disk like the steel disks normally used to cut concrete or stone. The fiber disk was too abrasive and melted the sheeting wherever it touched it.

Please feel free to give us a call for quotes on wooden pergolas, sun decks and other timber related construction by completing this simple form.  Or you can get us on 082 496 5444.

Go back

Your message has been sent

Warning
Warning
Warning
Warning

Warning.