Wooden Sundeck Constructed in Toti Durban

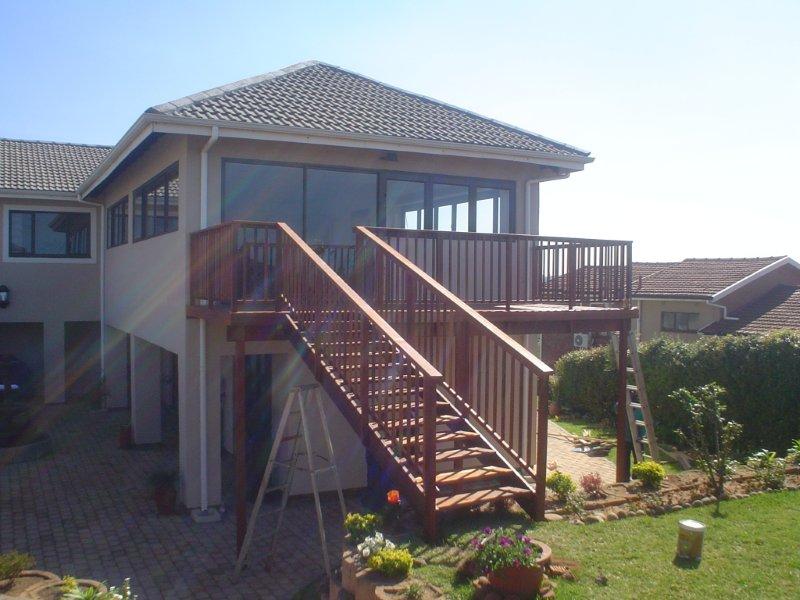
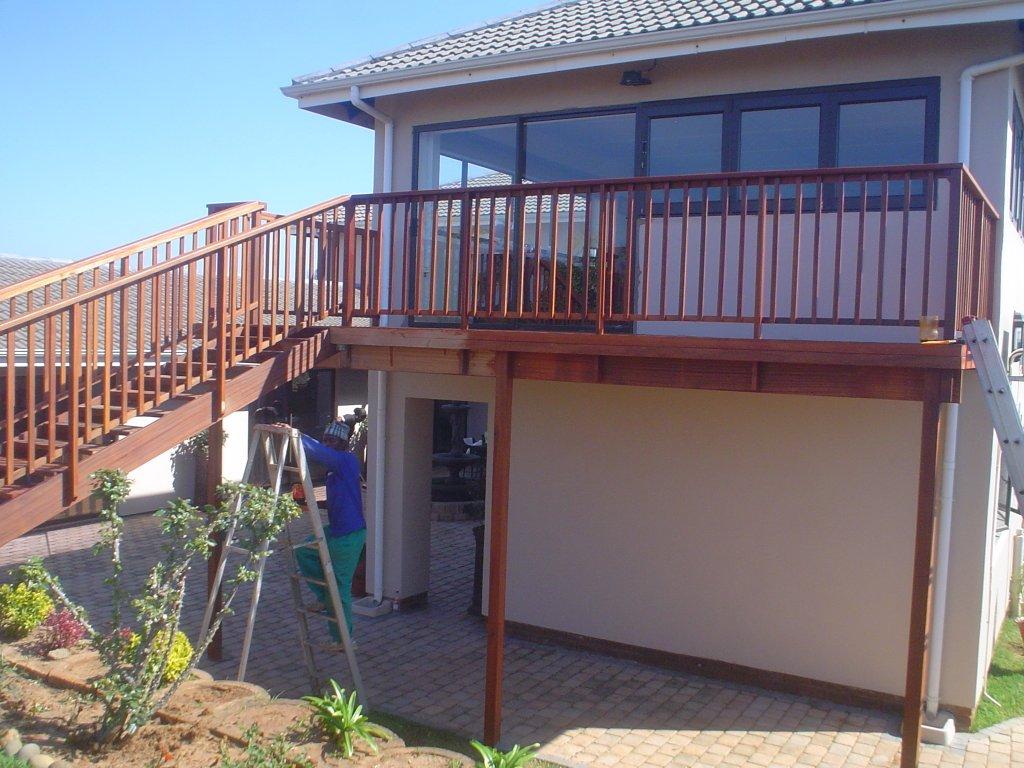
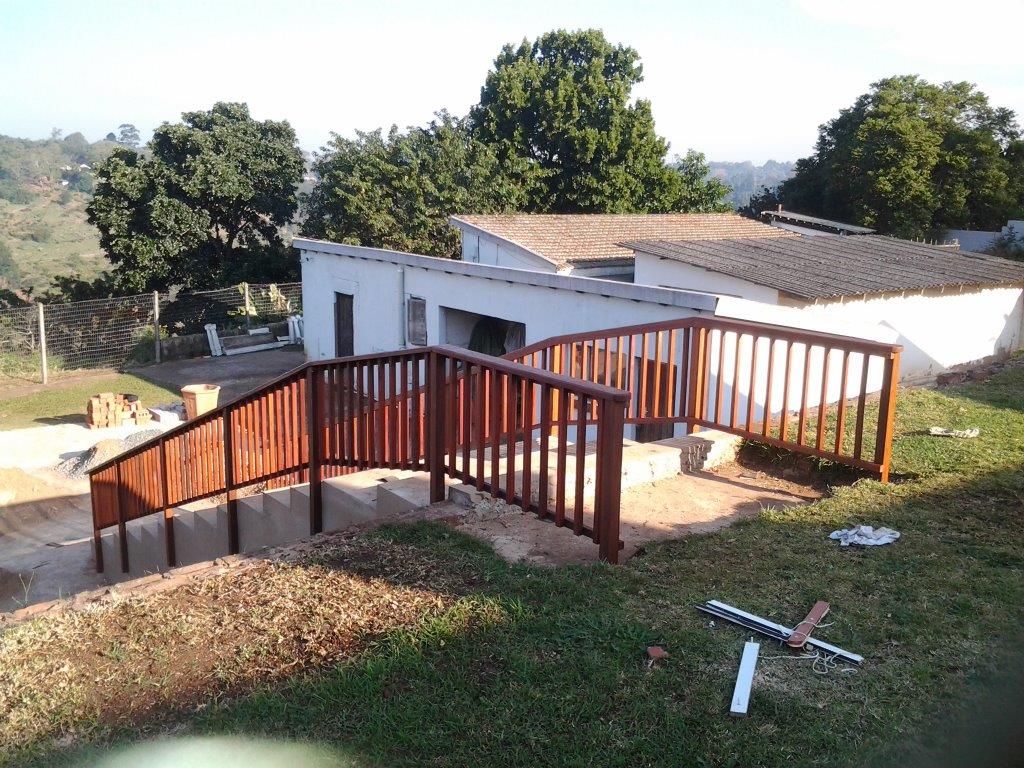
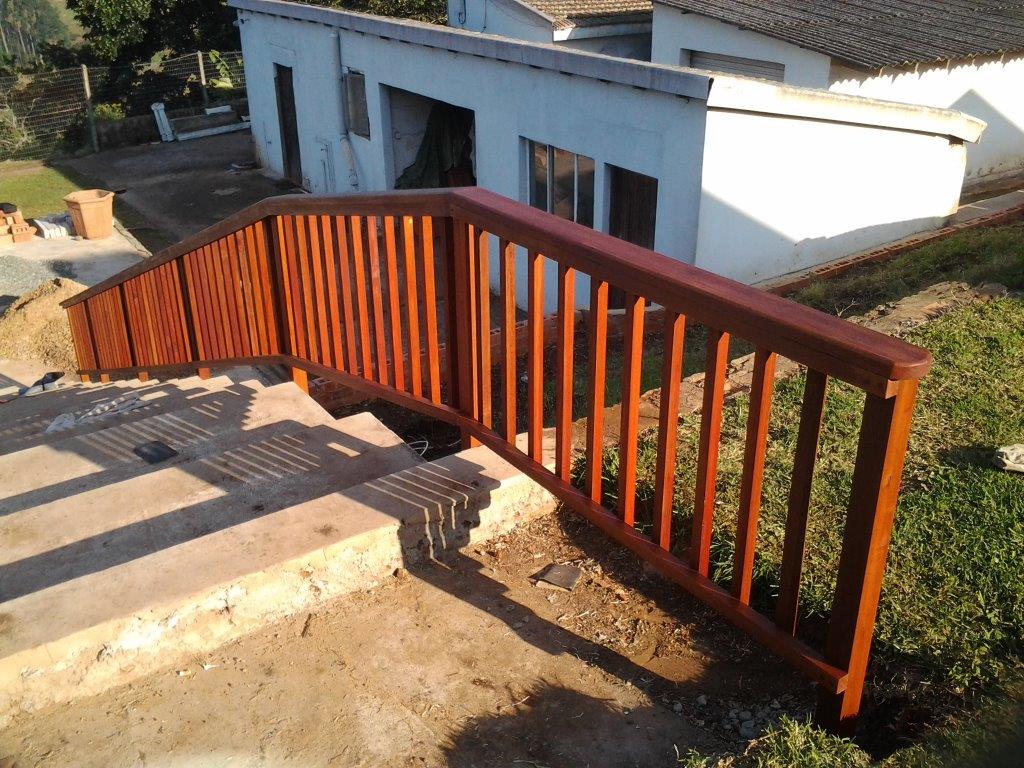
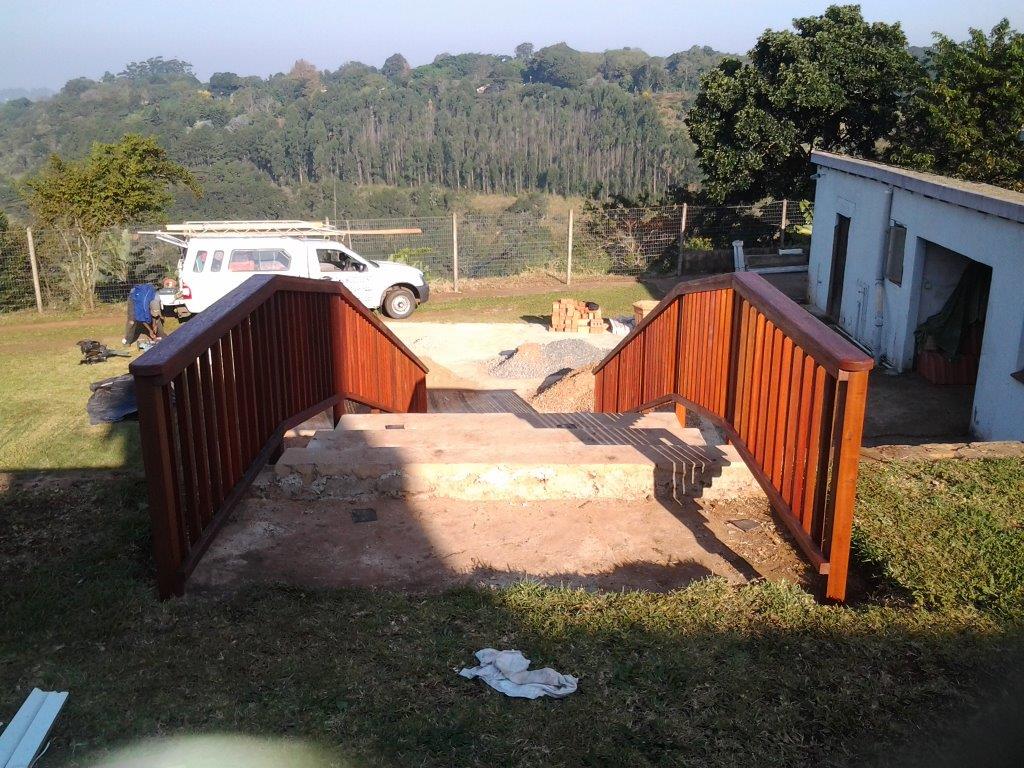
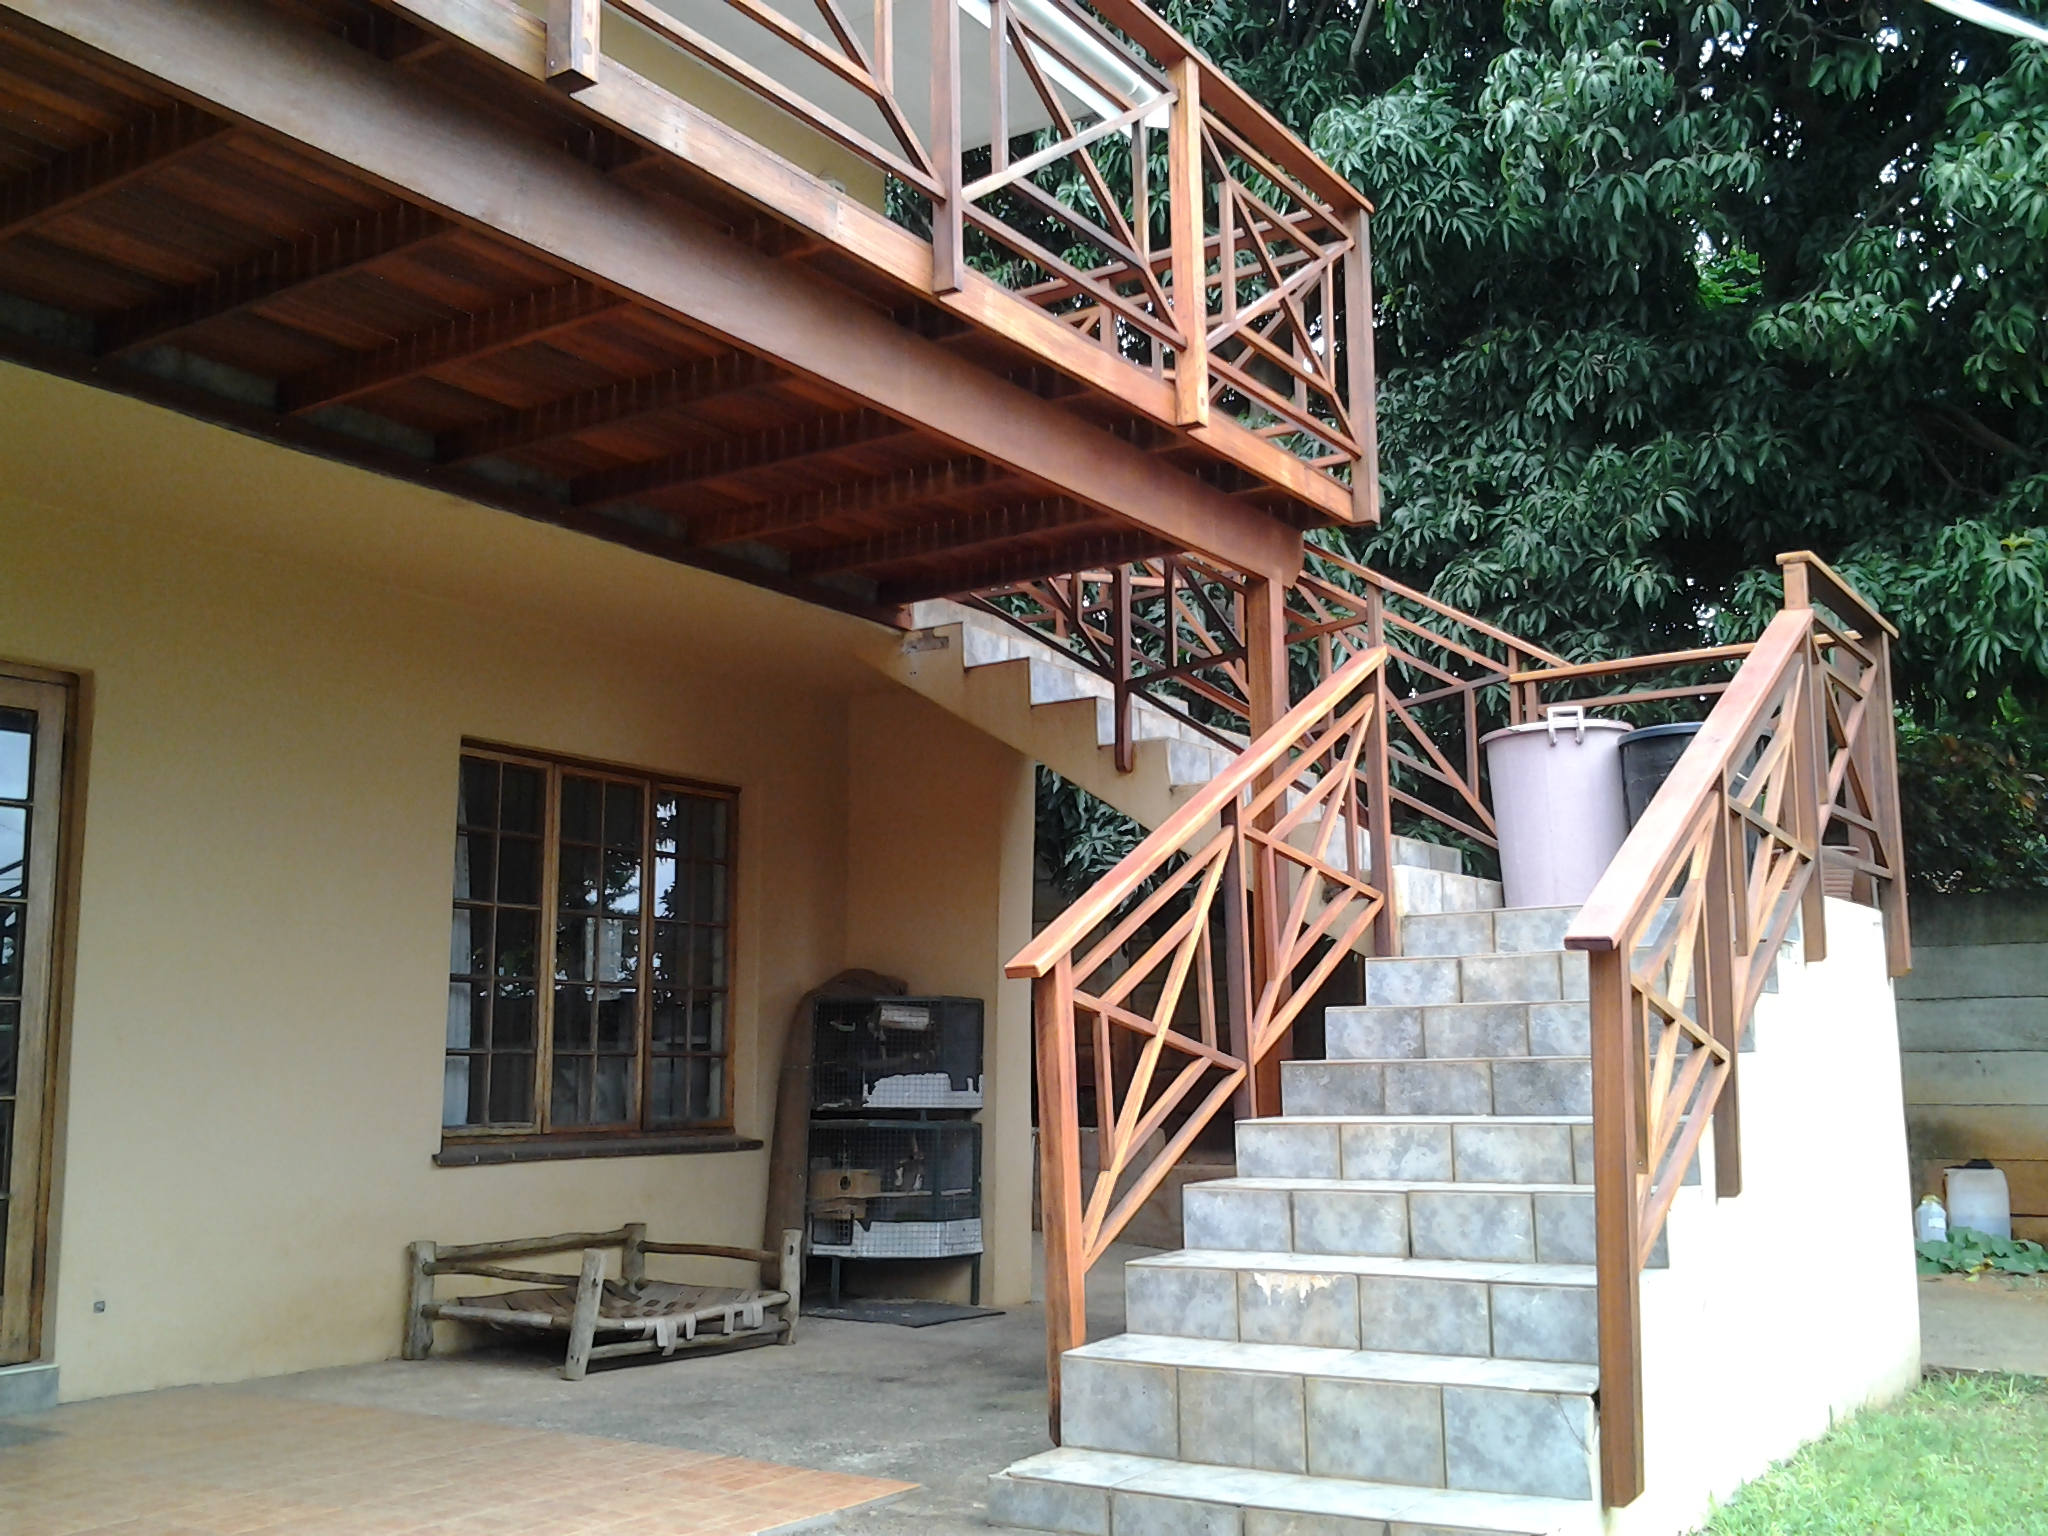
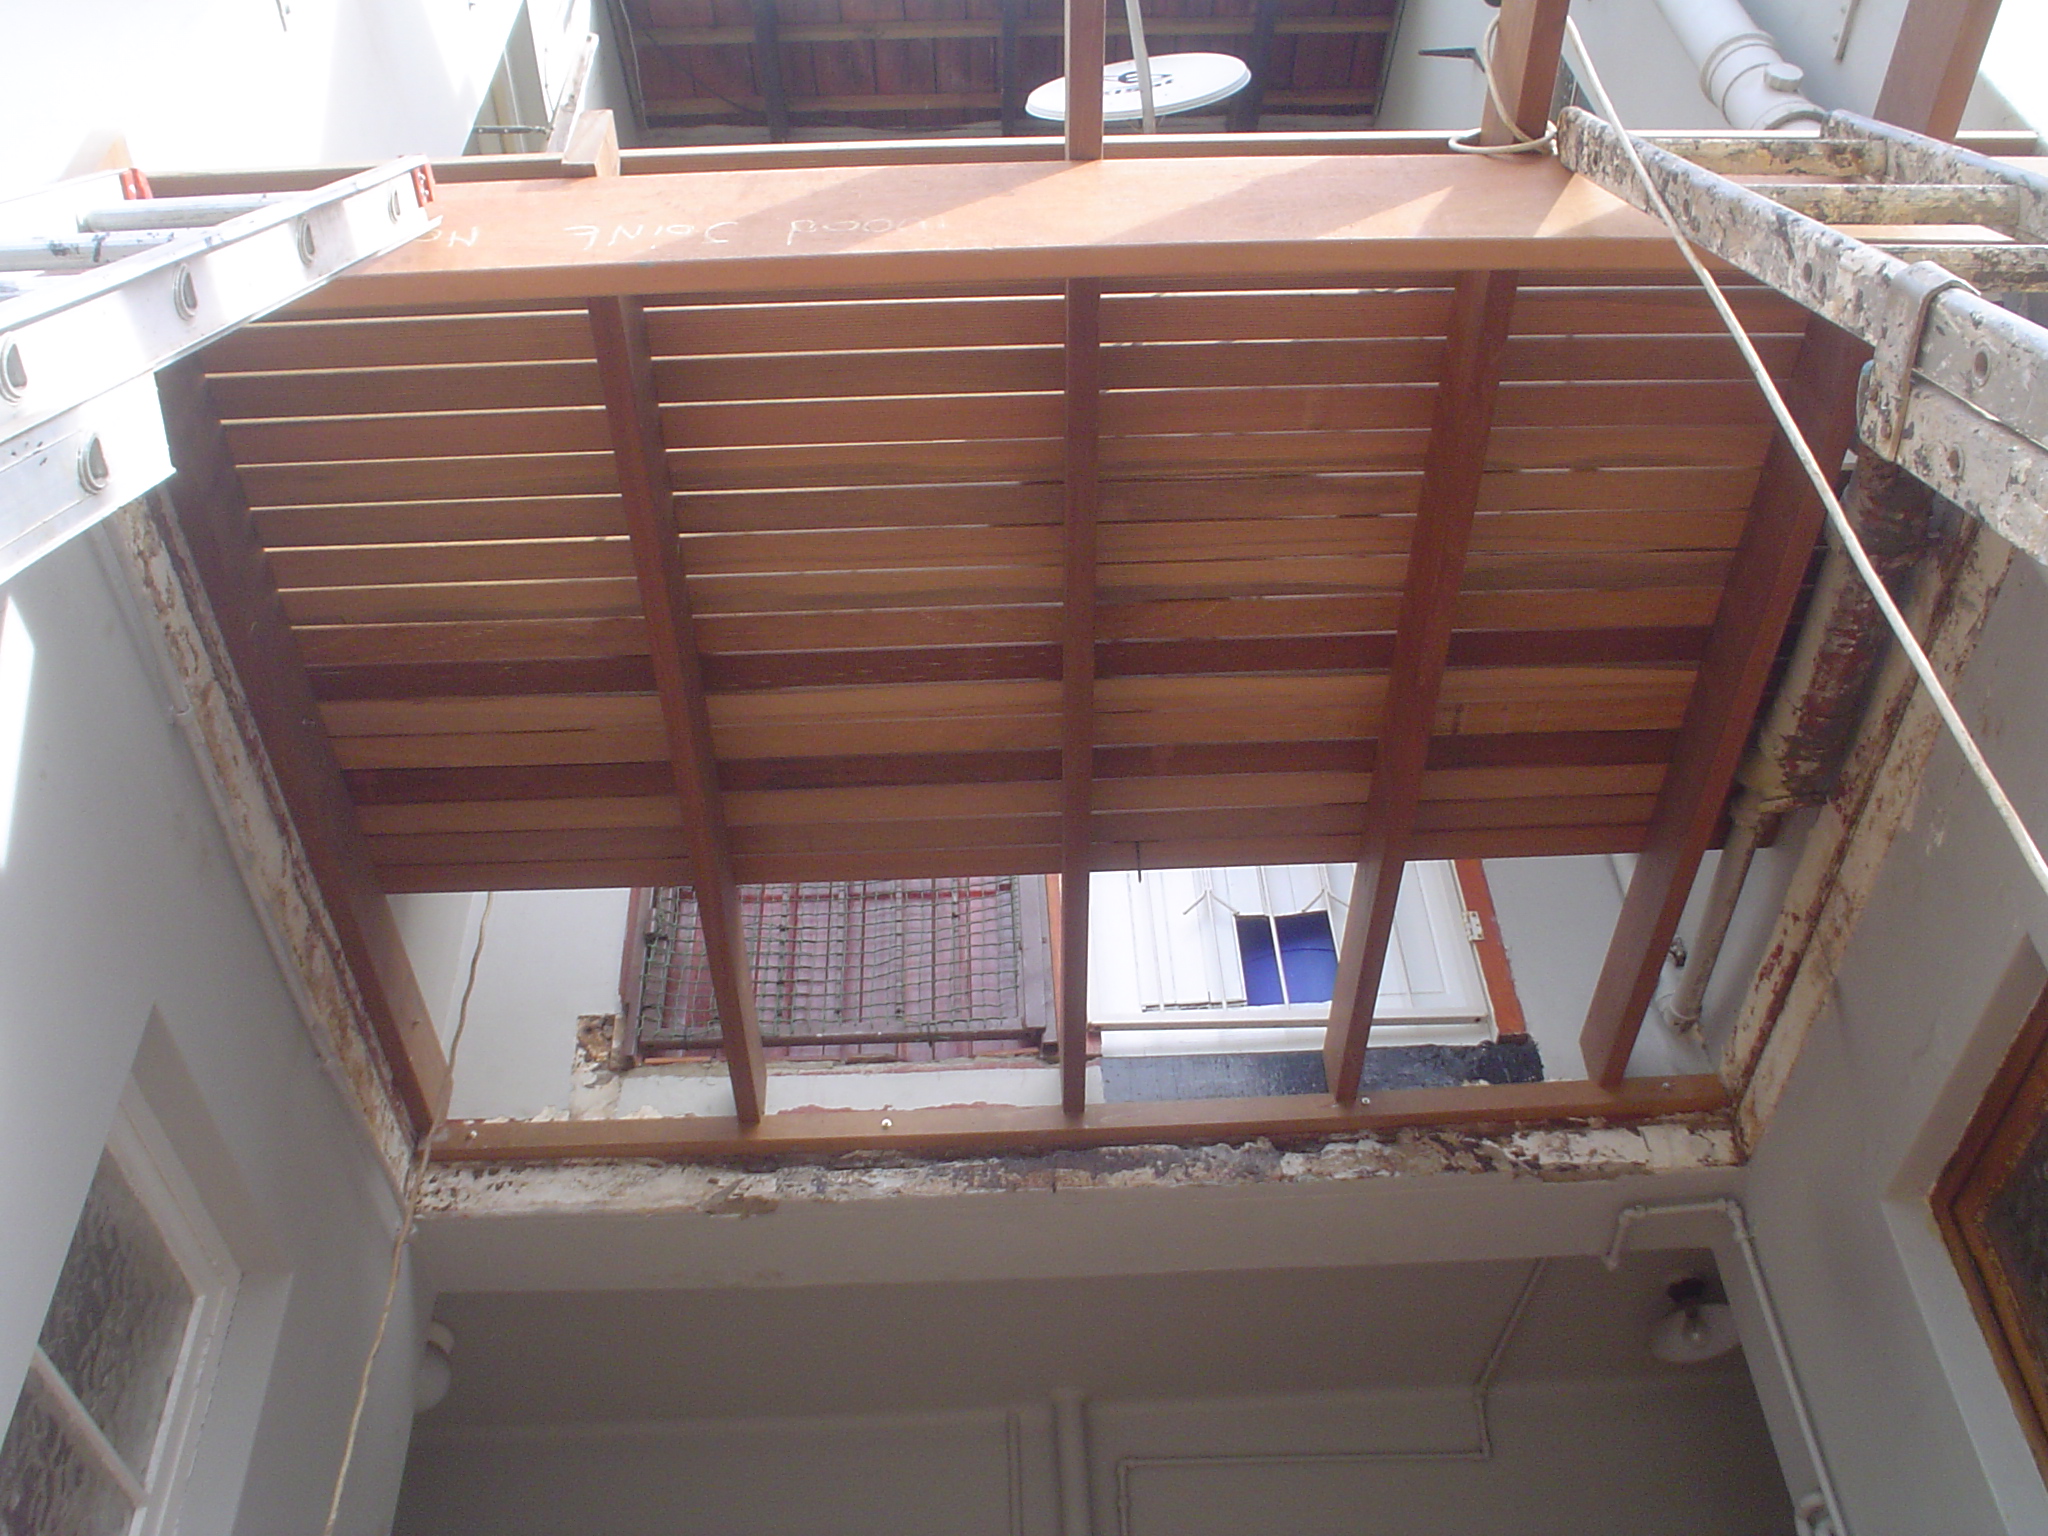
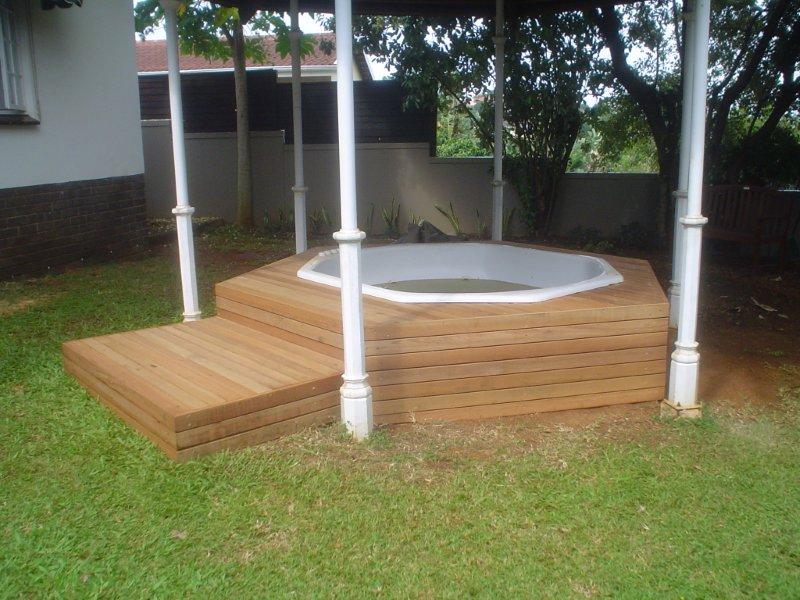
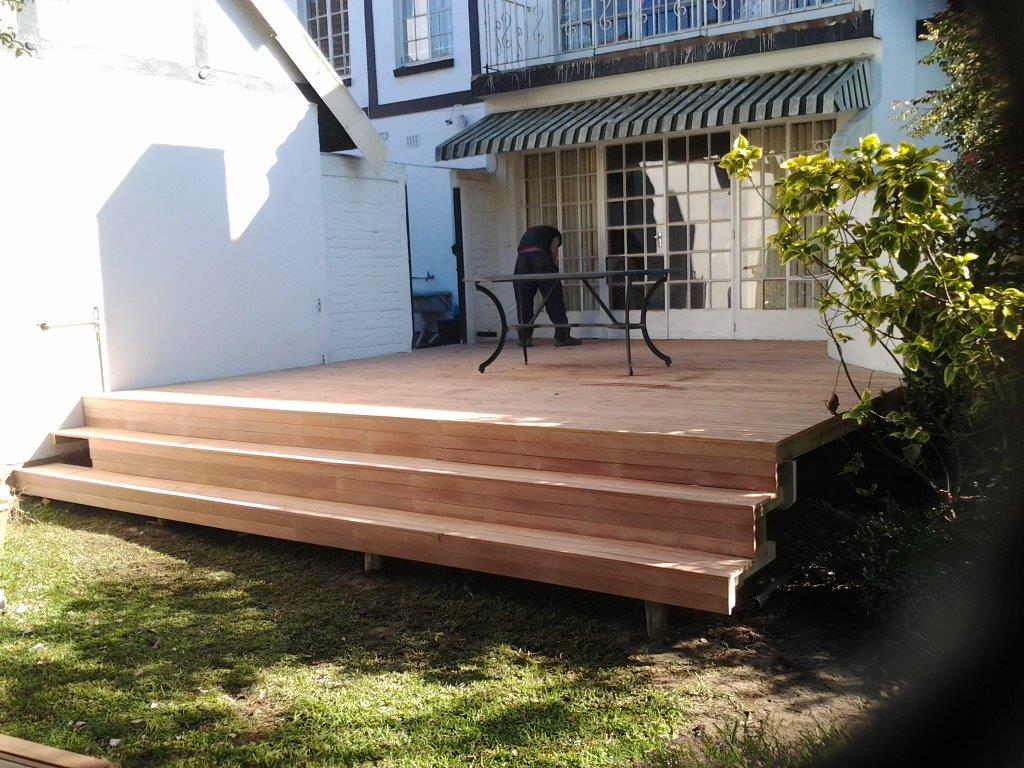
This wooden sundeck we constructed in Durban was a low-level deck which was barely off ground level. We were taking it flush off the level of the floor in the lounge and extending it outwards into the garden. The grass was not growing properly in this area due to large trees that were creating a large shadow so the client wanted to deck it to eliminate this problem.

The biggest challenge when building a wooden deck near or on ground level is to get a support beam underneath the joists where needed. There are two methods one can use. The first is what I call the cleat and beam system whereby a beam is placed underneath the joists to give them their support. We normally use a 38 x 114 joist and a 50 x 228 beam. One needs to span the 38 x 114 to a maximum of 2m but 1.8 is preferable. So every 1.8m to 2m one needs to slot an under beam below so as to support those joists. Posts should be used every 3m on the 50 x 228 beam. With this spec one can save on timber while still providing adequate support so that the deck is structurally sound.

The problem with this system arises because if you have a 228 beam, plus a 114 joist and then a 19mm deckboard on top of that your total height needed above ground level is 361mm. If the deck is too close to ground it will mean excavating soil to be able to drop that beam down enough to still arrive at the original height of your deck. Although this is quite possible and not that too time consuming, it sometimes results in the main beam sitting in soil or it may come into contact with wet soil over time. One must therefore use at least H4 CCA Treated SA Pine as the beam and in fact that whole substructure should be H4, even though the joists aren’t in contact with soil, to ensure that no rot will occur.

The other method is to create a frame, all in the same plane using 38 x 114 and use no under beam. This will result in the deck only being 133mm in height so that no excavation will be needed in order to bring the deck up to the required height. However now that you don’t have a beam to attach posts to, you will need to attach the posts to the joists and fascia beams. Again this is not a problem, but it will require a few more posts than in the first method as you can only span your 38 x 114 to a max of 2m. Hence more posts, more concrete and more labour in digging holes.

We used the joist and beam system here as we had enough space below to set the beam without having to dig too far into wet soil. So our work was made lighter by not having to dig too many holes.

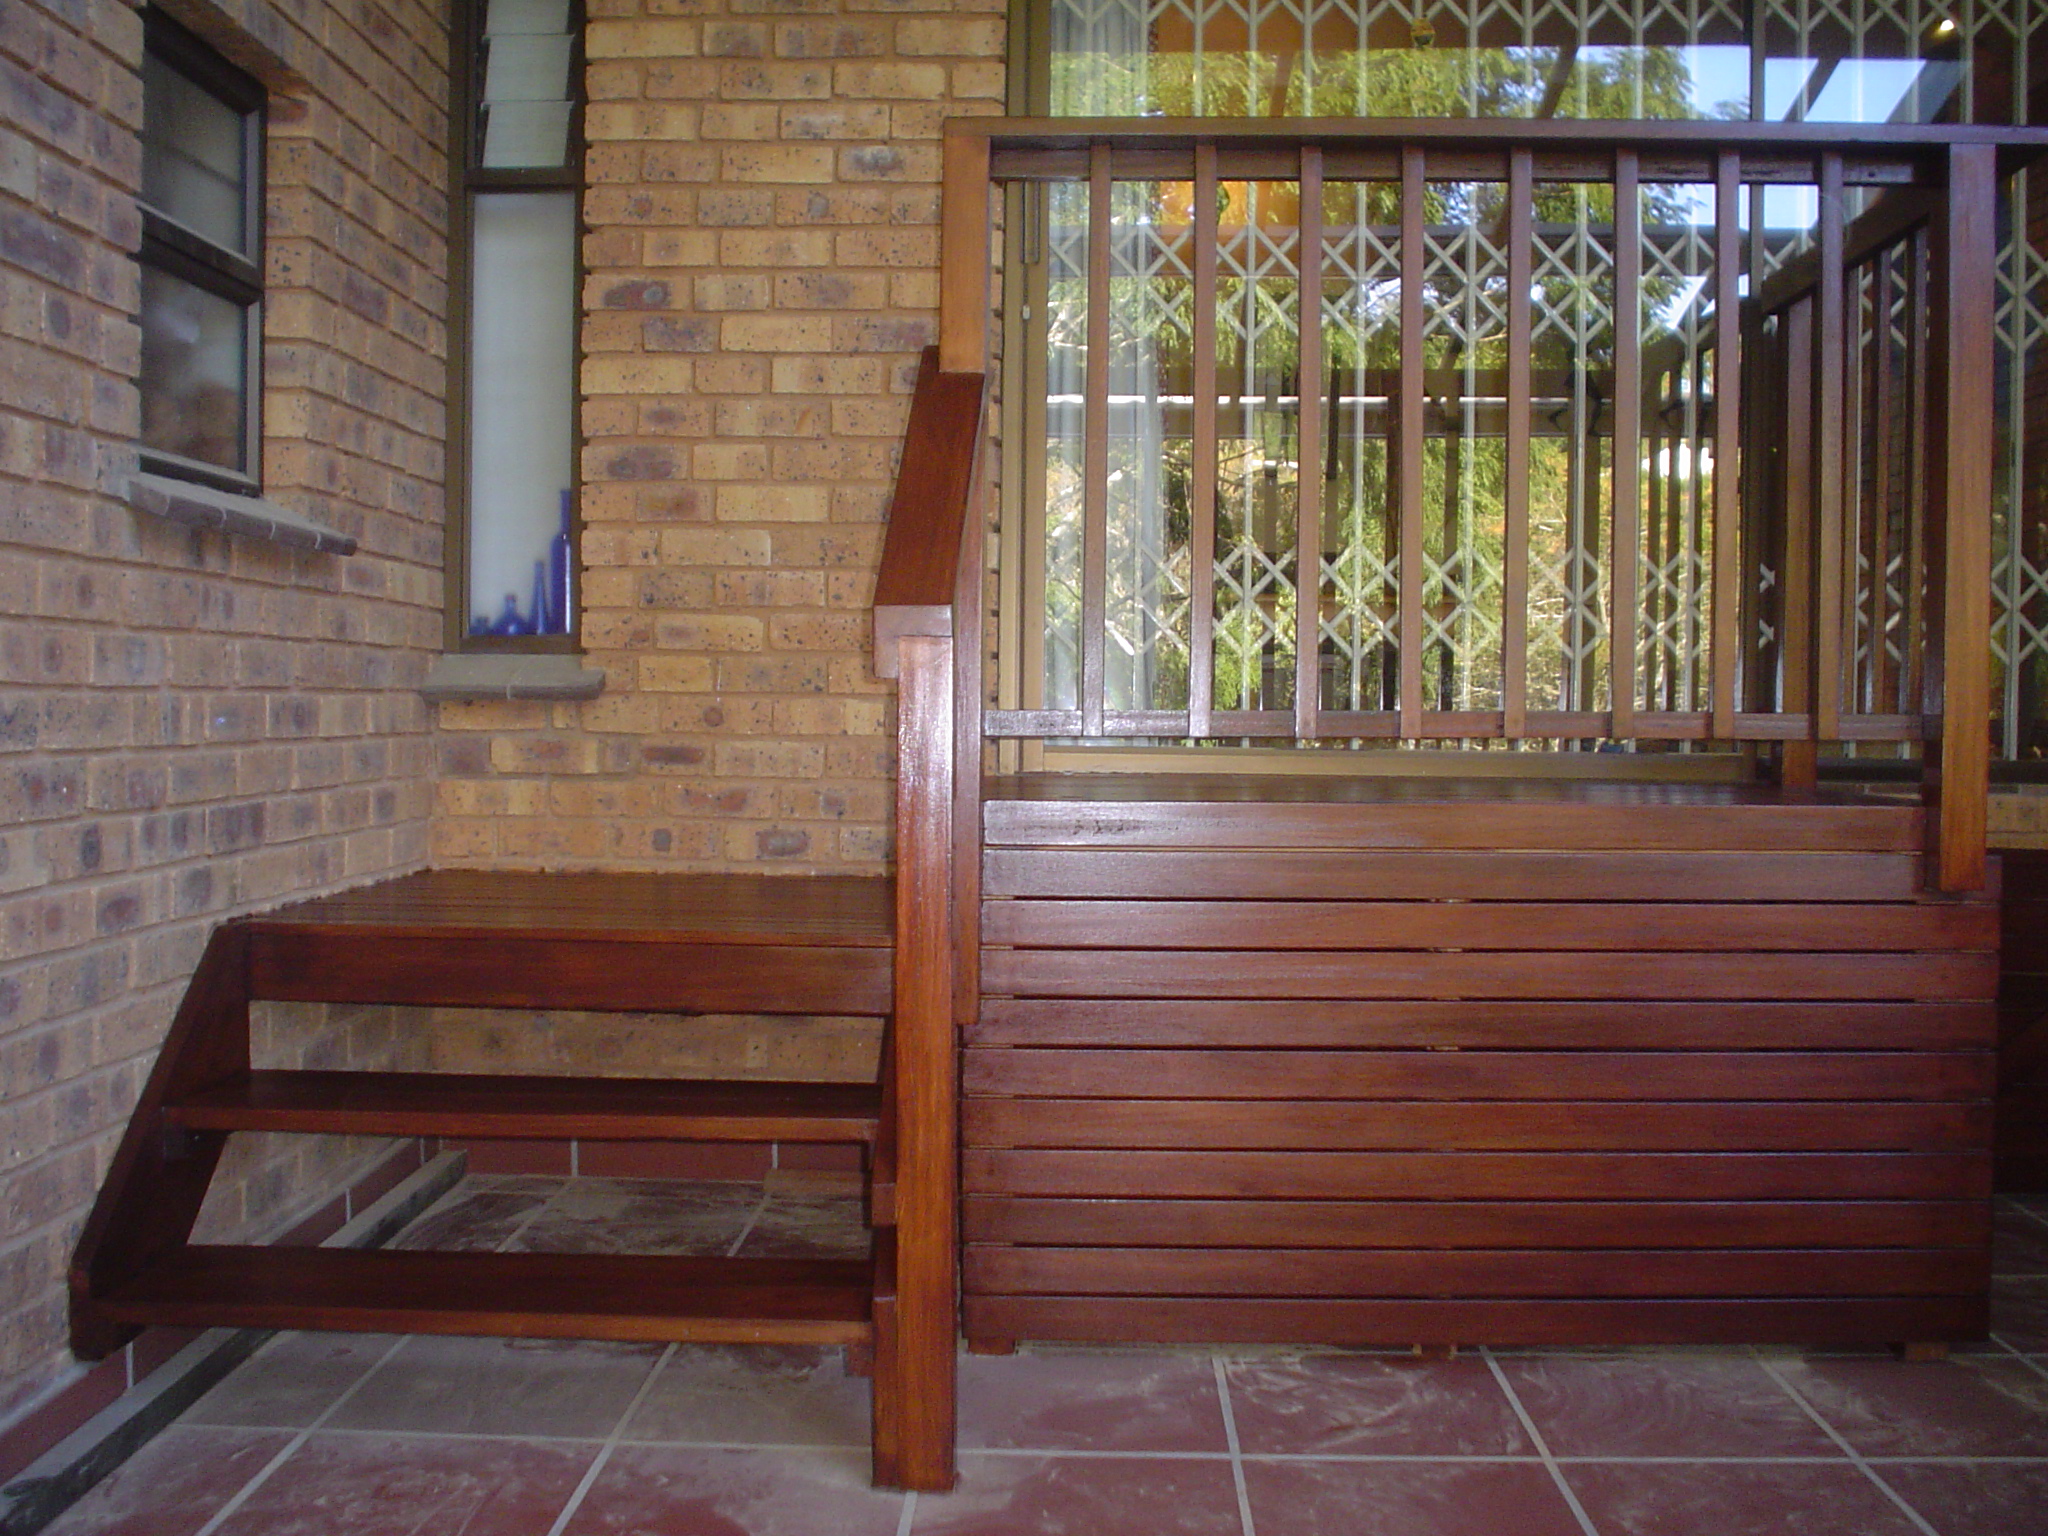
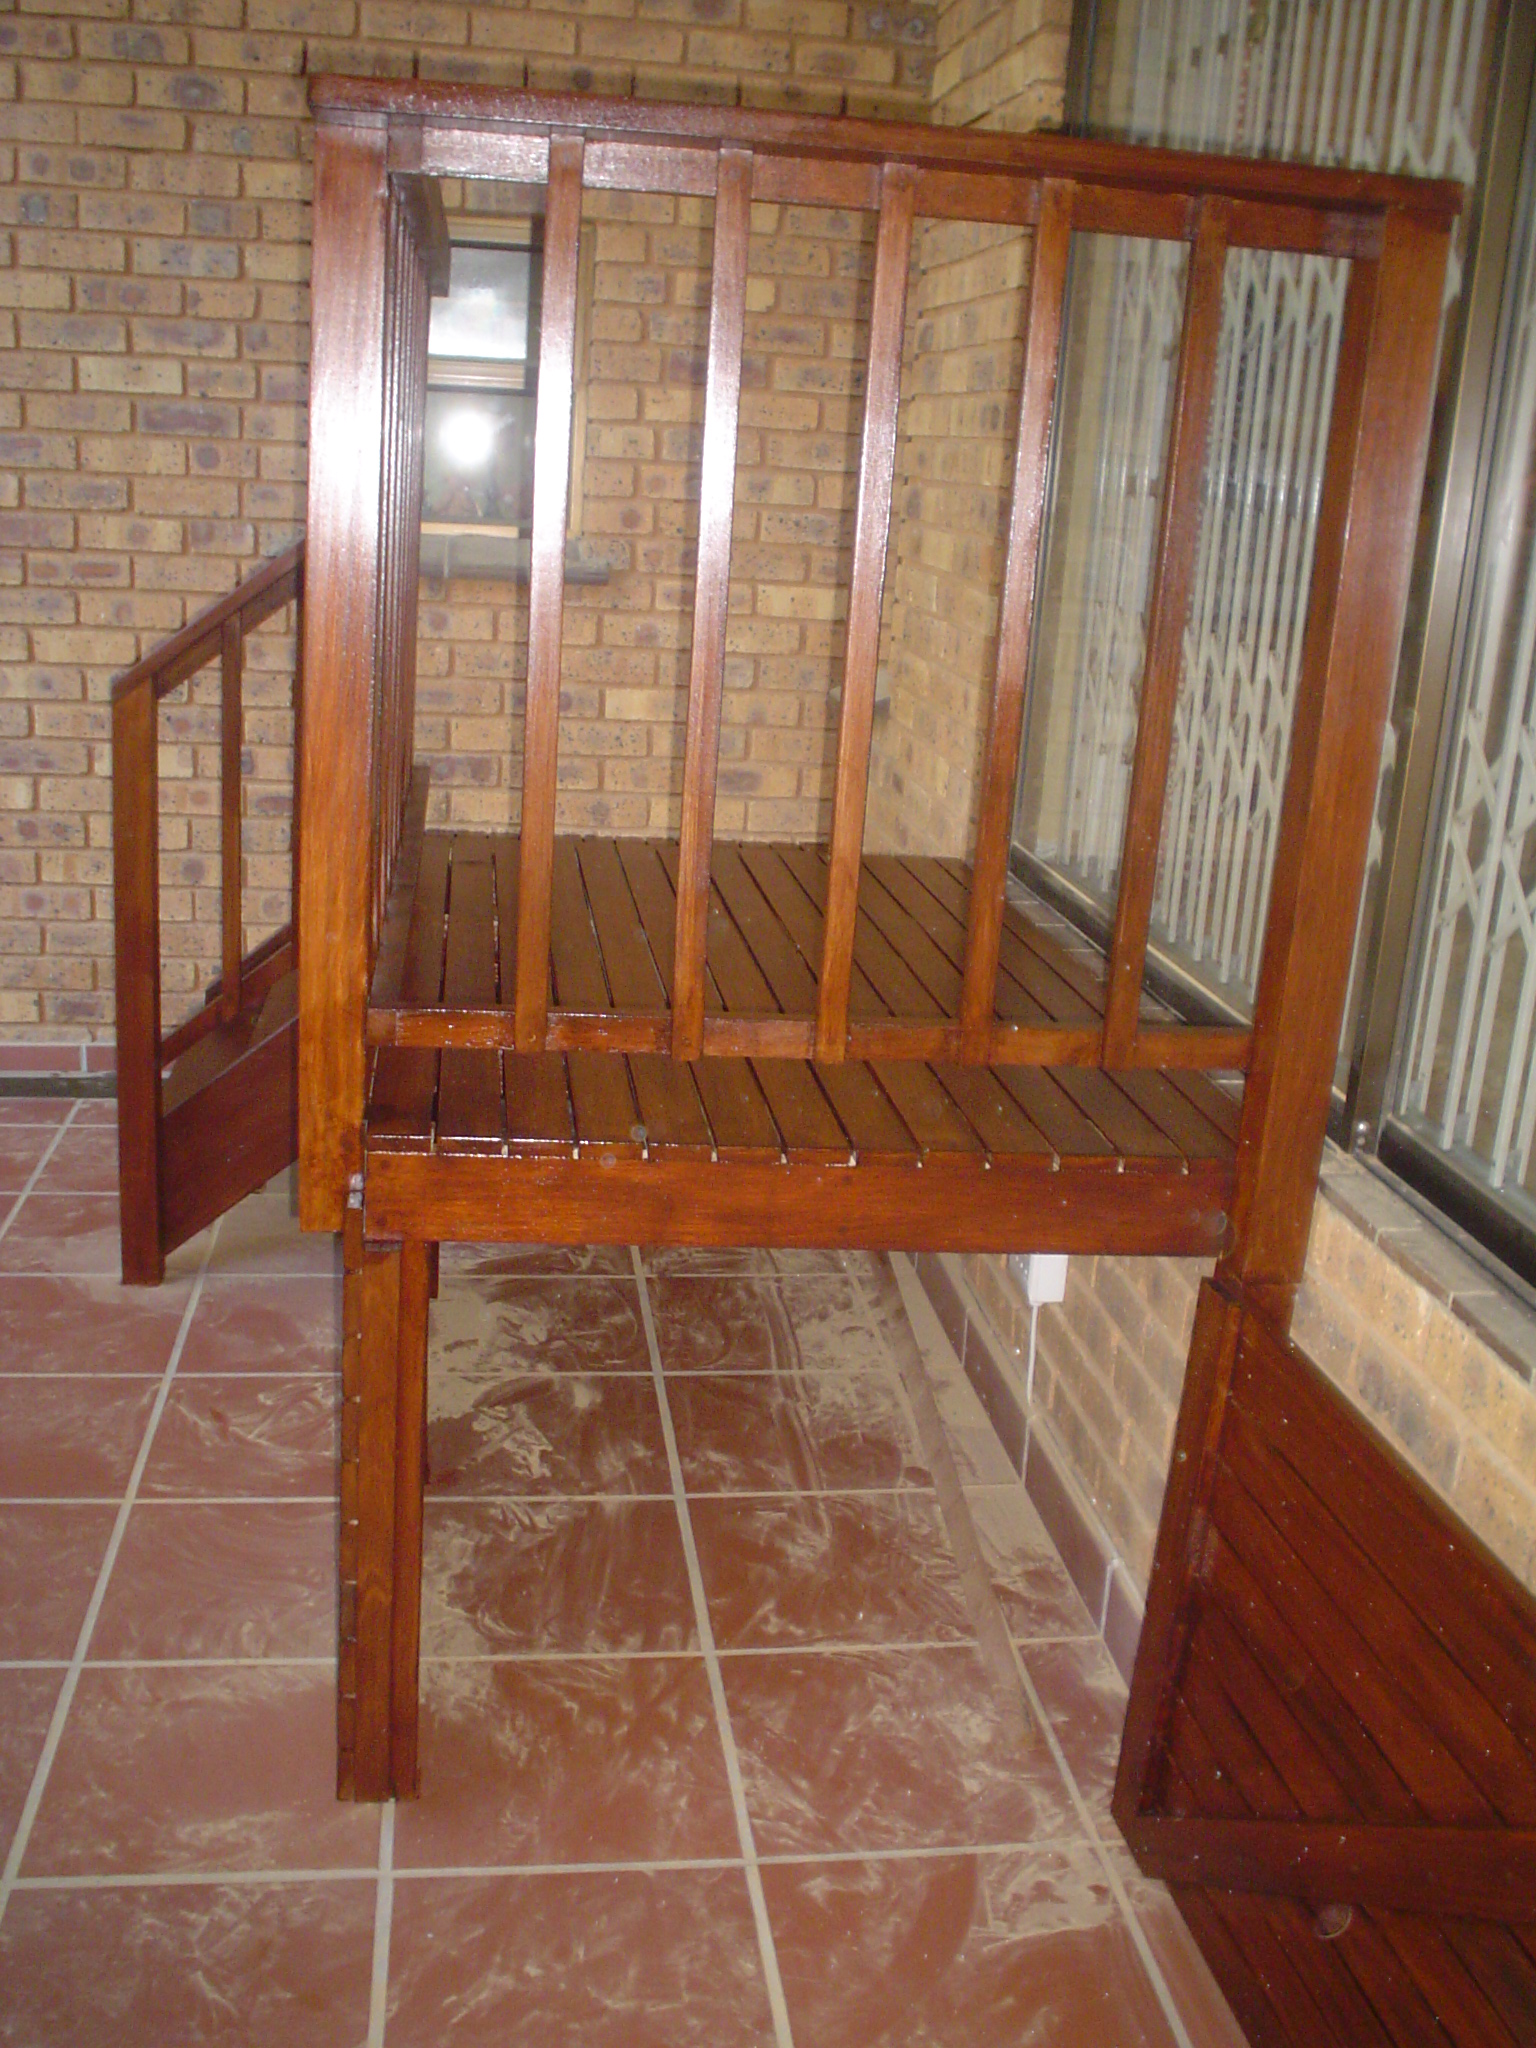
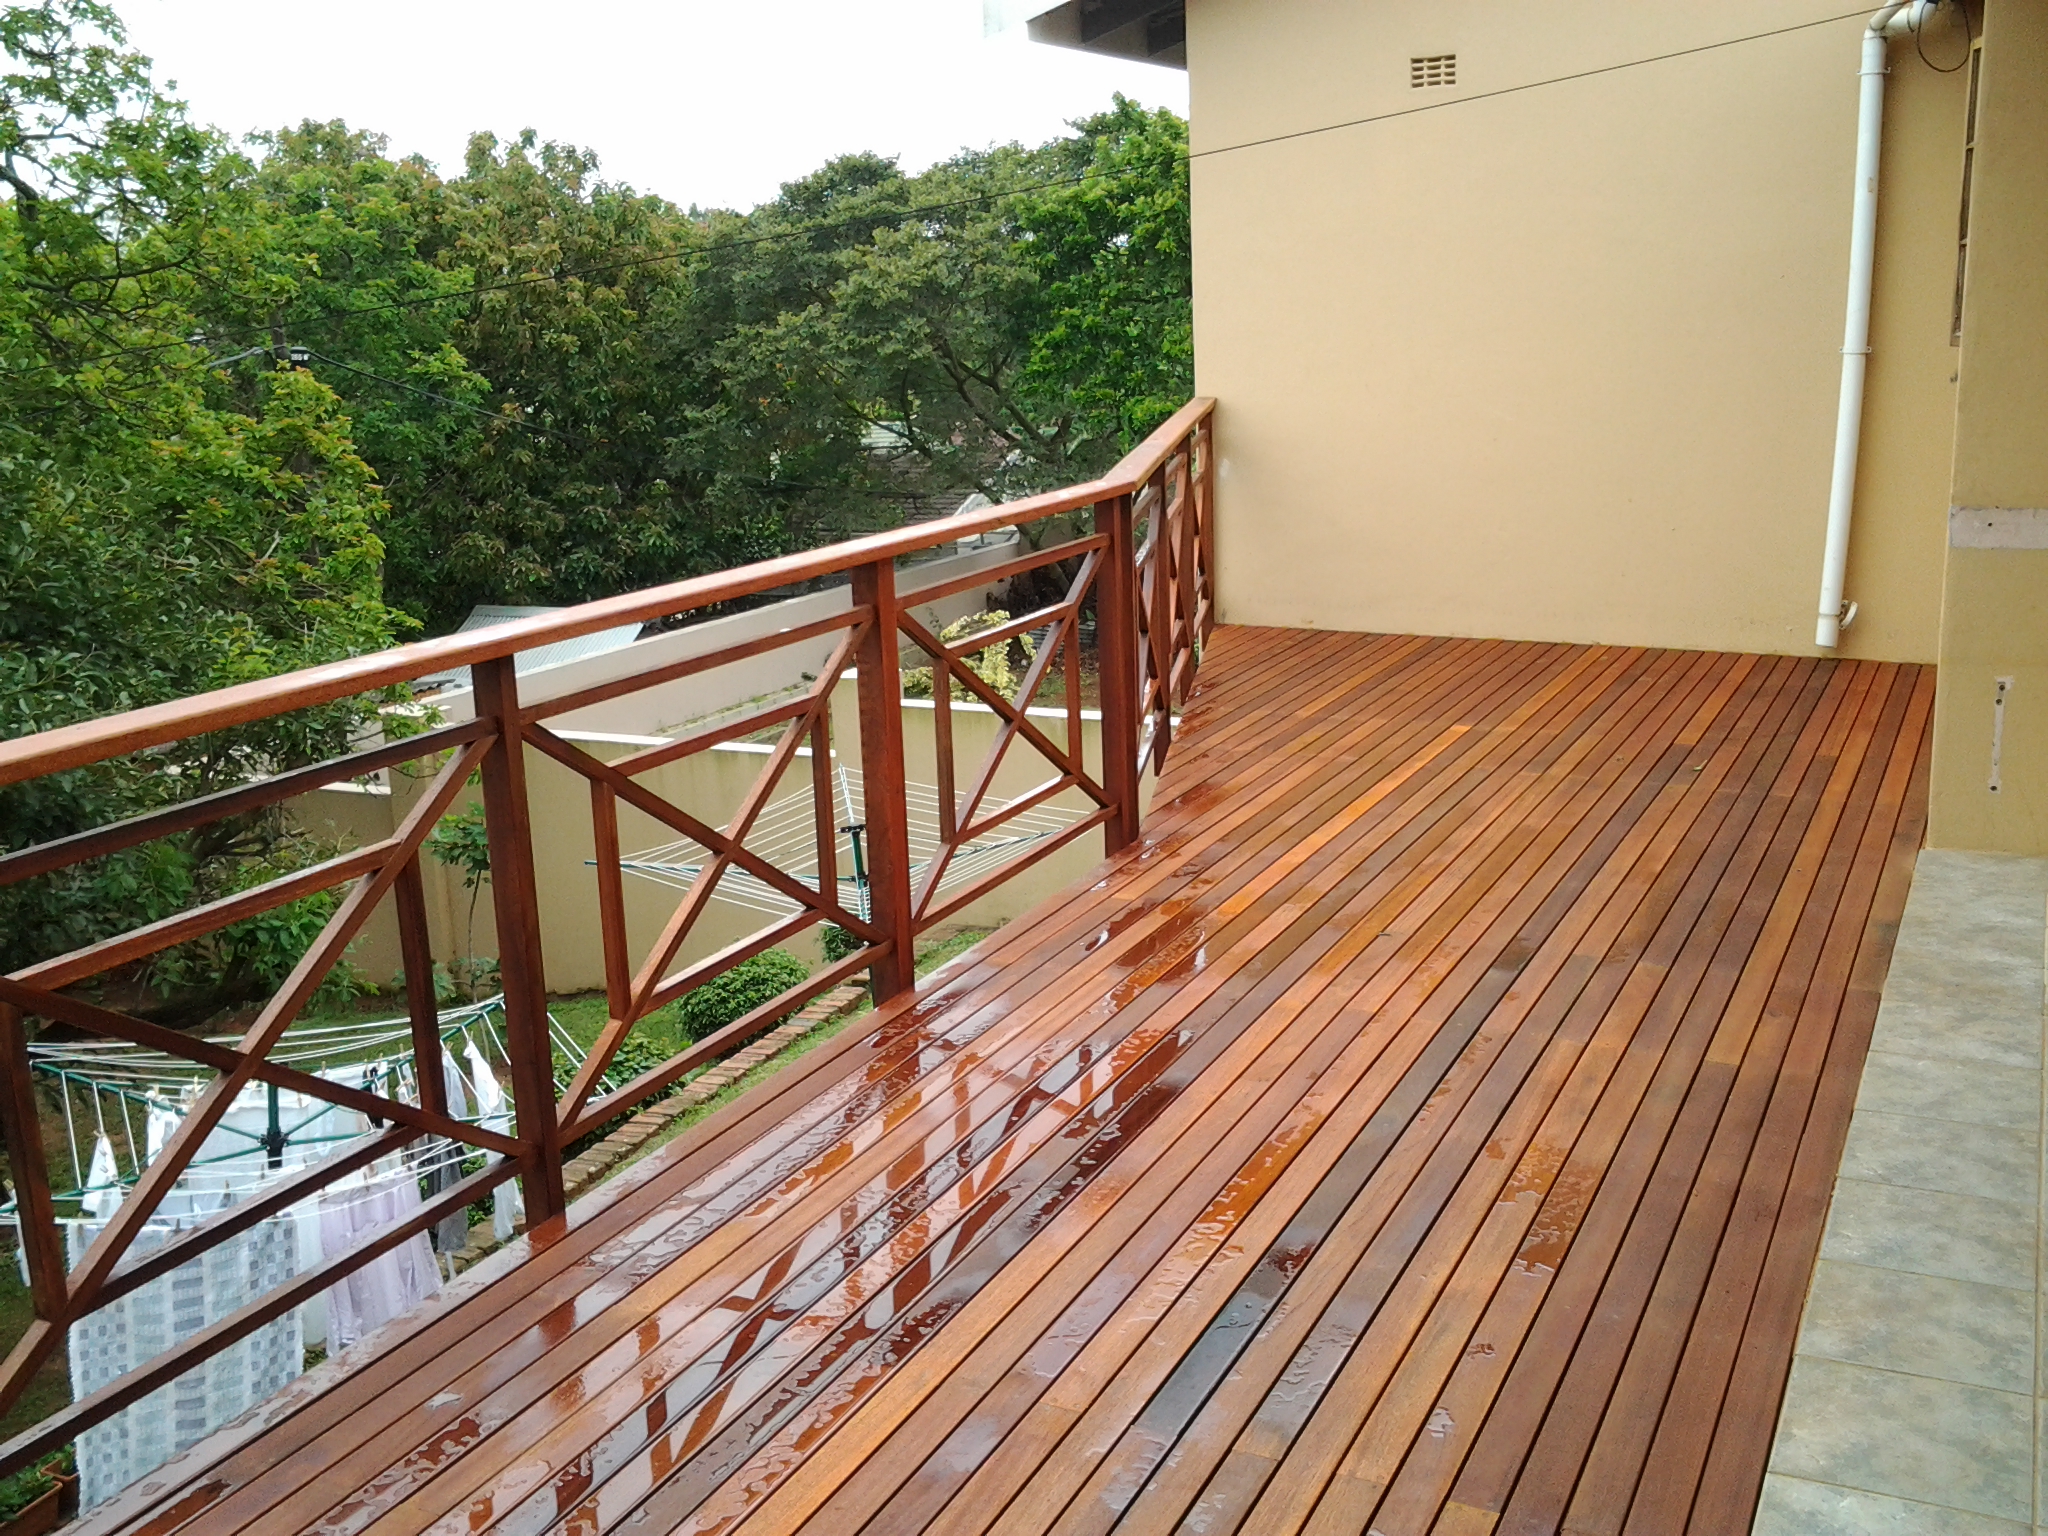
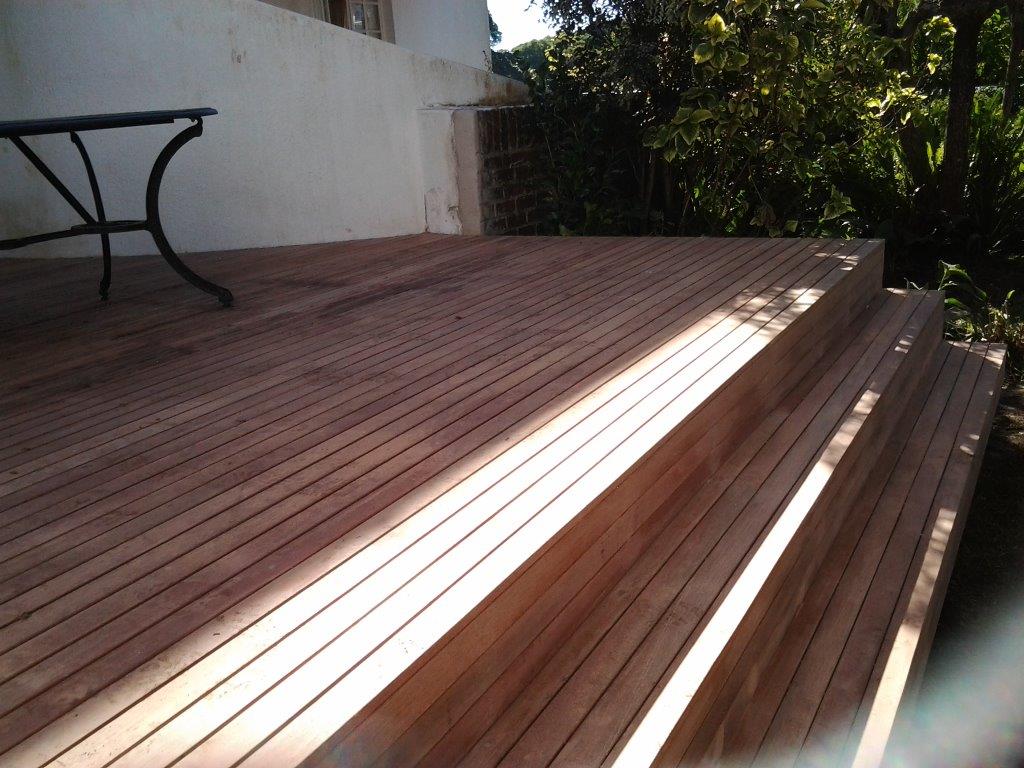
Once the substructure is up, the deckboards can go down. On this wooden deck we used 19 x 68 balau deckboards. We used two deckboards as a fascia to cover our joists and beams, filled our holes with epoxy, sanded and sealed.

For a free no obligation quote or advice on your deck or other outdoor timber construction please call us on 082 496 5444 or use the form below to contact me.

← Back

Thank you for your response. ✨

Wooden Deck Built in Toti at a Guest House

Wooden deck builder Durban

Click to enlarge

This was one of my first wooden decks in Durban that I undertook. The Guest House we built it for had just opened up the side of the dining room on the first floor with sliding doors and now wanted to extend the area by adding a deck of about 14m². It is always important to first break through the wall and install the sliding doors and then build the wooden deck. This way the deck builder can get the surface of the deck flush with the entrance to the room. I have built one deck before where the client insisted that I build the deck first and then they were going to break through. Although we did our best to measure where the inside floor was, there may still have been a small step up or down once they had broken through. On this build though it was done the right way around and the deck was flush with the floor inside the dining room.

The deck was a normal cleat, beam and joist system where we secured a cleat to the wall with sleeve anchors, installed vertical posts and attached a beam to that and then ran joists between the cleat and beam with a small canter lever. We had to try to set our posts as far out as possible so as to create enough space under the deck that could be used.

Wooden deck builder Durban

Click to enlarge

The balustrade was a normal picket style one. These are the safest and really the only one that is completely compliant with building regulations. Building regulations state that there should be no opening that is larger than 100mm. With all other balustrades there are some spaces that become greater than 100mm. Besides being non-compliant they are not that safe especially for small children. With the pickets running in a vertical direction it is more difficult for children, or adults, to climb up on the balustrade and fall over. The other designs offer more horizontal pieces that people can use to climb up on.

The stairs we built here joined the deck to the pool area which was about half a floor up from ground level. There were separate concrete stairs running from ground level to the pool area but the new wooden stairs we built could now be used to access the pool area, and the rest of the outside area, from the dining room. Because there was no way of supporting the stringer mid-way we had to ensure that we had the correct width of stringer so that it would not break over time. Most of the strength in a piece of wood is in the width and not the thickness as the downward force is exerted on the width.

Wooden deck builder Durban

Click to enlarge

We finished up by filling our holes with epoxy and sawdust and sealing with a Timberlife Satin Wood Base 28 Mahogany tint. In our decks we counter sink the screws which leave a small screw hole that water can get into. It is important to fill these so that no water can get in. If water does get in it can travel down the end grain and will cause the wood to rot much quicker at the point of the screw hole. Water travels through wood along the end grain rather than being absorbed from the face or side grain. Wood filler is also not suitable as it will pop over time due to the weather. Clear epoxy works well mixed with a little saw dust to match the colour. Once it’s dry, use a grinder with a sanding pad to flat it and then sand the grind marks off before finishing.

For a free no obligation quote on your deck or for some advice, please contact us on 082 496 5444 or complete the form below.

← Back

Thank you for your response. ✨

Wooden Balustrade Built in Everton – May 2013

Wooden balustrade

Click to enlarge

This wooden balustrade we built in Everton Kloof, Durban was for an established client of ours that we have done various amounts of work for in the past. She had had some stairs built in brick and concrete down the bank to access the lower level of her property. We had to wait a few weeks in order for the concrete to cure properly before we drilled into the side of it. It is always a pleasure installing a wooden balustrade onto a concrete substrate as opposed to a brick or block substrate. With concrete your holes can be drilled easily and the sleeve anchors used to secure the posts to the side of the stairs take nicely and bind properly. When drilling into bricks, or even worse blocks, the cavity that exists in the brick or block almost always creates a problem in that the sleeve anchor has nothing to set itself against and ends up turning on itself and not binding properly. It is most frustrating and sometimes results in drilling new holes to find a solid substrate or even going the chemical anchor route. If one is drilling into blocks with large cavities, it is sometimes better to go the chemical anchor route from the beginning.

Wooden balustrade

Click to enlarge

Chemical anchors come with sleeves that are inserted into the holes first and then the two-part chemical is squeezed into that and then a thread bar is inserted. The chemicals dry very quickly, in a few minutes or less, and the thread bar is then fixed securely in the wall. A post can now be pre drilled and inserted over the thread bar and washers and nuts fastened onto that. It is a much stronger bond than sleeve anchors, albeit more expensive. Currently chemical anchors can cost about R300-00 per tube, the size of a tube of silicone, and the sleeves are about R15-00 each.

This wooden balustrade needed to have a bend in it that can be seen from the pictures alongside as the top tread was deeper than the rest of the treads. There was a small landing at the top where the balustrade needed to be level with ground. This was the normal vertical picket style balustrade and we sealed it using our favourite Timberlife Satin Wood Base 28 in a mahogany tint. Using this product will result in lower maintenance costs going forward as no sanding will be required when re-sealing. You simply clean and re-seal.

Wooden balustrade

Click to enlarge

Balustrades are not the easiest thing to install. One needs to be very careful that both rails are parallel to each other and that they are parallel to the tips of the risers. Of course the tips of each riser will not necessarily be in a straight line. What we do is run a straight edge or fish line across all the risers to get an average line that we work from. The lower rail is then set parallel to this line and the top rail and hence the capping is set to this, again parallel. One also needs to be careful when taking corners. Often the distance between the capping and the steps can vary, especially if there is a landing involved. Where a balustrade arrives at a landing one needs to step the balustrade so that the capping will remain at the 1m mark above ground.

For a free no obligation quote on your wooden balustrades or other timber construction, please complete the form below and I will contact you or you can contact us on 082 496 5444.

← Back

Thank you for your response. ✨


Balau Screening in Cotswold Downs – June 2013

Balau or timber screening

Click to enlarge

We were called upon to quote on some balau screening in the Hillcrest, Durban area at a new development called Cotswold Downs.

There were various aircons, heat pumps and gas bottles that needed to be clad or screened so as to conceal them.

We used balau 30 x 40 struts or cleats attached to the walls. In some instances we used hiltis as there was not much load on the cleat.   In other instances we used 10mm x 100mm sleeve anchors.  We built a frame using the 30 x 40 balau and then clad it using a standard deck board of 19 x 68 with a 19mm space between. The 19mm space is standard in screening or cladding as it provides enough coverage without being too tight in its appearance. A gap of 5mm, which is standard in building a deck, would be far too close and would give it an odd appearance.

Most of the structures we built here were simple enough with either two or three sides and a removable lid so that access could be gained to change gas bottles or service aircons. Some of them had to have fronts

Balau or timber screening

Click to enlarge

that were removable as well as tops so that access could be gained from above or from the front. Some were removable lids and fronts and some were hinged. One needs to be careful which hinges you chose as they need to be strong enough and weather resistant. Solid brass hinges are expensive and with the weight of the balau can be problematic. Solid stainless hinges with bearings are best if the weight of the door is quite large. On the smaller door we used aluminium hinges as the door wasn’t too heavy and the aluminium will stand up the weather.

There were two doors we made which measured 2.5m high and 750mm wide each. That size door in balau is quite heavy and we used three galvanised strap hinges on either side. The only problem with strap hinges is that they need to be placed on the side of the door that opens, so they were visible on the outside. Some may say it adds character to the door, but sometimes you don’t want to see them. Being galvanised steel they are difficult to paint but can be painted with a Hammerite product specially designed for galvanised steel.  The only other alternative to these were to use the galvanised strap hinges that have a bent arm and slot into another piece attached to the frame. However these would have resulted in a large gap between the frame and the door or gate. Normal butt hinges wouldn’t have been strong enough to hold the door due to the sheer weight of them in balau.

Balau or timber screening

Click to enlarge

When building this type of structure it is often easier to try to build the whole thing in situ. So a frame goes up first, then you set the braces at the back to the correct length and then start adding deckboards, leaving one side long which can be cut afterwards.  If it is quite large then the door needs to be built on the ground, leaving the ends long and hung, then cut in situ.

They are unlike a normal door in that they can’t be successfully planned to fit the frame because the end grain is on the side.

We finished them off by filling holes with epoxy, sanding flat and sealing with Timberlife Satin Wood Base 28 in a mahogany tint.

For a free no obligation quote or advice on your decking or screening requirements please complete the form below and I will contact you, or you can call us on 082 496 5444.

← Back

Thank you for your response. ✨

Wooden Stairs Built in Cowies Hill, Durban

Wooden stairs Durban

Click to enlarge

These wooden stairs we built in were quite interesting because the client had a dining room which was raised about 600 from the patio outside. He wanted to be able to access the dining room through the new sliding doors. So we designed a small landing and some stairs to fit snugly in on one side so as to not take up too much space on the patio yet still allow a safe passage down the stairs. There were only a total of two treads plus the landing. It not only added value by creating an access point but also added charm with wood.

We built the entire landing on the ground from balau, screwed it all together and then lifted it into place and attached it to two walls of the house using sleeve anchors. This method also kept the whole landing in the same plane i.e. no cleat and joist system but rather a joist and fascia beam system. Each method has their own applications. If it is a fairly large deck where it would be impossible to attach each joist to the beam and then lift it into place, then one would need to use a cleat, beam and joist system. However where it is possible to attach each joist to the beam or fascia beam then it can be semi pre assembled and lifted into place. This can also successfully be done with a deck that is quite close to ground as the ends of the joists can be supported quite easily while the other ends are attached to the fascia beam which is then attached to the wall. However a deck that is raised off the ground would pose problems in trying to support each joist individually while attaching them and then lifting the entire structure up. The fascia beam system also allows one to keep the structure in the same plane and if space beneath the deck is limited then this is a better option.

Wooden stairs Durban

Click to enlarge

We clad or screened the underside of this landing to create a storage area with a hinged door on one side so that it could be closed and locked.

This one we finished with Timberlife Ultra Care Gold as it was not exposed to direct sunlight. The Timberlife Satin Wood Base 28/28 has a much lower wax content so tends not to blemish that easily in direct sunlight. The Ultra Care Gold however has a much higher wax content and the UV in the sunlight tends to make it go a bit blotchy which can result in you having to sand it all off when it comes to maintenance. The key to low maintenance in wooden decks is to apply the correct finish correctly. To sand an entire deck back to wood and remove all traces of finish is almost impossible and at times I have thought it would be cheaper to simply replace the entire deck.

This was a small day which took us a day to complete. We also added a small gate for him on the existing deck, so in total it was a two-day job with sanding and sealing.

For a free no obligation quote on stairs or other wooden structure please complete the form below and we will contact you or you can call us on 082 496 5444.

← Back

Thank you for your response. ✨

Wooden Deck Built in Durban North – November 2011

Wooden deck Durban

Click to enlarge

This was a normal wooden deck in the normal cleat, beam and joist system with a cleat attached to the wall on the house side, joists running off that perpendicular to the house and a main beam supporting the joists. This deck was built in the days when I was still sing balau as a substructure which made it relatively expensive. I have since started using at least H3 CCA Pine as a substructure. As mentioned in a previous article there is really no need to use balau as a substructure. Provided one uses the correct Hazard Grade (H grade) of CCA Treated Pine then the manufacturer of the chemicals used in the treatment process will guarantee that timber for up to 50 years. So there is a very strong argument that H3 CCA Pine will actually outlast balau because balau is not treated and will eventually rot although it will take a very long time.

H3 should be used where the timber is exposed to the elements (rain and sun) and H4 where it is buried in the ground or in constant contact with wet soil. H2, which is commonly purchased from your timber yards, should NEVER be used in decking and should only be used as roof trusses or other applications where it will not get wet that often.

Wooden deck Durban

Click to enlarge

The wooden deck was a normal rectangle with a slight deviation towards one side to create a triangle so as to meet flush with the corner of the house. We used 90 x 90 balau posts to support the main beam and resting on top of the concrete surface below. These posts had a 12mm hole drilled from below up into the posts and then a re-bar was inserted with epoxy and the same done into the concrete floor. This prevents the posts from moving sideways. There is no need to dig these posts in as they can rest successfully on the surface of the concrete. A shoe was cut from timber in order to secure the main beam to the wall of the house. It is really just a piece of timber that is notched to accommodate the beam and the shoe is then secured to the wall using sleeve anchors. The beam then rests in this shoe and cannot move sideways or down. The weight of the deck of course prevents it from lifting up plus it is screwed into the shoe.

The balustrade was interesting as it was not the normal picket style you see in most other articles. It was the criss cross design with a box in the middle or Tahitian style as it is often called. We also carried this style of balustrade down the stairs. One can sometimes switch to picket style as one goes down the stairs and return to Tahitian style on the flat surfaces. We needed to adjust the angles slightly as we turned the corner down the stairs in order to get the balustrade in the correct plane.  We also built a gate at the top of the stairs which could be latched closed or even locked.

Wooden deck Durban

Click to enlarge

It was sealed using a Timberlife Satin Wood Base 28/28 product which is a timber preservative that soaks into the timber rather than drying on the surface. Maintenance is therefore easy in that it can never peel or flake as it has soaked in and not dried on the surface. Simply clean it and apply two or three more coats. No more sanding, EVER.

For a free no obligation quote or advice on design of your wooden deck, please complete the form below or call us on 082 496 5444.

← Back

Thank you for your response. ✨

Wooden Stair Case Build Durban

Wooden stair builder

Click to enlarge

This wooden stair case build by The Wood Joint in Durban was a tricky one. The client was a committee member on the body corporate for a small block of flats in Durban. There were about 4 units in the block and the existing steel fire escape had rusted to a point where it was unsafe. So first we had to remove the steel structure. With a little help from my friends, we came in and chemical anchored stainless eyes into the wall on both sides above the steel platform you see in the pics. From there we rigged up some climbing equipment to be safe and started cutting sections out of the steel structure and lowering them slowly to the ground. We had to cut small sections as the steel was 10mm thick and we didn’t want to damage the walls, windows or doors on the way down. We managed to get most of it down in one day with a small piece remaining for day two. We battled slightly in getting the main support off as the sewage pipes had been installed after the steel so we had to cut the steel out around the pipes so as not to damage the pipes. In removing it we inadvertently damaged a corner of the wall as the rawl bolts there were quite large, rusted and pretty much part of the building by now. We patched that using structural grout which was hard and strong enough to support our main beam to.

Wooden stair builder

Click to enlarge

With the steel gone, we set out to build a wooden stair case and landing that could act as a fire escape. The small landing part was easier enough and we canter levered it so as to keep our posts out of the way below for parking. In these smaller blocks of flats in Durban space is very limited so posts need to be kept well out the way of parking space. Because we were canter levering it we needed to use 30 x 140 joists of balau rather than our normal 30 x 102 joists.

The stringers for the stairs were also tricky as we had to follow the original line of the stringers because there was a window beneath that we couldn’t cover and we could only protrude to the end of the wall without obstructing the driveway. This resulted in our stringers being placed at 45 degrees which resulted in our risers being of equal length to our runs or treads. It is not ideal as it makes the stairs very steep but we had no option due to space and height. We were a total of about 4m in the air to the landing.

The treads went on alright, the balustrade too and we had to join the stringer on the outside with two independent posts to ground to support it as the timber we could get wasn’t long enough to run the full length of the stringer.

Wooden stair builder

Click to enlarge

We went back there a year or two later as one of the treads had popped a screw. Sometimes the timber moves more than one wants it to and breaks the screw off. We do however put additional back up screws in each piece we secure so they are safe in the event that one screw does break.

For a free no obligations quote on wooden stairs or any other outdoor timber construction please complete the form below or you can call us on 082 496 5444.

Wooden stair builder

Click to enlarge

Wooden stair builder

Click to enlarge

← Back

Thank you for your response. ✨

Lutyens Bench – Outdoor Garden Furniture

Outdoor garden furniture

Pictured is a bench with a curved centre backrest. The benches we now make have a straight piece as the centre back rest. The curved top backrest remains as pictured.

This was a lovely job to have received. A client found me on the internet and came across some of the outdoor furniture I was making. Before I started building wooden decks I made furniture, largely outdoor picnic tables, Adirondack chairs and the like. I think I’ve mentioned it before in this blog, but it is difficult to make a decent living making furniture in South Africa. The imports that exist nowadays are so cheap and unfortunately people almost always look at price before quality.

Nevertheless, I was approached by this client and commissioned to make this bench. Lutyens Bench is a bench that was designed and first built prior to 1913 by the Edwardian architect Sir Edwin Lutyens (the Dutch name is pronounced “Lut-chins”). They have since become very popular and are very distinctive in their design as can be seen.

The client brought me the plans which he had ordered online and they had been delivered to him in full size of scale 1:1. All of the pieces came as templates and they were cut out and the pieces of MDF then cut from them. I made a few templates for the curved pieces from supawood or MDF. MDF is easy to shape as it is relatively soft and can be worked quite easily. Once I had a template I rough cut my balau slightly larger than it needed to be and then clamped the templates to the work piece and ran a flush trim router bit over it. The flush trim router bit contains a bearing at the bottom which is in line with the cutting edge. So the bearing runs along the template beneath and the cutting edge cuts the work piece above to the same shape as the template. Multiple pieces can then be cut to the exact same shape.

Outdoor garden furniture

Pictured is a bench with a curved centre backrest. The benches we now make have a straight piece as the centre back rest. The curved top backrest remains as pictured.

Once I had all my pieces cut I used a domino machine from Festool. The plans indicated dowel joints but after buying my Domino Machine years ago I don’t use anything else. A Domino Machine works in a similar way to a biscuit jointer but it cuts a long straight hole rather than the traditional round hole that the biscuit jointer cuts. A Domino made from birch is then inserted into the hole and it produces a mortise and tenon joint that is both strong an easy to cut. The birch expands slightly with the moisture of the glue so the domino fits tightly in the hole. They have grooves to allow the excess glue to squeeze out and are slightly shorter than the hole to allow them to be inserted completely. A very clever machine from Festool I must say and I am surprised that other manufacturers haven’t copied it.

The pieces went together quite well but I did battle on a few of them where I couldn’t use the Domino machine so had to use epoxy as my glue and a nail gun to hold then in place. I bumped into the client years later and the bench was still in one piece so my method must have worked.

Outdoor garden furniture

Pictured is a bench with a curved centre backrest. The benches we now make have a straight piece as the centre back rest. The curved top backrest remains as pictured.

I finished it with an outdoor timber preservative. I chose balau as my timber because it was to live outdoors and the balau holds up very well to the weather in Africa. The client had built the area you see in the picture especially for this bench. It took me a while to leave after delivering it because it all seemed to fit so perfectly together in the setting they had chosen in the garden.

For a free no obligation quote on outdoor furniture or any other timber work that you require please complete the form below and I will get in touch with you.  Or you can call us on 082 496 5444.

← Back

Thank you for your response. ✨


Jacuzzi Cladding – Umhlanga, Durban

Jacuzzi Cladding Umhlanga, Durban

Click to enlarge

Jacuzzi cladding is a nice job to get hold of because it allows one to use up a lot of off cuts that would otherwise be useless in building say, a 20 square metre deck, as most of them are less than 1m in length. A lot of wood is wasted when erecting a wooden deck because one will order a 3.3m piece of timber and only 3m or 2.9 will be required. Or the lengths required are not available from the supplier so a longer piece needs to be bought. Cladding Jacuzzis allows one to use these off cuts in the substructure and thereby recover some of the cost of the waste. The timber is still new and is not compromised and would need to be cut to that length anyway (so sorry no discounts because of this).

This Jacuzzi cladding was fairly simple in that there was an existing structure there that had deteriorated and was therefore removed and replaced with exactly the same shape structure. So there was no thinking involved really, we simply made sure that the existing structure was correct in its dimensions and then we replicated what was there.

When constructing these types of decks or cladding structures it is best to try to keep the deckboards running in the same direction. To make the deck boards all run parallel or perpendicular to the pool or Jacuzzi would be very tricky and may result in errors. Having said that we are busy with a wooden deck now in Westville where we have kept the deckboards parallel to the pool on all sides for various reasons. I will update you once that is finished, with pics.

Jacuzzi Cladding Umhlanga, Durban

Click to enlarge

The structure of this cladding went on well and we then clad it with normal standard deckboards. We created a 1m² step or landing so that once people had finished in the Jacuzzi they could dry off on this landing without having to try to balance on the edge. It provided a nice platform that remains relatively dry. The shelf or step on the side of the Jacuzzi provided a nice ledge to climb in and out of the Jacuzzi with and to place drinks or snacks on while relaxing.

All screw holes were plugged with a mixture of clear epoxy and saw dust (to match the colour as closely as possible) and then sanded flat. It was sealed using Timberlife Satin Wood Base 28, an outdoor wood sealer suitable for woods of low porosity. Maintenance is therefore kept to a minimum as this product penetrates the timber and does not dry on the top as do most shop bought sealers. The timber can be left unsealed but it will turn grey and any sealing thereafter needs to be done carefully by bleaching the timber first to get it back to its natural colour.

I haven’t done many Jacuzzi cladding jobs, but as mentioned above it is a useful way to get rid of off cuts that would otherwise be useless in a larger wooden deck. Our other use for off cuts is shower duckboards and pot plant holders, for the much smaller pieces. They keep the pot plants off the deck which prevents that piece of the deck being exposed to excessive or continual wet. The duckboards are useful for getting in and out of the shower. We sell those at the cost of timber in an effort to recover a bit on the waste.

For a free quote or advice on your wooden deck or Jacuzzi cladding please complete the form below and we will contact you.  Or you can call us on 082 496 5444.

← Back

Thank you for your response. ✨

Wooden Sundeck Built in Gillitts – April 2013

Timber deck builder Durban

Click to enlarge

This was our second deck we built in Durban using CCA pine as a substructure. I can confirm that there is a substantial cost saving using pine as a substructure and provided it is CCA treated to the correct Hazard Level (H level), then it is guaranteed by the supplier and manufacturer against rot and insect infestation for up to 50 years. So at least H3 must be used which is good for outdoors, exposed to the elements and if there are parts of it that are making contact with ground then H4 is better. In fact the cost difference between H3 and H4 is so slight that I am tending to just use H4 throughout as a matter of course to err on the side of caution.

This deck extended from the house outwards about 5m. Half of that 5m length was on existing tiles and concrete so we placed batons of 38 x 76 and the rest of it dropped down about a metre onto soil. We chose 76mm as our width of baton because it brought us up to exactly where we wanted to be in terms of height of the deck in order to clear the bottom of the door. We therefore had very little space between joist and the tiles so there was very little packing to do. When we place batons on the ground as joists, we fix them using a hilti. The hilti is really just to stop the joist moving sideways and not really up or down as once the deck is built the weight of it keeps it from lifting up. However the hilti provides enough fixing power in both directions so sleeve anchors are not necessary. Often the ground on which you are fixing these batons / joists to, is not completely flat and in order to get the surface of the deck level, one needs to shim one end of the baton or joist. This results in one end being higher than the concrete ground level and as such a gap exists between the baton and the ground. Because these batons are relatively thin (between 38mm and 76mm) they are not strong enough in their width to support the deck. They therefore need to be packed with structural grout or a building sand / cement mixture to take up the gap between the baton and the ground.

Timber deck builder Durban

Click to enlarge

The rest of the deck was elevated about 1m off the ground so from that point we installed 38 x 114 joists with a main beam running the width of the deck (parallel to the stairs in the picture). We set that back 300mm so that our span between beam and wall was only 1.9m which is the maximum I am happy to go with a 38 x 114 joist.  The rest of the deck was therefore cantilevered by about 300mm.

Deckboards went on without a problem, and we then built the stairs that you can see in the picture. We took a different approach to the stairs that we normally do, or have done in the past. In the past we have secured a beam all the way along the front of each riser. In this case we built treads and risers in line with each joist and then only on the front riser we fixed a fascia beam which was then secured to posts that had been set in concrete in the ground. It was much quicker than, and just as stable as our previous method. The structure that we built can be seen on one of the pics alongside.  The client wanted to leave the sides open as he is planting some indigenous plants alongside to cover the gap thus allowing his access beneath the deck if need be, but once the plants grow they will cover the sides.

Timber deck builder Durban

Click to enlarge

This deck was left unsealed as the client wanted the greying effect. I will re-visit it in a few months’ time and if the client is agreeable we can bleach it and high pressure clean it in order to bring it back to its natural colour.

For a free, no obligation quote please complete the form below and I will contact you.  Or you can call us on 082 496 5444.

← Back

Thank you for your response. ✨