Wooden Decking in Durban – What Timber to Use

Wooden decks Durban

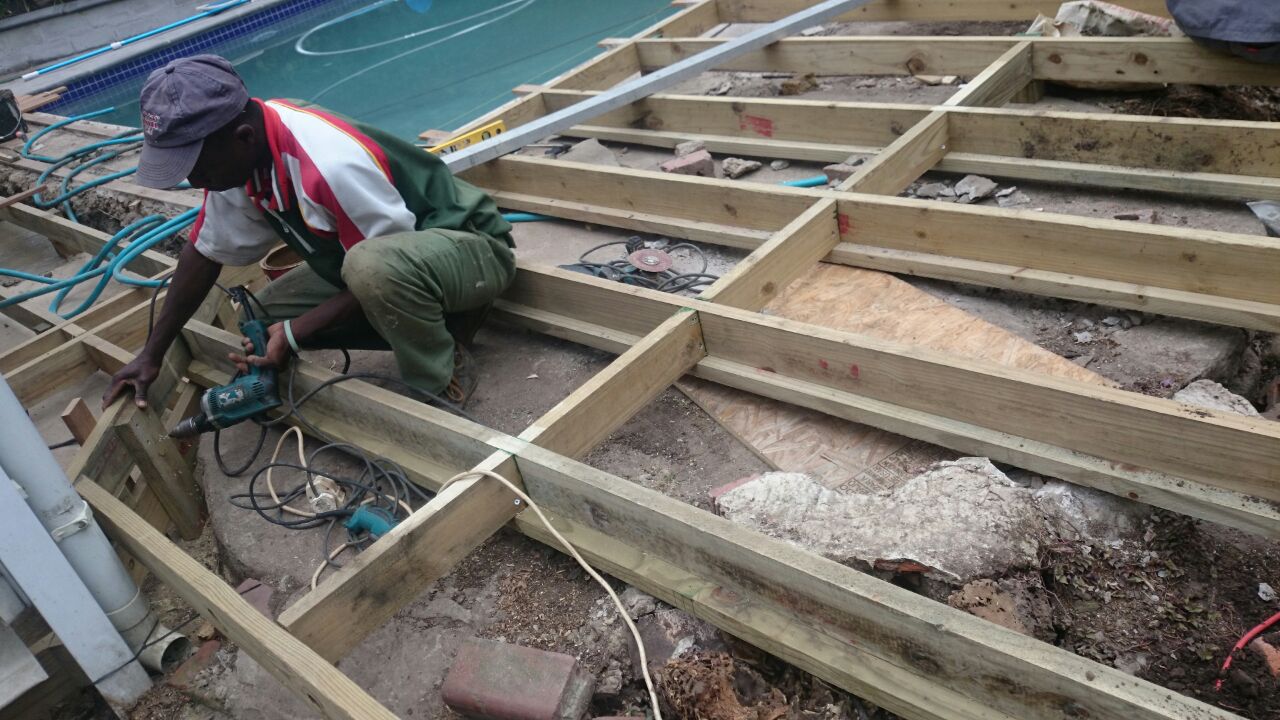
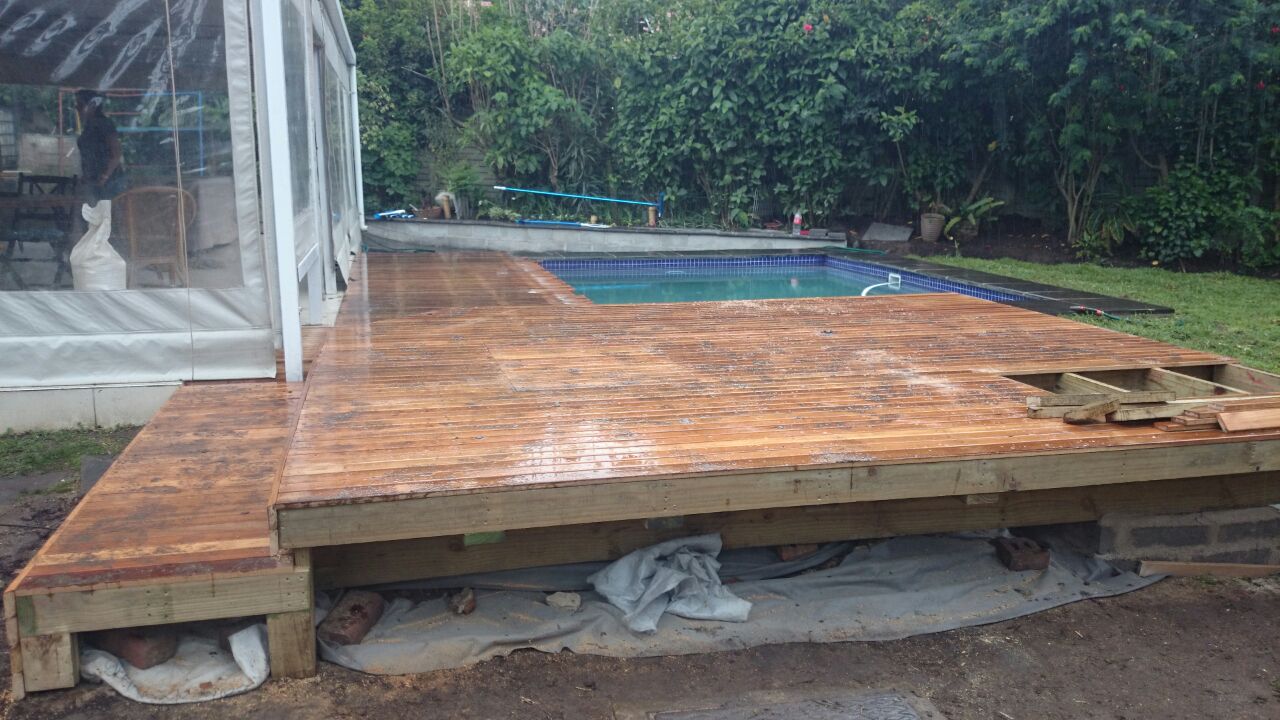
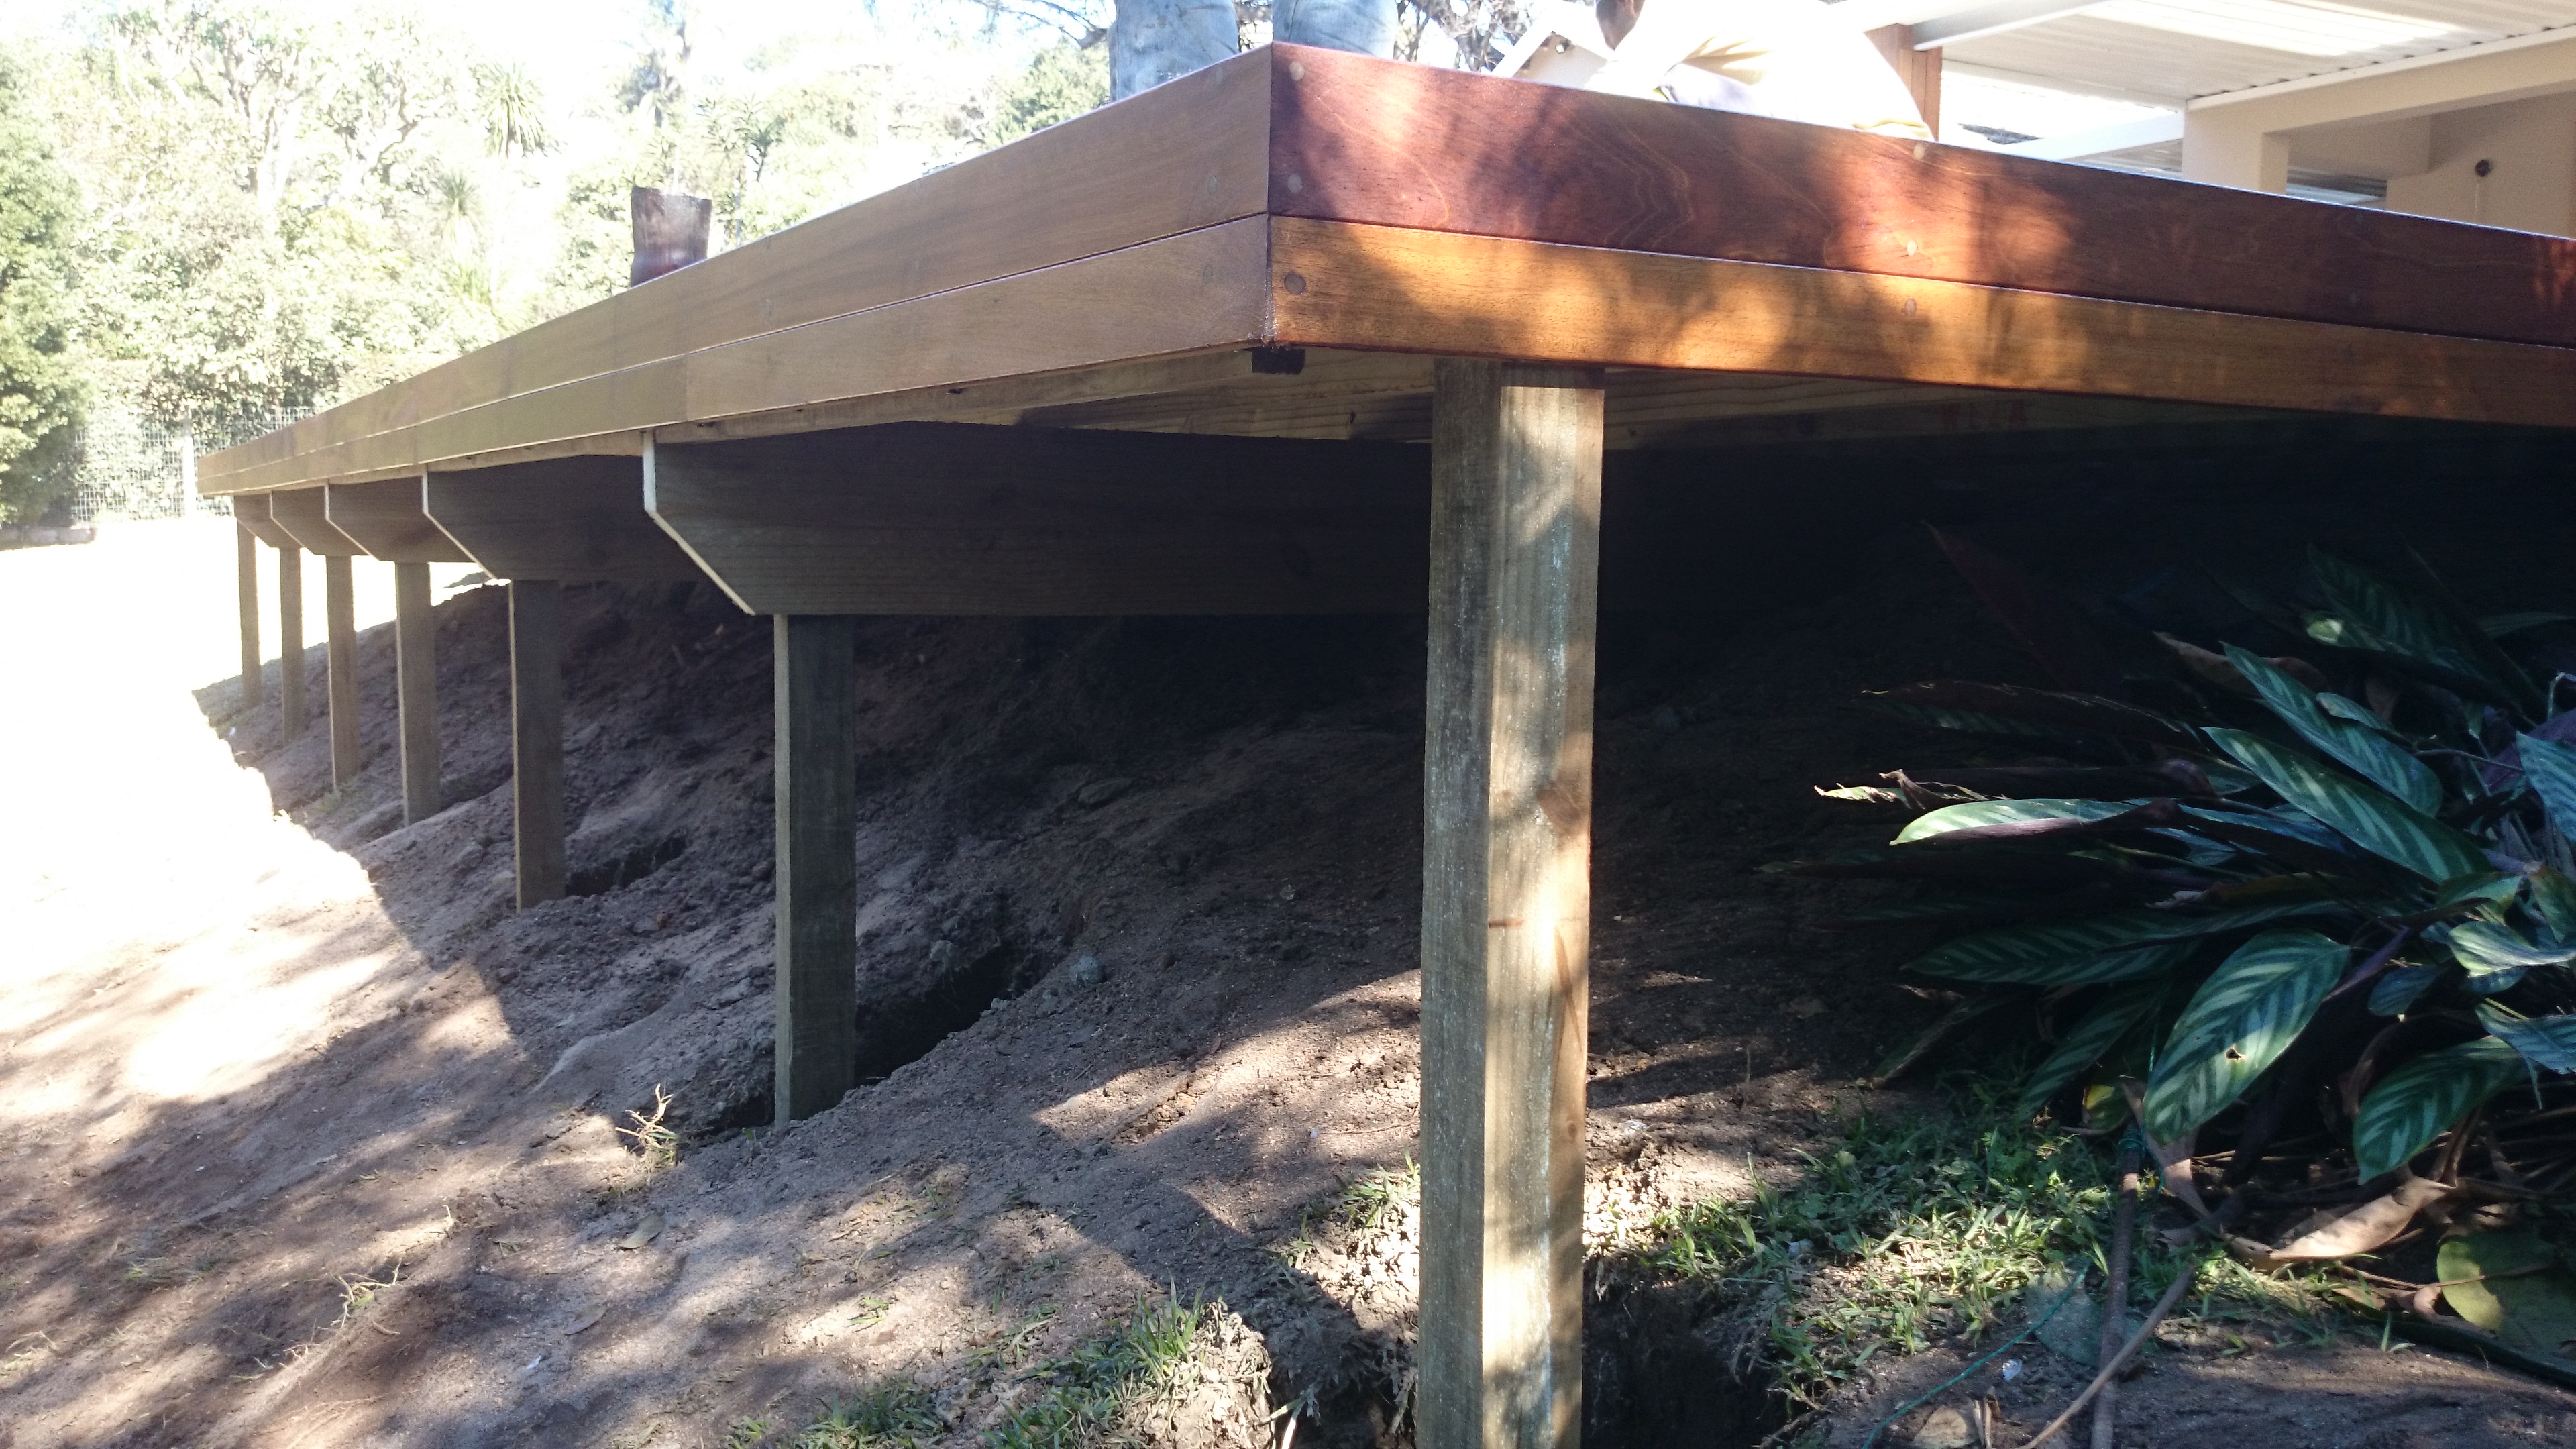
A CCA treated pine substructure and balau deck boards

Wooden decking in Durban, or any other area in South Africa is a valuable, inexpensive way of creating extra outdoor space. The climate in South Africa lends itself to outdoor living and as such a wooden deck in Durban is almost essential. There are many articles on this blog on how to build a wooden deck, what methods we use in building etc. so please feel free to browse and find what you are looking for. In this article I will mention some of the types of wood we use in building our wooden decks and provide reasons why we choose those types of wood.

Our deck substructures are made from CCA treated pine. Pine is a locally grown timber, relatively fast growing and as such inexpensive. It is used widely in the building trade as structural timber. It does however need to be CCA treated in order to prevent rot and insect infestation. CCA treatment is available in various H levels or Hazard Classifications. H3 is what is typically used in wooden decking as it is suitable to live out doors with occasional wetting. H4 is what one uses for posts or beams that are in constant contact with wet soil. If you stick to these guidelines, as set out by The South African Wood Preservers Association, then you will get a minimum of 50 years life span from your H3 timber and 30 years from your H4 timber. Pine is also relatively cheaper than balau. Balau can be used as a substructure but it is about 4 to 5

Wooden decks Durban

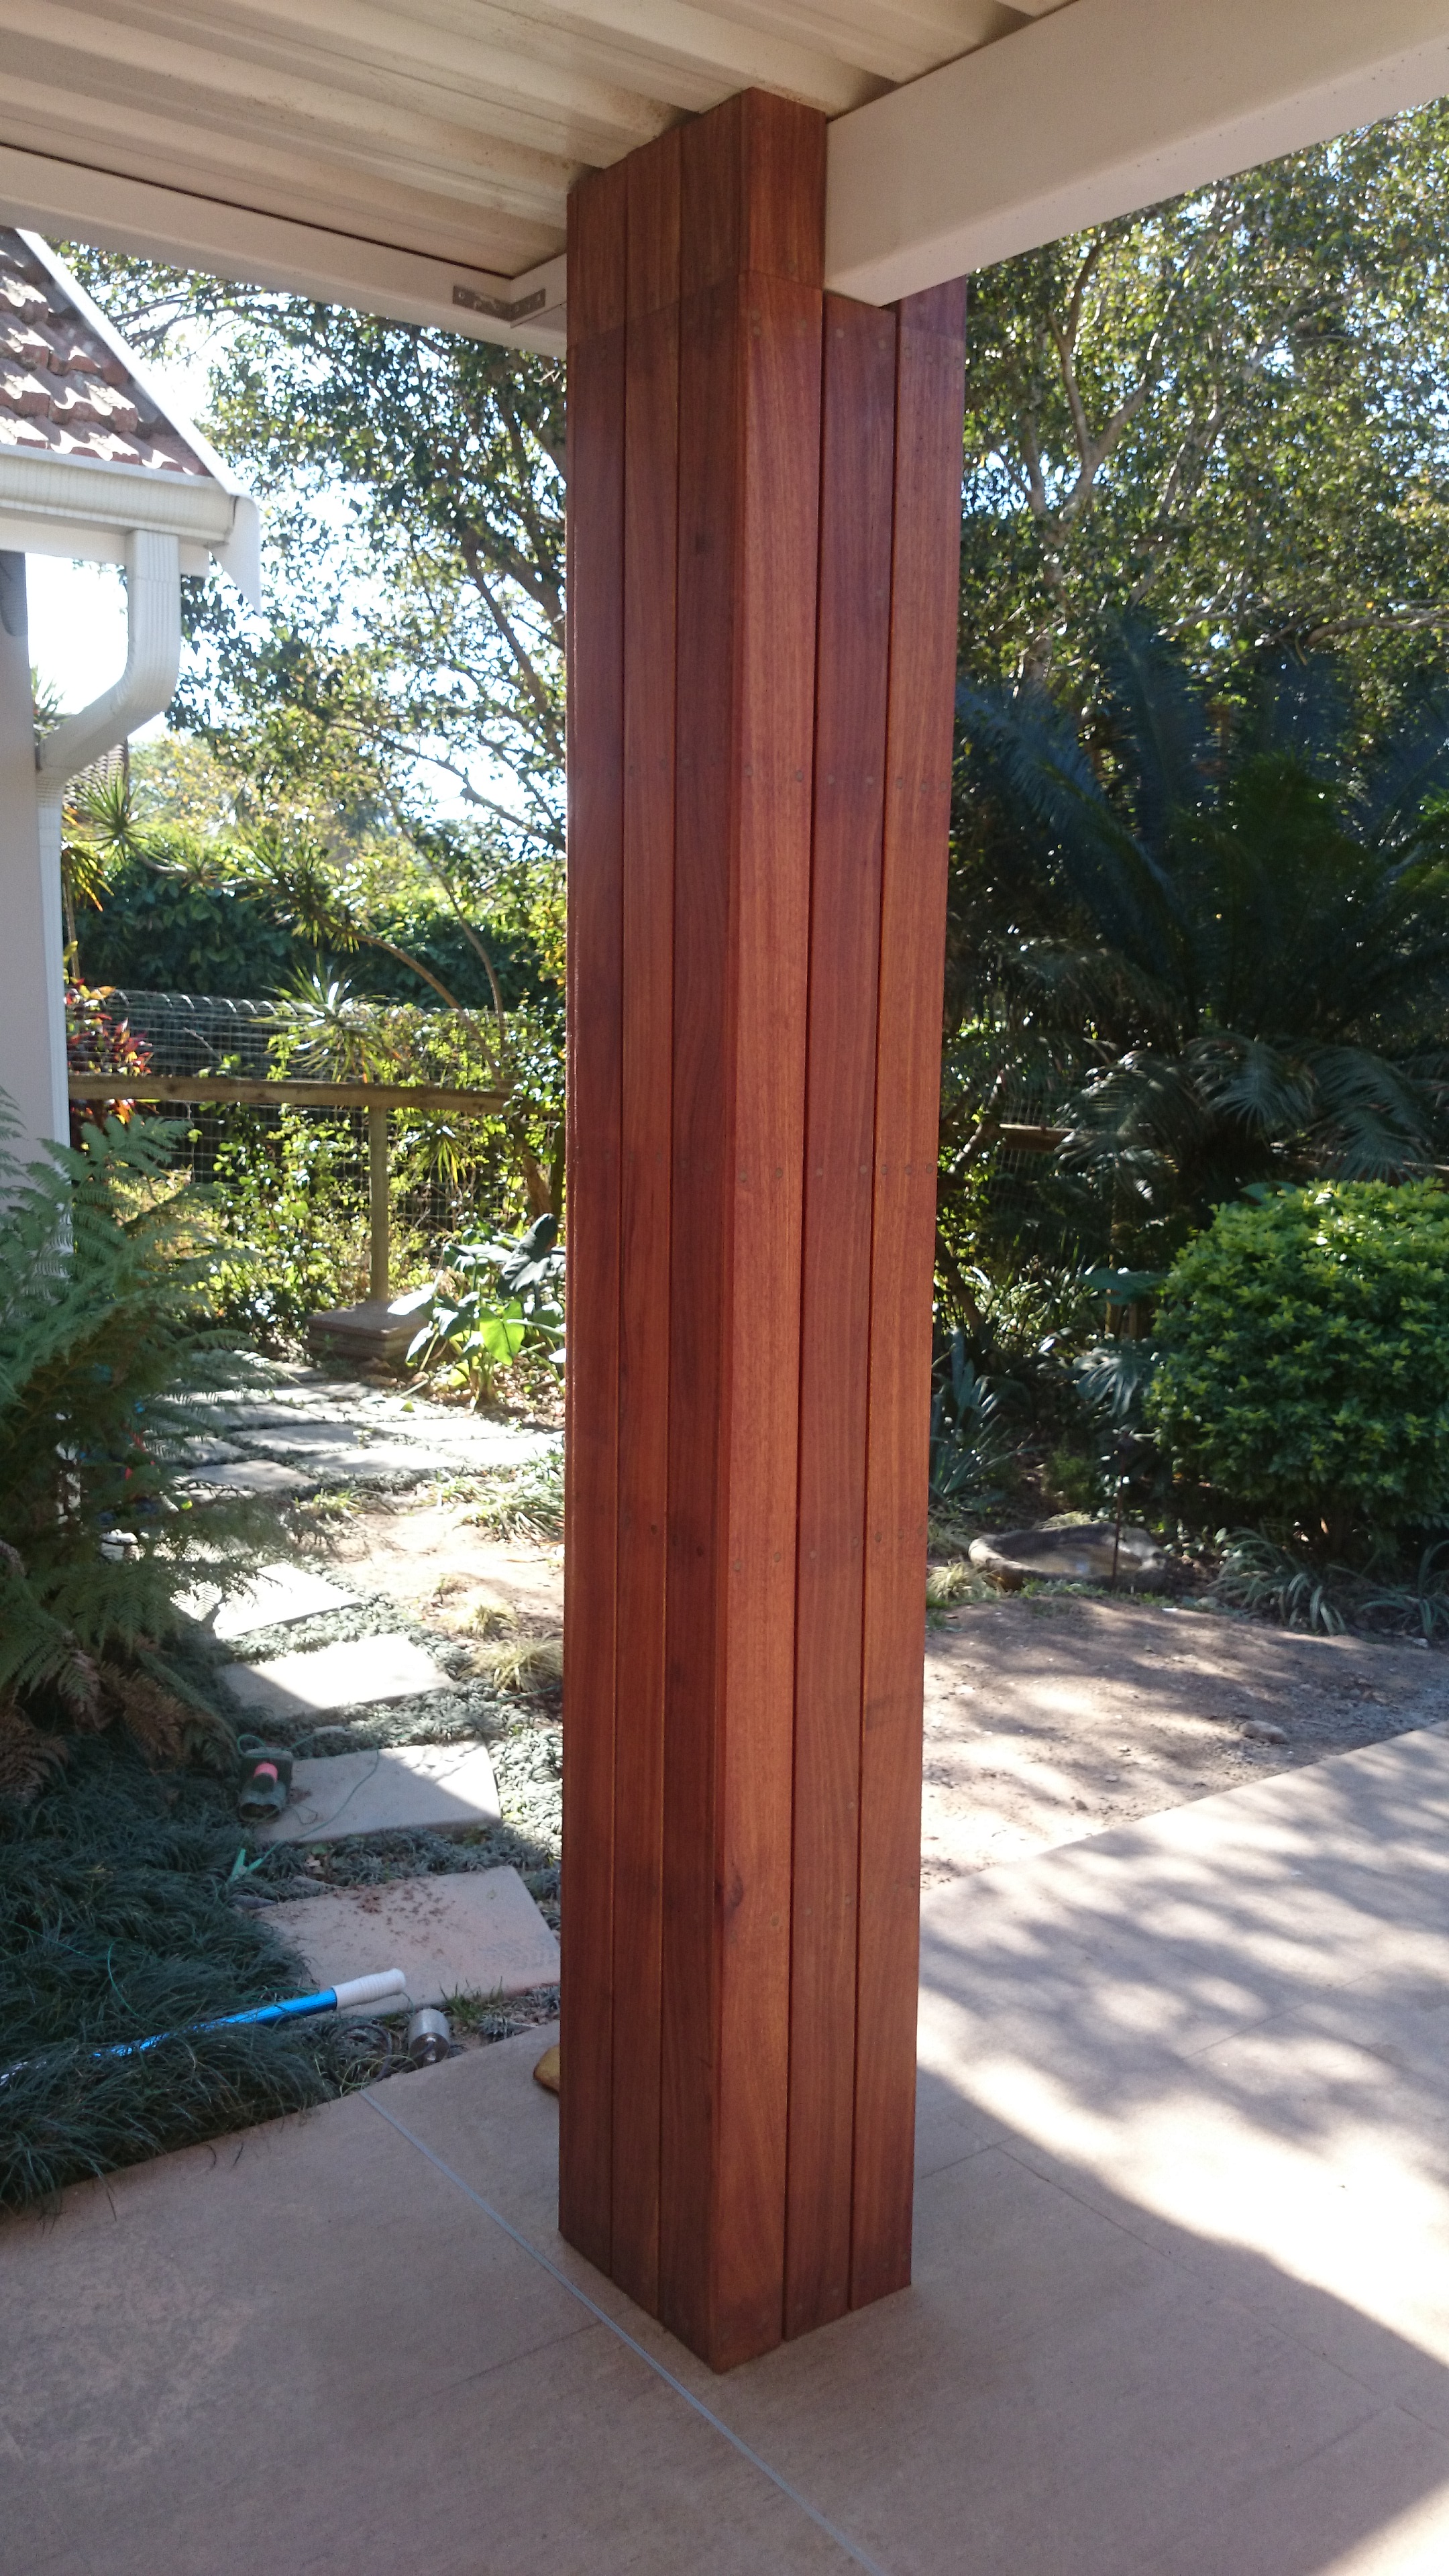
A balau substructure

times the price of treated pine. Balau will rot quicker than correctly treated pine in a substructure, believe it or not.

The pine that needs to be used in the substructure needs to be at least S5 which is SABS structurally approved timber. What it means is that there is no more than a certain specified amount of knots per square metre of timber. Pine is very knotty and is split up into different S categories which all carry a different price tag.

Pine is however not my fist choice for deck boards. Firstly it costs pretty much the same as balau. The reason for this is that the grooves below are machined here in South Africa and it is S7 timber so virtually knot free and it therefore carries a higher price tag then S5 pine. Added to this is that you are using almost twice as much timber because it is less dense. Typically a pine deck board would be 32mm thick whereas a balau deck board would be 19mm thick. The cubic metre rate for balau deck boards is also about half the price of the structural balau. Pine also tends to, warp and crack more easily then balau when exposed to direct sunlight because it is less dense and expands and
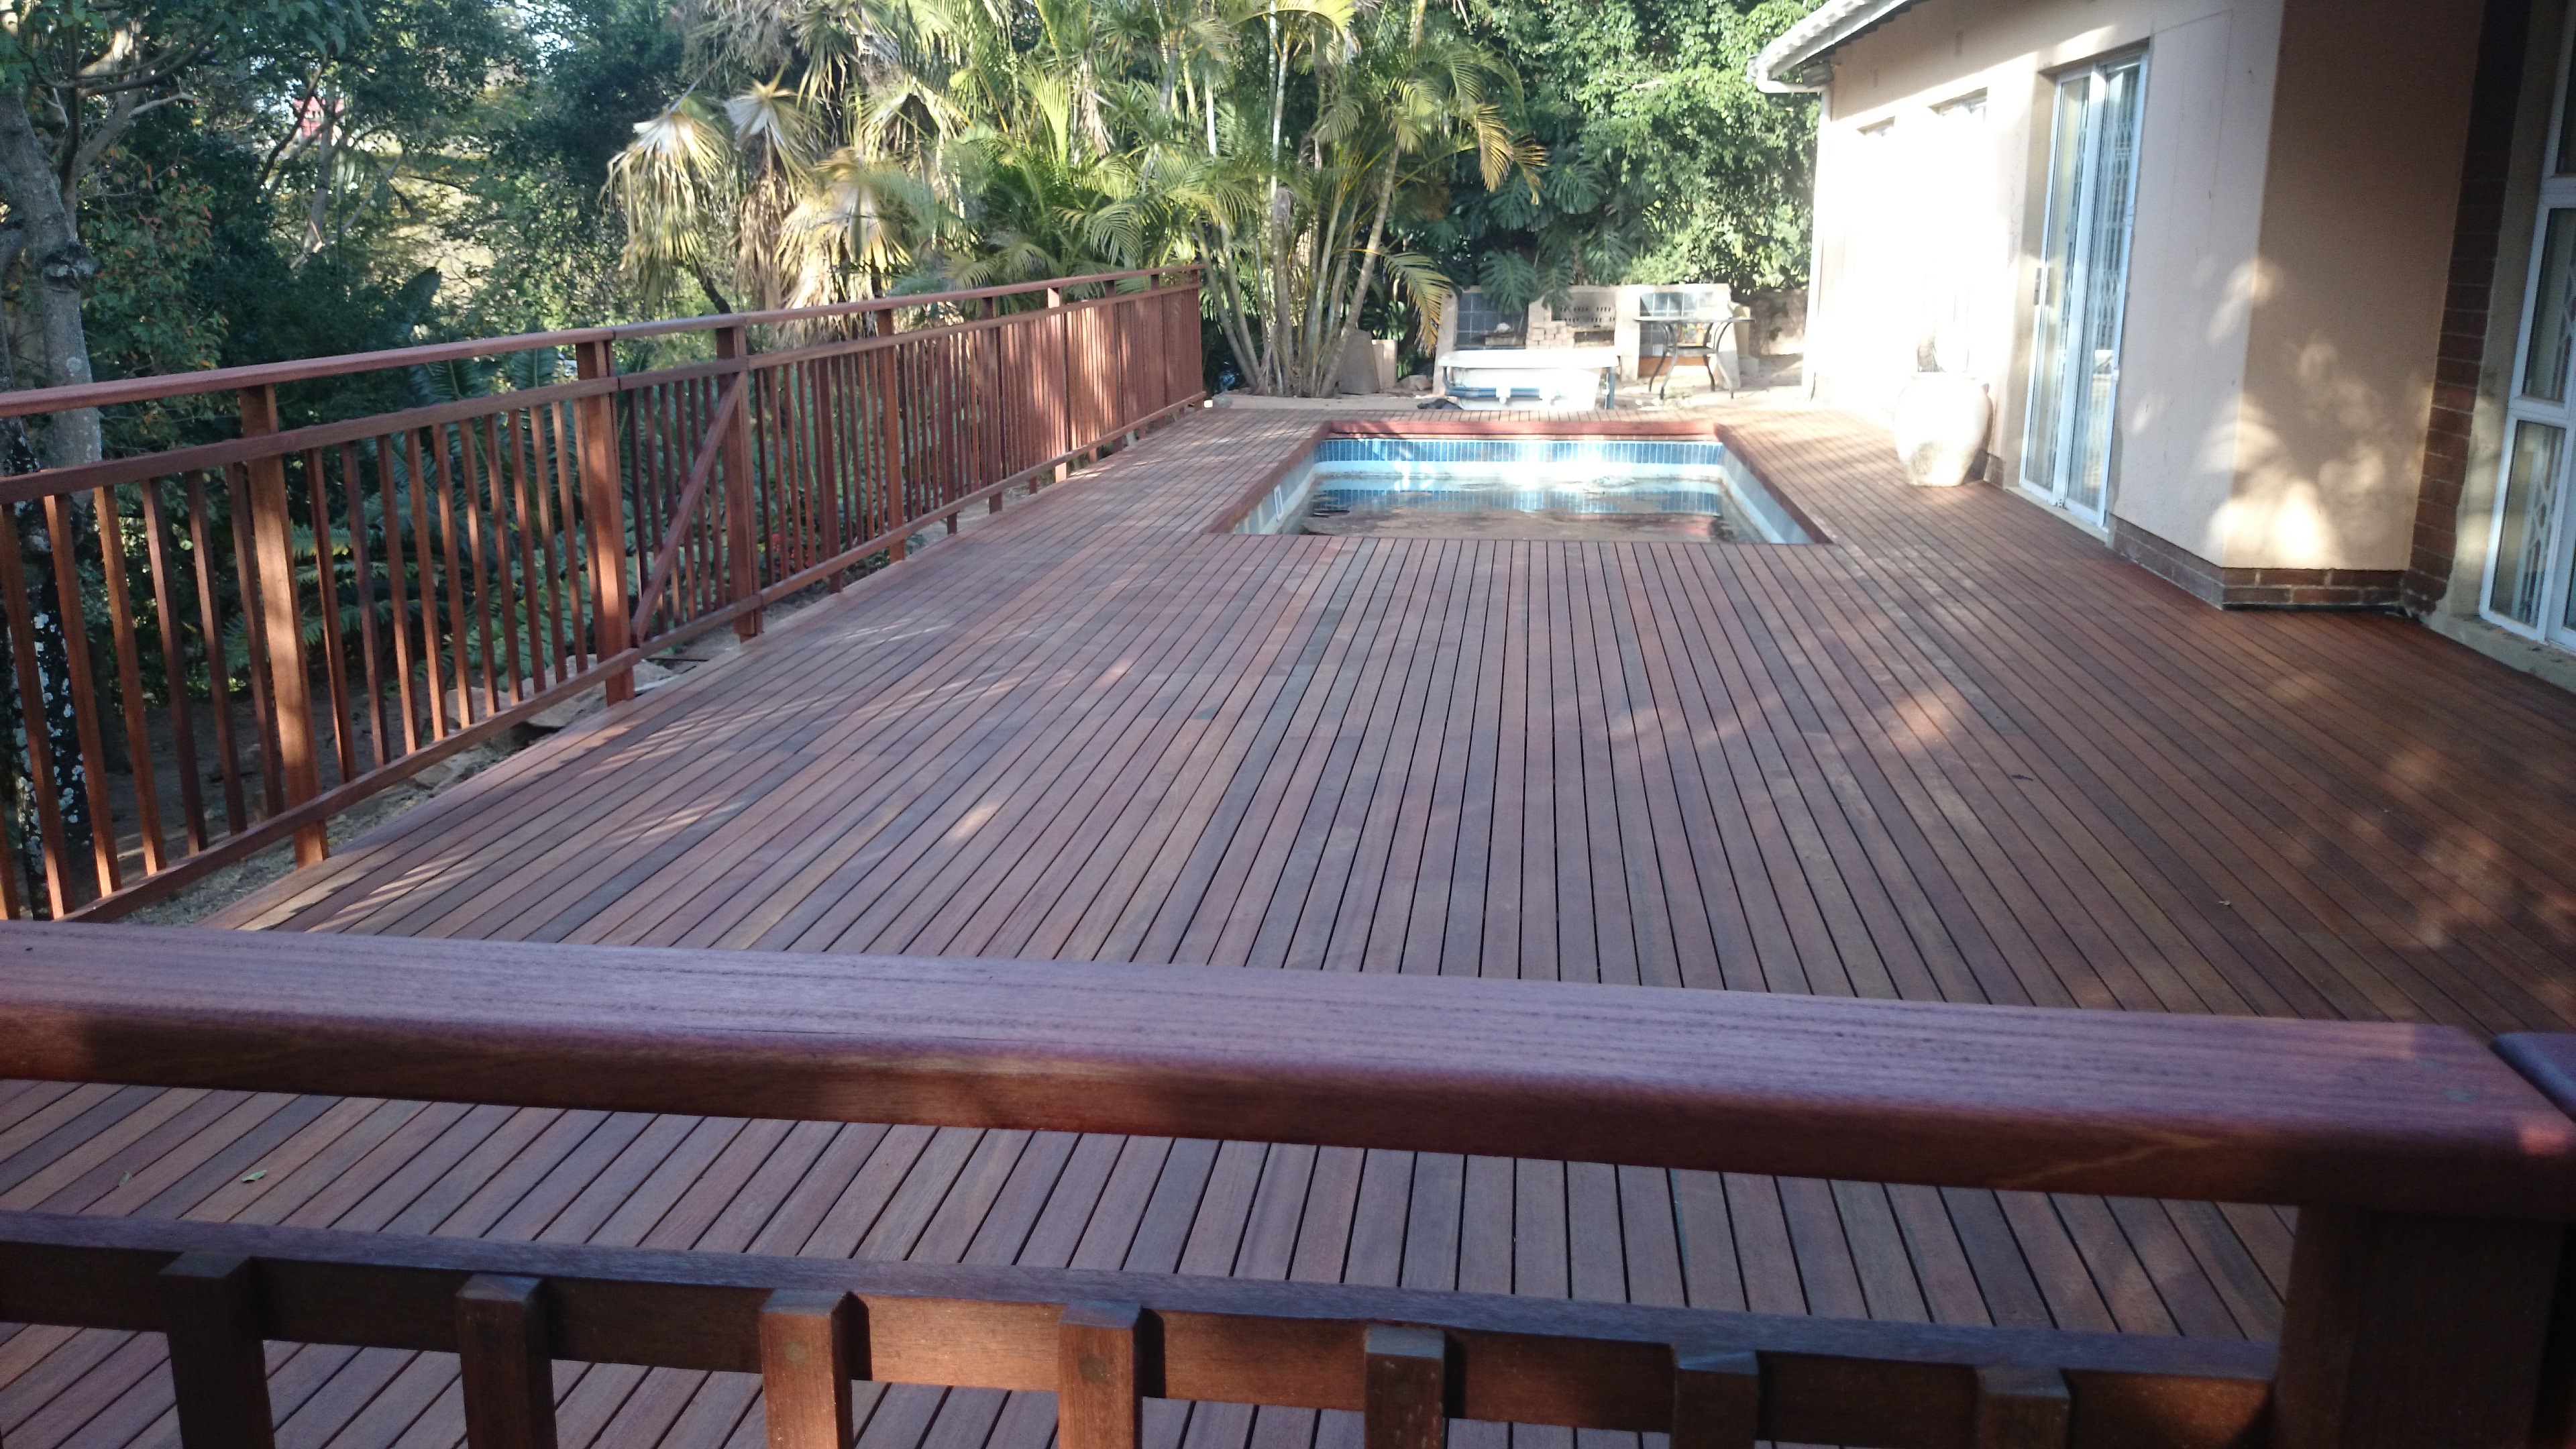
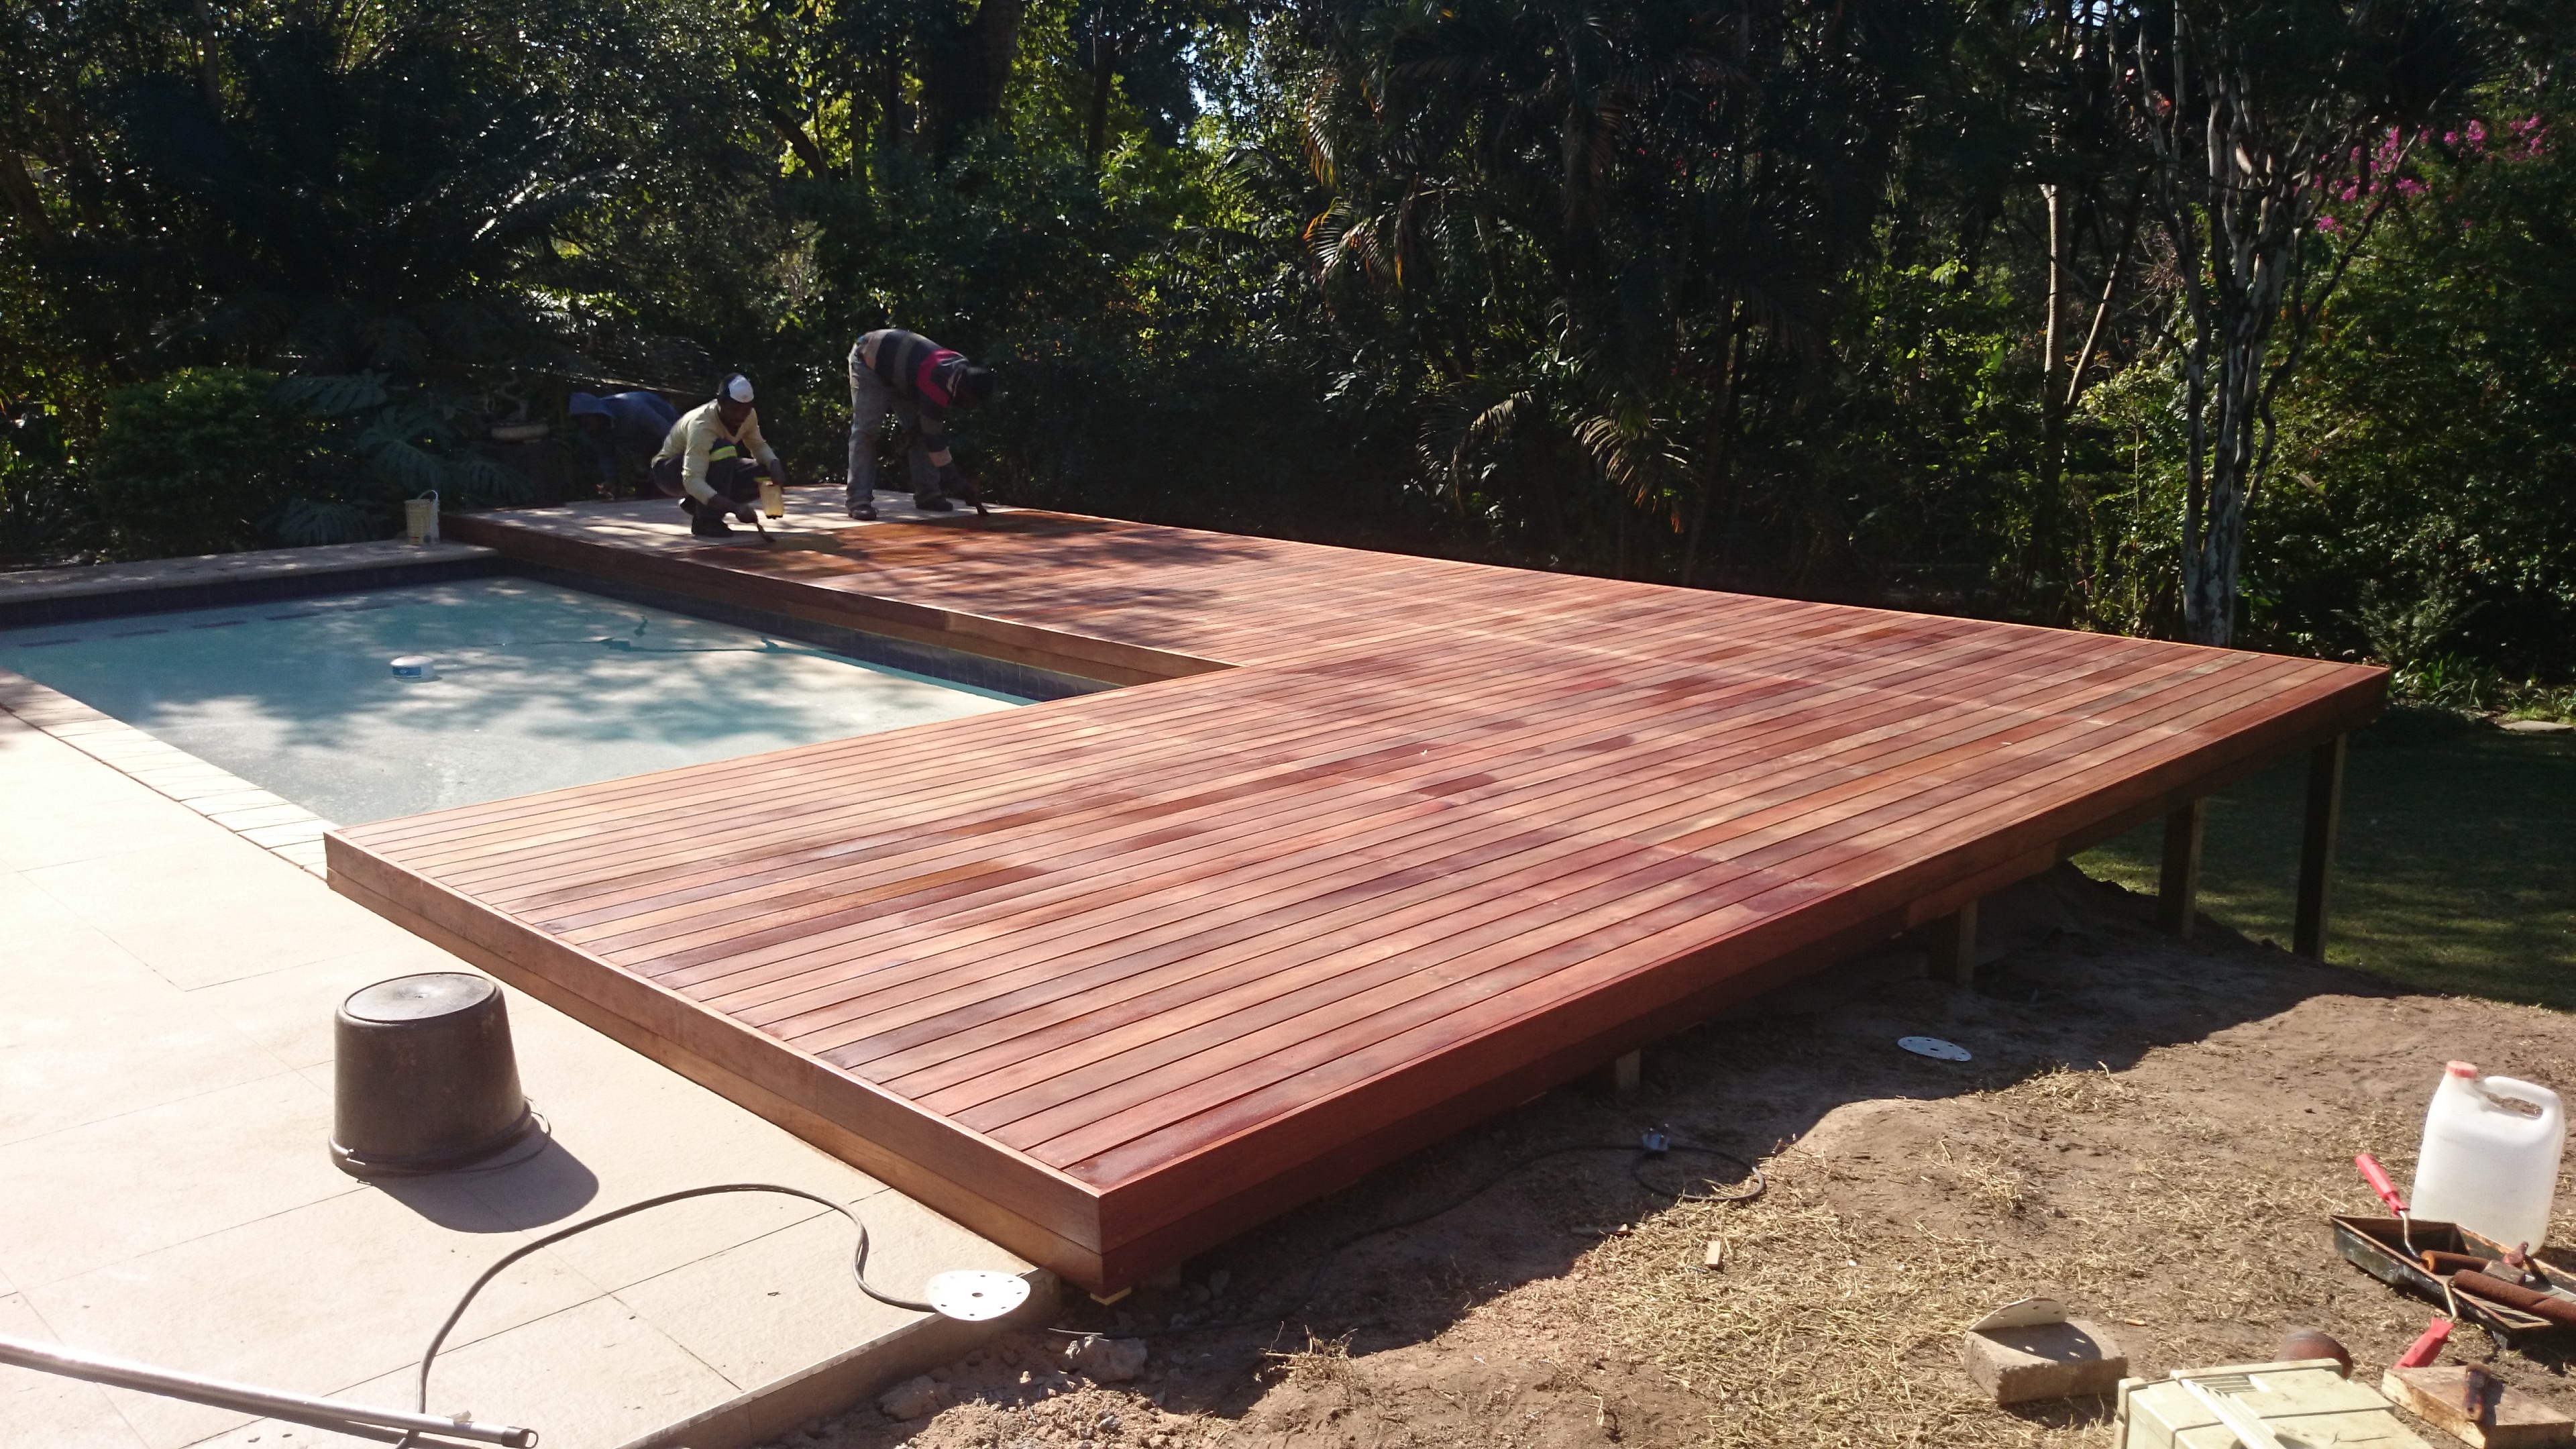
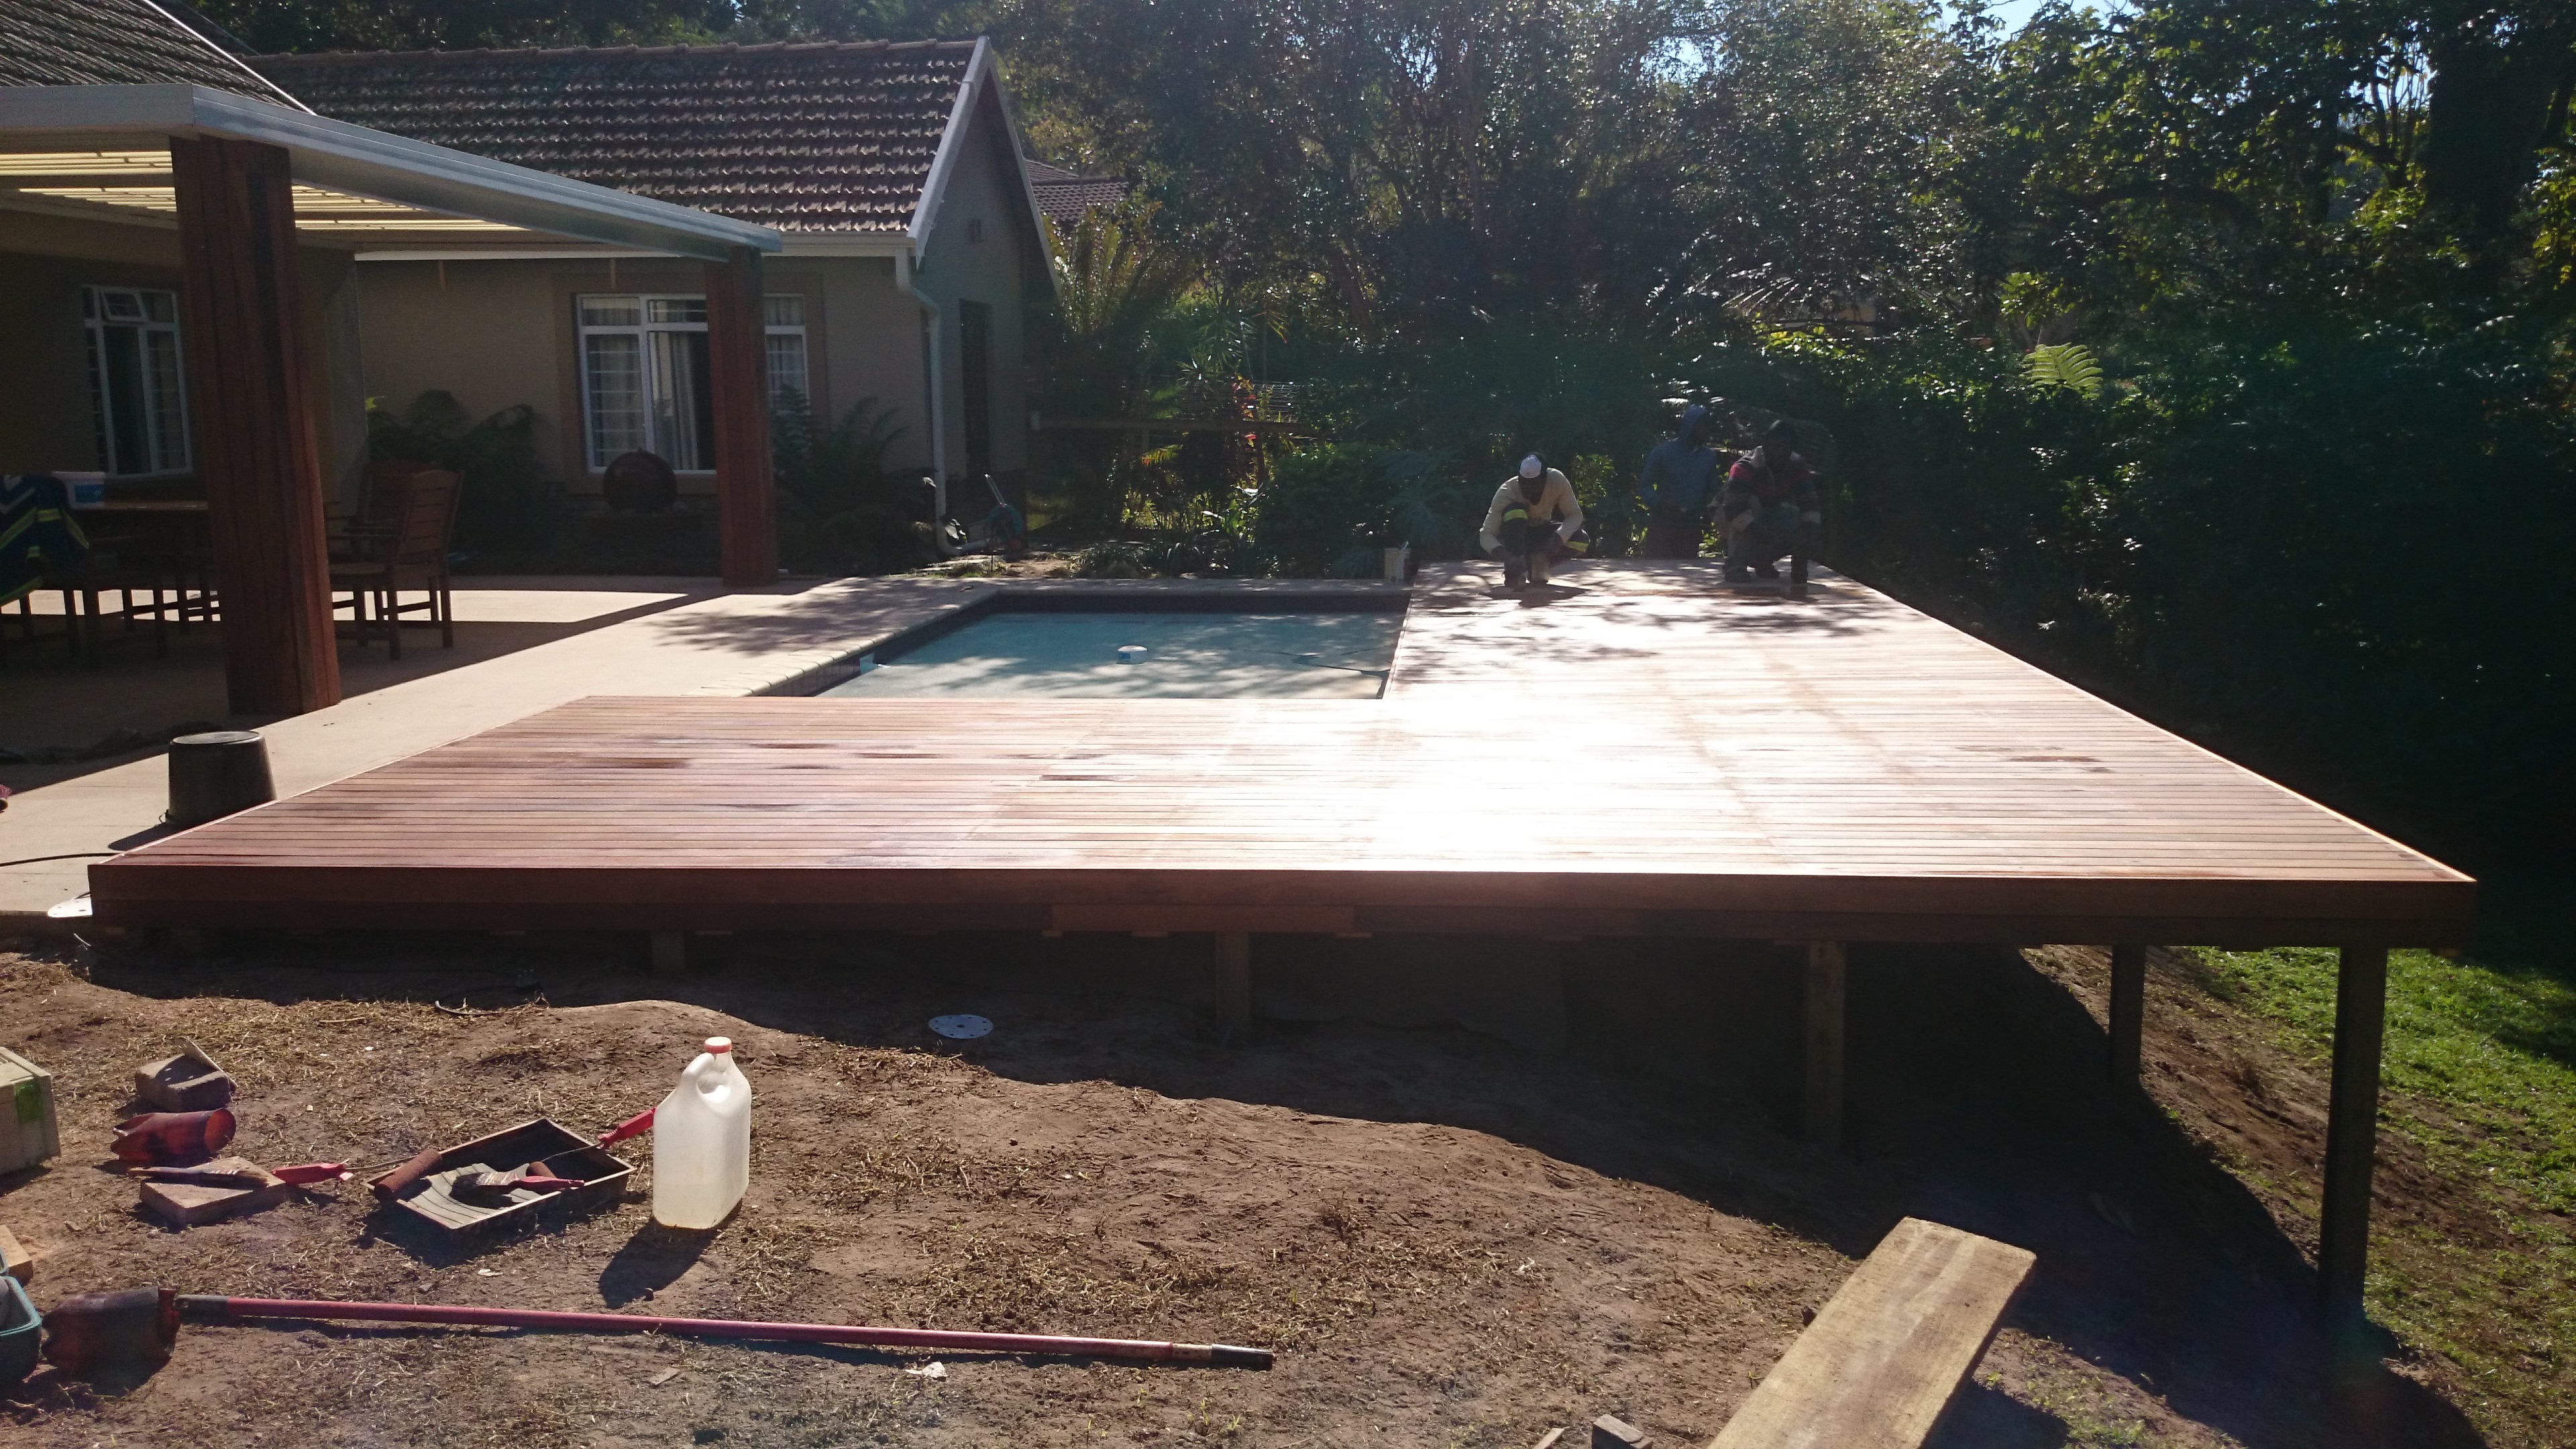
Wooden decks Durban

Balau deck boards

contracts a lot more than balau. This is fine for a substructure which uses thicker pieces of wood and is protected from the sun, but doesn’t work well on deck boards.

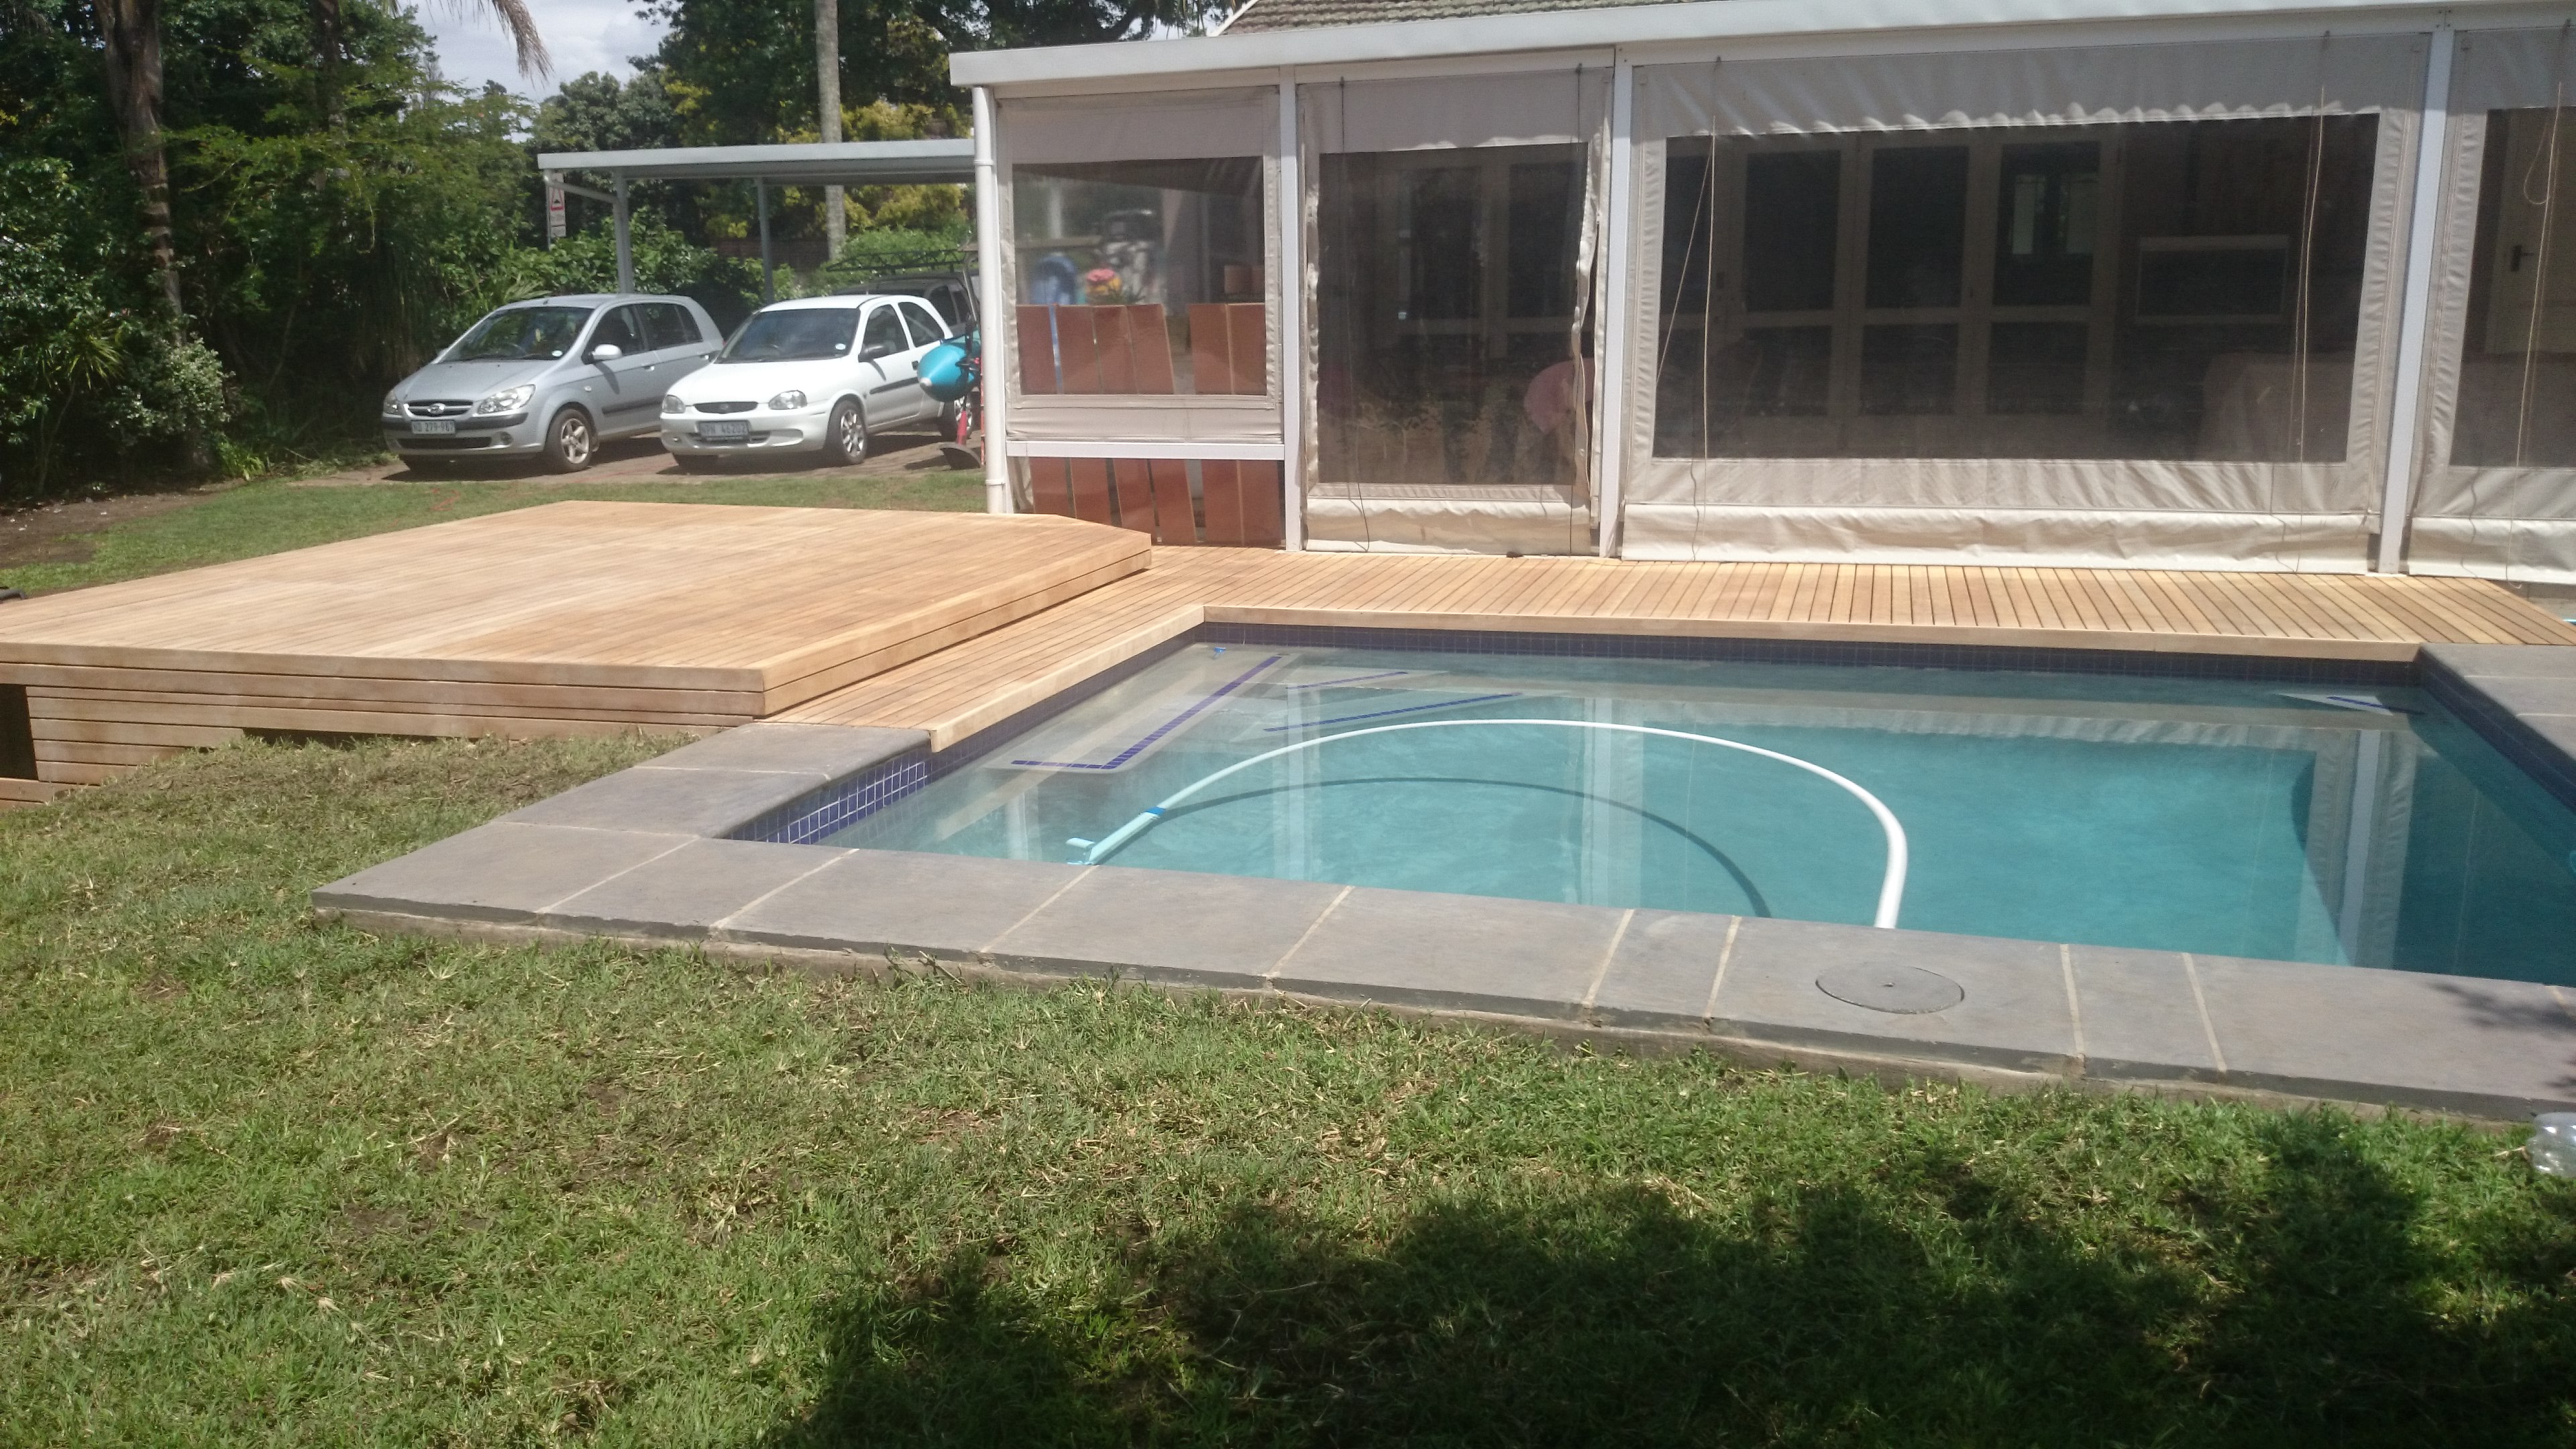
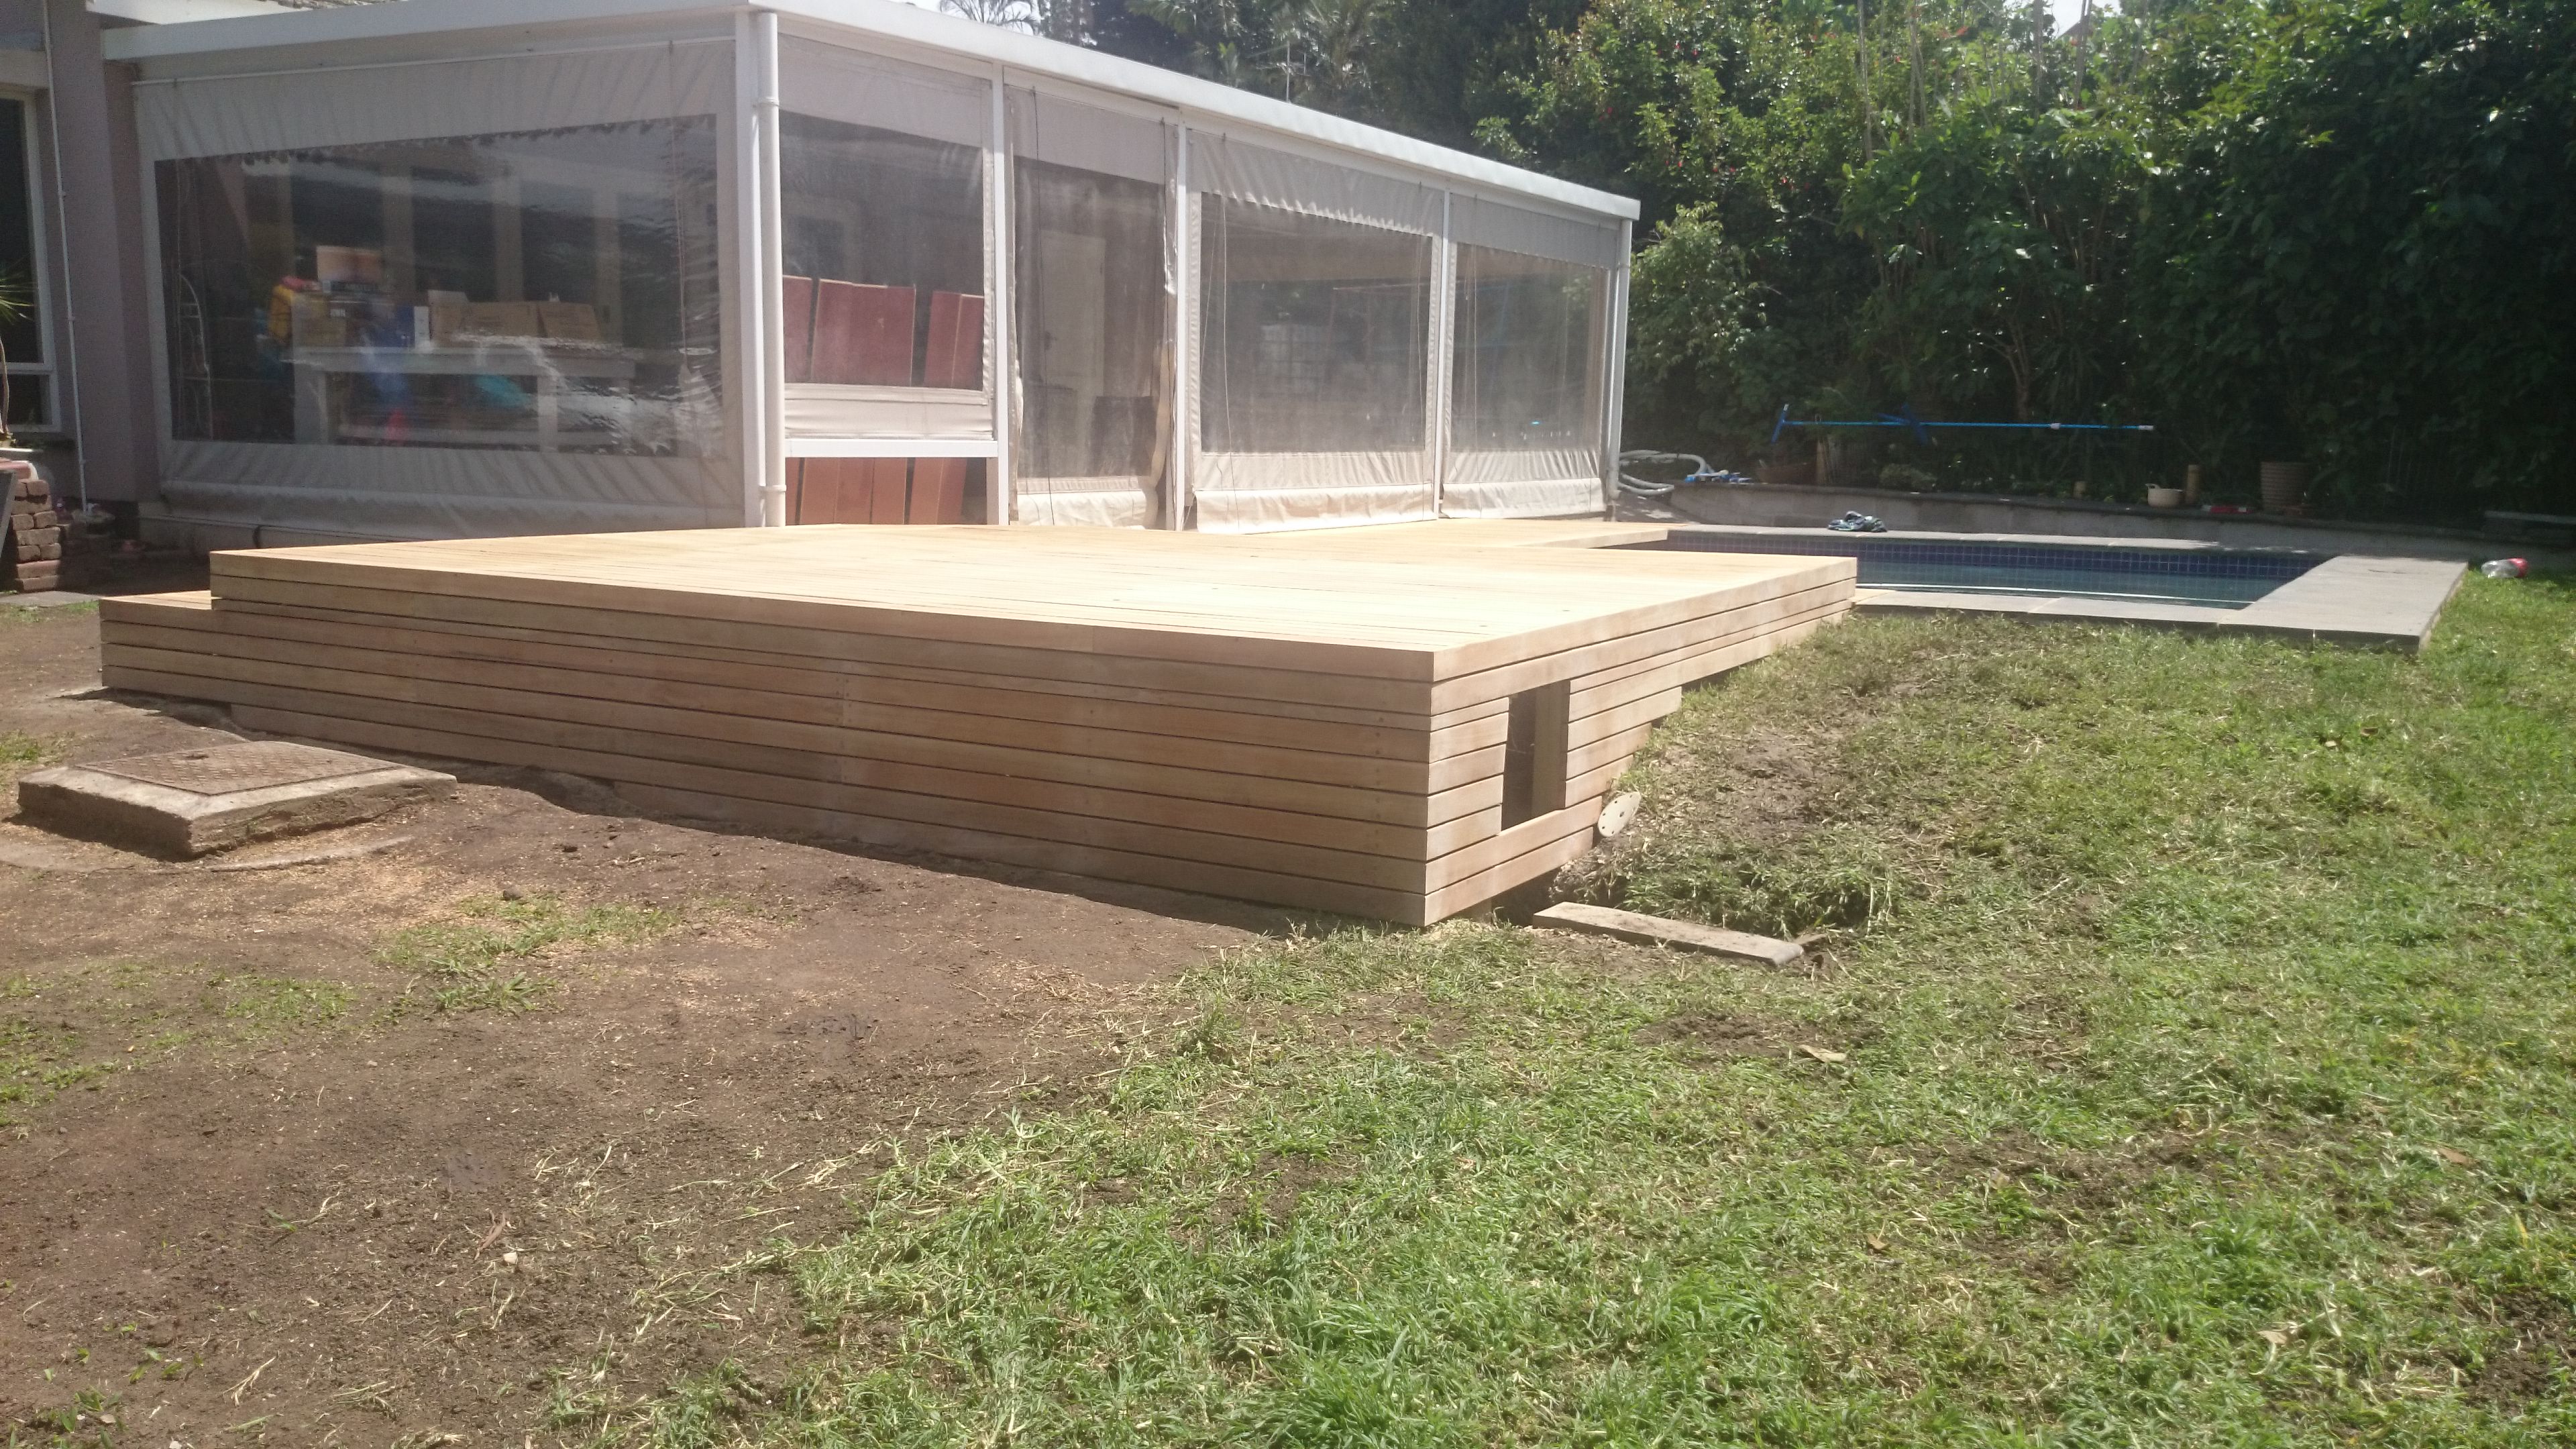
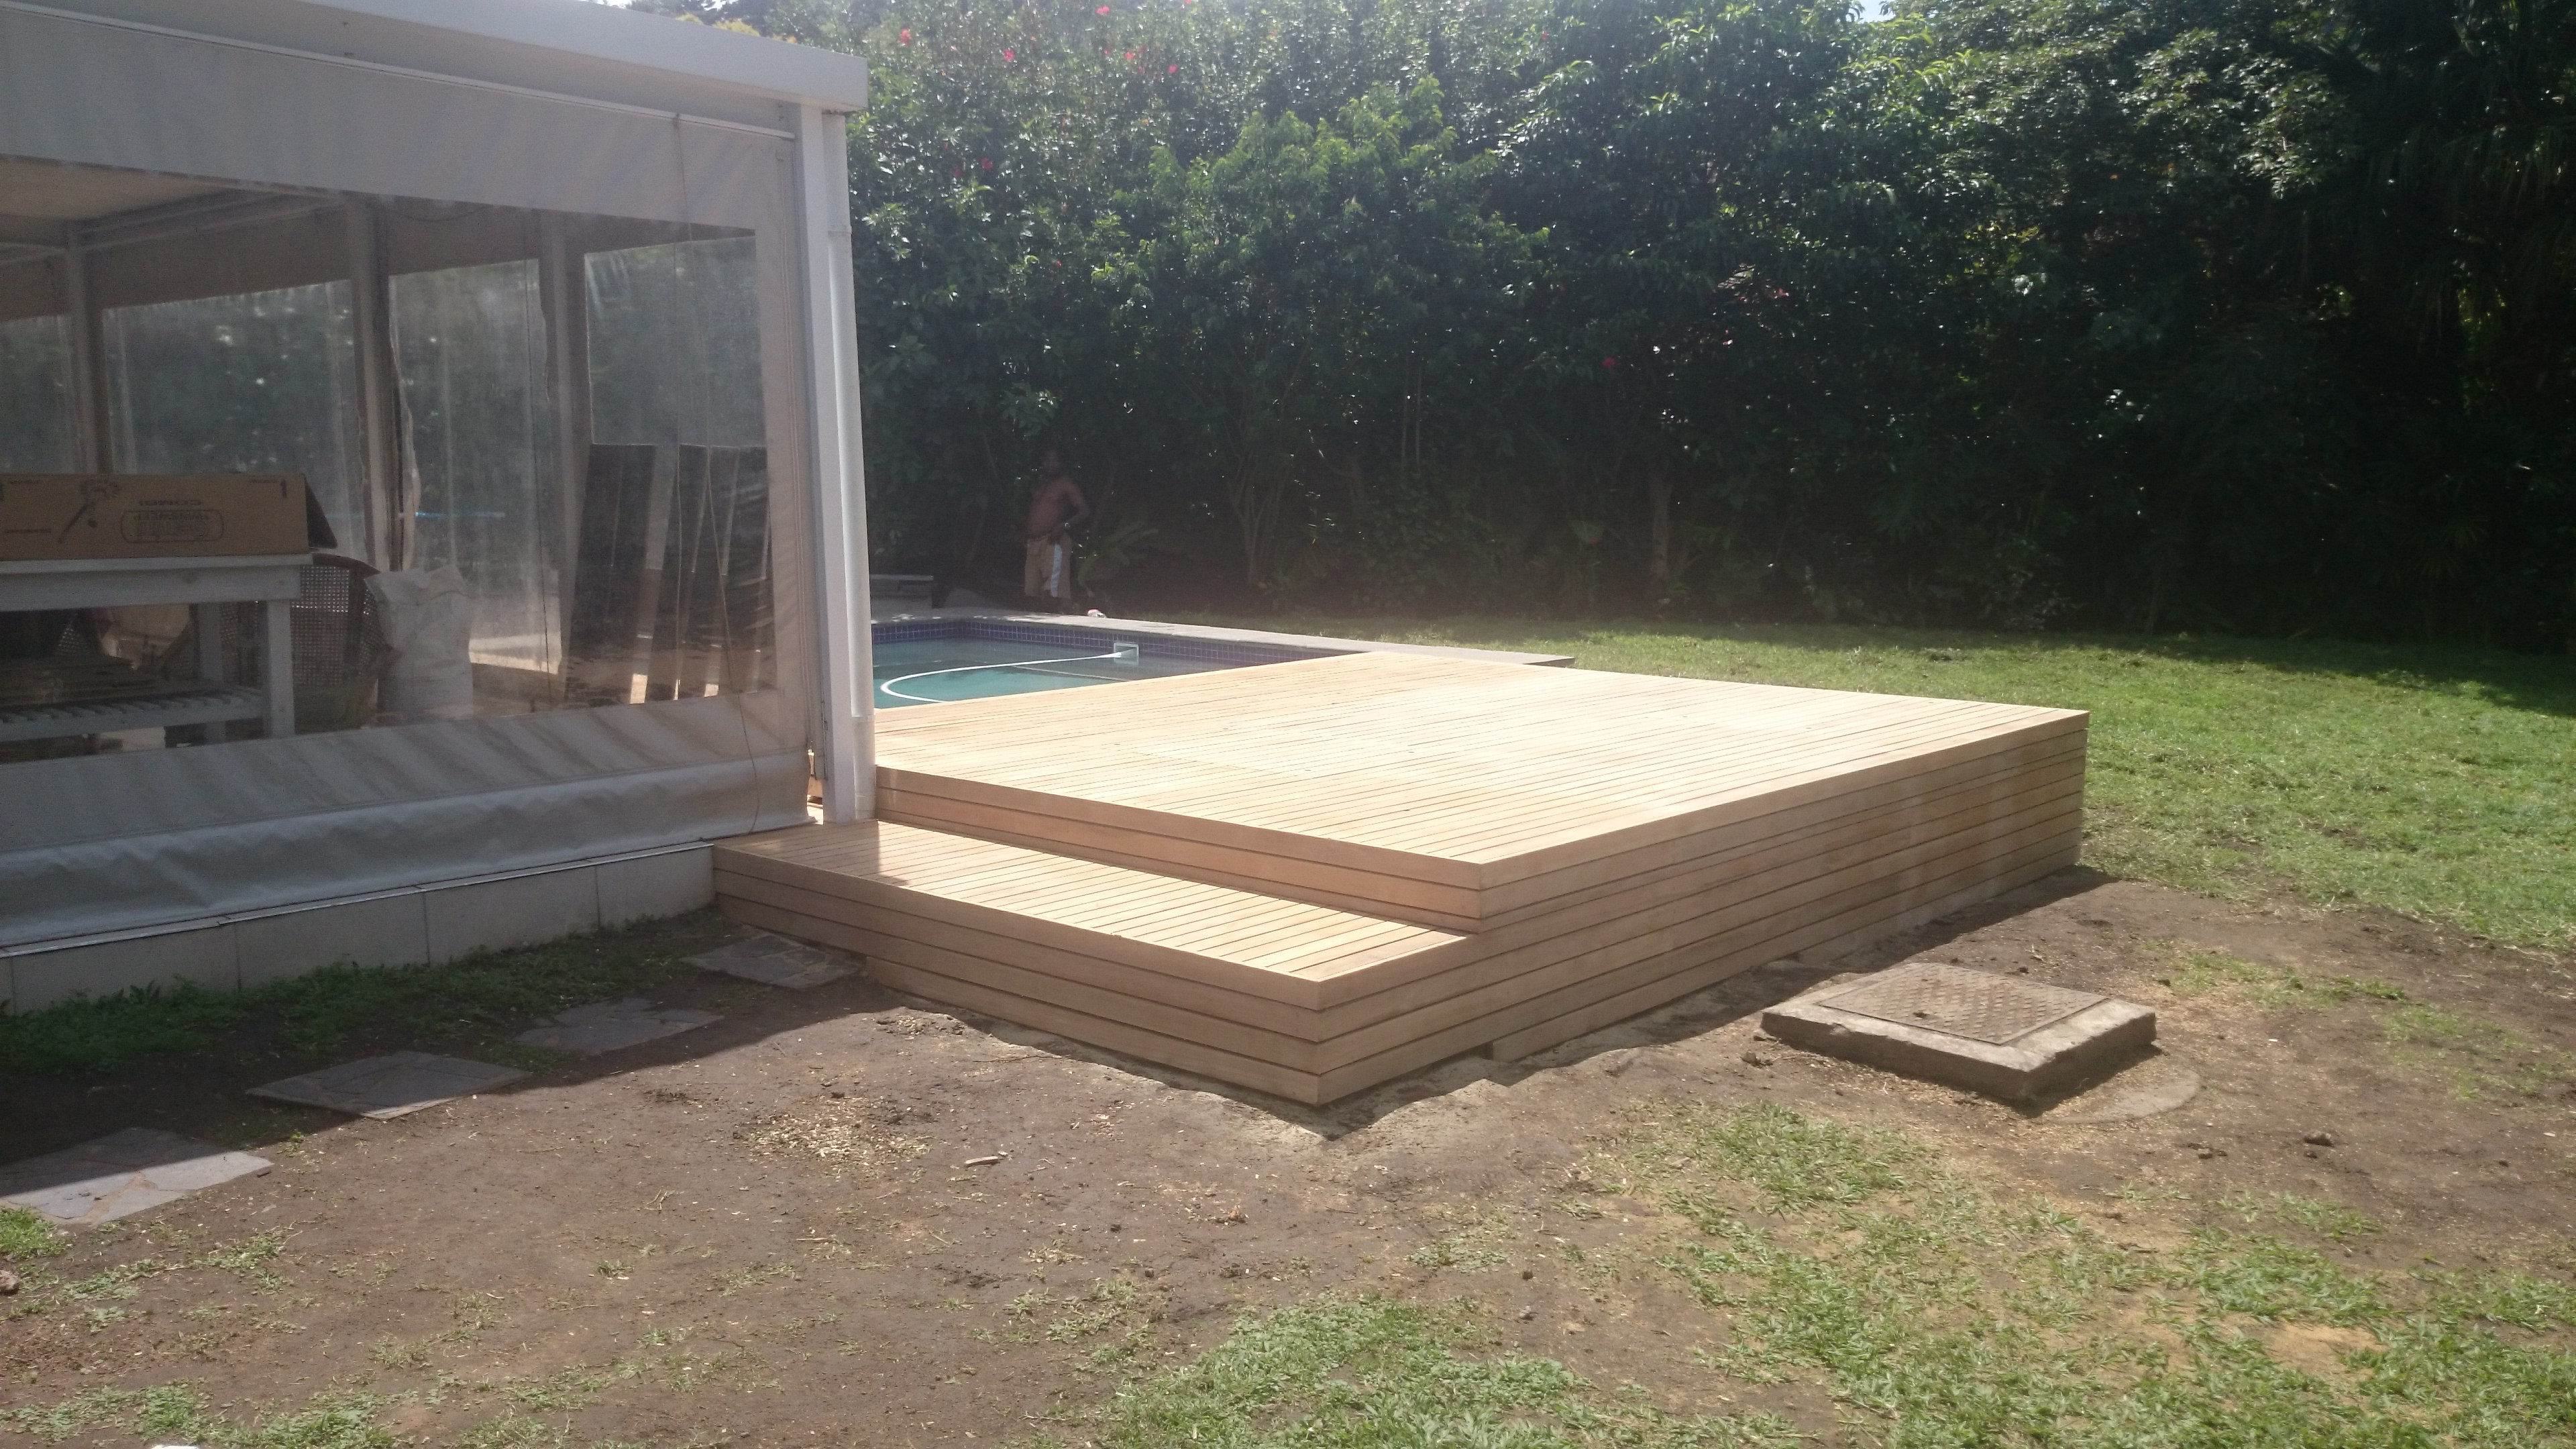
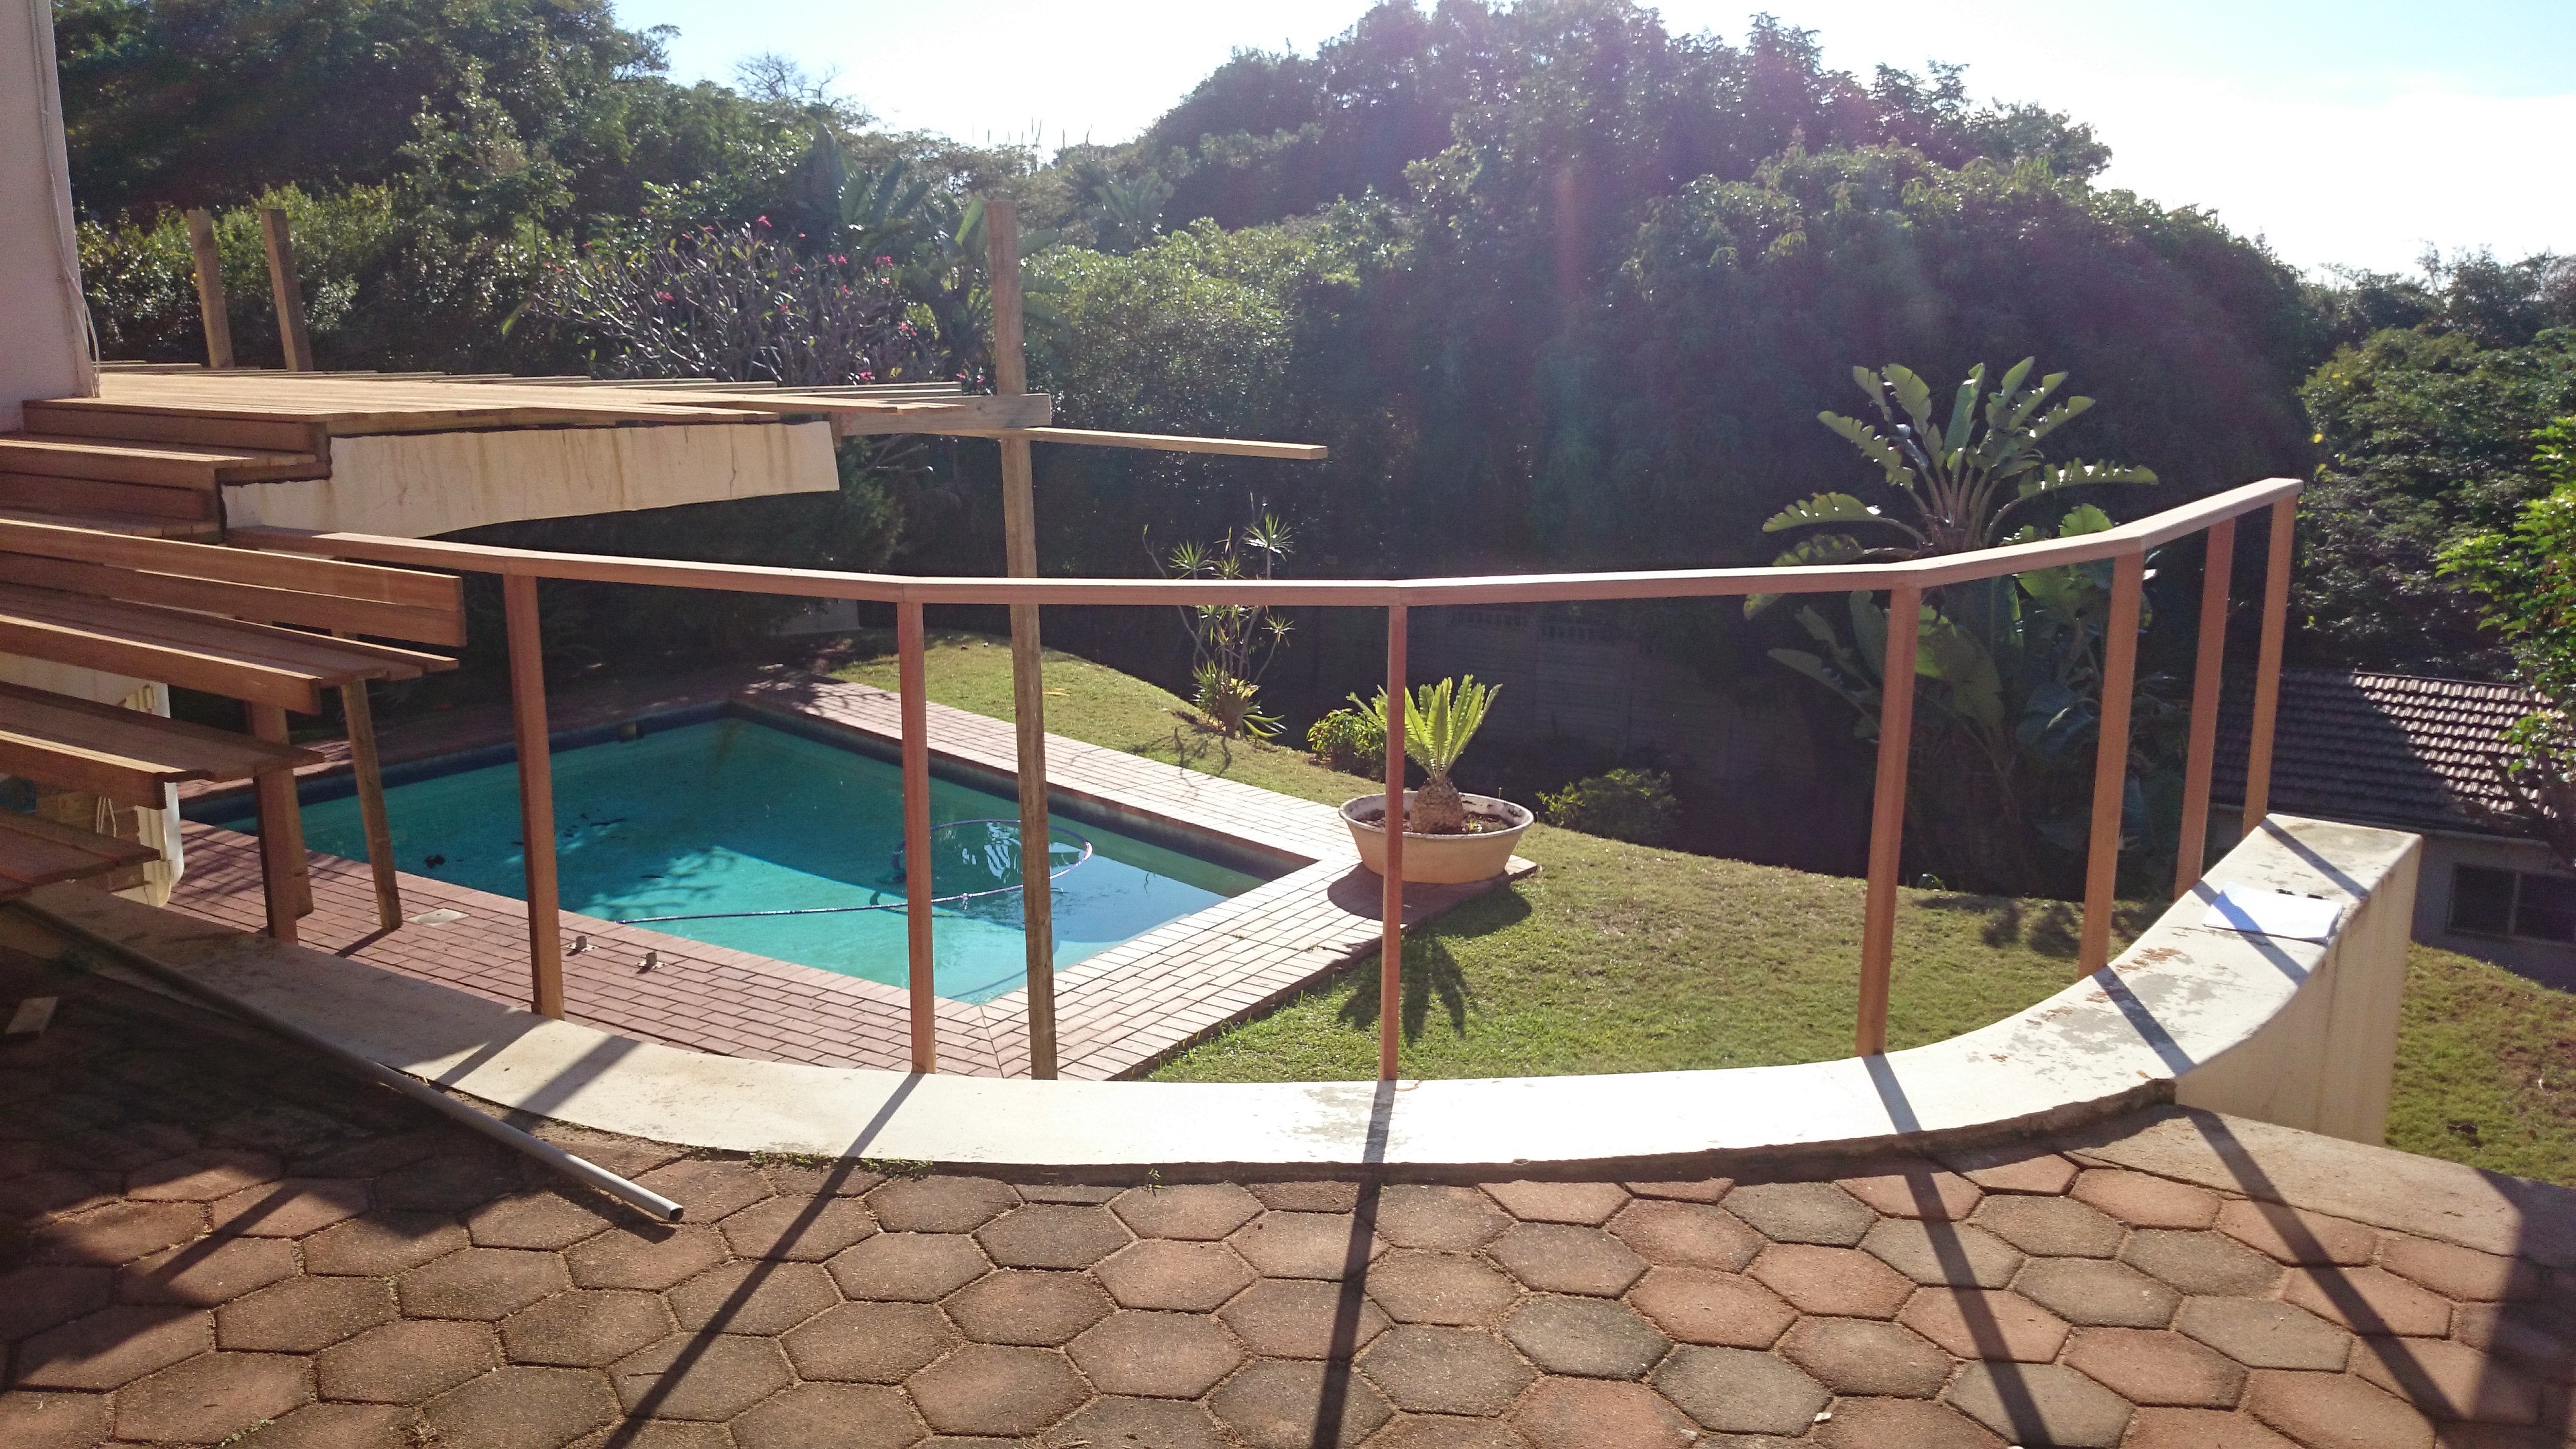
Based on all the above, it makes financial sense, and structurally it is the best option, to use H3 and H4 CCA Treated pine as a substructure and balau deck boards.

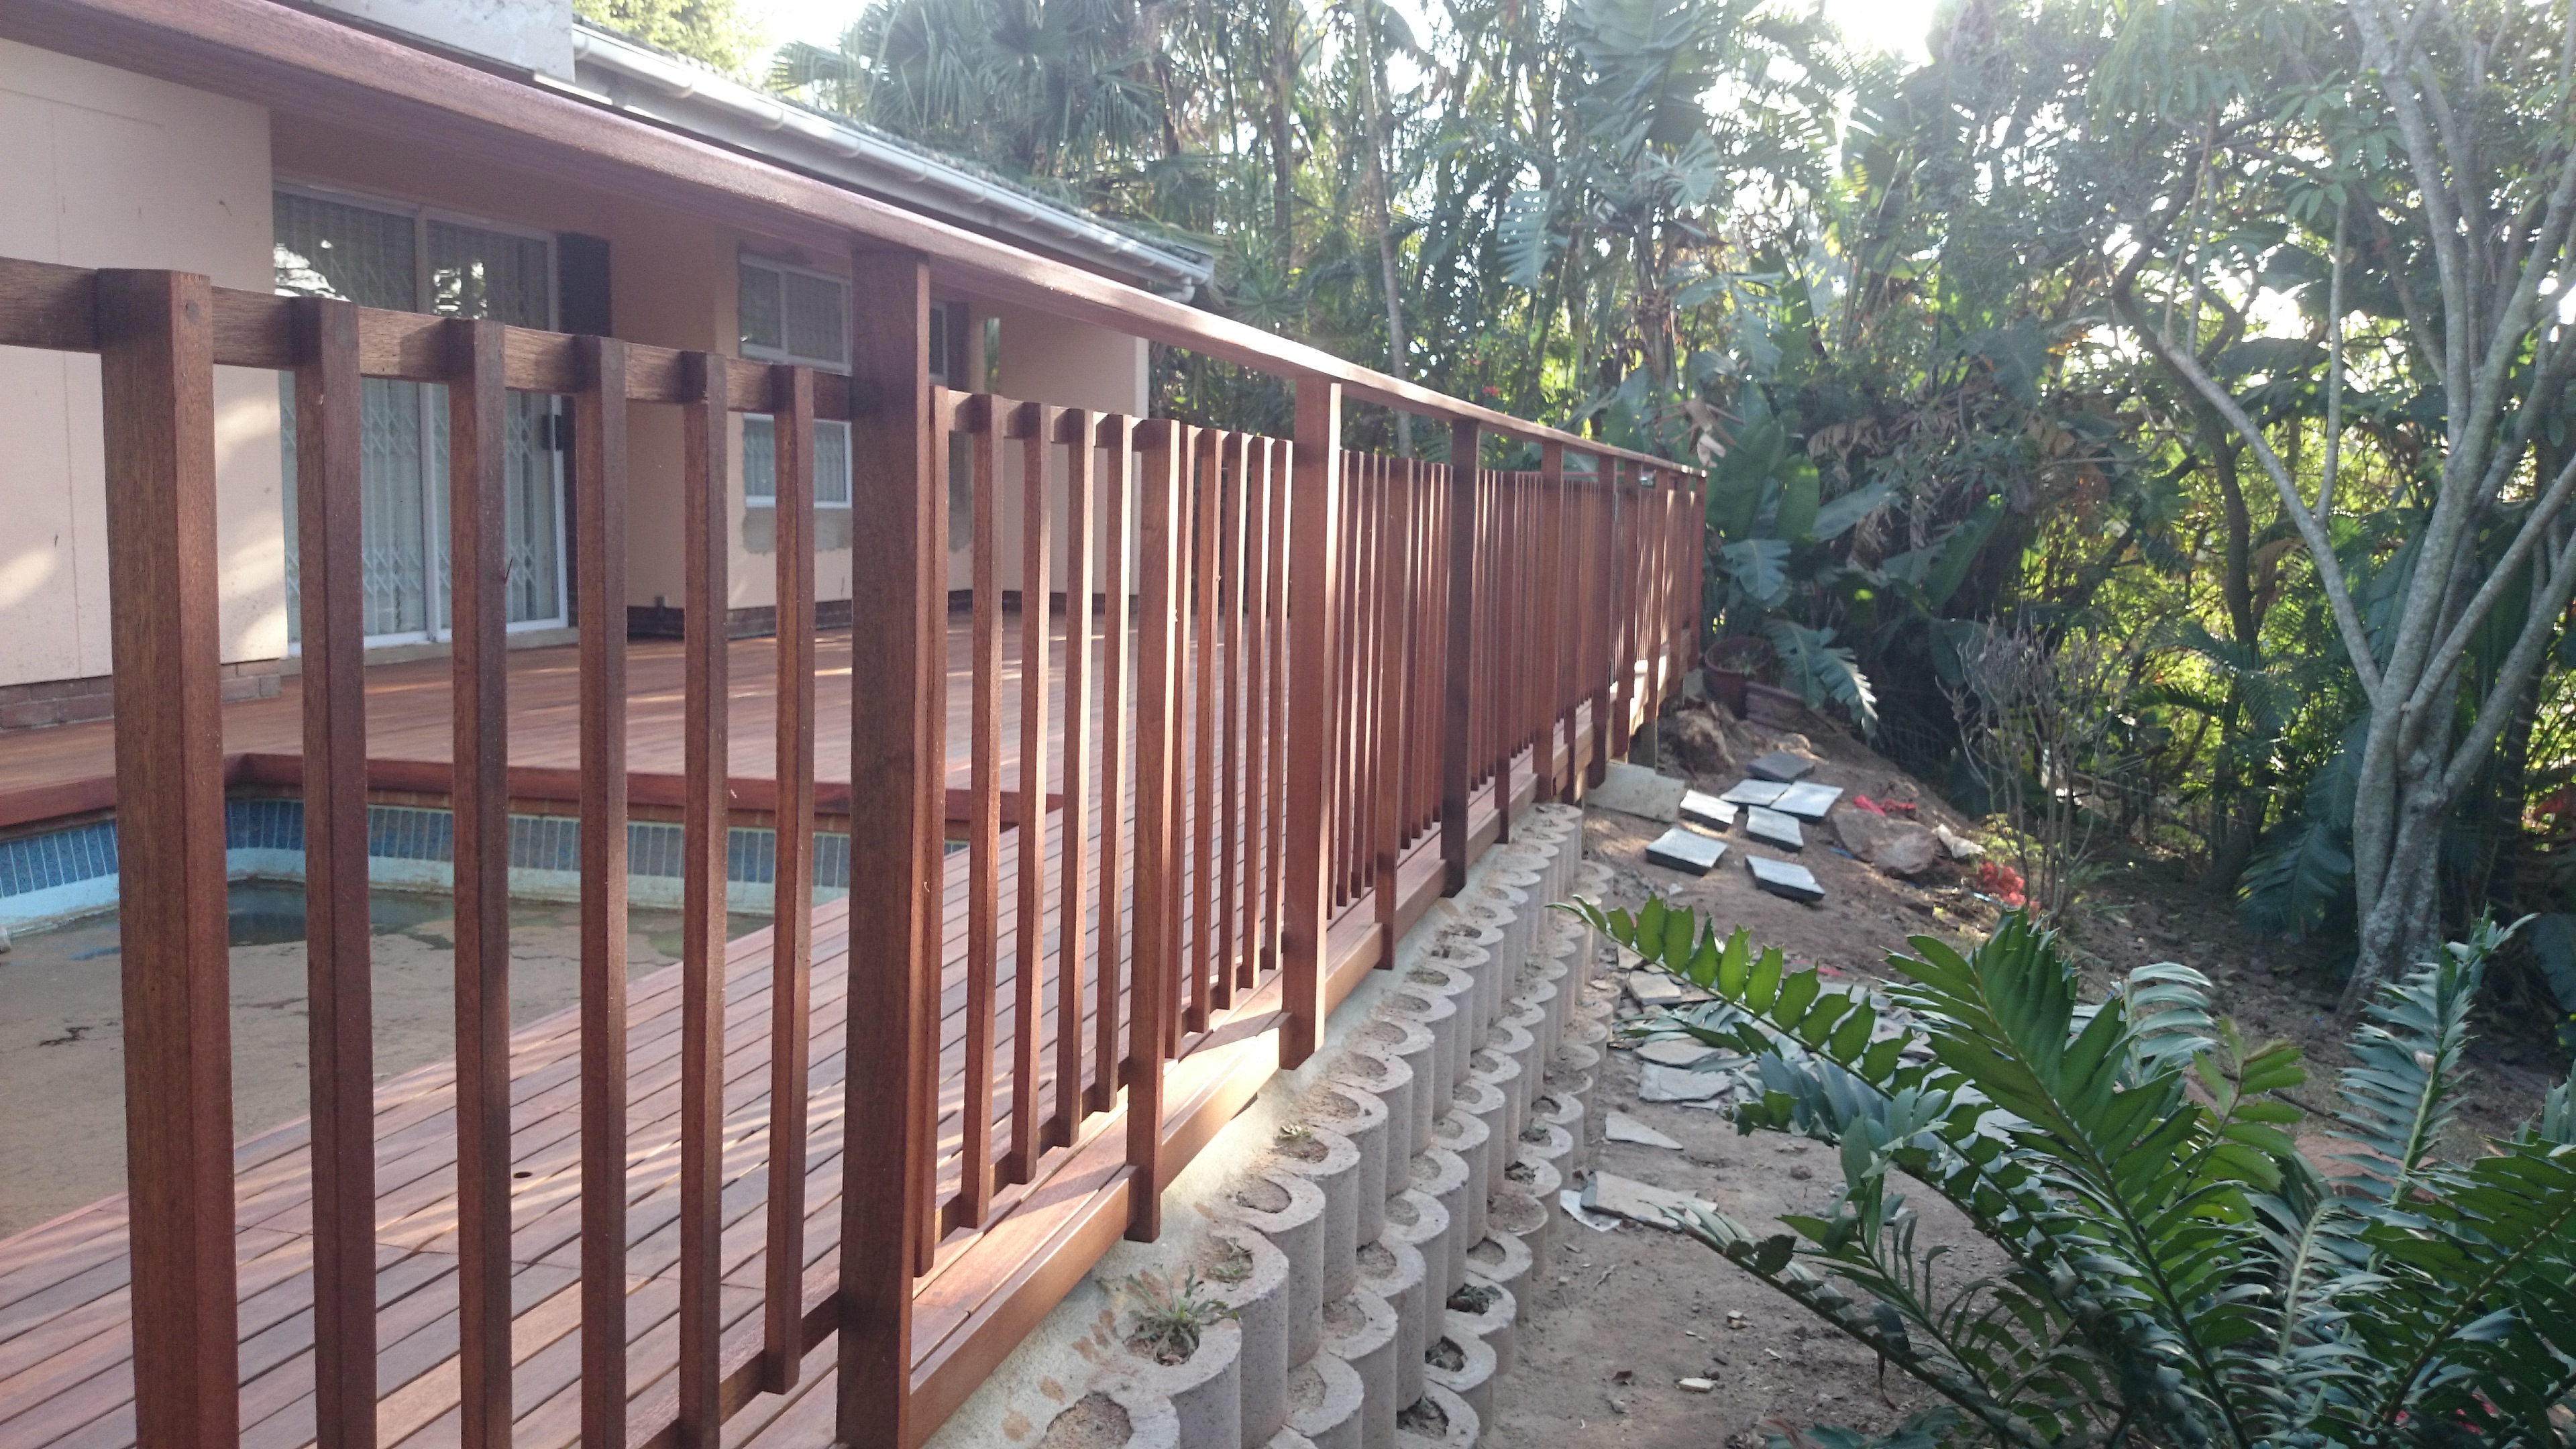
There are other options for deck boards. Massaranduba and Garappa are both very good woods which will outlast balau, but cost about 20% more per square metre. They are mostly used in the Highveld and in areas of South Africa where they experience extreme temperatures between seasons. Because they are denser, more stable and less prone to cracking

Wooden decks Durban

Balau deck boards

and warping, they can withstand minus 10 in winter and plus 30 in summer. Durban however has a more stable climate with less extremes between seasons and as such balau is the most suitable choice for hardwood decks.

For a free no obligation quote on your wooden sun deck in Durban please call us on 082 496 5444 or use the contact us form below.

Name (required)
Email (required)
Tel / Cell (required)
Area
Comment (required)
Submit

DIY Timber Decking in Durban

Timber decking companies DurbanAlthough we are professional installers of timber decks in Durban, we also offer a DIY service whereby we will supply the materials required to build your own wooden deck. We will also provide a brief outline of what is required and how to go about installing it.

As an introduction to this service I will offer some basic guidelines of how to set about building a wooden deck.

The most cost-effective method is to use an H3 and H4 CCA Treated substructure and balau deck boards. H3 timber is guaranteed, by the supplier, for 50 years and H4 is guaranteed for 30 years. This is of course subject to certain conditions that need to be fulfilled such as sealing cut ends with an approved end sealer and using H3 and H4 where they should be used. You can see a list of H classifications on www.sawpa.co.za. Provided the correct H level of timber is used in the correct application your deck will probably out live you.

Wooden decking companies Durban

First few rows of balau deck boards down

Substructure construction will vary depending on the height of the deck and some other criteria, but basically you will be aiming to install joists at about 450mm to 500mm centres. This will vary depending on the total length you need to install joists over. The joists are generally built using 38 x 114 S5 H3 timber. S5 is minimum SABS structural grade timber and refers to the number of knots per square metre that are present in the wood. H3 is the level to which it is treated at the treatment plant. H3 is suitable for outdoors. If you are placing timber in the ground, or in constant contact with wet soil, it should be treated to a minimum of H4.

Should you require main beams to support your joist structure you will typically use a 50 x 228 H4 beam and you can use 76 x 76 H4 treated square posts to support these beams. Your beams will be installed at 3m centres. If the structure is higher than about 2m I would suggest using gum poles to support it as they are harder and stronger. Again use H4 CCA Treated as they will be placed in the ground.

Timber decking companies DurbanIt is best to use balau deck boards as they are a lot more stable than pine and will not bow and cup as easily as pine. I use the 19 x 68mm reeded deck board as they are relatively inexpensive in comparison to the 19 x 90 deck board. They need to be reeded and the grooved side must face down in order to allow water trapped between the bottom of the deck board and the joist to escape, thus preventing premature failure due to rot. One can also use other timbers such as Massaranduba and Garappa, but they are more expensive. Balau is fine for coastal regions. Garappa and Massaranduba work well in the Highveld where the temperatures range from very cold to very hot.

Deck boards should be spaced with a 5mm gap between them in order to allow water on the surface of the deck to drain away quickly.

For a free no obligation quote on timber supply or supply and install for your decking needs, please contact us on 082 496 5444, or use the contact us form below.

Go back

Your message has been sent

Warning
Warning
Warning
Warning
Warning

Warning.

Timber Decking Companies Durban


We are a timber decking company based in Durban and specialise in the construction of timber sun deck, pergolas, walkways, stairs etc. We use primarily H3 and H4 CCA treated pine as our substructure and balau deck boards. Our balustrades and stairs are all made from balau unless otherwise specifically designed in pine. The H3 and H4 CCA Treated pine has a life span of between 30 and 50 years outdoors in the elements and although the balau is not pressure treated it will also last in excess of 30 years.

The timber deck we built in this article was in Plantations in Hillcrest and was a low-level pool deck. The pictures alongside show the different stages of construction and I will explain, in this article, the challenges we experienced with this one. All timber decks we build come with their own challenges and there are various techniques we use to overcome these challenges.
Our first challenge here was that the paving alongside the pool was not parallel to the house. There was a difference of about 80mm over a distance of about 3m. If we had simply placed our deck boards down with equal gaps between them we would have ended with a wedged shaped deck board with a measurement of zero on one side and 68mm on the other side which would be unsightly. In order to overcome this one needs to vary the gaps between deck boards.

In this instance we needed to gain 80mm over a distance of 3m. We needed to start with a gap of 4mm on one side of the run, and the gap needed to increase along the length of the deck board run to 6mm on the other side effectively giving us a gain of 2mm per board. Over a distance of 3m, a total of 40 deck boards, with a width of 68mm and a gap of approximately 5mm, will be needed. If we increase the gap on one side of the run to 6mm and reduce the gap on the other side of the run to 4mm, we gain 2mm per run of deck boards. 2mm x 40 deck boards gives us a
total of 80mm that we will gain thereby reducing the difference on either side to zero. In effect you are “fanning” the deck boards to close the difference created by the wall not being parallel to the house. Simple hey? Not always so. Because each run of deck boards is made up of about 3 or 4 separate pieces it can be tricky to keep the runs straight whilst still “stealing” millimetres. At the same time you need to try to end on a full deck board instead of having to rip one deck board to half the width to finish decking the area. We weren’t able to do this because we were running out of space to start increasing or decreasing the gaps to end on a full board. So instead we installed a 90mm deck board on the last run to close the 32mm gap we had left.

We built this timber deck in two sections and then filled the gaps in between. Some of it was on grass and some was on soil, so there was a mixture of posts in ground with concrete and posts on top of paving.

Another challenge here was that because we were building flush to the pool paving AND the floor inside we had to check that the height of the pool paving and the height of the floor inside were the same. They never are because the world is not flat. While I prefer building as flat, level and square as I can, sometimes one needs to build slightly off in order to line up with other substrates that are not perfect, and they never will be. One needs to be careful though that by building off square and level does not affect the total build or the visual appearance of the structure. If it will, then another plan needs to be made.

For a free no obligation quote on your sun deck and other outdoor related structure please contact us on 082 496 5444 or use the contact us form below.

Go back

Your message has been sent

Warning
Warning
Warning
Warning
Warning

Warning.


Wooden Decking Durban

Wooden decking DurbanWe built this wooden deck in Pinetown, Durban over a well so could not rest any joists on the well lid itself. Normally we would have raised the height of the deck enough to use 50 x 228 as joists. A 50 x 228 piece of wood can be spanned about 3m without any support below which would have solved our problem. However we could not come up that far as that would have resulted in two steps from the raised deck level to the tiled area on the patio.

We used 38 x 152 stock as our joist material, compared to the normal 38 x 114 stock which we normally use. This allowed us to span up to about 2.2m which still wasn’t quite far enough to get over the well. We brought the feet of the deck in as close as we could and placed them on top of the side wall of the well. We also braced the deck in other places so as to stop any bouncing which would have occurred otherwise. There was also a corner that we had to cut off so that it created a clear pathway from the lower deck around the awning upright and on to the tiled patio. Half of the Wooden decking Durbanpool was built with pavers or coping stones on the edge of the pool and the other half had wooden decking. So we had to get all our levels right to create a seamless integration between materials. It is quite popular now to mix materials and have a combination of pavers and wood and grass.

The pool pump was installed below the deck on the highest end and some trap doors were built on top of the deck to access the filters etc. We had to build a big enough trap door to allow a person to climb in there to change the sand or do other maintenance if needed.

The sides were clad to block visibility underneath the deck and a full length step was built along the one side for access to the grassed area.
A small opening was created on one side to house the pump DB board and this can later be hinged with a small door if the client wishes.

Wooden decking DurbanThe challenges on building pool decks between a tiled area and the side of a pool is to get the deck boards to fit into the space you have been given to work with. If the side of the pool isn’t 100% parallel to the side of the house, up to which you will deck, then you need to adjust the spaces between deck boards on one or both sides of the deck to either gain or lose space as you lay deck boards. If for instance one side is 20mm wider than the other side, you will need to gain 1mm per row of deck boards in order to bring your deck boards parallel to the house so that you don’t end on a wedge-shaped deck board. At times this can be quite tricky. We are working on one in Hillcrest where the house and the pool paving is 77mm out of parallel. The total distance is only 2.4m. So the space will take approximately 32 deck boards to fill. Which means we need to gain or lose more than 2mm per row of deck boards to bring the last deck board parallel to the side of the house (or pool depending on which side we start decking). What we’re doing there is to increase the gap between deck boards to 6mm one side and reduce it to 4mm on the other side.
Then the last trick is to adjust your deck board spaces so that you don’t end on a half deck board. So once you are parallel you need to either reduce Wooden decking Durbanthe gap tot 4mm or increase to 6mm to gain or lose space so you end on a full deck board.

For a free no obligation quote on your wooden sun deck, balustrades, walkways, pergolas, screens and other timber construction, please call us on 082 496 5444, or use the contact us form below.

Go back

Your message has been sent

Warning
Warning
Warning
Warning

Warning.

Wooden decks Durban


Wooden decking Durban


Wooden Decking Companies in Durban

wooden decking companies durban

Click to enlarge

There are many wooden decking companies in Durban that one can choose from when planning to install a wooden deck. Some are reputable companies and some are not, as in any industry.

Besides comparing price one should always compare services to make sure you are comparing like quotes. Some wooden decking companies in Durban for instance will offer to build you wooden deck as well as seal it and other will only quote to build it. Some will offer to fill the screw holes with epoxy to stop water getting in them which will cause rot and others won’t. It is these small things that one needs to ask about and make sure that the service being received from one wooden decking company in Durban is the same as the other that you are comparing to.

Our service at The Wood Joint, includes the following: –

Building the deck with quality yellow balau. We generally build our substructure out of H3 and H4 CCA Treated pine. This is not only due to a cost factor but also because the pine is correctly treated to H3 CCA level which has a life span of at least 50 years exposed to the elements. You can expect to pay about 40% more if you chose a balau substructure. H3 CCA Treated pine is guaranteed for 50 years if used in the correct application and installed correctly.  It will therefore outlast balau as a substructure because the balau is not, and cannot be, pressure treated. I have often seen balau joists rotting from the top where the water gets trapped between the joist and the deck board. We always use balau deck boards as balau behaves better than pine on horizontal surfaces. Balau is a lot more stable and the pine tends to cup and warp over time with the constant hot and cold, expansion and contraction and occasional wetting.

wooden decking companies durban

Click to enlarge

Our balustrades and stairs are all made from balau, unless otherwise specified, because if one uses pine as a balustrade, the pickets and cross supports need to be almost twice as thick as balau so they tend to look a bit too chunky. Balustrades do not work well in pine because of the knots found in pine which weaken the timber.

We use a kalgard decking screw which is guaranteed for 25 years by the manufacturer against rust. The screws are counter sunk and the counter sunk hole is filled with epoxy and saw dust so as to match the colour as closely as possible. Filling the screw hole stops water sitting in that hole and travelling up the deck board along the grain. Exposure to water for too long will speed up the rot process. So we fill it, sand it flat, and seal the deck using an oil based sealer which contains no wax. This makes it easy and therefore inexpensive to maintain your deck going forward. I have done a few refurbishment jobs where the decking company has not filled these holes and on the older decks, the deck boards have started to rot there. These are all standard services we offer which are normally included in the price we quote. So when comparing our quotes to others, please check what value added services they are offering you.

For a free no obligation quote on your wooden deck, pergolas, screens, walkways, etc. please contact us on 082 496 5444 or use the contact us form below.

Go back

Your message has been sent

Warning
Warning
Warning
Warning
Warning

Warning.

Wooden Sun Decks and Wire Rope Balustrades

Wooden Balau Deck with Wire Rope BalustradeWooden deck with wire rope balustradeWooden deck with wire rope balustradeA wire rope balustrade on a wooden sun deck, as pictured in this article, has a few pros and cons to it which I will discuss below. I will also describe the method used to install wire rope balustrades and what to be careful of to ensure that the job runs smoothly. If you don’t feel like doing it yourself, or don’t have the right tools or time, then scroll to the bottom and complete the contact us form below. I will contact you and we can take the task off your hands. Alternatively call us on 082 496 5444. We are Durban based.

Firstly one should choose the correct wire rope to use. We use the 4mm marine grade stainless steel wire rope with button heads. One can also get the 5mm wire rope but I have found that that often contains one rogue strand which will tarnish over time and spoil the look of your balustrade. The 4mm wire rope does not bend as easily as the others so where you get to a 90° bend you will need to terminate your wire rope with a button head and start again on the next run. The 4mm wire rope can bend around gentler curves quite easily. It is just the 90° bends that require a new run.

We start by installing our wooden, normally balau, uprights and these can be anything from a 30 x 60, 40 x 60 or 60 x 60. Obviously the 60 x 60 is better as it is more solid and stable, but it unavoidably carries a higher price tag. A 40 x 60 works very well, but the 30 x 60 can do the job just as well if installed properly. Now install your capping on the top to hold the whole lot together while you install your wire rope.

There are various methods of securing your wire rope. We use the button heads as opposed to turnbuckles. A hole is drilled, to a diameter slightly bigger than the button head, in the wooden upright and the wire rope is threaded through it so that the tag end is protruding to the outside of the balustrade. One side of the button head is then inserted over the wire rope and crimped using a special crimping tool. The crimping tool looks very similar to a large bolt cutter with a head that has been adapted to accept the button head and crimp it to the right size to hold the wire rope without damaging it.

Now cut a length of wire rope to slightly more than is required. Remember think twice, cut once as it is always easier to cut more off then to add more on once it has been cut too short. Now all your holes need to be drilled in all the other upright posts. Measure you spaces out accurately so that your wire rope will run parallel to the capping on the top and the wooden deck on the bottom. When drilling through a piece of wood it is easy to hold the drill slightly skew resulting in the drill bit exiting the wood at an angle which will result in the exit hole not being in the place it should be. So drill half way from one side and then drill from the other side to get your entry and exit holes perfectly lined up. It doesn’t matter if the middle of your hole is slightly skew because you can’t see it and it is not enough to impede the path of the wire rope. Thread the other un crimped end of the wire rope through all your holes in your uprights until you get to the end.

Wooden deck with wire rope balustradeNow take the other button head with the thread on it and measure, very carefully, where you need to cut your wire rope. You will need to cut it with a thin cutting disk on a baby grinder so as to get a nice clean-cut. If you cut it too long you won’t be able to tension it and too short, well start again from the beginning. So cut and check before crimping the other end. The second button head will be inserted through the hole from the back and the wire rope inserted into it from the front and crimped. Make sure you have your thread to its longest position so that you still have thread to use to tension it. Now tension it, but do not over tighten it. It is not a guitar string and only needs to be tight enough to be visibly straight. Over tightening it will result in the end wooden uprights bowing, or even failing.

Pros of Wire Rope Balustrades

• Does not interfere in your vision when seated and looking through the balustrade
• Adds a second material, other than timber, for a clean minimalist look and feel
• Marine grade stainless will last a life time

Cons of Wire Rope Balustrades

• Does not offer as much protection from objects or people falling through the strands as timber does
• If installed incorrectly can look terrible
• Can detract from the timber look and feel

Good luck in installing your wire rope balustrade. I hope this article has helped. If you’re not up to it, please complete the form below, or contact us on 082 496 5444 and we will gladly quote you to do the task for you. We are Durban based and work throughout KZN.

Go back

Your message has been sent

Warning
Warning
Warning
Warning
Warning

Warning.

Laying Balau Deck Boards Down

This video shows how we have laid these deck boards without ending on a half deck board or a wedge-shaped deck board.

Most often two opposite walls will not be exactly the same length and they certainly won’t be designed to accommodate an exact amount of deck boards with a uniform gap. What can happen is that you start on one end and end up with a half deck board that has to be ripped length ways on the other end. This is both unsightly and can result in premature failure because the deck board may become too narrow to be secured properly.

If the two opposite walls are not the same length then the problem is compounded because not only will you end up with half a deck board, but you will end up with half a wedge-shaped deck board.

So we need to try to mitigate this problem by adjusting our gaps between deck boards either up or down, very slightly so as to be unnoticeable.
Normally the gap between deck boards is 5mm and we commonly use a 6 inch nail as a spacer. By increasing one end of the line of deck boards to 4mm and the other end to 6mm you can effectively gain, or lose 2mm per line of deck boards. In this video these boards were 90mm wide, so if on every line we gain 2mm, we will gain about 20mm for every 1m of deck boards installed. So after 4.5m you can gain a full deck boards width. On most decks this is sufficient to allow you to finish on full deck boards and to avoid having to cut a wedge-shaped deck board.

Watch the video and you will see how I panned around the little alcove that we had to deck into. We employed both methods here to end on a full deck board and to avoid a wedge-shaped deck board.

It is far easier when decking to the end of the deck as here you can continue with full deck boards until you reach the end, and then cut your joists off at the right length.
It makes for a much neater deck and less chance of failure.
Other videos are also available on the Videos Tab on the menu bar on the left. These show other techniques we employ in building wooden decks which can make the job a lot easier.

For a free no obligation quote on your wooden deck, please contact us on 082 496 5444, or use the contact us form below.

Go back

Your message has been sent

Warning
Warning
Warning
Warning
Warning

Warning.

Substructure on Low Level Wooden Pool Deck


We are busy with a new wooden pool deck build in Hillcrest, Durban and I have taken a video to show how the substructure is built before the deck boards go down.
This is a low-level wooden pool deck that we are building which is only about 200mm off the ground. Because it is 200mm off the ground we can’t simply use 38 x 38 cleats as we have done in the past which are secured to the ground. We still need to use a joist of at least 114mm wide which is supported every 1.6m with a foot or post as there will be a void beneath the joist and the paved substrate. We have aimed to get our deck flush with the floor inside the house which is about 200mm above the paved area around the pool.

We built our substructure in a number of separate frames which are then lifted up into place on the wall side and secured using sleeve anchors. The opposite ends of each frame are then also lifted up to get the top of the joists level and flat and supported using a 76 x 76mm square post which rests on top of the paving. We will also remove some paving on every other post and sink that into the ground to ensure that the deck doesn’t sink over time if the paving sinks. The separate frames are then all attached to each other.

We have left our joists long to extend over the pool and now that the side of the frame is attached to the house we can work out exactly where we want our joists to end so as to get our fascia board on the inside of the pool completely flush with the vertical of the coping of the pool. This way we can slide our fascia down to cover the coping neatly. We can now trim our joists to the correct length and install another 38 x 114 joist running at right angles to the main joists. We could not make use of a beam and joist system here because we don’t have space beneath our joists to install a beam. We would need an extra 228mm to do this. So our frame is assembled in one single plane rather than having joists sitting on top of beams.

We’ll install some truss hangers where the joists meet the side beam which is attached to the wall. All that is holding those joists to this side frame now are two 60mm screws from behind so they need to be supported with a truss hanger to stop them ever dropping if the screws fail. Those screws are screwed into ends grain which is never that strong in terms of fixing.

The trick to this type of deck is to get the fascia frame around the pool to sit completely flush with the coping of the pool so that a fascia board (two deck boards) can be installed in the vertical plane to cover the fascia. Once that is all fixed in place and can’t move then we can deck.

Balau deck boards will be secured on top of our joists and we will start our deck boards on each side of the pool and deck towards the house and towards the grassed area. When decking towards the house we need to hope that the pool is parallel to the house and if not then we need to adjust our spaces between boards to accommodate any difference. So for instance if one side, between pool and house is 20mm shorter than the other, then we will need to increase the gaps between deck boards by 1mm for 20 boards to get the deck parallel to the house. If not we will end up with a wedged shape board as the last board which will be unsightly and will fail more easily. Also we need to try to end on a full board rather than a ripped half board as that too will be unsightly and may fail prematurely. Again we will adjust the gaps as we go to ensure we end on a full board. The gaps are normally 5mm, but we can adjust them to 4mm or 6mm without being noticed. Then we will “fill” the section between each long side of the pool and again we need to ensure that we don’t end on a half board, by adjusting our gap to 4mm or 6mm. The final result will be a deck with full deck boards and no wedges.
The grassed side is easy enough in that we can protrude over the end of the paving to end on a full board and terminate our deck there. On this end we will install a screen of 1.8m high the length of the deck. So we will tie our upright posts for the screen into the posts for our deck to secure the deck into the ground with concrete to prevent any slippage, and at the same time providing an upright of 1.8m for our screen.

For a free no obligation quote on your wooden sundeck, pool deck, balustrades, screens, cladding, walkways etc. please contact us on 082 496 5444 or use the contact us form below.

Go back

Your message has been sent

Warning
Warning
Warning
Warning
Warning

Warning.

Wooden Pool Deck Built in Westville, Durban

Pool deck built Westville Durban

Click to enlarge

Balau Deck board

Click to enlarge

50 degrees

Here was a nice size wooden sun deck, or pool deck, we built of approximately 60m². I say a nice size because at that size one can reduce the costs slightly, pass a saving on to the client, and make a little bit more money on the job.

Wooden deck with jacuzzi cladding Durban

Click to enlarge

This wooden sun deck was built around the pool as you can see from the pics alongside. It also extended to the far end of the house and was enclosed by a balustrade on two sides with two gates leading to the garden. Access to the deck was from two bedrooms on one end in front of the pool and from the lounge on the other end. The level of the floors, in the rooms, near the pool, were not the same level as the level of the lounge floor so we were left with a choice to either step the deck or have a small step up to the lounge. We chose to create a small step up to the lounge because having a step in the middle of your wooden pool deck is only going to lead to someone tripping and hurting themselves.

In this article I want to write about the different ways of laying the boards when it comes to pool decks or any other deck where the boards can possibly run in both directions. If a deck needs to be built with deck boards all running the same way it is relatively easy to install them in that the ends do not need to match up. The problem one can have in trying to match up ends of deck boards is that if they are not cut at precisely 45° then the length of the cut ends will differ. I’ve drawn a sketch alongside to illustrate this.

It is highly unlikely that any pool will be perfectly square. When installing the wooden pool deck it may be necessary to cut one end at say 44° and the matching board that runs at right angles to it, at 46°. The two ends will not be of equal length and will therefore not match up flush with each other. The problem is compounded with each deck board that is added. Let’s assume that the one cut end is 2mm longer than the other. After installing 15 deck boards (or one metre) the boards will have shifted by 30mm (15 x 2mm). This will be unsightly. The problem is also compounded by the variance from 45° which results in the difference in lengths of cut ends being greater.
There is a way to overcome this problem and that is to install a joiner between the cut ends as the sketch alongside illustrates. The other way is to run the deck boards all in the same direction (i.e. not all parallel to the edge of all sides of the pool, but rather all parallel to each other).

Pool deck built Westville Durban

Click to enalrge

Another advantage though of running the deck board’s parallel to all edges of the pool, with corner joins, is that you will have face grain facing the pool and not end grain. Water is absorbed largely through the end grain of wood and if this end grain is facing the pool, then it stands to reason that the deck boards on this side of the pool will be exposed to more water and will tend to rot more quickly than those with face grain facing the water. Even though we use balau for our deck boards, which is rot resistant, all wood will rot and by employing methods that will inhibit rot, makes good sense. Having said all that, it is easy and cheap to replace deck boards and if a deck board with end grain facing the pool gives you 15 years life, the cost vs. preference is not that great.

For a free no obligation quote on your pool or sun deck, or any other outdoor timber construction, please call us on 082 496 5444 or use the contact us form below.

Go back

Your message has been sent

Warning
Warning
Warning
Warning
Warning

Warning.

Balau Wooden Sundeck Built in Kloof, Durban

Wooden Sun decks Durban

Click to enlarge

Here’s a balau wooden sundeck we’ve just built on Kloof, just inland of Durban.

We used a 19 x 90 balau deck board on this wooden sun deck at the client’s request. We normally use a 19 x 68 balau deck board as they are considerably less expensive per square metre than the 19 x 90 balau deck boards and we can pass that saving on to our clients. Granted it is quicker to install a deck board that is wider as you need less boards per square meter (in this instance 15 boards per square metre using a 68mm wide board and 11 using a 90mm board), but not by that much that it warrants paying 35% more for it. 90mm boards are about 35% more expensive per square metre than 68 mm boards.

Wooden Sun decks Durban

Click to enlarge

When screwing down a 19 x 90 deck board I put two screws, per board, in each joist line, one in each shoulder. I have seen other deck builders putting one in

Wooden Sun decks Durban

Click to enlarge

every alternate shoulder. It does work, but if you do get a board that is particularly prone to warping it will warp where the one screw has been left out. It is not a huge cost or effort to put a second screw on the opposite shoulder of each board at each joist line. Obviously the wider the board the more prone it will be to warping. Why they are more expensive I haven’t yet worked out because good balau is good balau is good balau. If the wider boards we taken from a different part of the tree, the heartwood vs. the sapwood, then I would understand the price difference, but they aren’t. It is a preference, at a price, that’s all.

Wooden Sun decks Durban

Click to enlarge

We ran the deck boards all in the same direction on this wooden deck. With this deck we ran the deck boards parallel to the edge of the pool meeting each other at a 45° angle on the corners. It is far easier to run them all in the same direction as you will never get a problem of matching the cut ends. If one board is cut at 46° and one therefore at 44°, they will be of different lengths and will not match up. In this instance you need to install a barrier between then (one deck board’s width) to hide any difference in length between cut ends. But I’ll write another article about that later. Running them all the same way on both sides of the deck eliminates this problem.

You need to be careful though to start installing your deck boards in the middle of the deck and not on one end. If you start on one end, you may very well reach the 90° corner and find that you have to rip a deck board in half to cover your space. This is unsightly and will result in that deck board failing more quickly than the rest. So start in the middle and move outwards to both ends and end with a full deck board.

There was also some other work on this wooden deck build in that the client wanted a planter stand built so he could place potted plants in it and he wanted his Jacuzzi walls clad. We battled a bit with the Jacuzzi cladding as the original brick structure that was there was skew and we had to try to mitigate this by building up

Wooden Sun decks Durban

Click to enlarge

our substructure to bring it back to square.

The cladded vertical posts you see in the pics alongside are 19 x 90 boards (x 3 of) around a 76mm steel awning post. We needed to build the steel awning post up to get to our 290mm and then attach it to the post. Although it looks very nice to have such bulky wooden posts, it does block the view slightly when sitting at the pool. Why 290mm when each board is 90mm (90mm x 3 = 270mm)? Because we set each corner chasing the other surface. And let’s just forget about the 5mm gap we had in between each board.

For a free no obligation quote for your wooden sundeck, pergola, walkway, screens or other timber construction please use the contact us form below or call us on 082 496 5444.

Go back

Your message has been sent

Warning
Warning
Warning
Warning
Warning

Warning.