DIY Timber Decking in Durban

Timber decking companies DurbanAlthough we are professional installers of timber decks in Durban, we also offer a DIY service whereby we will supply the materials required to build your own wooden deck. We will also provide a brief outline of what is required and how to go about installing it.

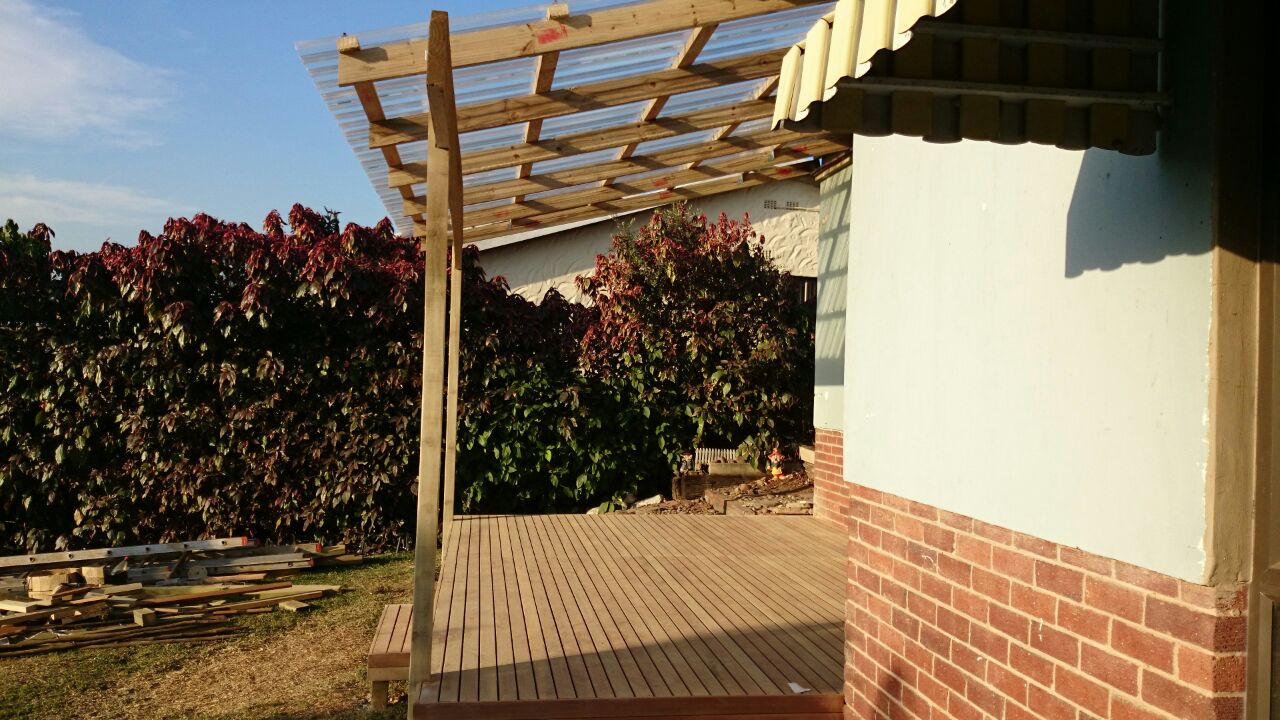
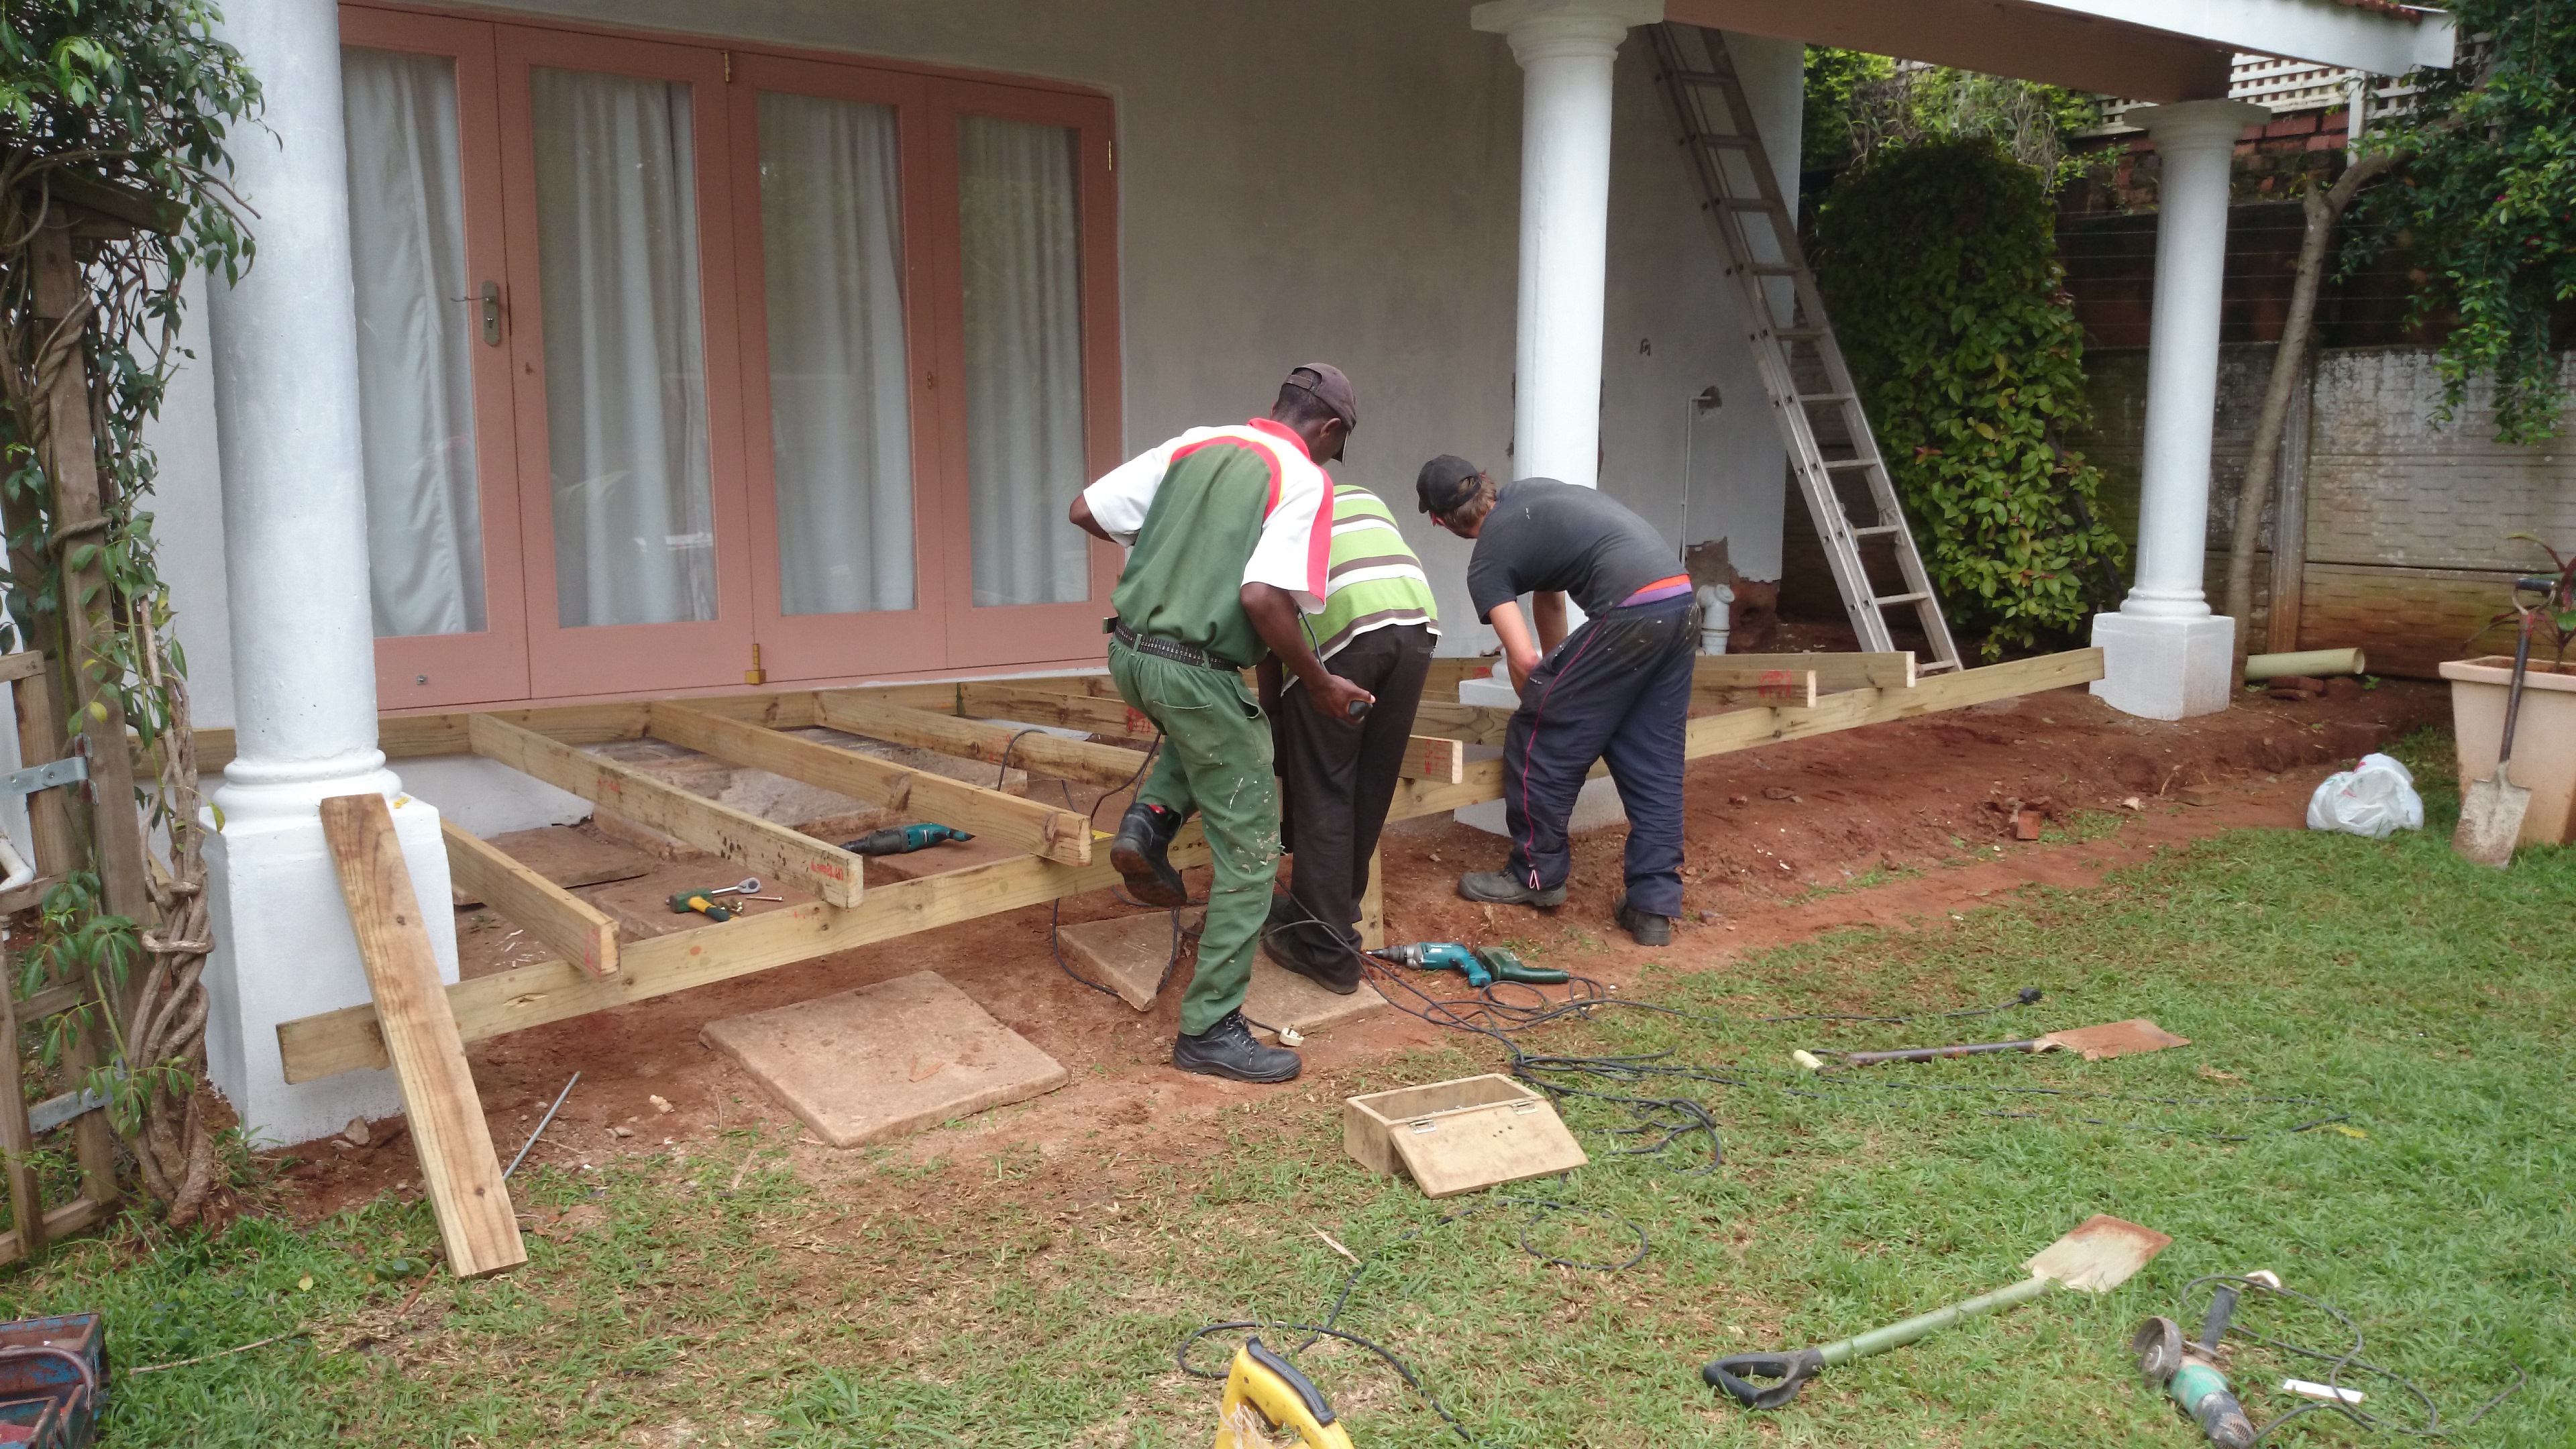
As an introduction to this service I will offer some basic guidelines of how to set about building a wooden deck.

The most cost-effective method is to use an H3 and H4 CCA Treated substructure and balau deck boards. H3 timber is guaranteed, by the supplier, for 50 years and H4 is guaranteed for 30 years. This is of course subject to certain conditions that need to be fulfilled such as sealing cut ends with an approved end sealer and using H3 and H4 where they should be used. You can see a list of H classifications on www.sawpa.co.za. Provided the correct H level of timber is used in the correct application your deck will probably out live you.

Wooden decking companies Durban

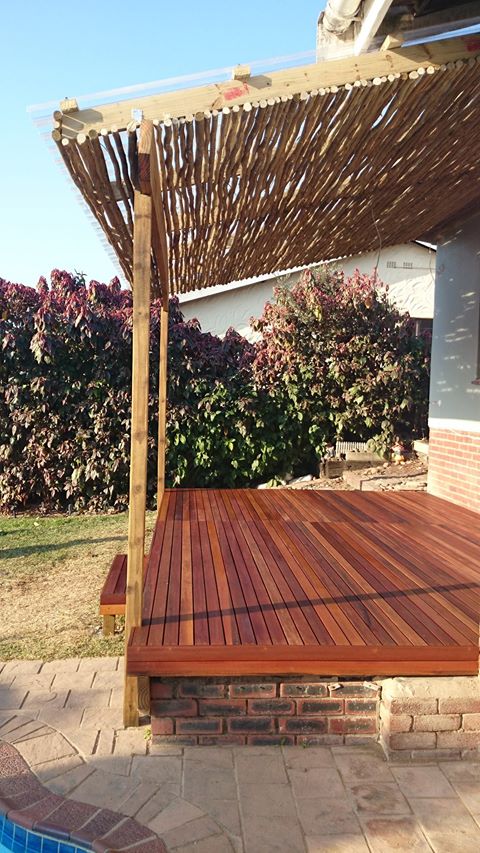
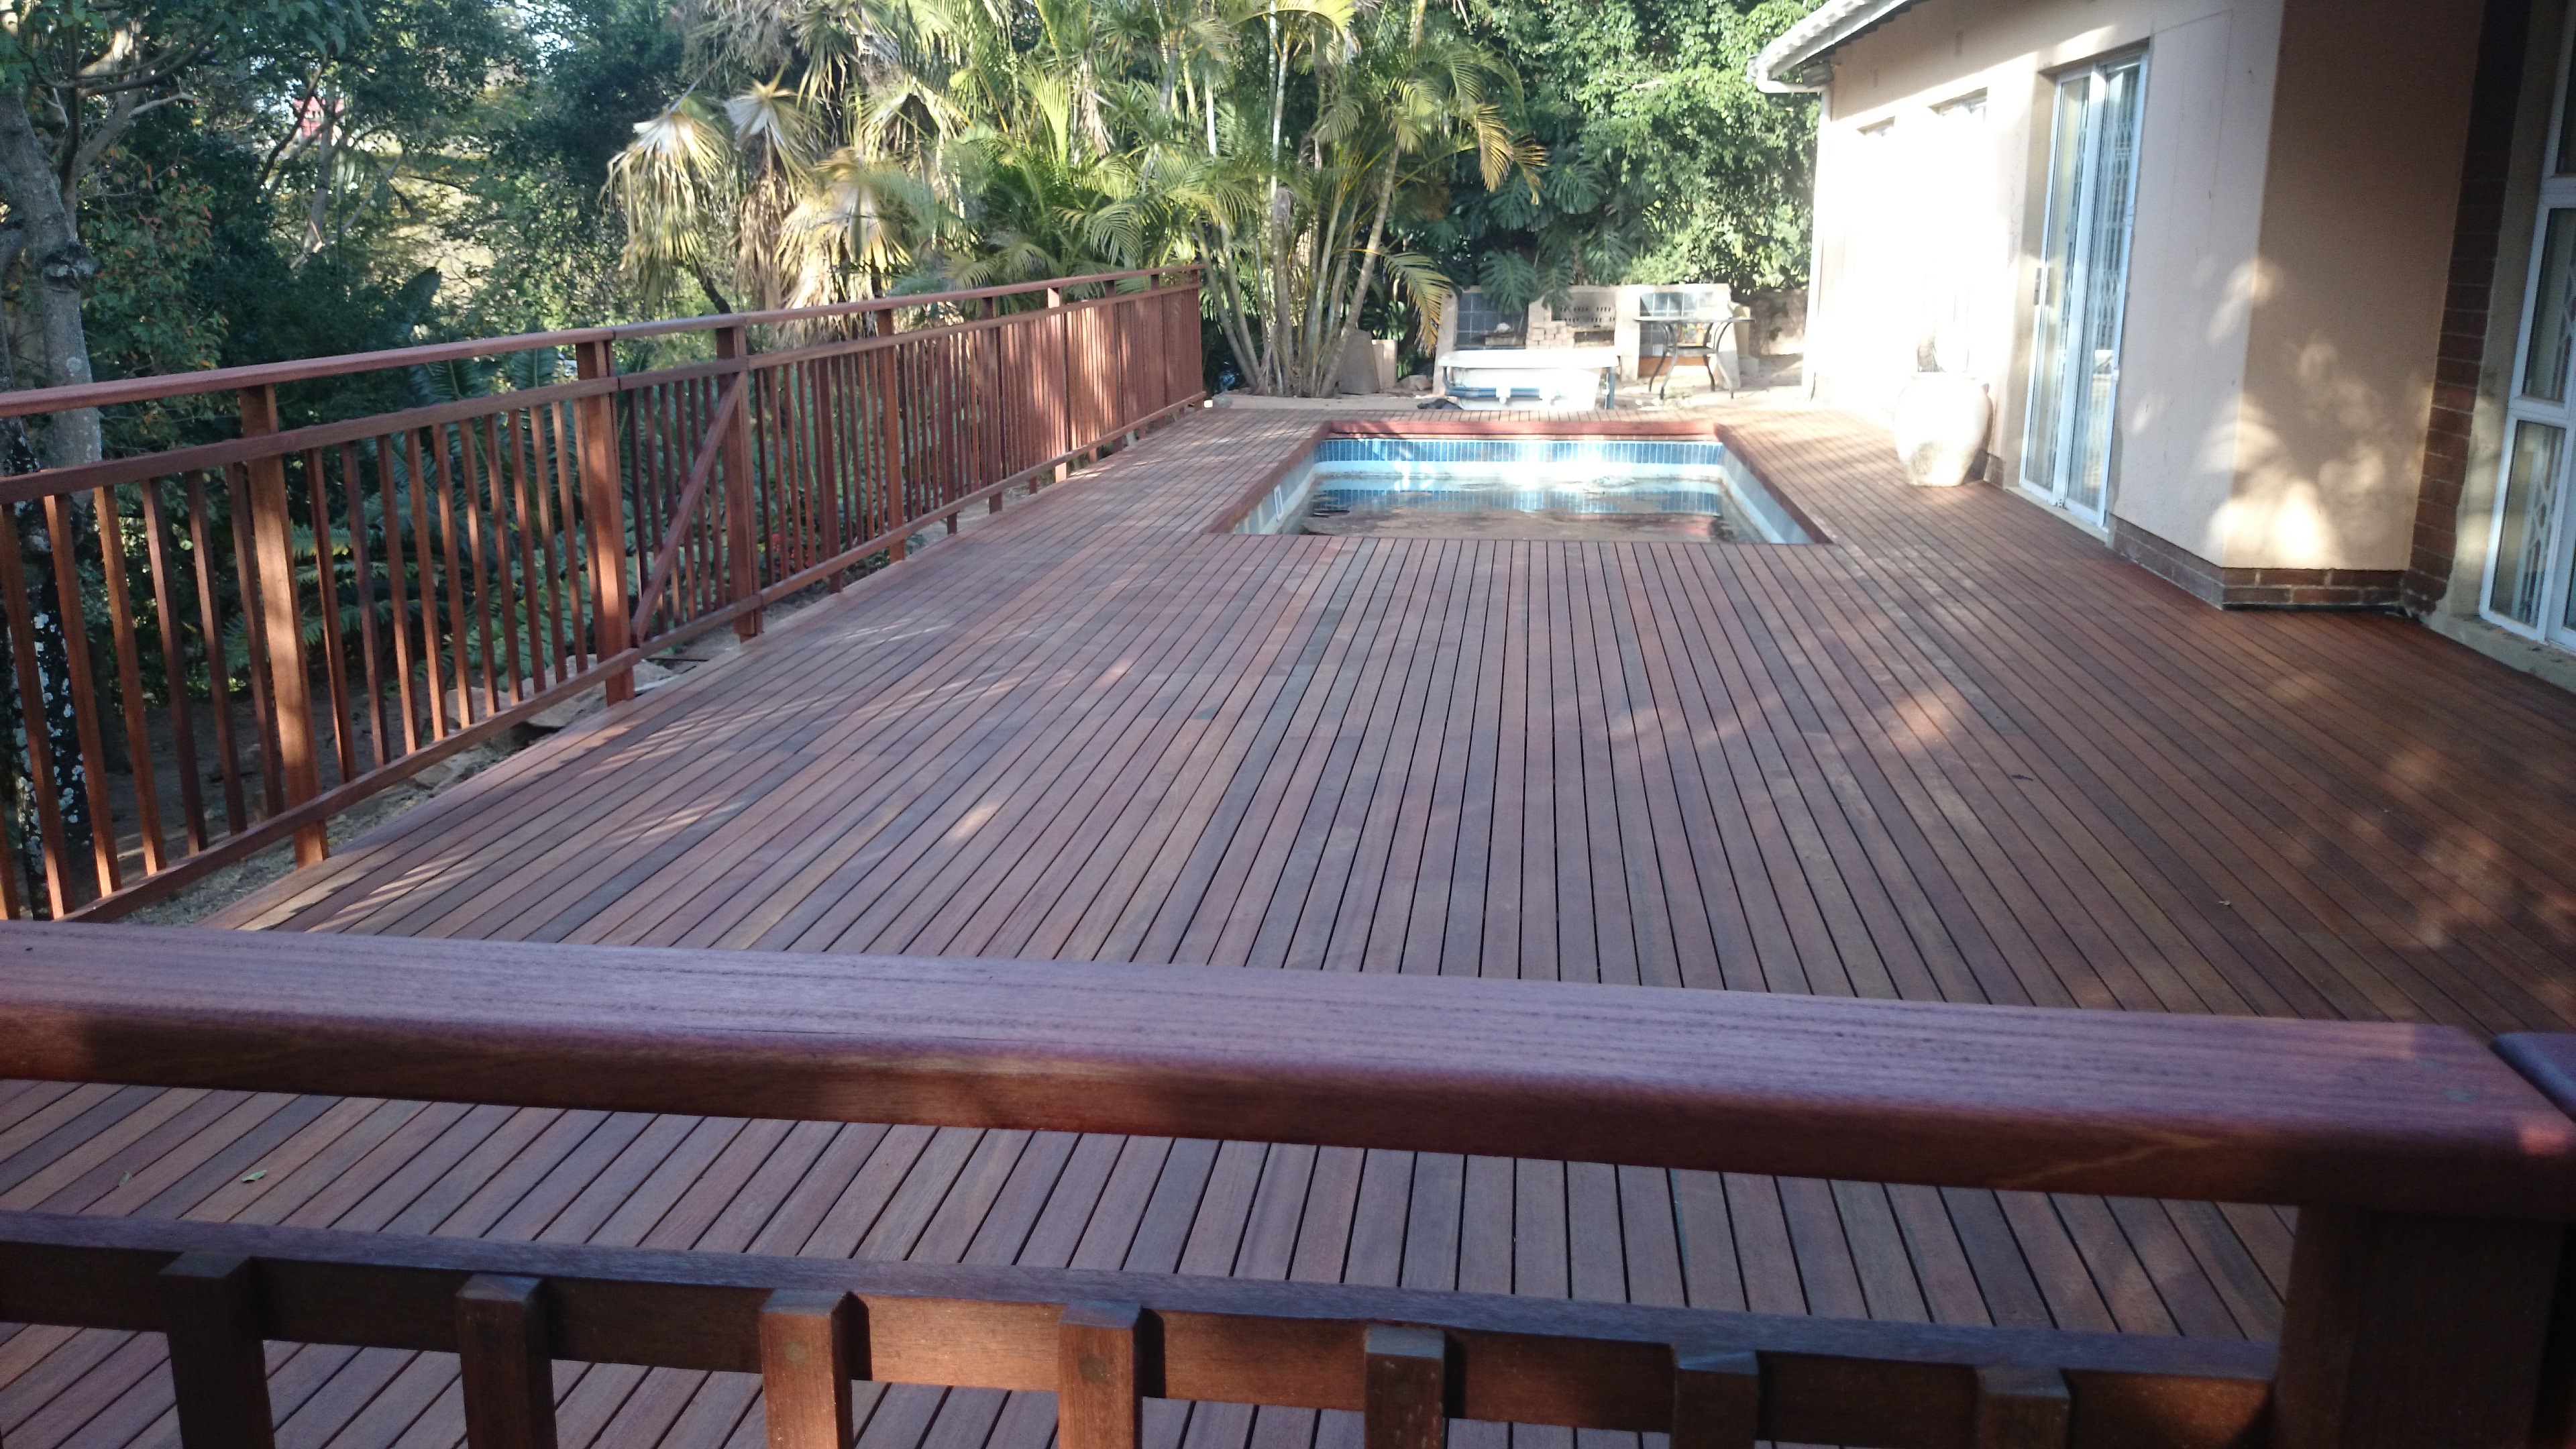
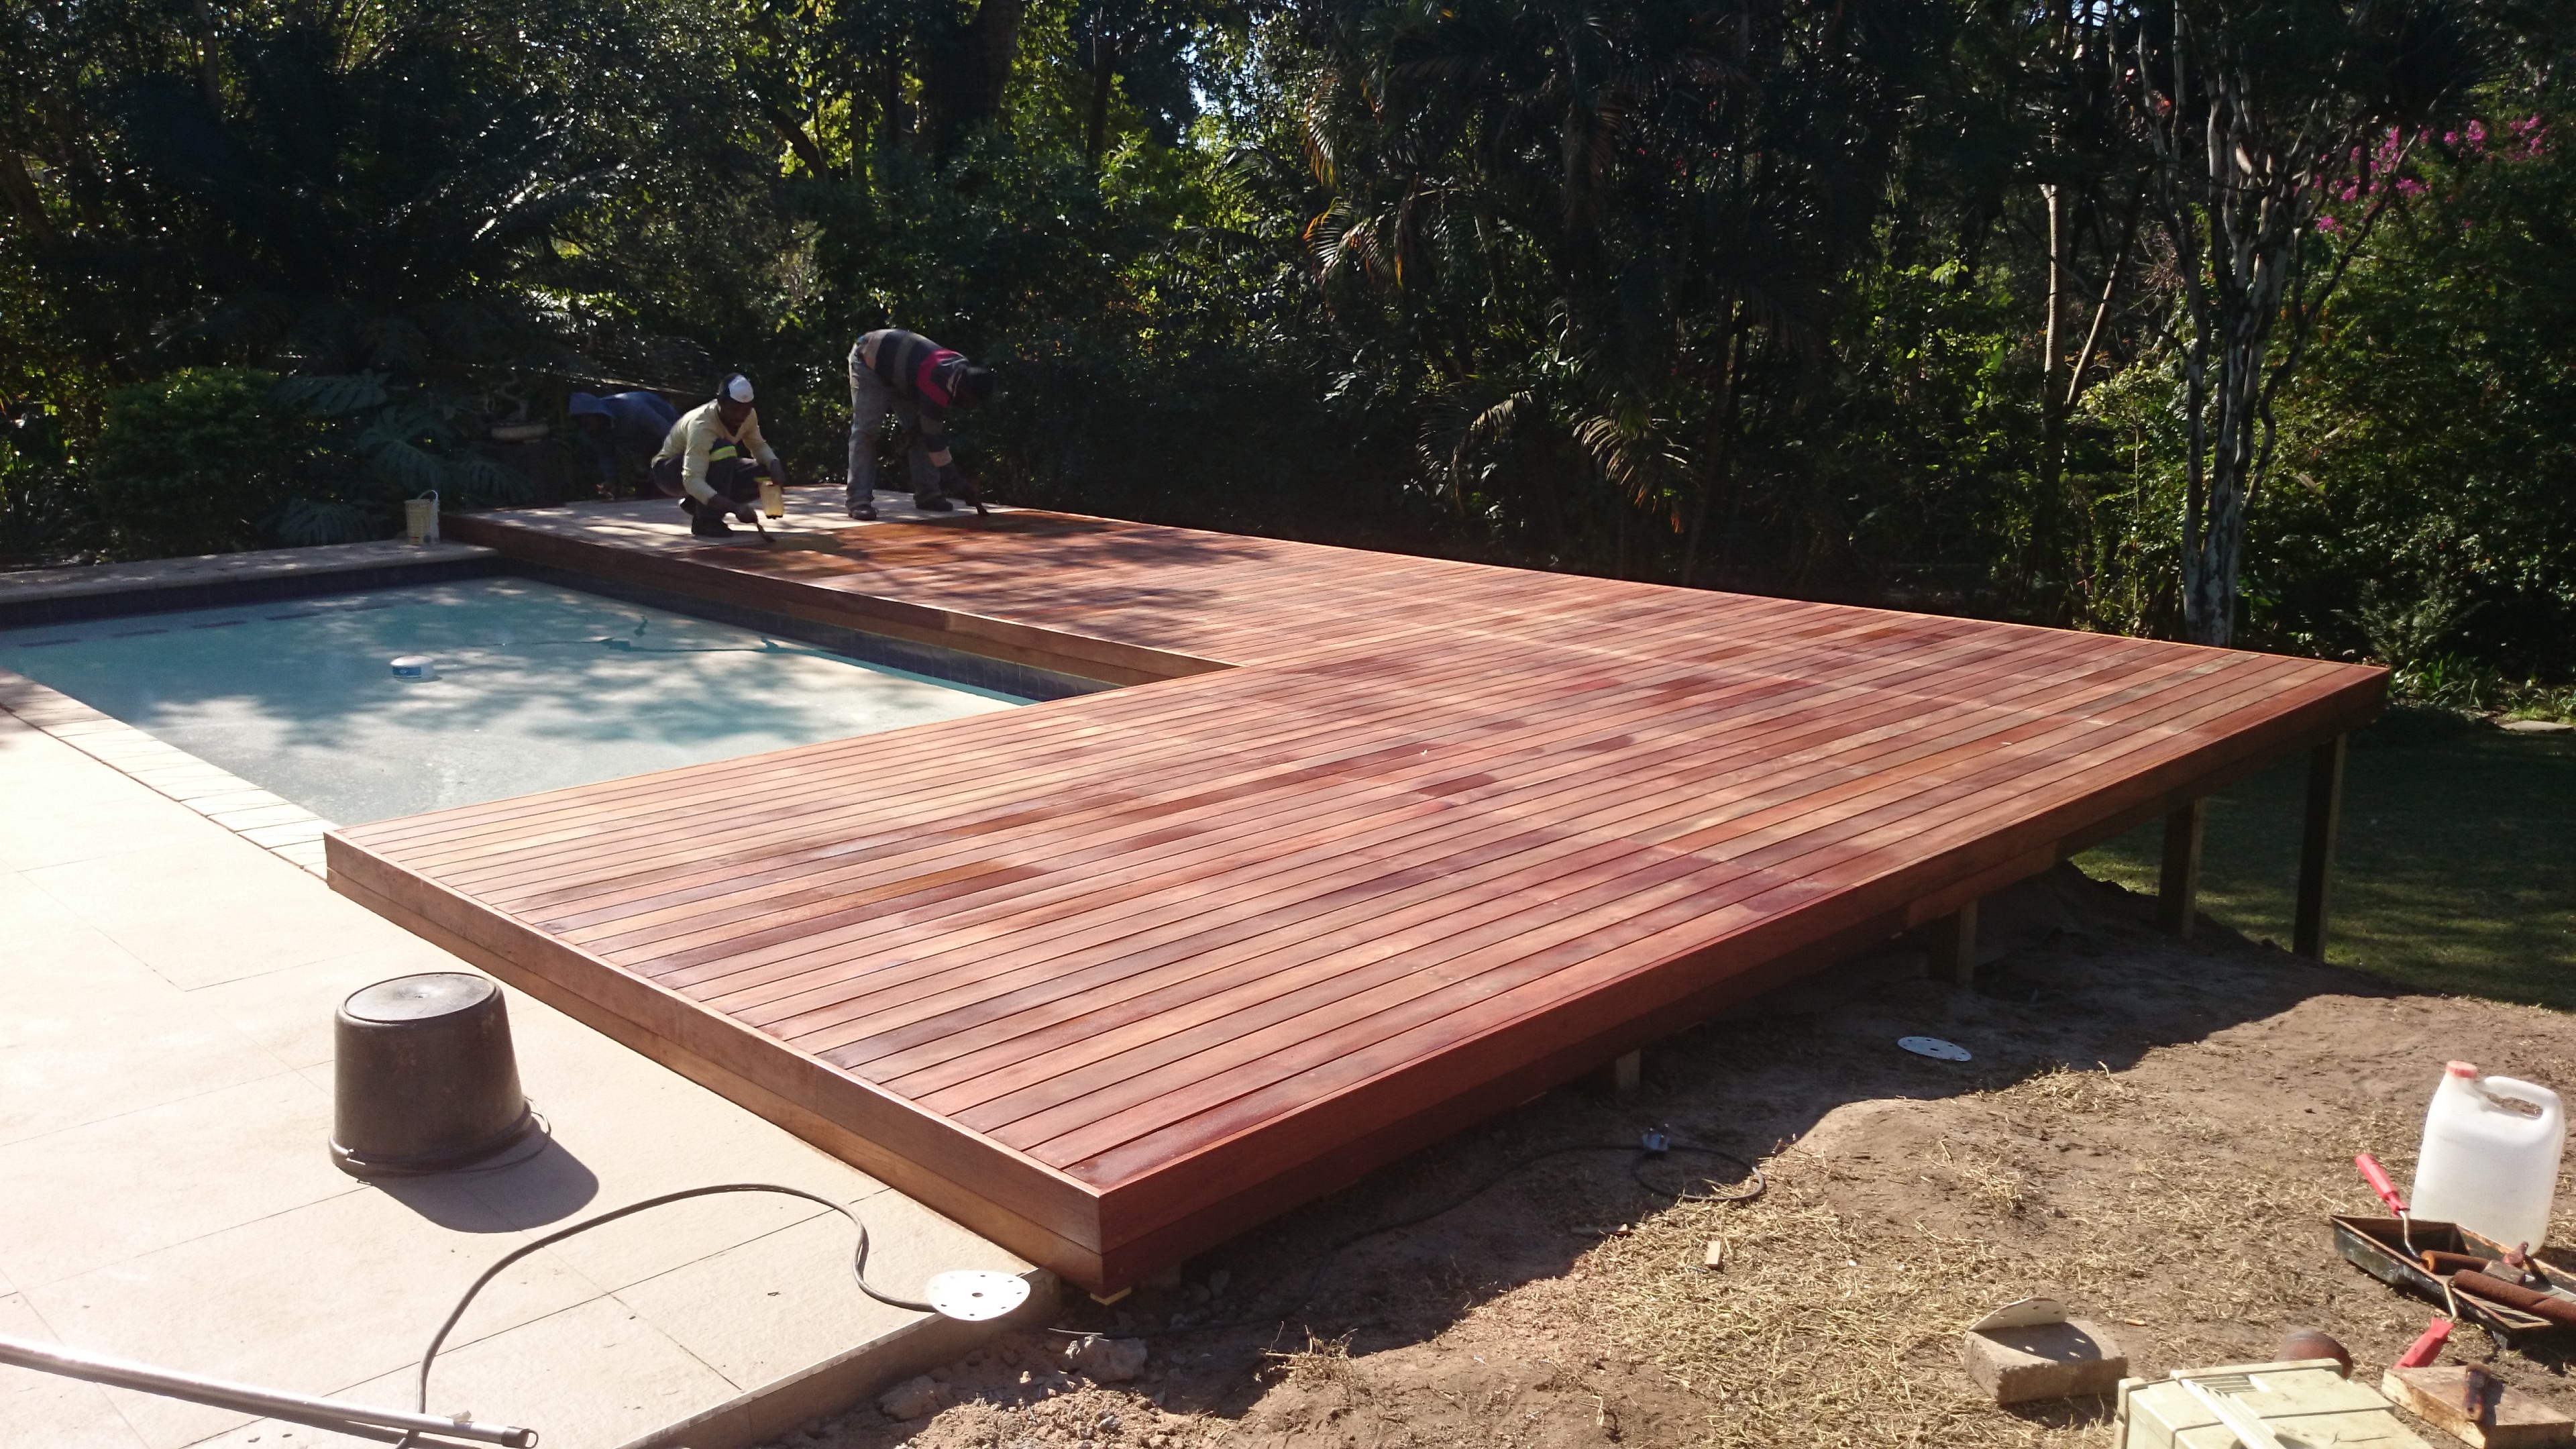
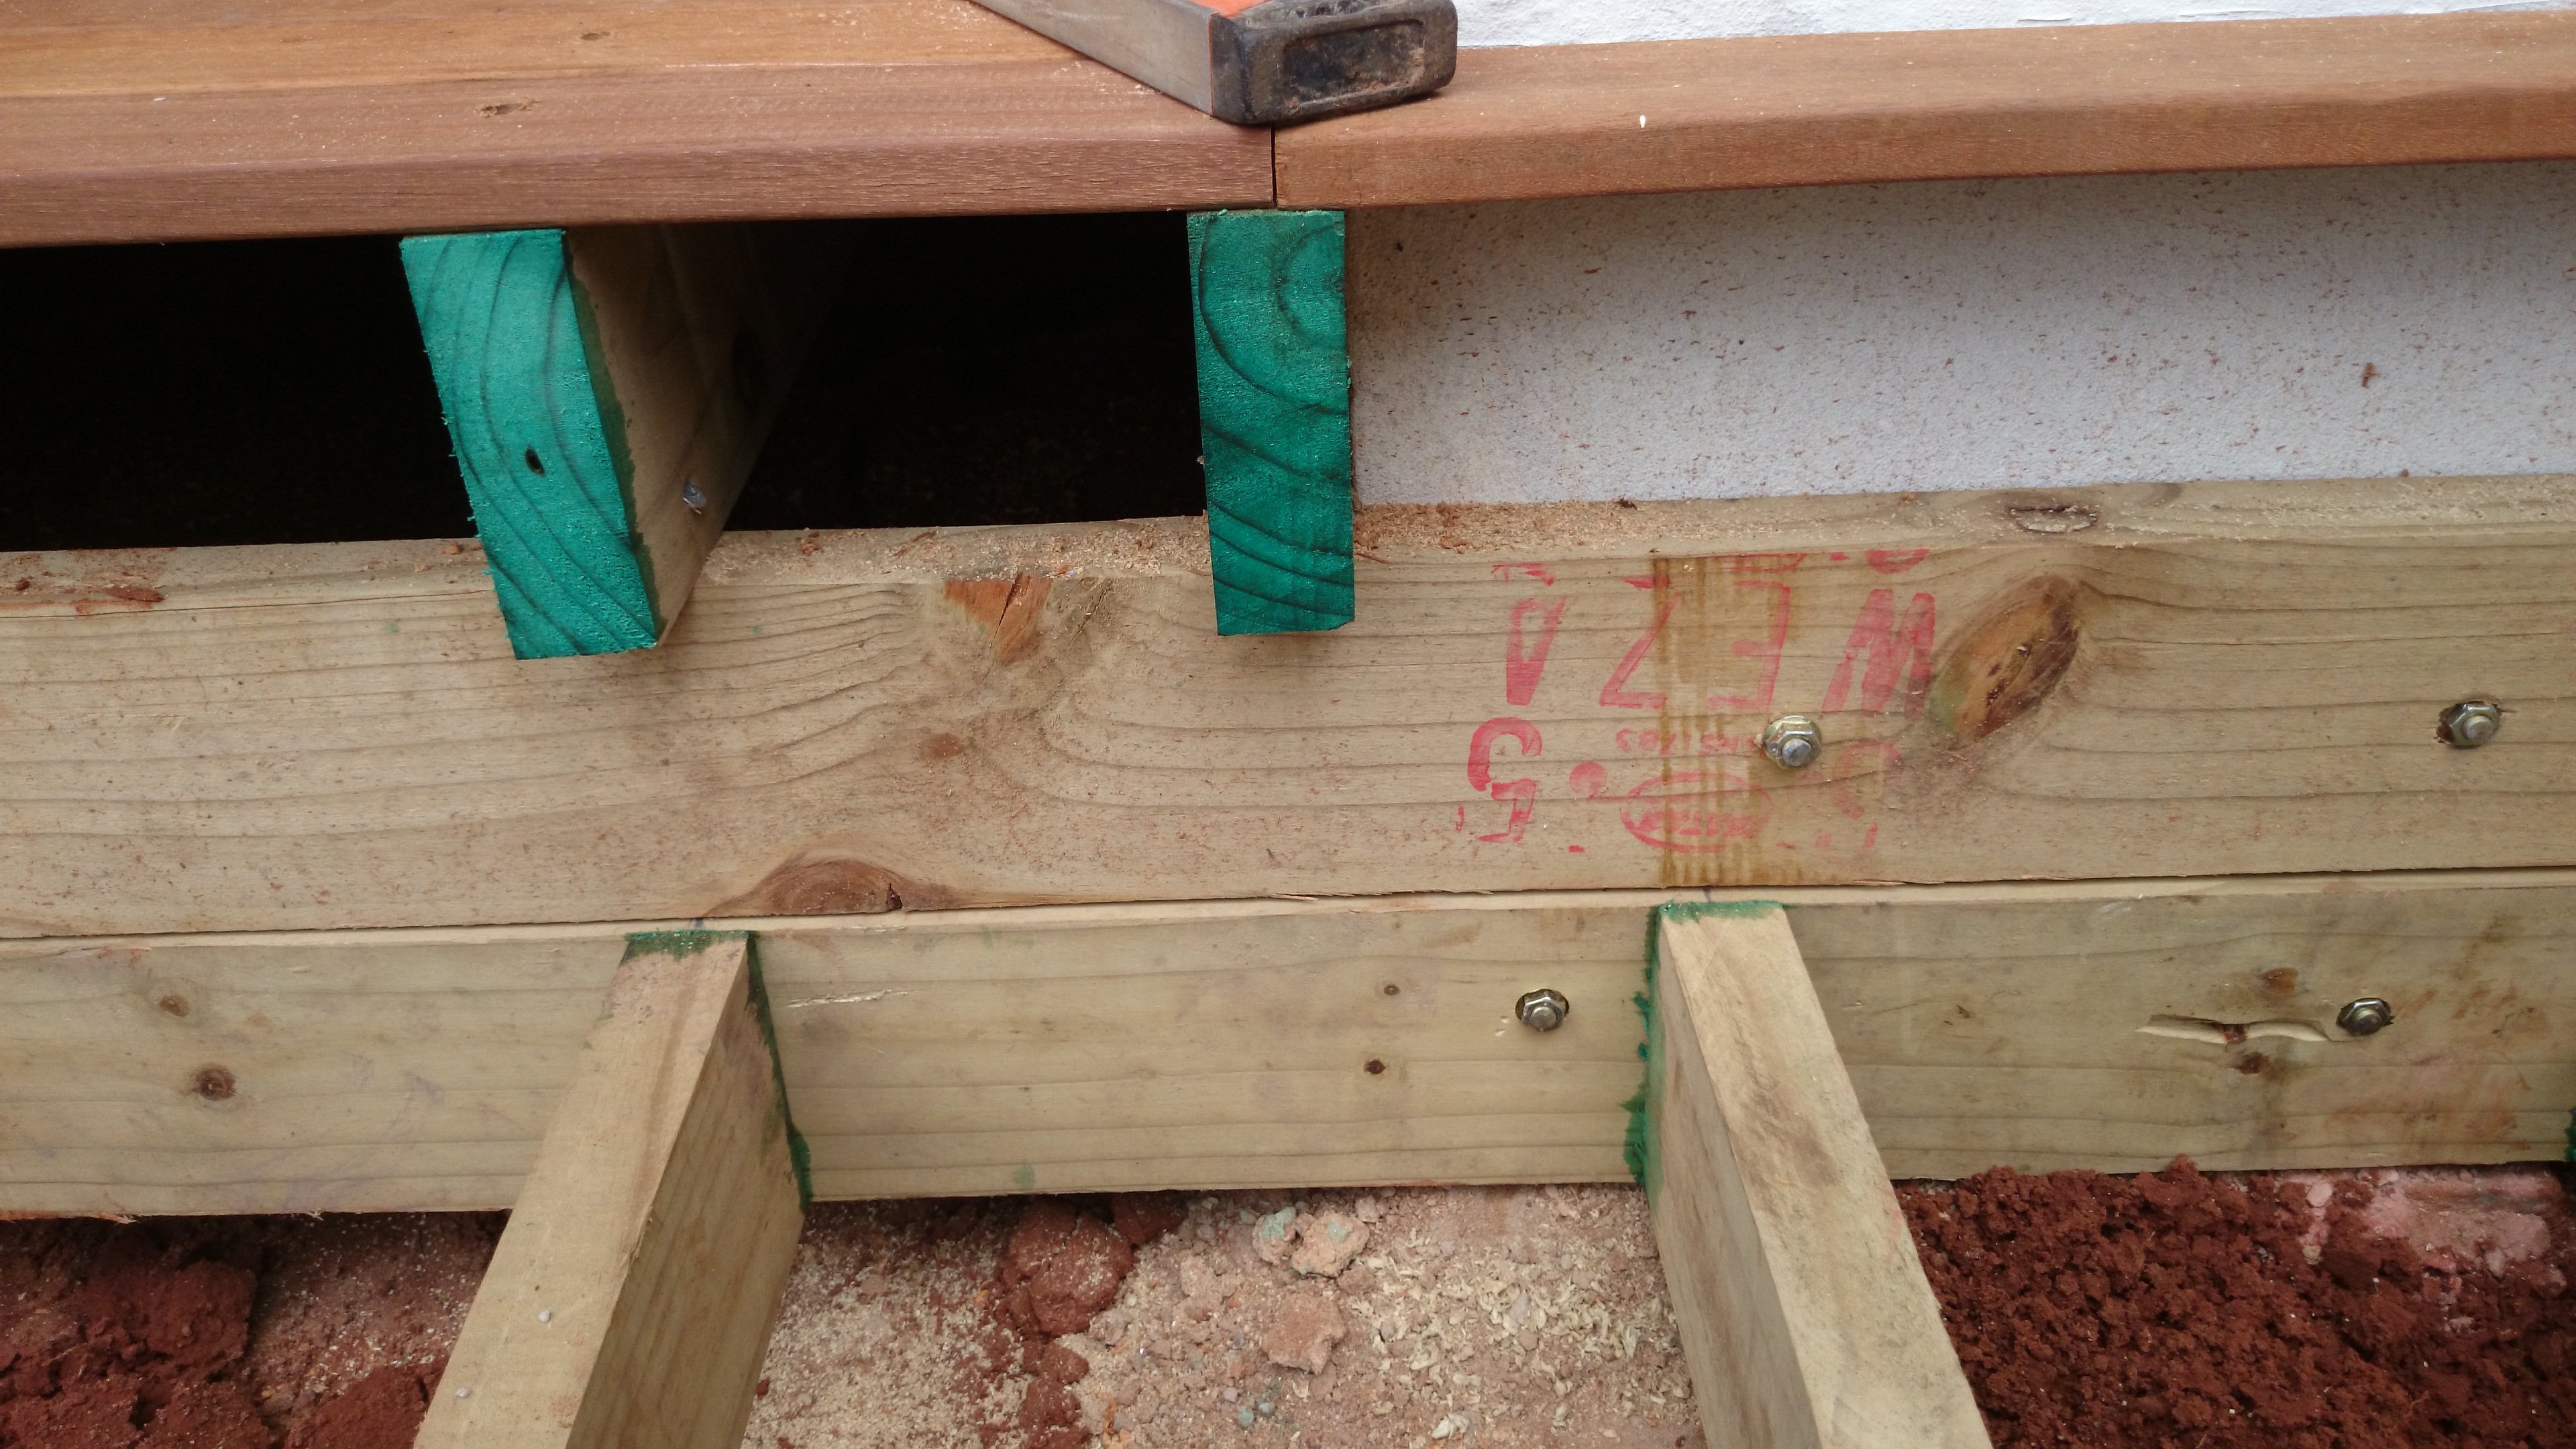
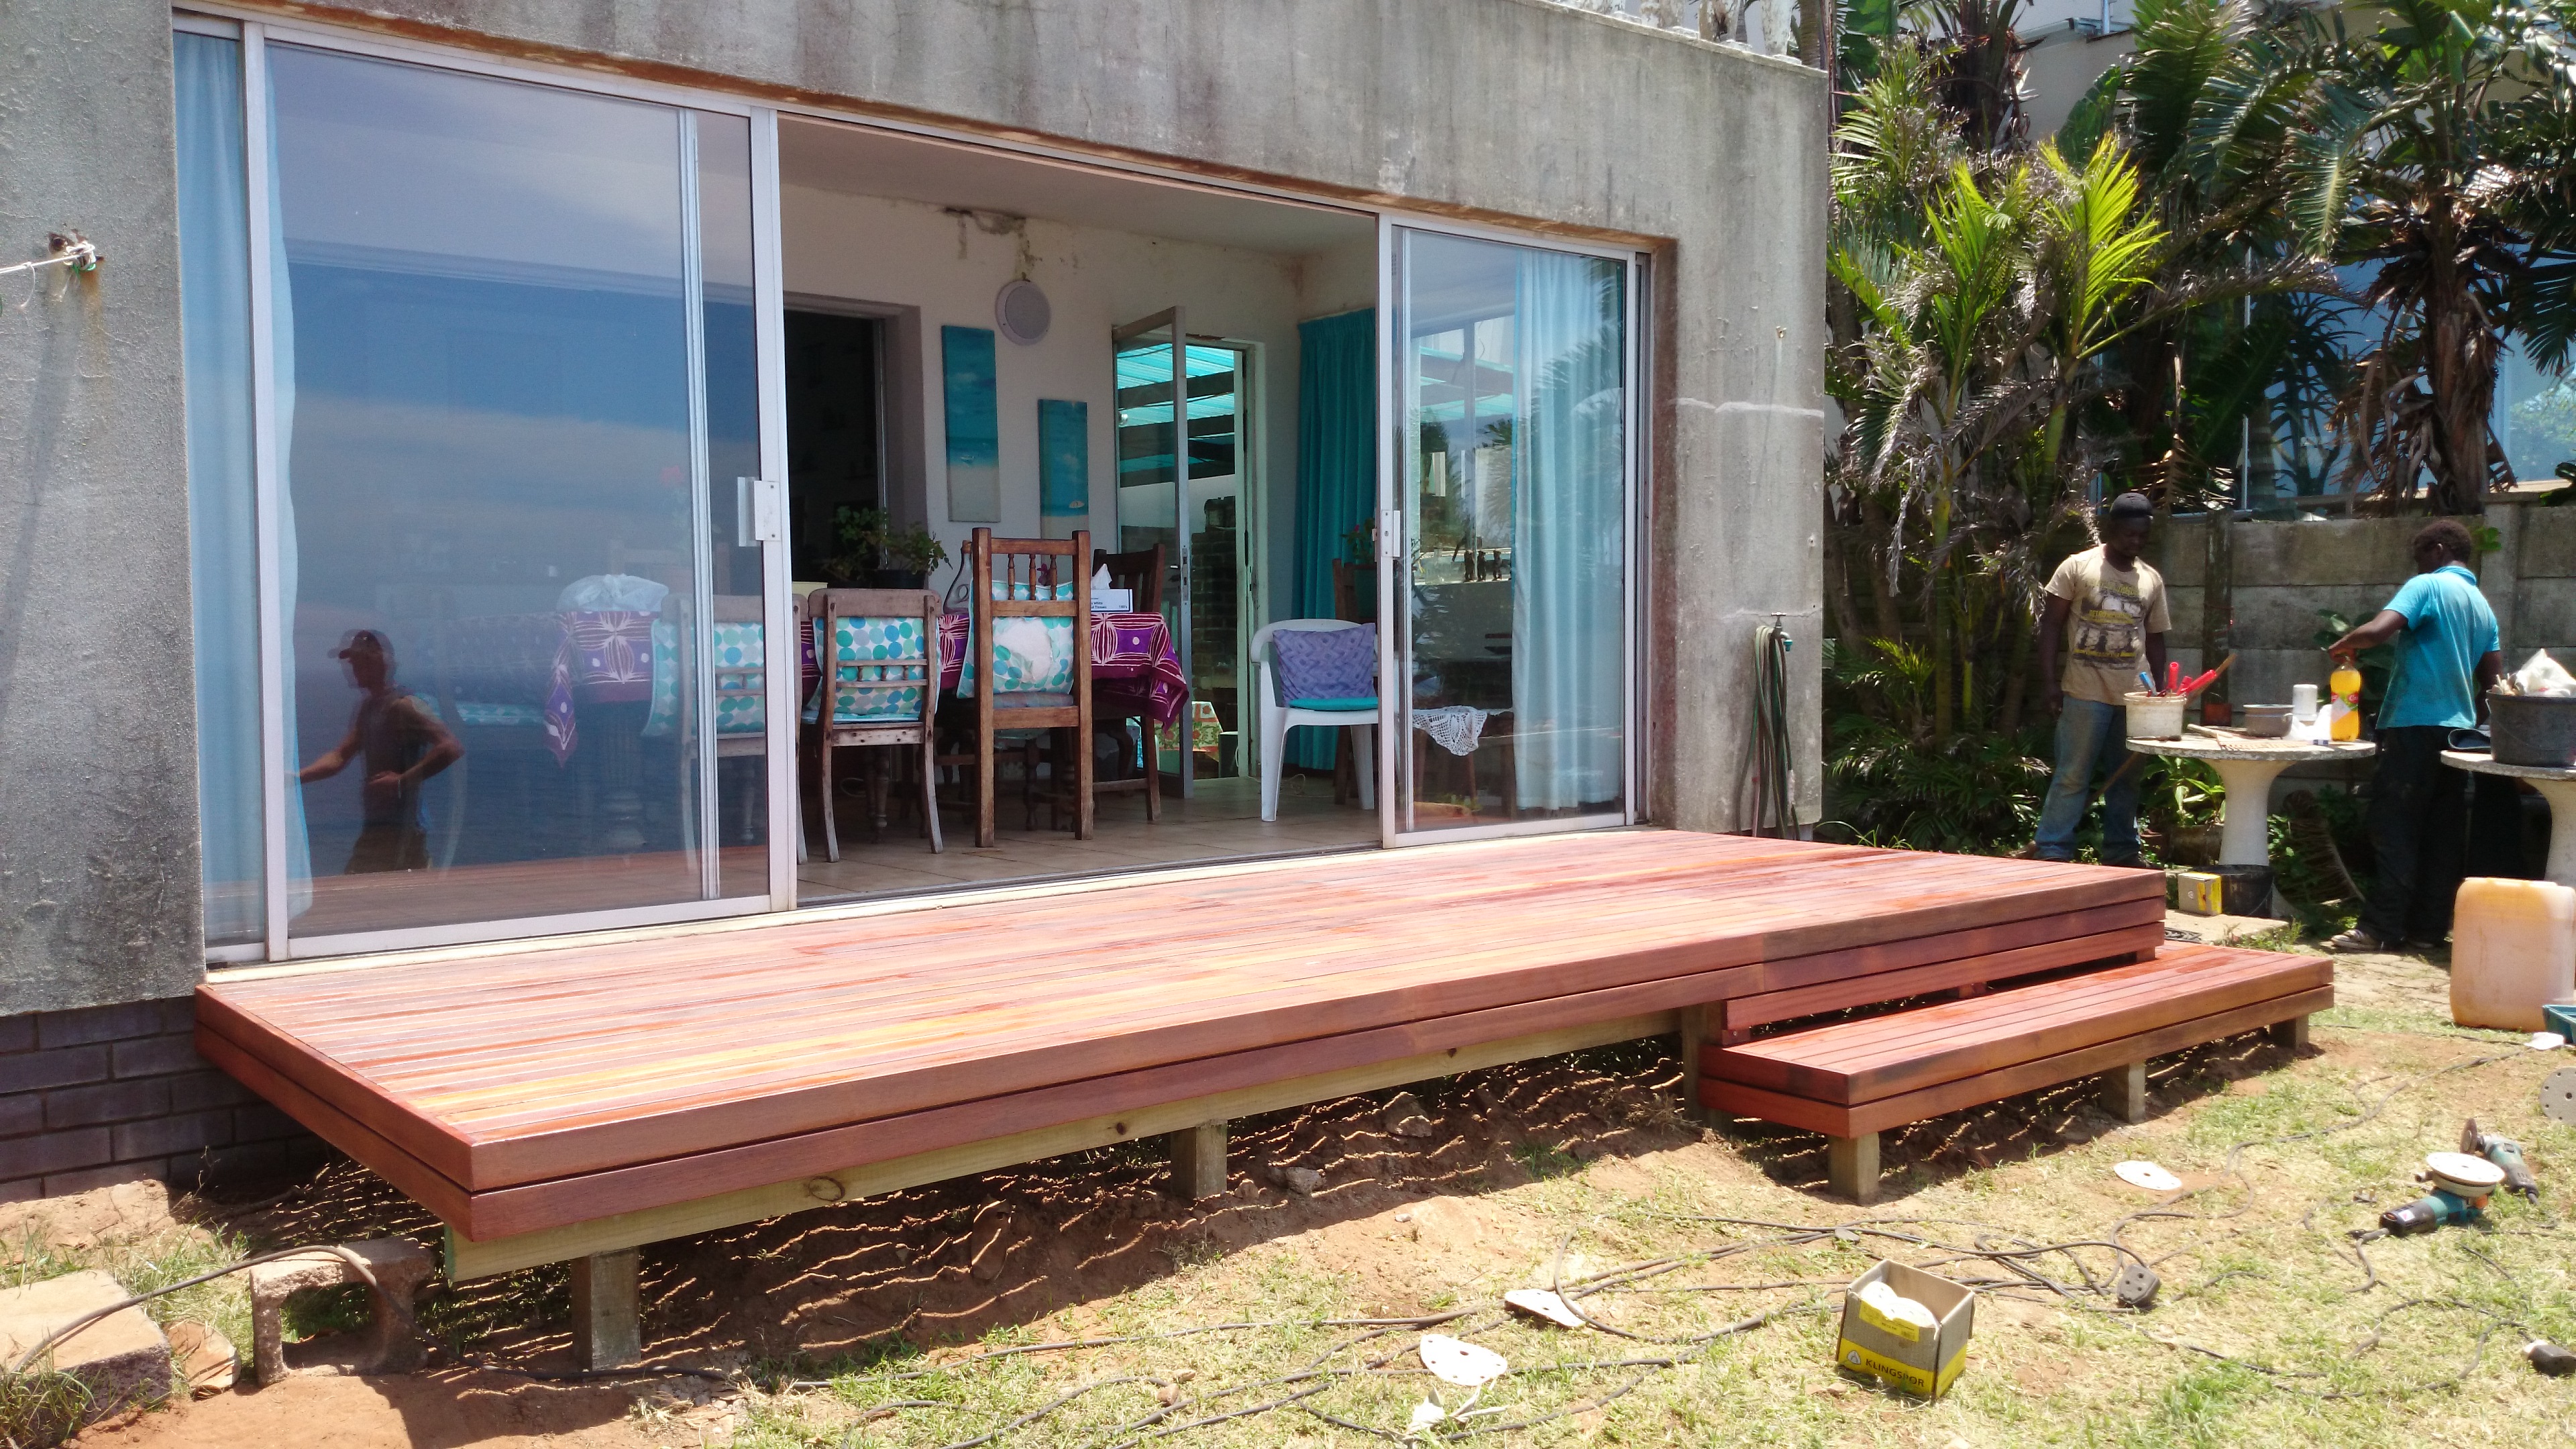
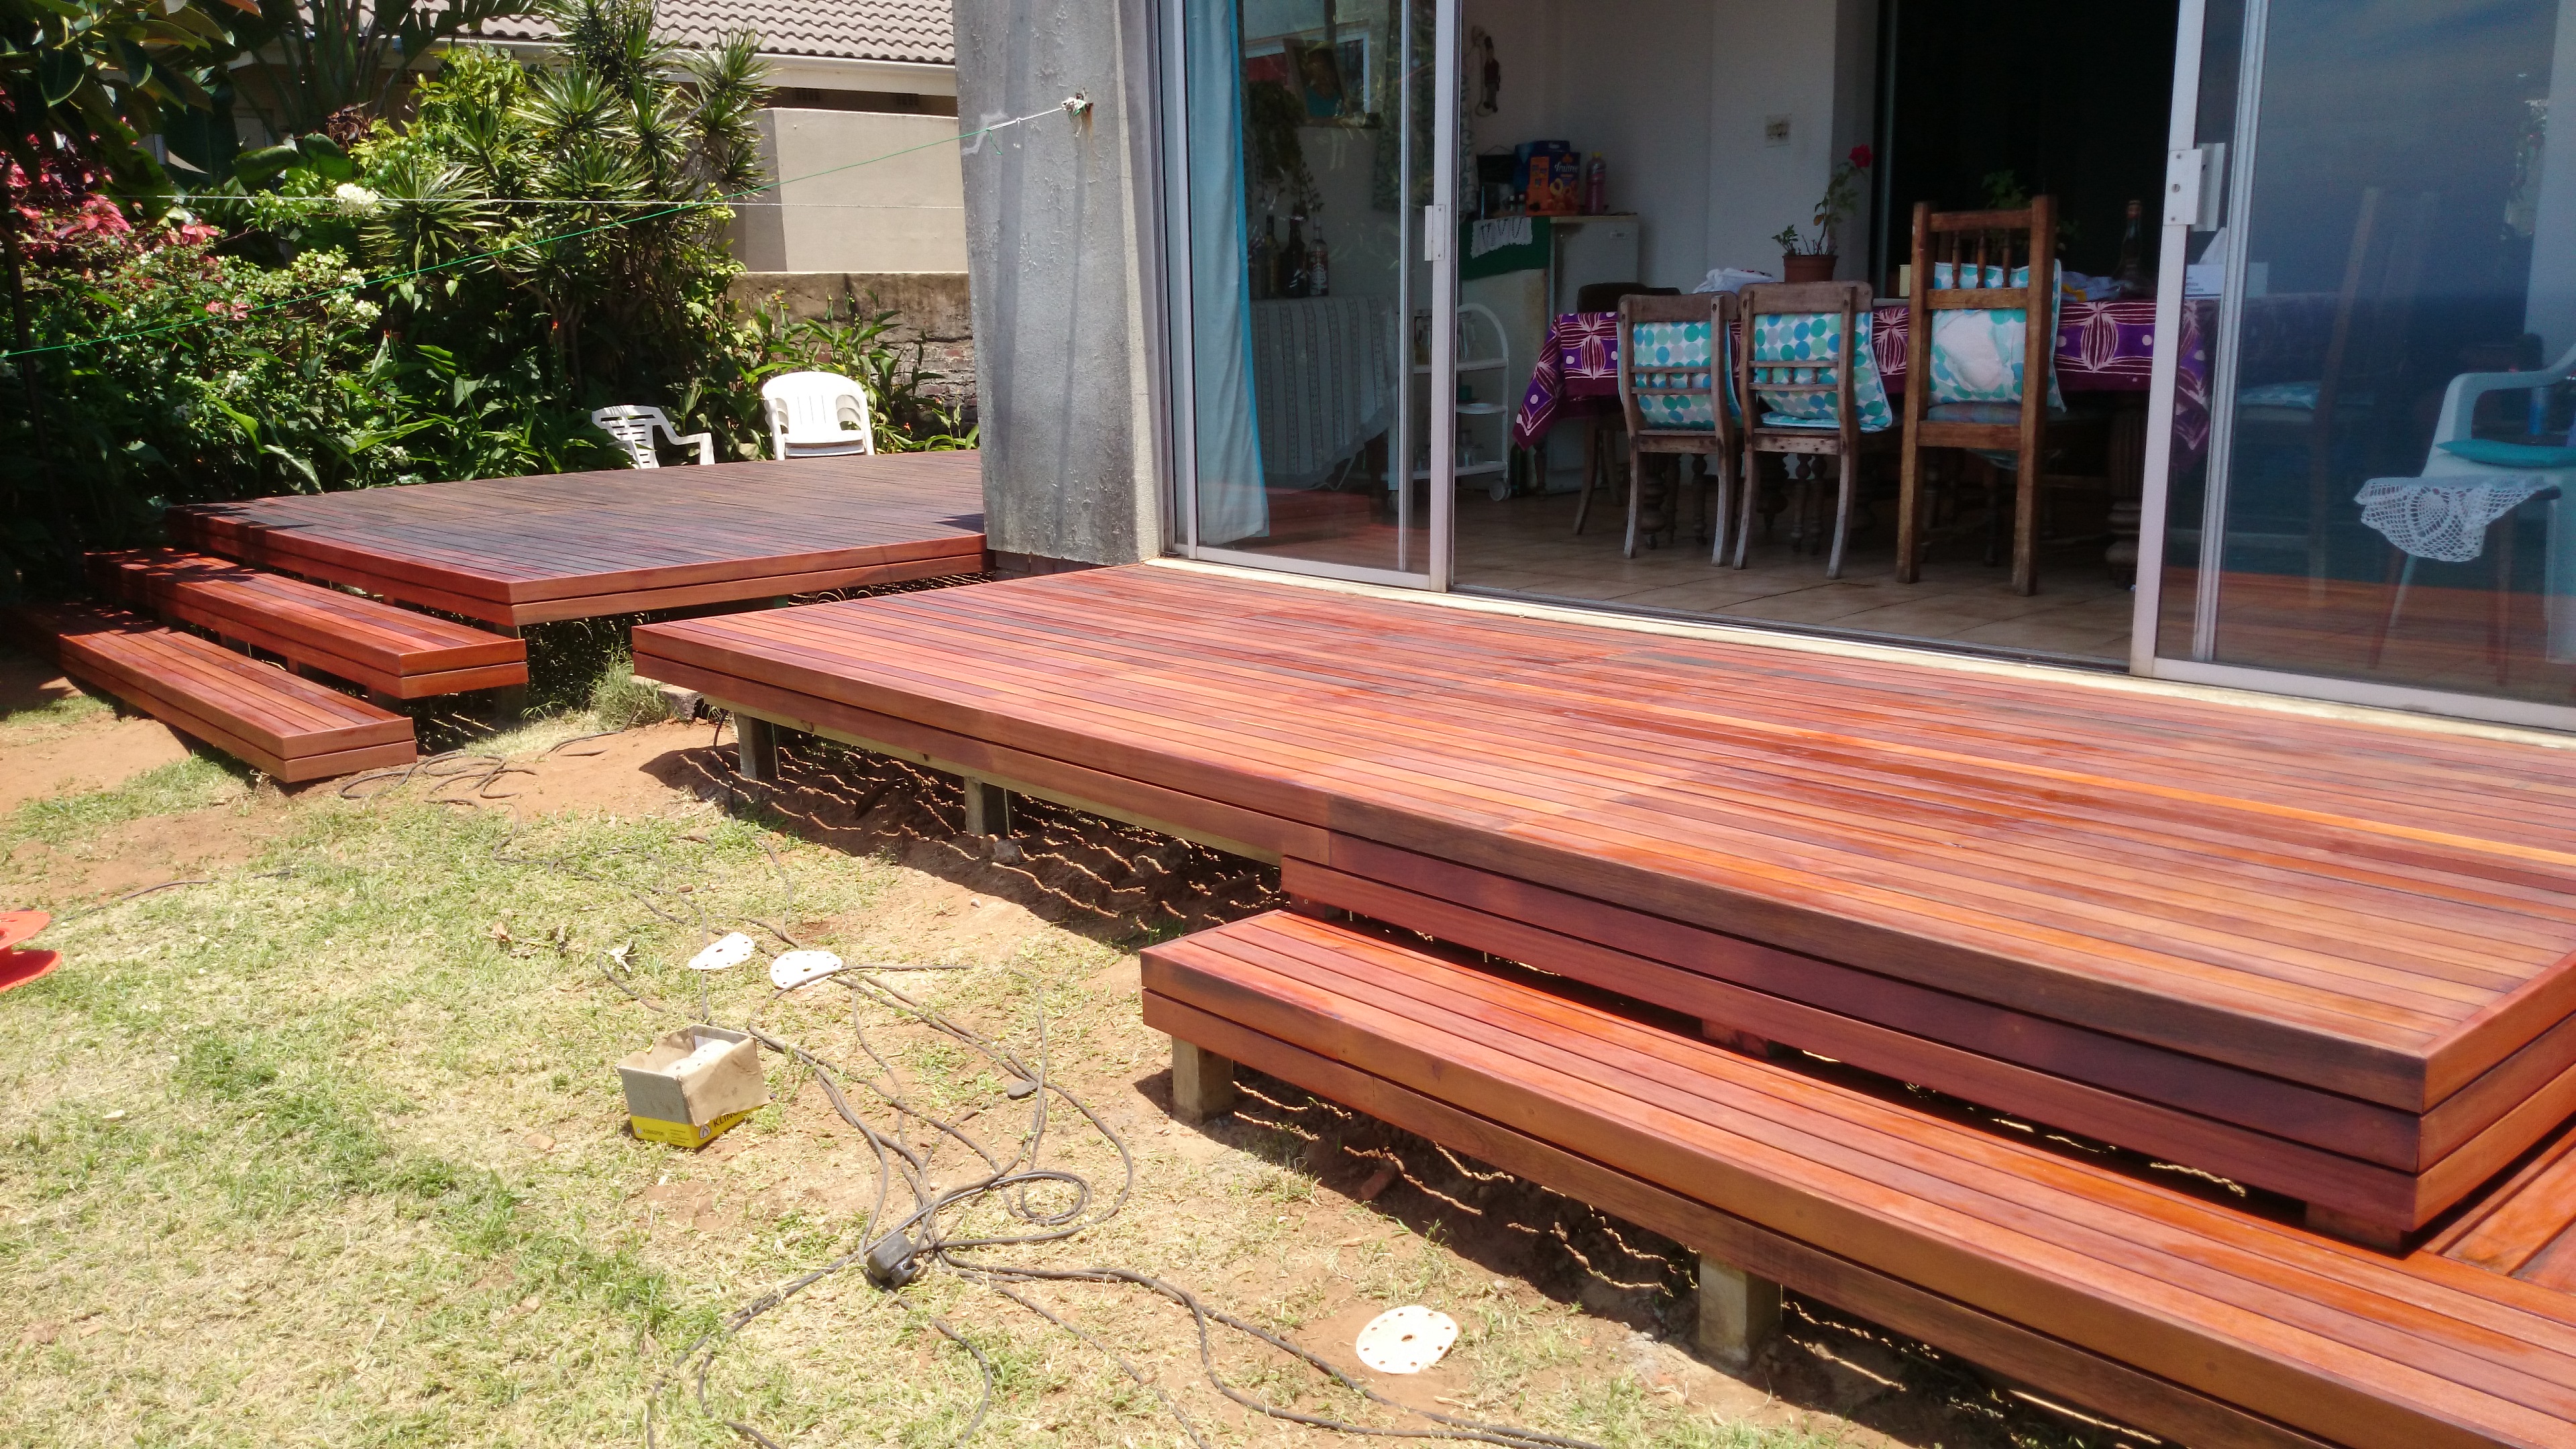
First few rows of balau deck boards down

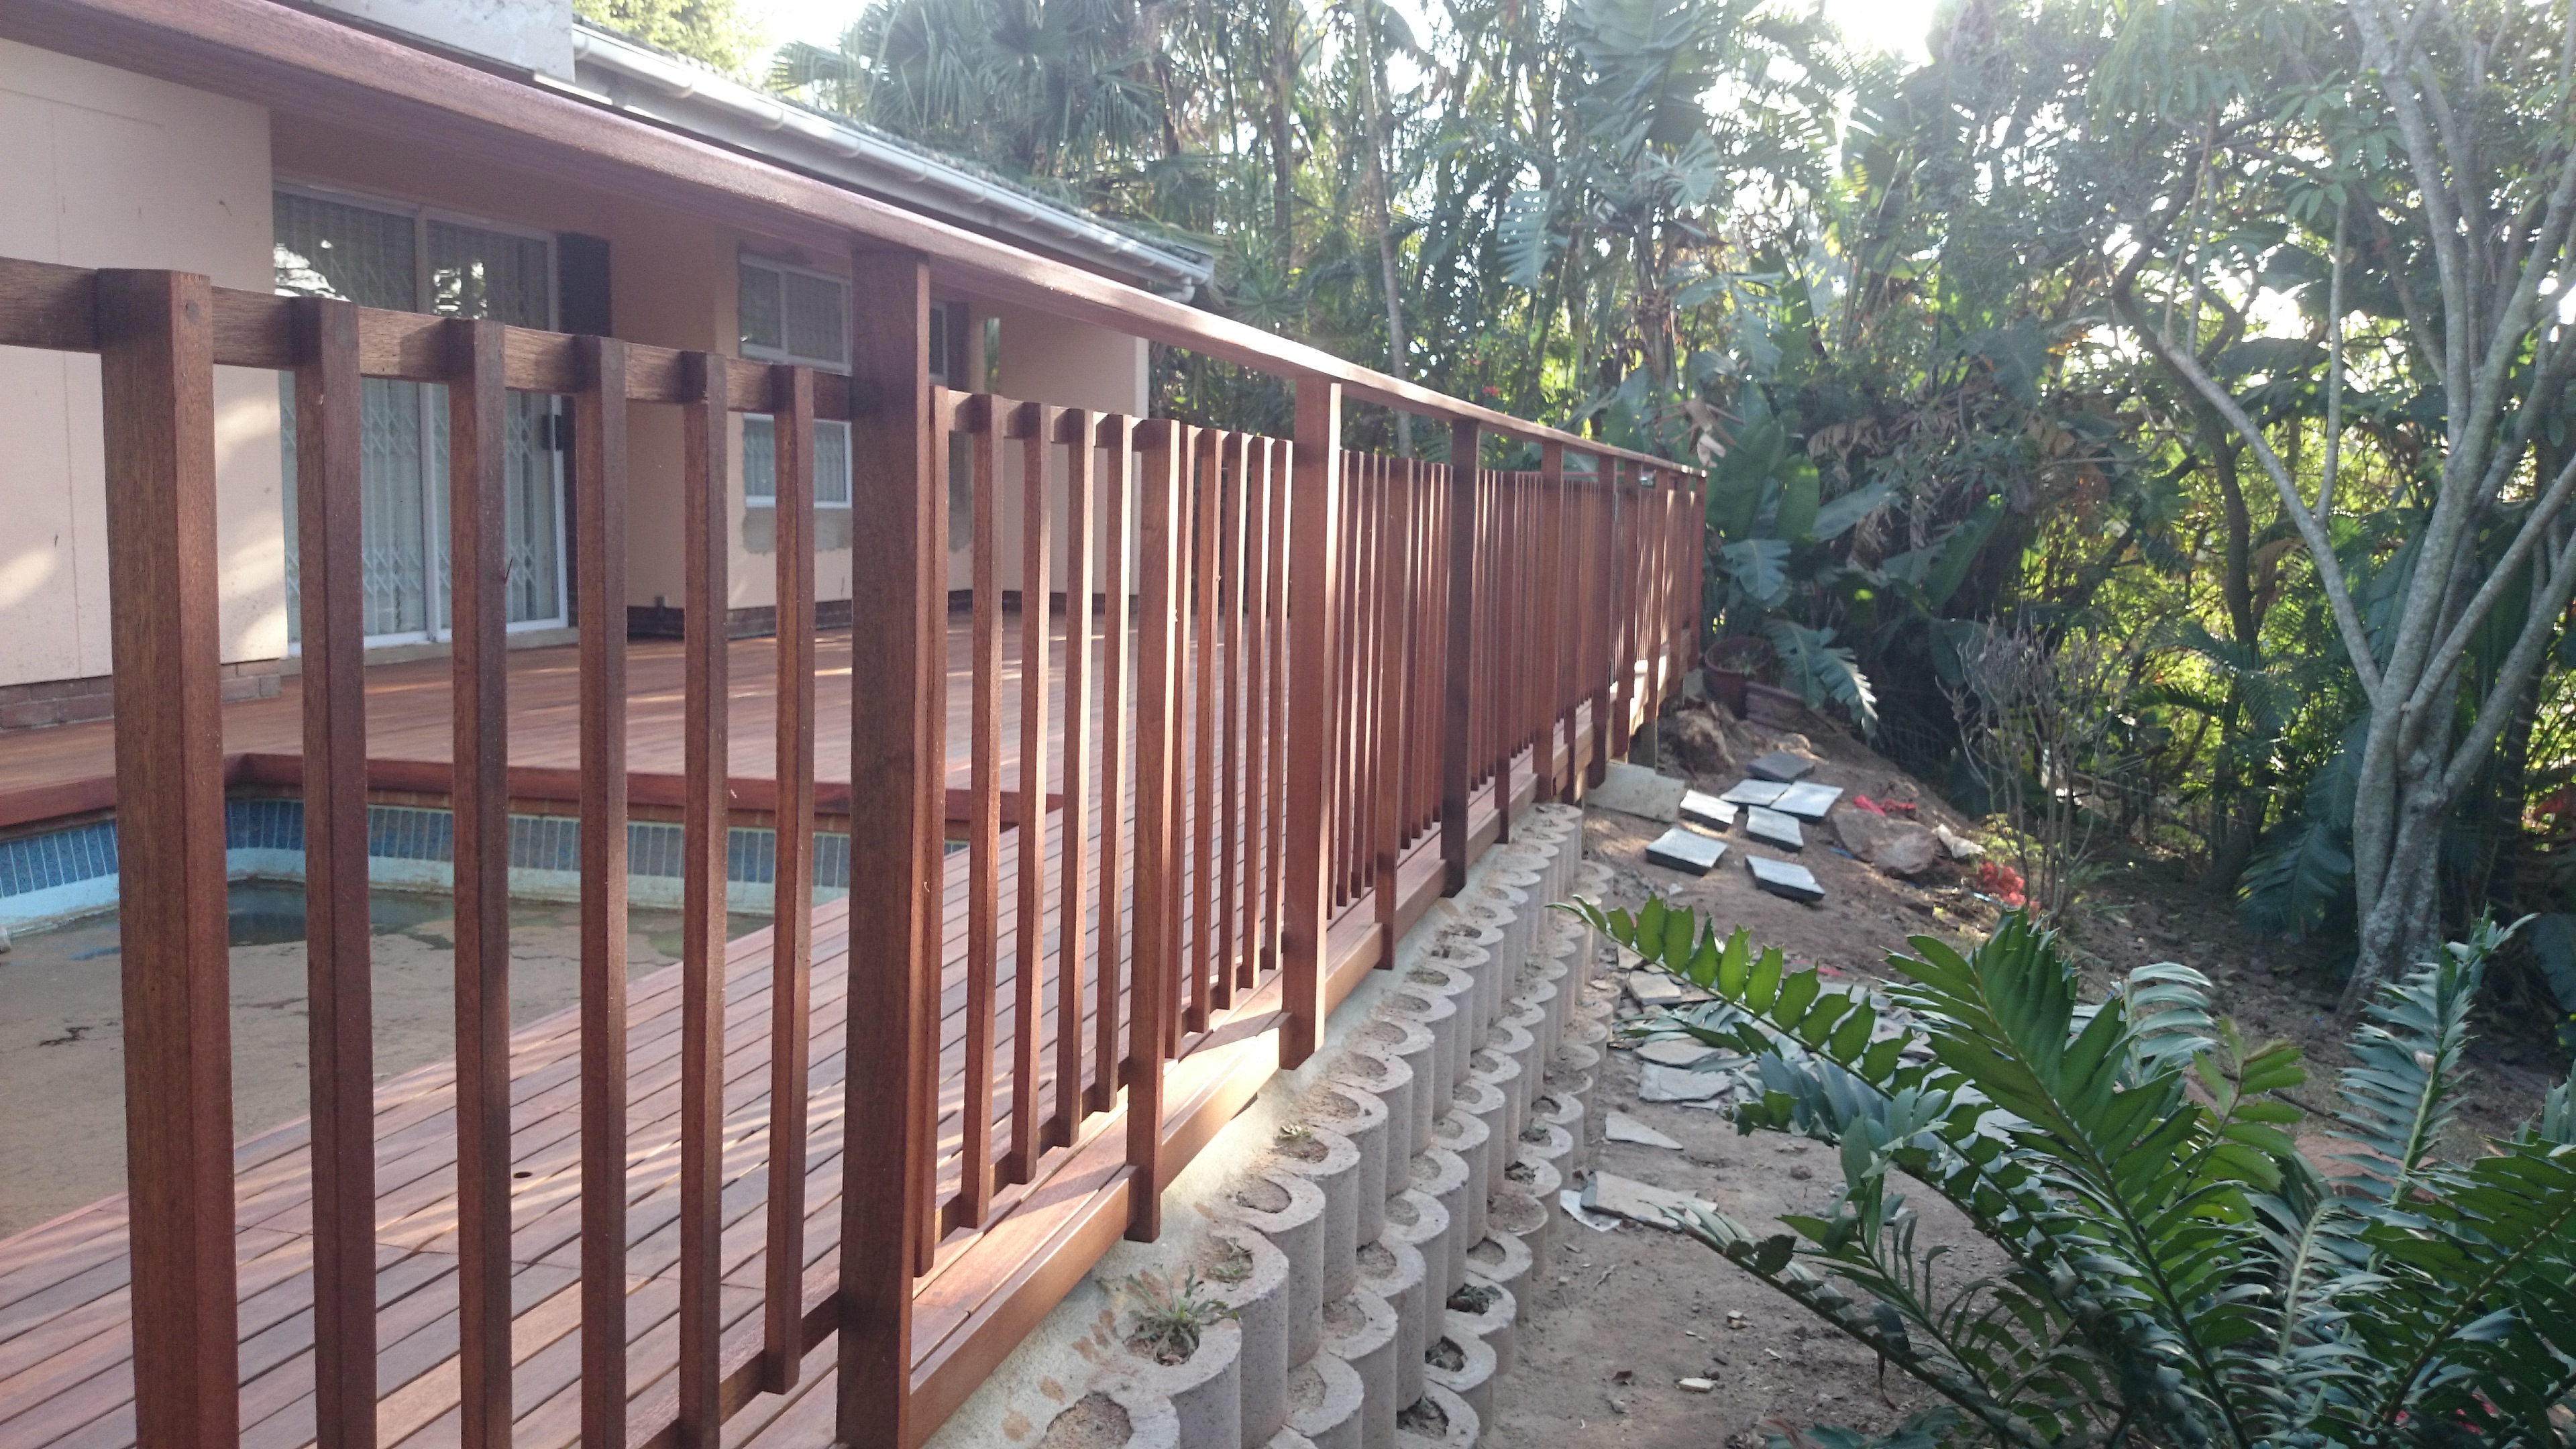
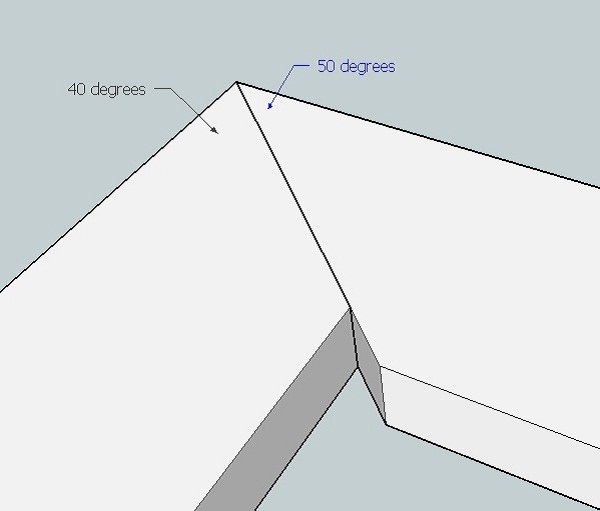
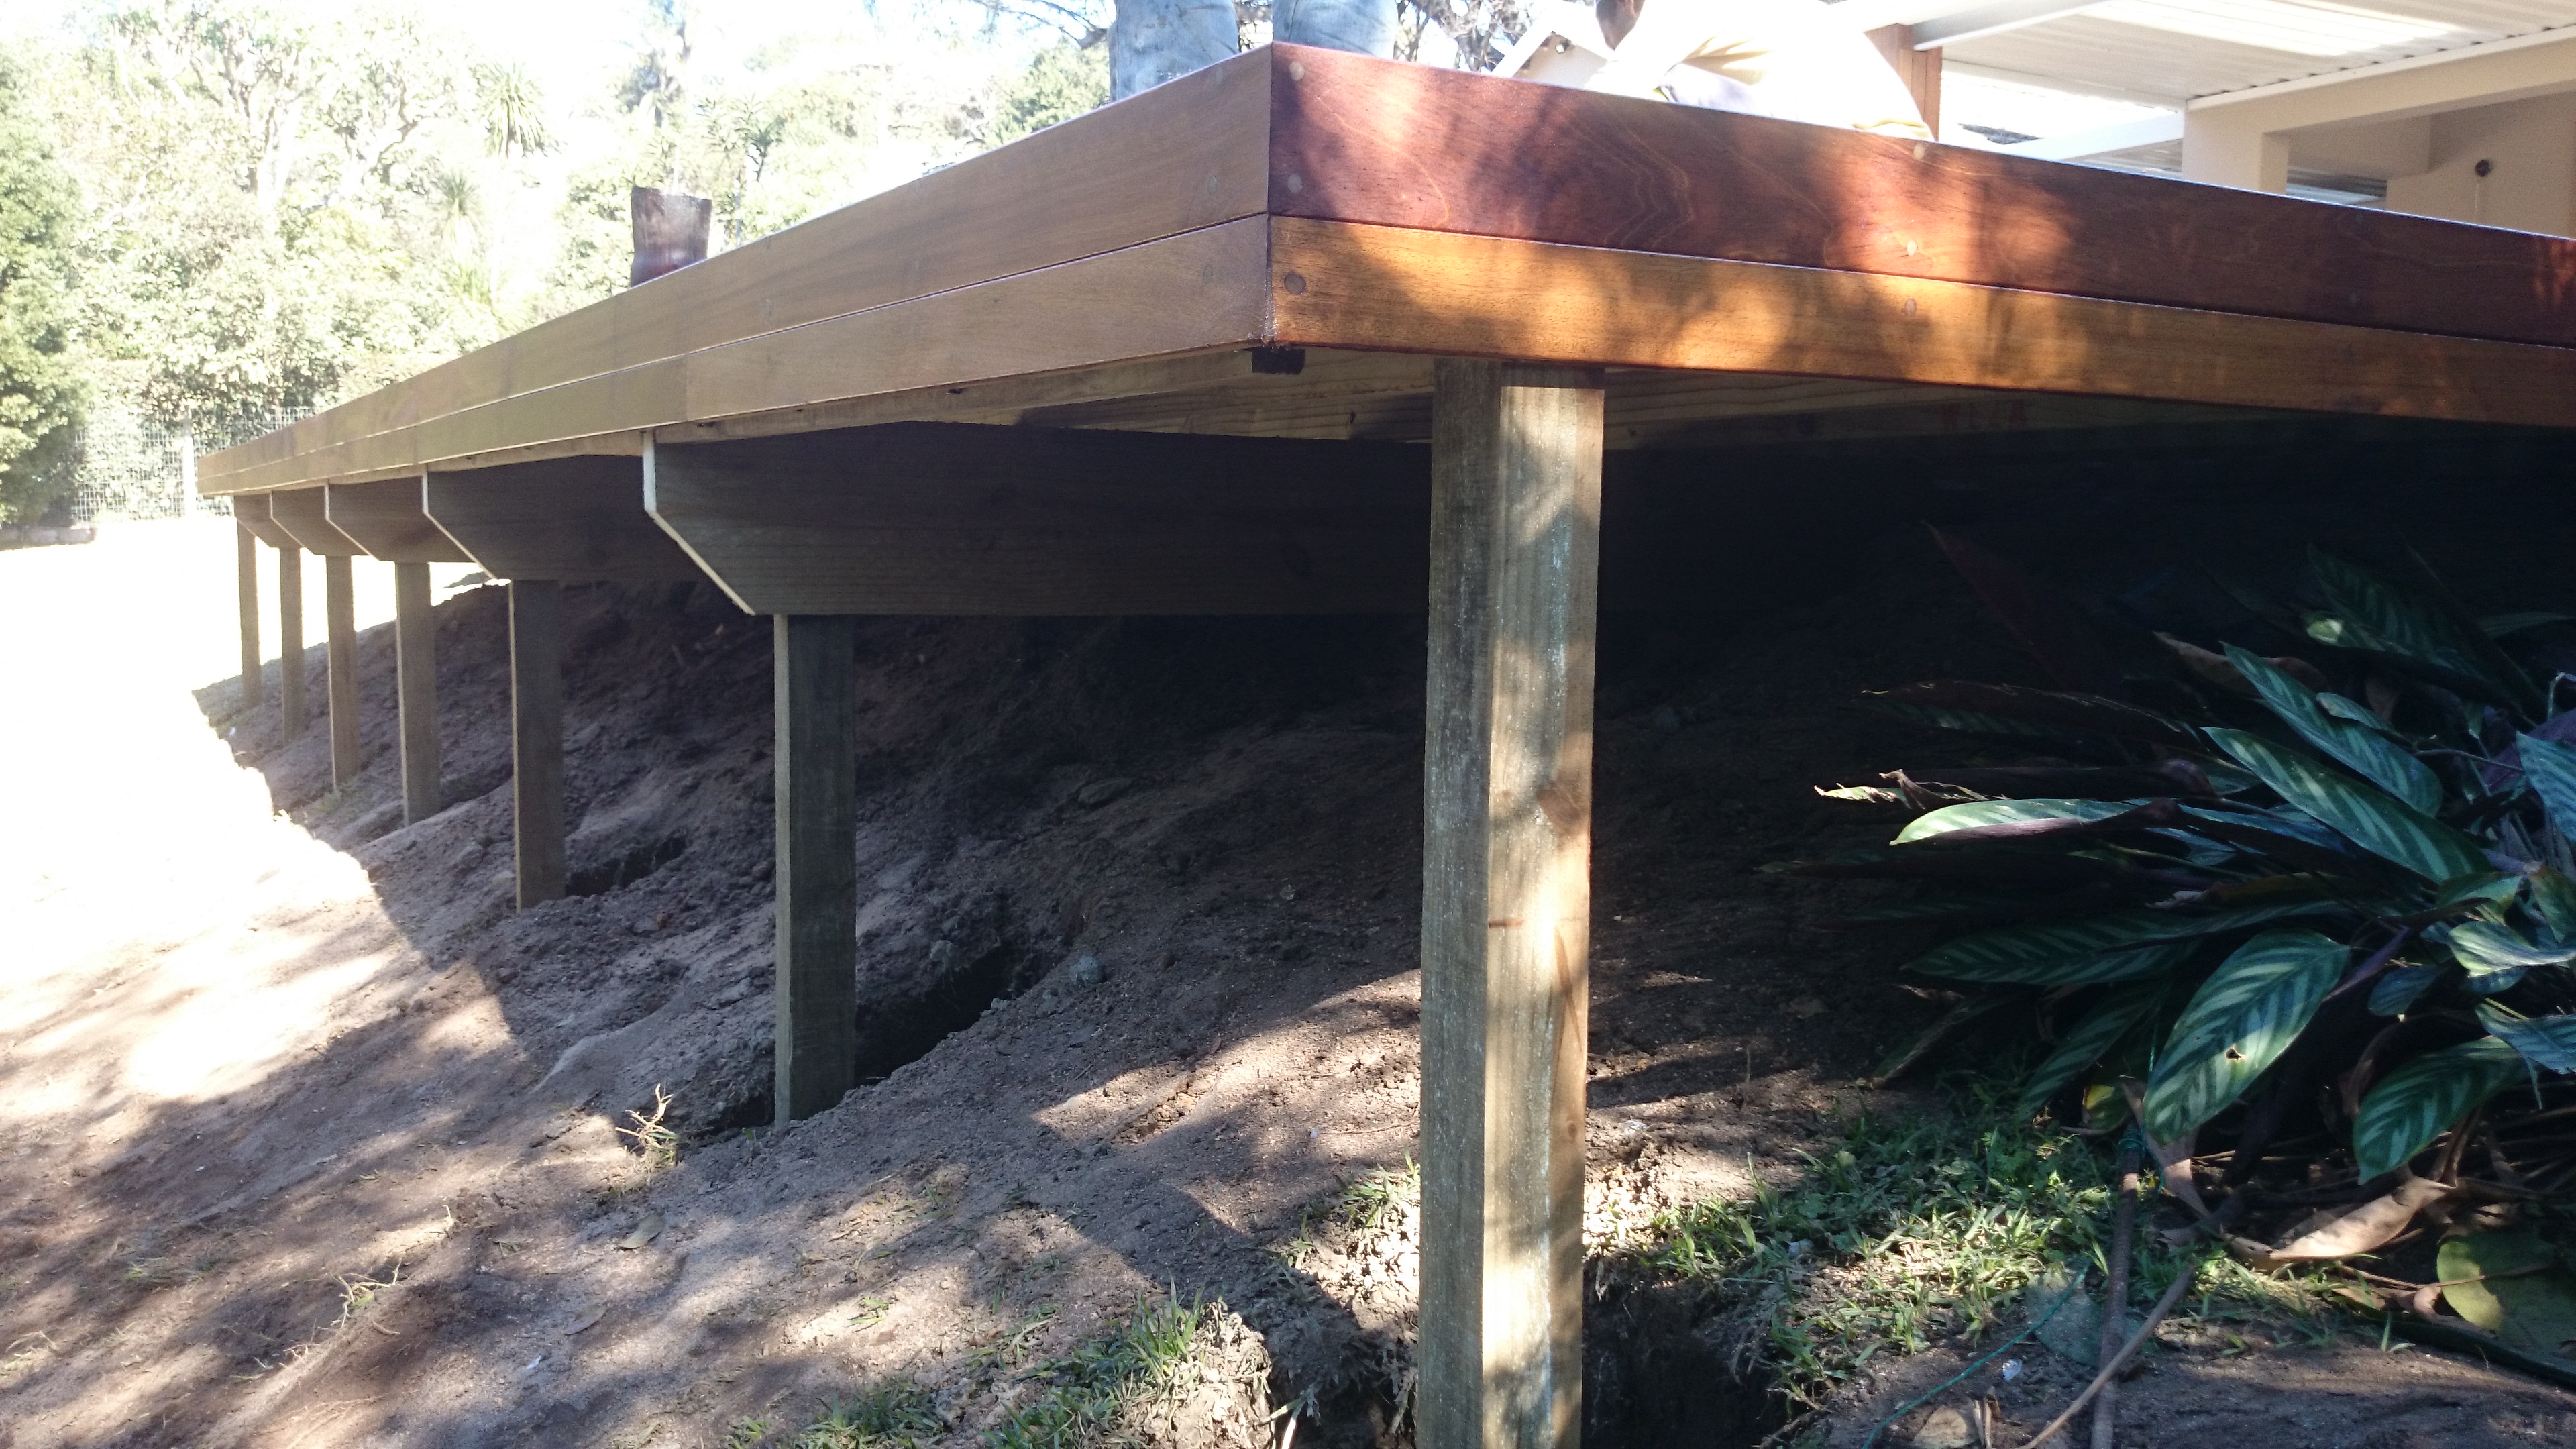
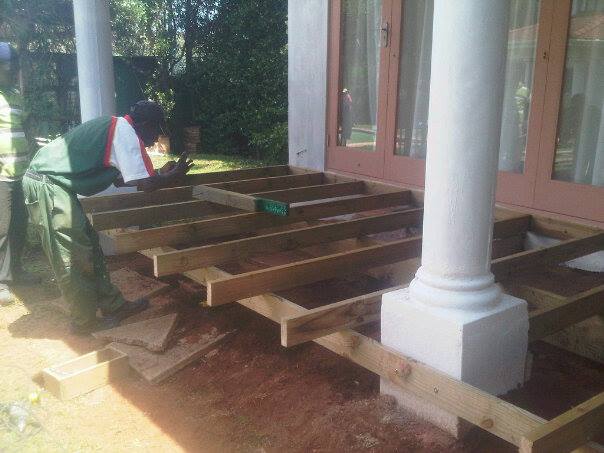
Substructure construction will vary depending on the height of the deck and some other criteria, but basically you will be aiming to install joists at about 450mm to 500mm centres. This will vary depending on the total length you need to install joists over. The joists are generally built using 38 x 114 S5 H3 timber. S5 is minimum SABS structural grade timber and refers to the number of knots per square metre that are present in the wood. H3 is the level to which it is treated at the treatment plant. H3 is suitable for outdoors. If you are placing timber in the ground, or in constant contact with wet soil, it should be treated to a minimum of H4.

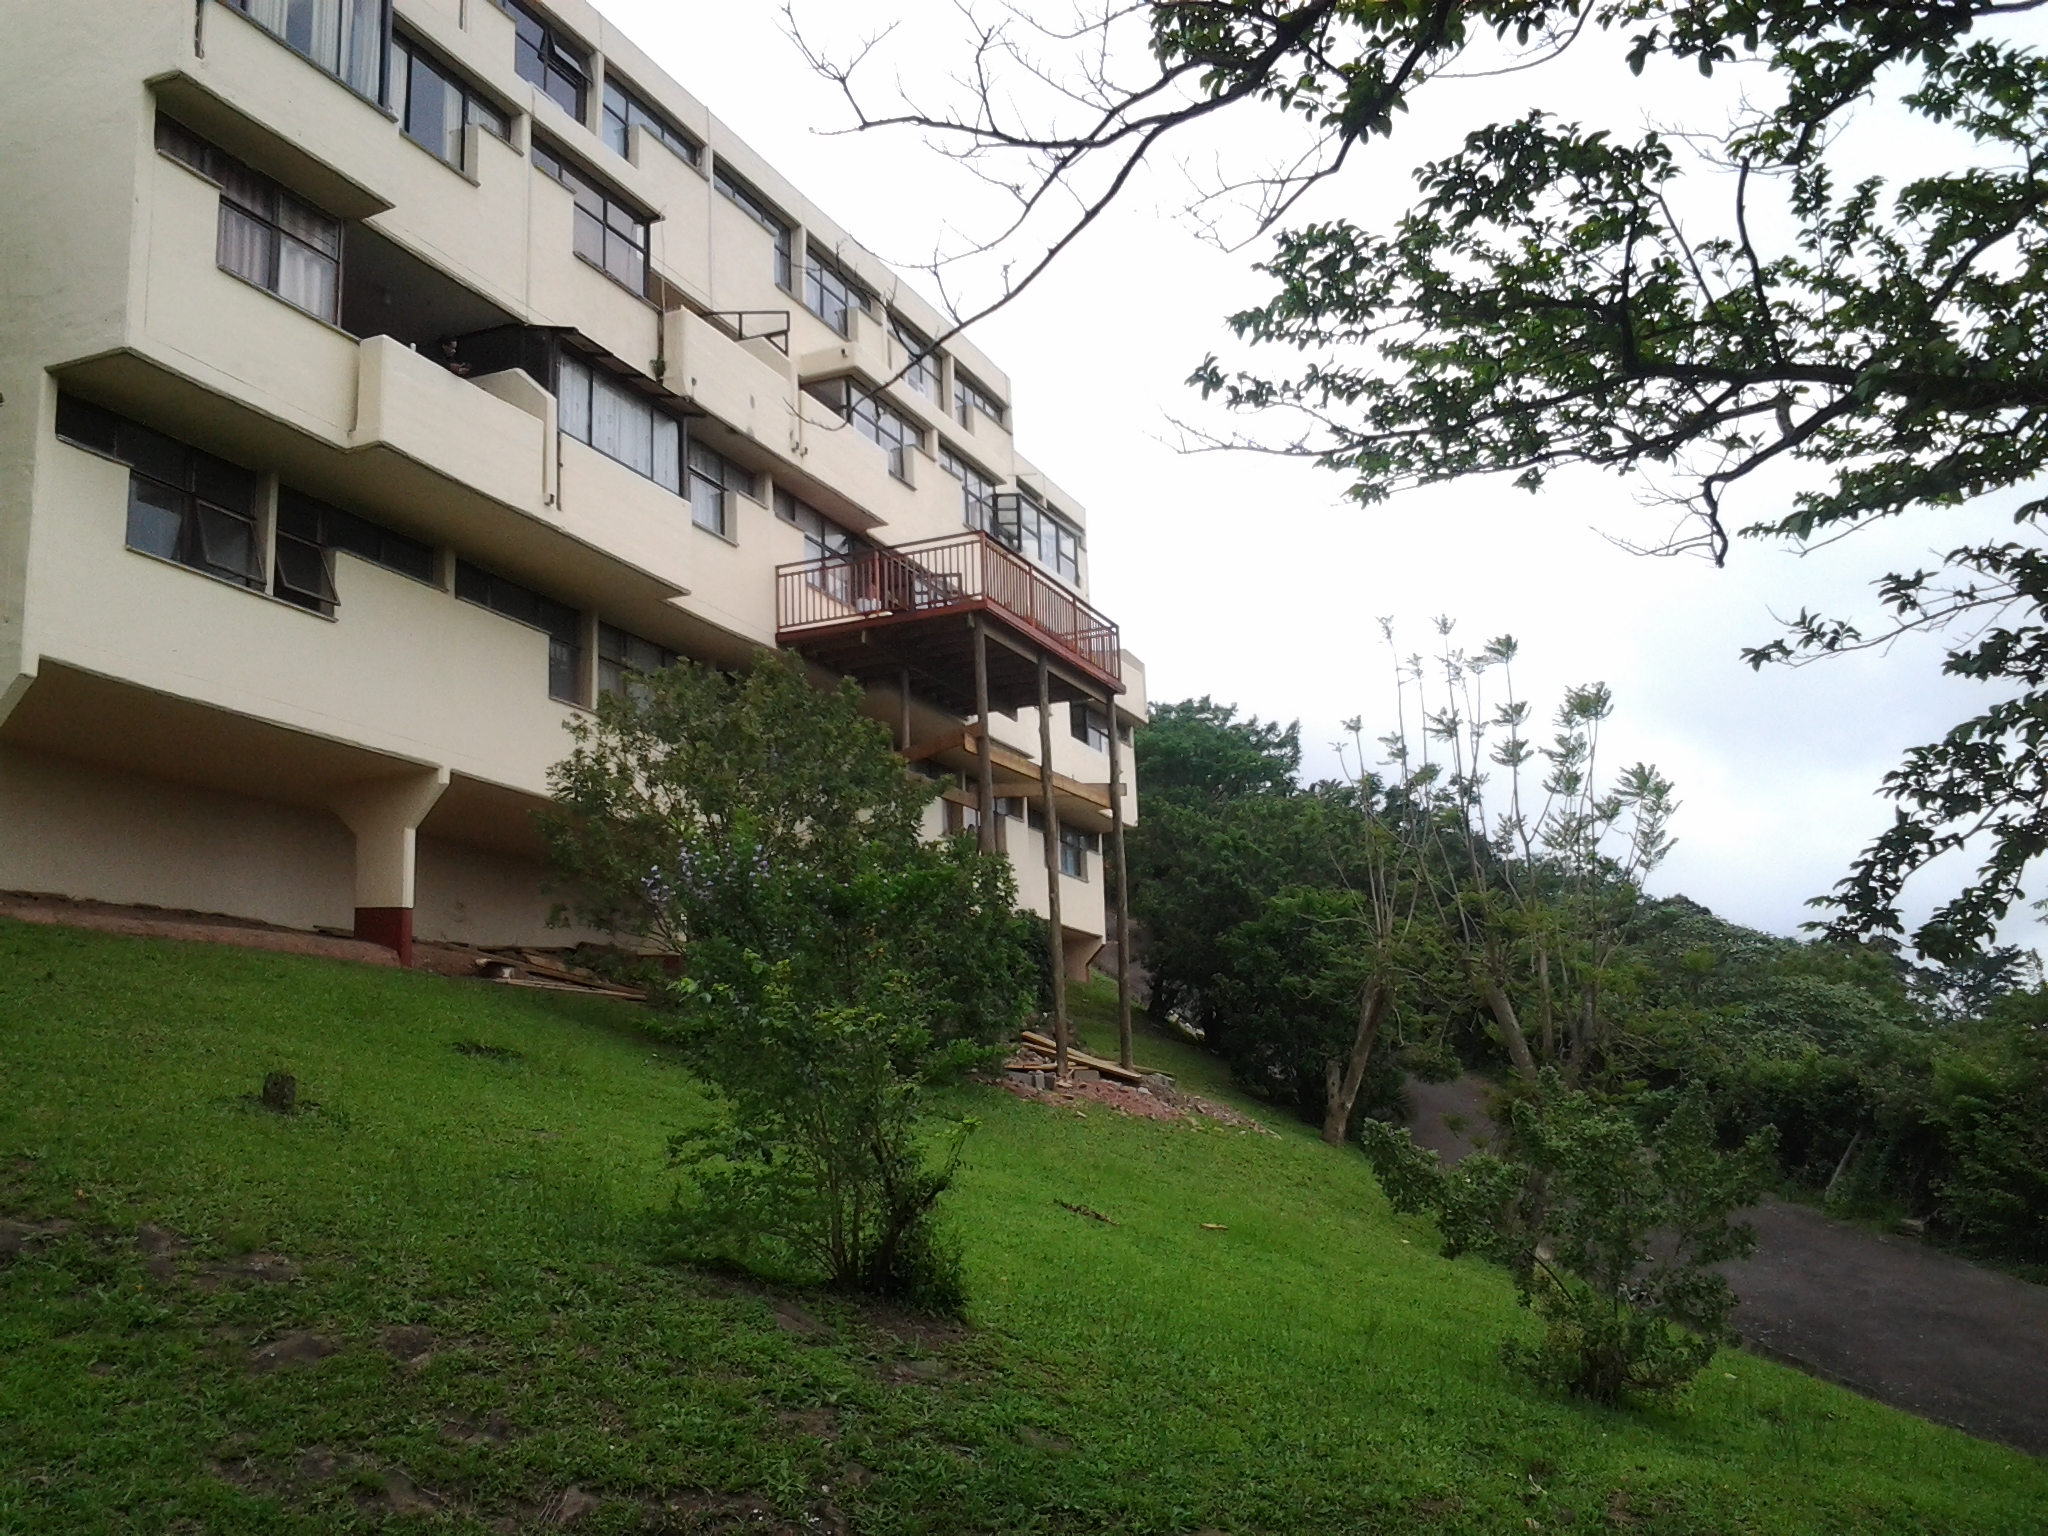
Should you require main beams to support your joist structure you will typically use a 50 x 228 H4 beam and you can use 76 x 76 H4 treated square posts to support these beams. Your beams will be installed at 3m centres. If the structure is higher than about 2m I would suggest using gum poles to support it as they are harder and stronger. Again use H4 CCA Treated as they will be placed in the ground.

Timber decking companies Durban
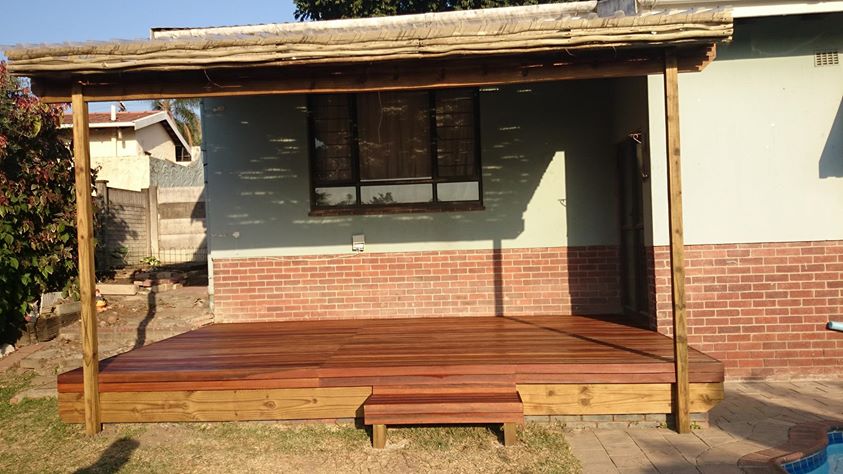
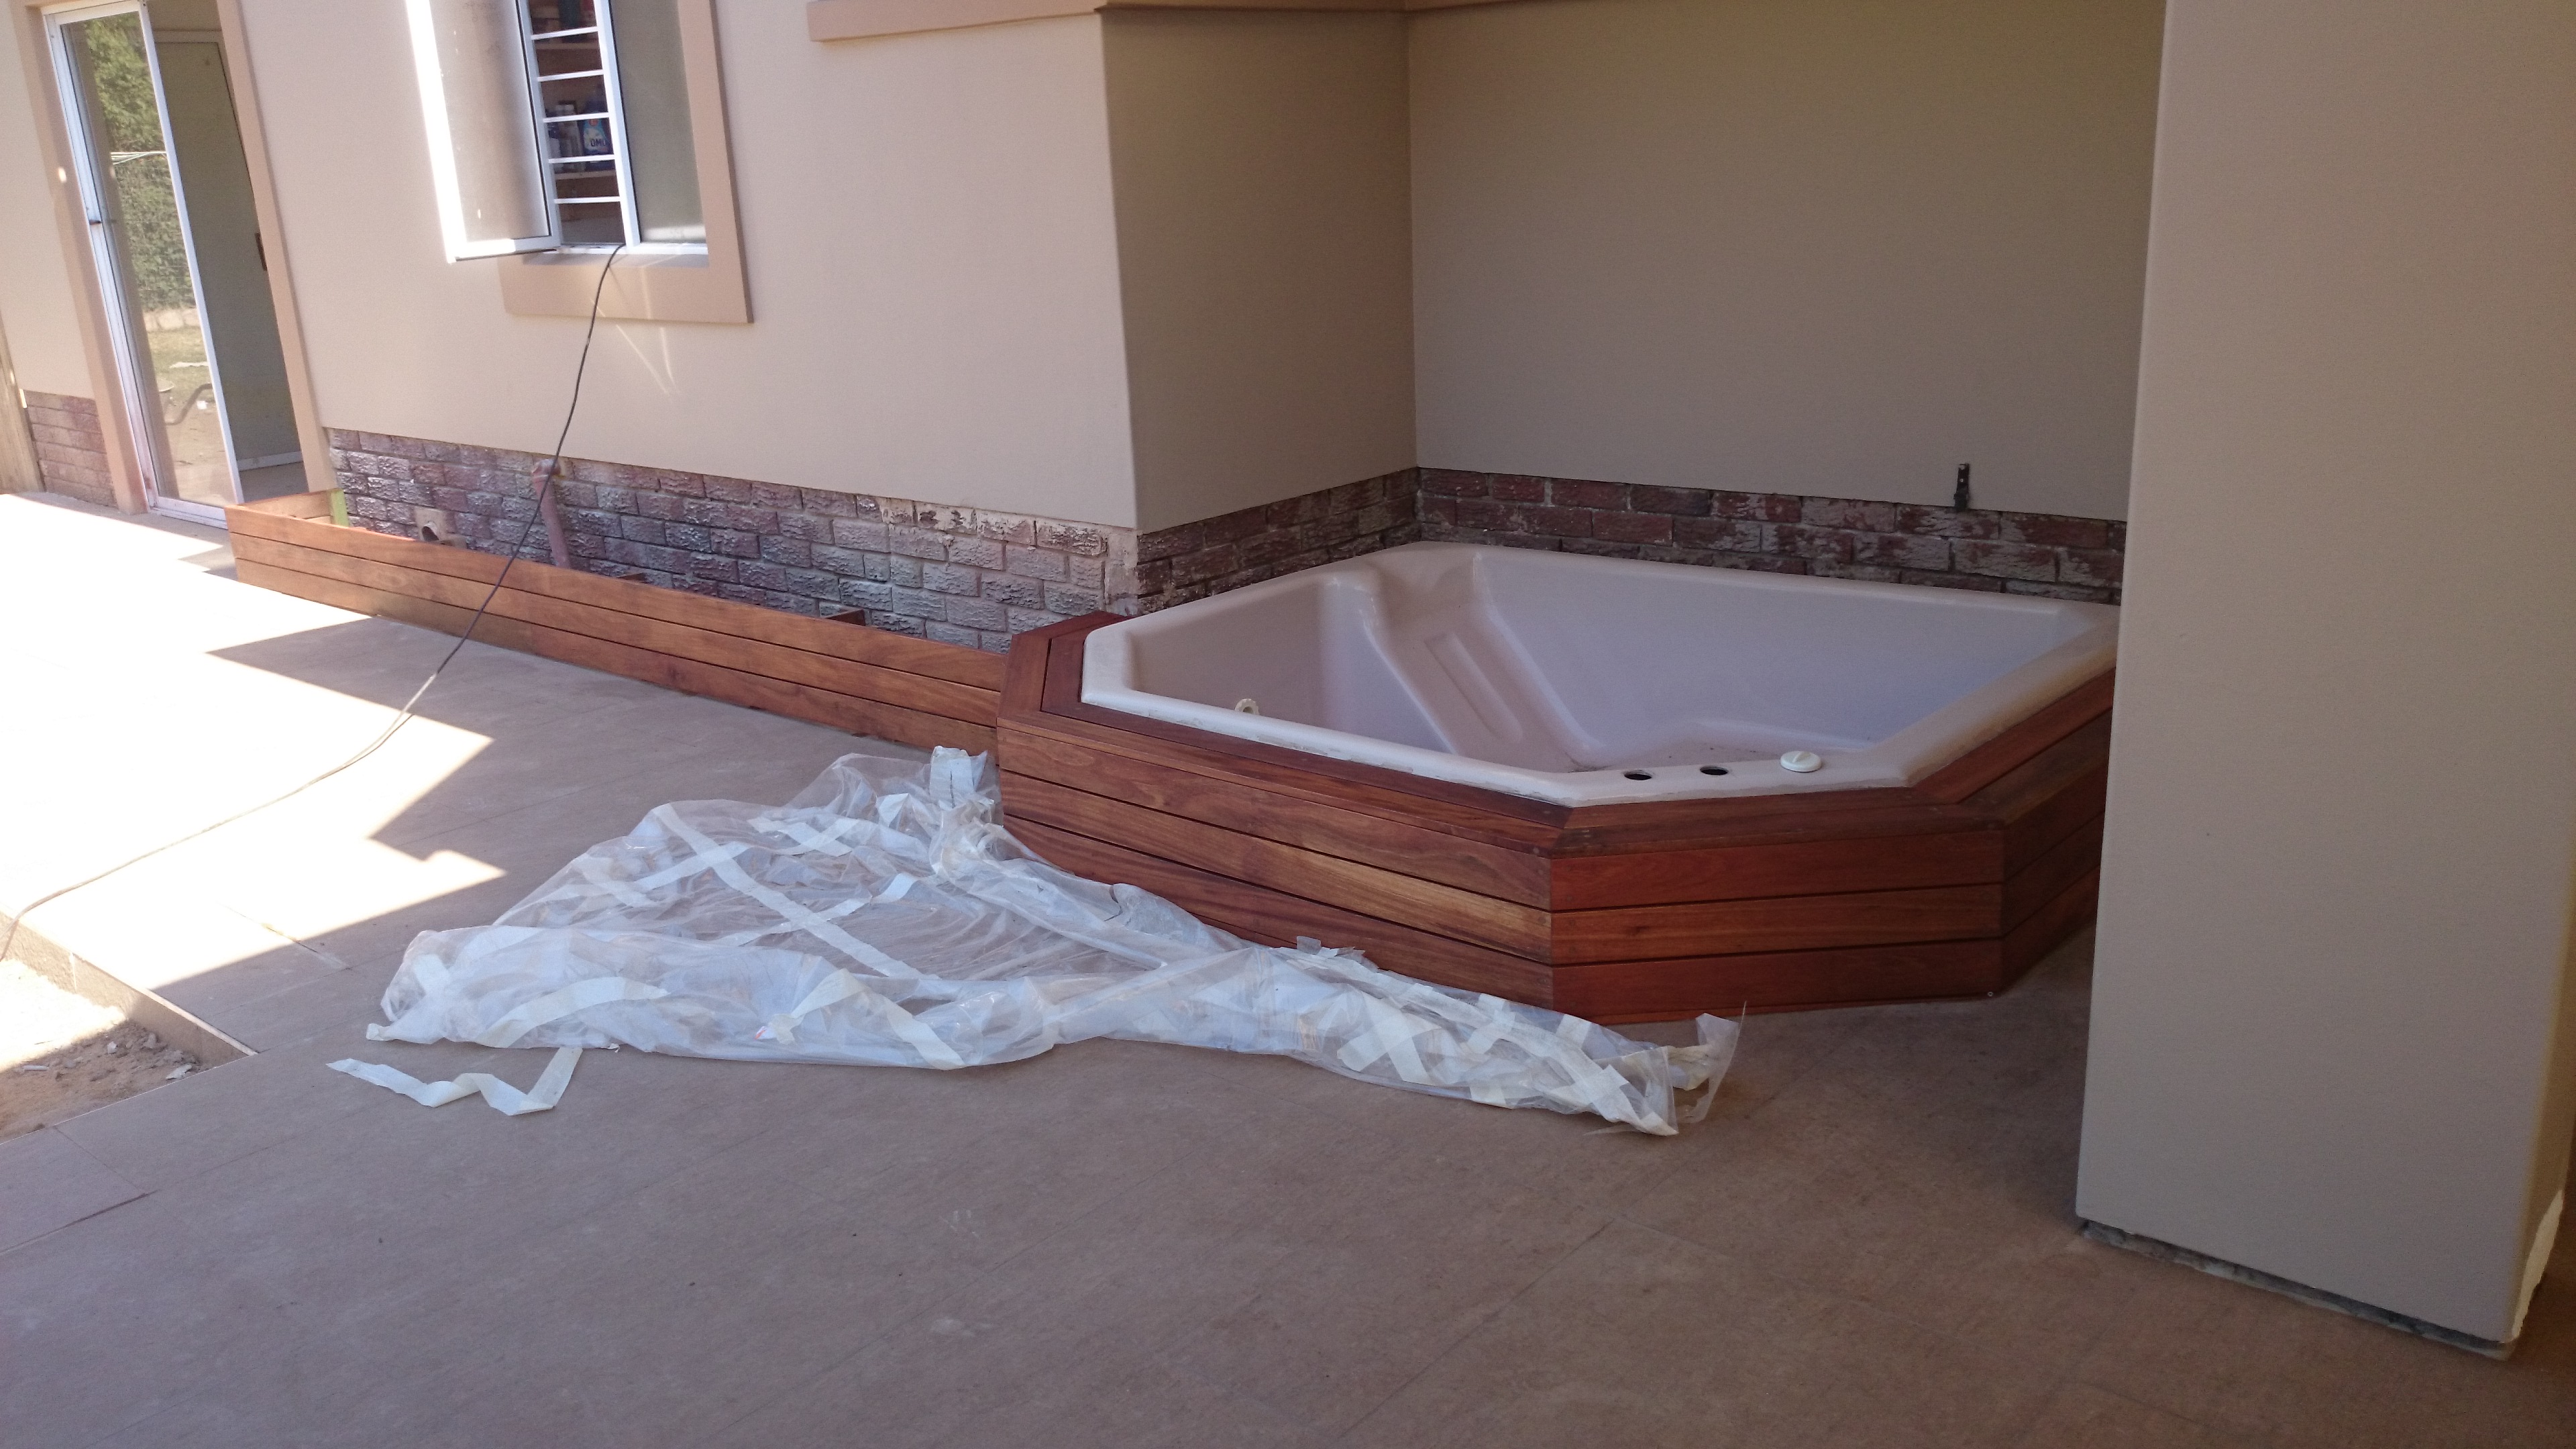
It is best to use balau deck boards as they are a lot more stable than pine and will not bow and cup as easily as pine. I use the 19 x 68mm reeded deck board as they are relatively inexpensive in comparison to the 19 x 90 deck board. They need to be reeded and the grooved side must face down in order to allow water trapped between the bottom of the deck board and the joist to escape, thus preventing premature failure due to rot. One can also use other timbers such as Massaranduba and Garappa, but they are more expensive. Balau is fine for coastal regions. Garappa and Massaranduba work well in the Highveld where the temperatures range from very cold to very hot.

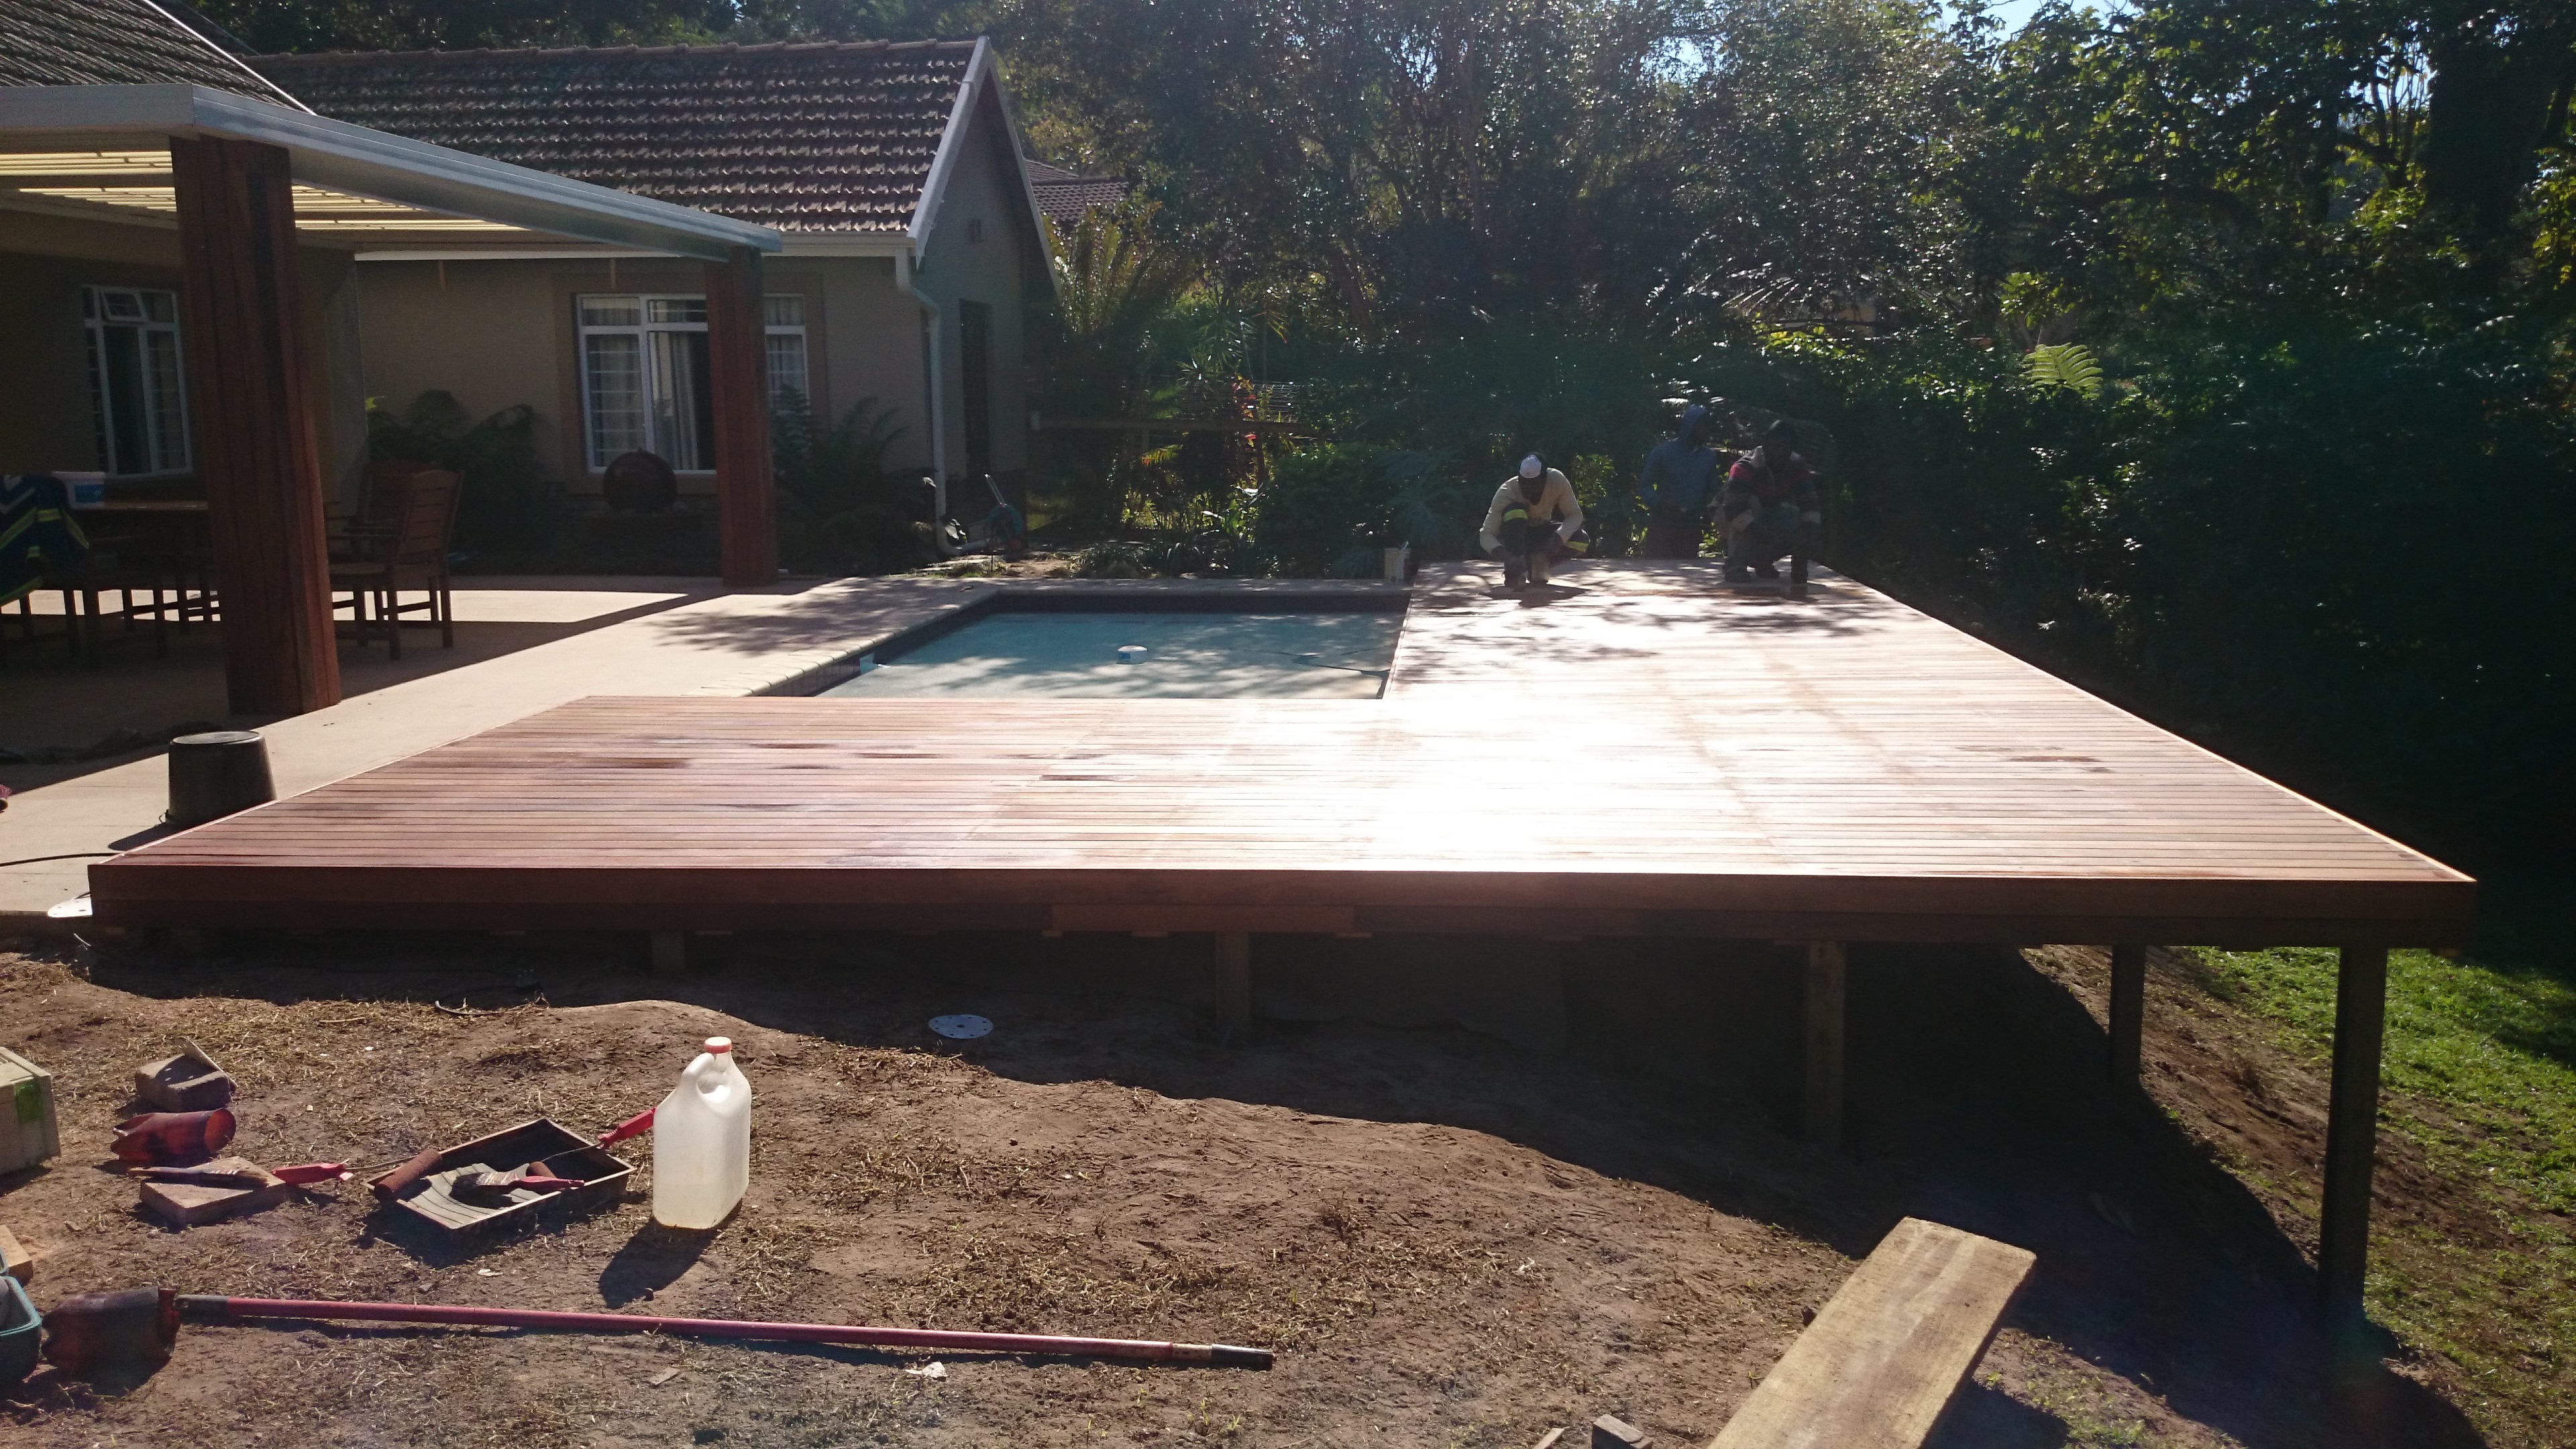
Deck boards should be spaced with a 5mm gap between them in order to allow water on the surface of the deck to drain away quickly.

For a free no obligation quote on timber supply or supply and install for your decking needs, please contact us on 082 496 5444, or use the contact us form below.

Go back

Your message has been sent

Warning
Warning
Warning
Warning
Warning

Warning.

Timber Decking Companies Durban


We are a timber decking company based in Durban and specialise in the construction of timber sun deck, pergolas, walkways, stairs etc. We use primarily H3 and H4 CCA treated pine as our substructure and balau deck boards. Our balustrades and stairs are all made from balau unless otherwise specifically designed in pine. The H3 and H4 CCA Treated pine has a life span of between 30 and 50 years outdoors in the elements and although the balau is not pressure treated it will also last in excess of 30 years.

The timber deck we built in this article was in Plantations in Hillcrest and was a low-level pool deck. The pictures alongside show the different stages of construction and I will explain, in this article, the challenges we experienced with this one. All timber decks we build come with their own challenges and there are various techniques we use to overcome these challenges.
Our first challenge here was that the paving alongside the pool was not parallel to the house. There was a difference of about 80mm over a distance of about 3m. If we had simply placed our deck boards down with equal gaps between them we would have ended with a wedged shaped deck board with a measurement of zero on one side and 68mm on the other side which would be unsightly. In order to overcome this one needs to vary the gaps between deck boards.

In this instance we needed to gain 80mm over a distance of 3m. We needed to start with a gap of 4mm on one side of the run, and the gap needed to increase along the length of the deck board run to 6mm on the other side effectively giving us a gain of 2mm per board. Over a distance of 3m, a total of 40 deck boards, with a width of 68mm and a gap of approximately 5mm, will be needed. If we increase the gap on one side of the run to 6mm and reduce the gap on the other side of the run to 4mm, we gain 2mm per run of deck boards. 2mm x 40 deck boards gives us a
total of 80mm that we will gain thereby reducing the difference on either side to zero. In effect you are “fanning” the deck boards to close the difference created by the wall not being parallel to the house. Simple hey? Not always so. Because each run of deck boards is made up of about 3 or 4 separate pieces it can be tricky to keep the runs straight whilst still “stealing” millimetres. At the same time you need to try to end on a full deck board instead of having to rip one deck board to half the width to finish decking the area. We weren’t able to do this because we were running out of space to start increasing or decreasing the gaps to end on a full board. So instead we installed a 90mm deck board on the last run to close the 32mm gap we had left.

We built this timber deck in two sections and then filled the gaps in between. Some of it was on grass and some was on soil, so there was a mixture of posts in ground with concrete and posts on top of paving.

Another challenge here was that because we were building flush to the pool paving AND the floor inside we had to check that the height of the pool paving and the height of the floor inside were the same. They never are because the world is not flat. While I prefer building as flat, level and square as I can, sometimes one needs to build slightly off in order to line up with other substrates that are not perfect, and they never will be. One needs to be careful though that by building off square and level does not affect the total build or the visual appearance of the structure. If it will, then another plan needs to be made.

For a free no obligation quote on your sun deck and other outdoor related structure please contact us on 082 496 5444 or use the contact us form below.

Go back

Your message has been sent

Warning
Warning
Warning
Warning
Warning

Warning.


Wooden Balau Deck Built in Malvern, Durban

Wooden balau deck built in Malvern, DurbanWe incorporated a pergola style roof covering into this wooden balau deck we built in Malvern, Durban.

We started with our deck in a normal joist and beam system, but installed our main beam of 50 x 228 on the front in line with the joists rather than slotting it in underneath. This was simply because we didn’t have much space below the deck to slot it in. On the front edge it was fine to use a 50 x 228 beam, but midway across the deck we couldn’t use a 50 x 228 and had to secure each joist to the ground with a small post. It wasn’t a problem though because we were placing it directly on top of the slasto substrate. So there were no holes to be dug and filled with concrete.

We then attached two 76 x 76 pine posts, which can also be replaced with balau 90 x 90, to give us some posts to work from for our pergola. Our pergola was built using a 50 x 228 beam on the front, but this could have also have been replaced with a 38 x 152 as there is no real weight on top of the pergola. You do get some wind loading from beneath in pergolas with fixed roof sheeting, but not much weight from the top. We only used two posts as our main beam on the front was long enough to span across the 5.2m of the front of the deck. Adding extra posts in between clutters up the front of the deck.

Wooden balau deck built in Malvern, DurbanWe added 50 x 76 purlins and covered that with clear polycarbonate roof sheeting. This allowed the light to still get in but it will be protected from rain. This roof sheeting is however not that attractive from beneath so we clad the underside with thatching laths with no gap between them. I’ve tried building one of these before with a laths gap between laths, but it doesn’t work as you can then see the roof sheeting clearly. Because the laths are not a regular uniform thickness all the way along, you still do get some gaps, even if placing them side by side, which allows light through but takes away the view from beneath of the roof sheeting.

We added a step on the front, as the top of the deck was more than 200mm off the ground on the front so this made for easy access to the garden from the deck.

In the pics alongside you can see the roof sheeting on before we placed our thatching laths on. We’ve also previously used a translucent bronze roof sheeting which works very well to cut the glare from the sun. The polycarbonate roof sheeting is far better than fibre glass roof sheeting, albeit more expensive, as it doesn’t contain strands as the fibre glass sheeting does.

For a free no obligation quote on your wooden deck, pergola or any other outdoor wooden construction, please call us on 082 496 5444 or use the contact us form below.

Go back

Your message has been sent

Warning
Warning
Warning
Warning
Warning

Warning.

Wooden balau deck built in Malvern, Durban

Substructure on Low Level Wooden Pool Deck


We are busy with a new wooden pool deck build in Hillcrest, Durban and I have taken a video to show how the substructure is built before the deck boards go down.
This is a low-level wooden pool deck that we are building which is only about 200mm off the ground. Because it is 200mm off the ground we can’t simply use 38 x 38 cleats as we have done in the past which are secured to the ground. We still need to use a joist of at least 114mm wide which is supported every 1.6m with a foot or post as there will be a void beneath the joist and the paved substrate. We have aimed to get our deck flush with the floor inside the house which is about 200mm above the paved area around the pool.

We built our substructure in a number of separate frames which are then lifted up into place on the wall side and secured using sleeve anchors. The opposite ends of each frame are then also lifted up to get the top of the joists level and flat and supported using a 76 x 76mm square post which rests on top of the paving. We will also remove some paving on every other post and sink that into the ground to ensure that the deck doesn’t sink over time if the paving sinks. The separate frames are then all attached to each other.

We have left our joists long to extend over the pool and now that the side of the frame is attached to the house we can work out exactly where we want our joists to end so as to get our fascia board on the inside of the pool completely flush with the vertical of the coping of the pool. This way we can slide our fascia down to cover the coping neatly. We can now trim our joists to the correct length and install another 38 x 114 joist running at right angles to the main joists. We could not make use of a beam and joist system here because we don’t have space beneath our joists to install a beam. We would need an extra 228mm to do this. So our frame is assembled in one single plane rather than having joists sitting on top of beams.

We’ll install some truss hangers where the joists meet the side beam which is attached to the wall. All that is holding those joists to this side frame now are two 60mm screws from behind so they need to be supported with a truss hanger to stop them ever dropping if the screws fail. Those screws are screwed into ends grain which is never that strong in terms of fixing.

The trick to this type of deck is to get the fascia frame around the pool to sit completely flush with the coping of the pool so that a fascia board (two deck boards) can be installed in the vertical plane to cover the fascia. Once that is all fixed in place and can’t move then we can deck.

Balau deck boards will be secured on top of our joists and we will start our deck boards on each side of the pool and deck towards the house and towards the grassed area. When decking towards the house we need to hope that the pool is parallel to the house and if not then we need to adjust our spaces between boards to accommodate any difference. So for instance if one side, between pool and house is 20mm shorter than the other, then we will need to increase the gaps between deck boards by 1mm for 20 boards to get the deck parallel to the house. If not we will end up with a wedged shape board as the last board which will be unsightly and will fail more easily. Also we need to try to end on a full board rather than a ripped half board as that too will be unsightly and may fail prematurely. Again we will adjust the gaps as we go to ensure we end on a full board. The gaps are normally 5mm, but we can adjust them to 4mm or 6mm without being noticed. Then we will “fill” the section between each long side of the pool and again we need to ensure that we don’t end on a half board, by adjusting our gap to 4mm or 6mm. The final result will be a deck with full deck boards and no wedges.
The grassed side is easy enough in that we can protrude over the end of the paving to end on a full board and terminate our deck there. On this end we will install a screen of 1.8m high the length of the deck. So we will tie our upright posts for the screen into the posts for our deck to secure the deck into the ground with concrete to prevent any slippage, and at the same time providing an upright of 1.8m for our screen.

For a free no obligation quote on your wooden sundeck, pool deck, balustrades, screens, cladding, walkways etc. please contact us on 082 496 5444 or use the contact us form below.

Go back

Your message has been sent

Warning
Warning
Warning
Warning
Warning

Warning.

Wooden Pool Deck Built in Westville, Durban

Pool deck built Westville Durban

Click to enlarge

Balau Deck board

Click to enlarge

50 degrees

Here was a nice size wooden sun deck, or pool deck, we built of approximately 60m². I say a nice size because at that size one can reduce the costs slightly, pass a saving on to the client, and make a little bit more money on the job.

Wooden deck with jacuzzi cladding Durban

Click to enlarge

This wooden sun deck was built around the pool as you can see from the pics alongside. It also extended to the far end of the house and was enclosed by a balustrade on two sides with two gates leading to the garden. Access to the deck was from two bedrooms on one end in front of the pool and from the lounge on the other end. The level of the floors, in the rooms, near the pool, were not the same level as the level of the lounge floor so we were left with a choice to either step the deck or have a small step up to the lounge. We chose to create a small step up to the lounge because having a step in the middle of your wooden pool deck is only going to lead to someone tripping and hurting themselves.

In this article I want to write about the different ways of laying the boards when it comes to pool decks or any other deck where the boards can possibly run in both directions. If a deck needs to be built with deck boards all running the same way it is relatively easy to install them in that the ends do not need to match up. The problem one can have in trying to match up ends of deck boards is that if they are not cut at precisely 45° then the length of the cut ends will differ. I’ve drawn a sketch alongside to illustrate this.

It is highly unlikely that any pool will be perfectly square. When installing the wooden pool deck it may be necessary to cut one end at say 44° and the matching board that runs at right angles to it, at 46°. The two ends will not be of equal length and will therefore not match up flush with each other. The problem is compounded with each deck board that is added. Let’s assume that the one cut end is 2mm longer than the other. After installing 15 deck boards (or one metre) the boards will have shifted by 30mm (15 x 2mm). This will be unsightly. The problem is also compounded by the variance from 45° which results in the difference in lengths of cut ends being greater.
There is a way to overcome this problem and that is to install a joiner between the cut ends as the sketch alongside illustrates. The other way is to run the deck boards all in the same direction (i.e. not all parallel to the edge of all sides of the pool, but rather all parallel to each other).

Pool deck built Westville Durban

Click to enalrge

Another advantage though of running the deck board’s parallel to all edges of the pool, with corner joins, is that you will have face grain facing the pool and not end grain. Water is absorbed largely through the end grain of wood and if this end grain is facing the pool, then it stands to reason that the deck boards on this side of the pool will be exposed to more water and will tend to rot more quickly than those with face grain facing the water. Even though we use balau for our deck boards, which is rot resistant, all wood will rot and by employing methods that will inhibit rot, makes good sense. Having said all that, it is easy and cheap to replace deck boards and if a deck board with end grain facing the pool gives you 15 years life, the cost vs. preference is not that great.

For a free no obligation quote on your pool or sun deck, or any other outdoor timber construction, please call us on 082 496 5444 or use the contact us form below.

Go back

Your message has been sent

Warning
Warning
Warning
Warning
Warning

Warning.

Balau Wooden Sundeck Built in Kloof, Durban

Wooden Sun decks Durban

Click to enlarge

Here’s a balau wooden sundeck we’ve just built on Kloof, just inland of Durban.

We used a 19 x 90 balau deck board on this wooden sun deck at the client’s request. We normally use a 19 x 68 balau deck board as they are considerably less expensive per square metre than the 19 x 90 balau deck boards and we can pass that saving on to our clients. Granted it is quicker to install a deck board that is wider as you need less boards per square meter (in this instance 15 boards per square metre using a 68mm wide board and 11 using a 90mm board), but not by that much that it warrants paying 35% more for it. 90mm boards are about 35% more expensive per square metre than 68 mm boards.

Wooden Sun decks Durban

Click to enlarge

When screwing down a 19 x 90 deck board I put two screws, per board, in each joist line, one in each shoulder. I have seen other deck builders putting one in

Wooden Sun decks Durban

Click to enlarge

every alternate shoulder. It does work, but if you do get a board that is particularly prone to warping it will warp where the one screw has been left out. It is not a huge cost or effort to put a second screw on the opposite shoulder of each board at each joist line. Obviously the wider the board the more prone it will be to warping. Why they are more expensive I haven’t yet worked out because good balau is good balau is good balau. If the wider boards we taken from a different part of the tree, the heartwood vs. the sapwood, then I would understand the price difference, but they aren’t. It is a preference, at a price, that’s all.

Wooden Sun decks Durban

Click to enlarge

We ran the deck boards all in the same direction on this wooden deck. With this deck we ran the deck boards parallel to the edge of the pool meeting each other at a 45° angle on the corners. It is far easier to run them all in the same direction as you will never get a problem of matching the cut ends. If one board is cut at 46° and one therefore at 44°, they will be of different lengths and will not match up. In this instance you need to install a barrier between then (one deck board’s width) to hide any difference in length between cut ends. But I’ll write another article about that later. Running them all the same way on both sides of the deck eliminates this problem.

You need to be careful though to start installing your deck boards in the middle of the deck and not on one end. If you start on one end, you may very well reach the 90° corner and find that you have to rip a deck board in half to cover your space. This is unsightly and will result in that deck board failing more quickly than the rest. So start in the middle and move outwards to both ends and end with a full deck board.

There was also some other work on this wooden deck build in that the client wanted a planter stand built so he could place potted plants in it and he wanted his Jacuzzi walls clad. We battled a bit with the Jacuzzi cladding as the original brick structure that was there was skew and we had to try to mitigate this by building up

Wooden Sun decks Durban

Click to enlarge

our substructure to bring it back to square.

The cladded vertical posts you see in the pics alongside are 19 x 90 boards (x 3 of) around a 76mm steel awning post. We needed to build the steel awning post up to get to our 290mm and then attach it to the post. Although it looks very nice to have such bulky wooden posts, it does block the view slightly when sitting at the pool. Why 290mm when each board is 90mm (90mm x 3 = 270mm)? Because we set each corner chasing the other surface. And let’s just forget about the 5mm gap we had in between each board.

For a free no obligation quote for your wooden sundeck, pergola, walkway, screens or other timber construction please use the contact us form below or call us on 082 496 5444.

Go back

Your message has been sent

Warning
Warning
Warning
Warning
Warning

Warning.

Wooden Sundecks – Durban North

Wooden sundecks Durban North

Click to enlarge

Wooden sundecks Durban North

Click to enlarge

We completed these wooden sundeck jobs in Durban North last year during our busy decking season. There were two decks we built. They were both quite simple in that they were low-level wooden sundecks coming off the granny flat, which had just been refurbished measuring 5m x 2.2m.

The first one was a relatively small deck. It had two steps off the front edge with closed risers. That was probably the most difficult part of the job but we have worked out a way to build these quite effortlessly. We build the deck with a fascia beam on the front and then we build a box complete with supporting joists frame etc. We then attach this to the fascia beam of the deck we have just built and we are left with a frame which we can clad to create our riser and tread of our stairs. It is much easier to do it this way. Trying to build it piece by piece in situ is a lot more difficult and time-consuming. In fact building decks in sections and then hoisting them up into place is the easiest way to build as it allows you to work on a section of the deck on the floor, get everything square and then simply level it in place and attach it.  We had two concrete columns on the front edge of the deck so it was relatively easy to secure the deck and made for fewer posts and concrete.

Wooden sundecks Durban North

Click to enlarge

The second deck was closer to ground level off the patio of the main house. Again we built this in sections and lifted them up to secure them to the wall and then secured the front edge with posts to ground using concrete. Because of the length of the deck (11m odd) we had to build it in two sections and lift each section up independently of each other. It becomes a bit cumbersome trying to lift an 11m deck into place. So it is better to build it in two sections and lift each one separately. You need to be careful though that the entire structure remains flat from one end to the other. By doing them in two sections it is easy to get a kink in the middle. So run fish line from one end of the one section to the far end of the other section and adjust the join to get the entire frame flat and level.

In another article I will describe the different methods used to screw the deck boards down. Again there is an easy and quick way or there is the slow process of marking and cutting each board individually. What one wants to do is to lay all boards out and snap chalk line where the cuts should be, then cut them all, put them back and secure them. There is another method too where you screw the boards down and then lift the ends that need to be cut and cut with a skill saw.

Wooden sundecks Durban North

Click to enlarge

These two decks were sealed using Timberlife Satin Wood 28 Base, a sealer suitable for woods of low porosity. Being and oil based sealer it goes on very easily, cannot run or streak and when it comes to maintenance, you simply wipe clean and re-apply. You will need to do it a bit more often than other deck “sealers”, but there will be no more sanding as the oil cannot peel or flake like a coating does. It soaks into the wood, nourishes it, leaving the full natural look of the wood and simply disappears instead of flaking and peeling.

For a free no obligation quote on your wooden deck, balustrades, stairs etc. please call us on 082 496 5444 or use the contact us form below.

Go back

Your message has been sent

Warning
Warning
Warning
Warning

Warning.

Wooden Screens, Pergolas, Decks and Gates Durban

Driveway gate clad in balau

Click to enlarge

Wooden gates Durban

Click to enlarge

Wooden Screens Durban

Click to enlarge

Wooden balustrades and pergolas Durban

Click to enlarge

We were asked to quote on wooden screens, wooden pergolas, wooden decks and wooden gates on a new build in Prestondale, an area north of Umhlanga, at a development called Izinga Ridge. We originally quoted in about June 2013 and the work was awarded to us for s start date of about 1 November 2013. The job consisted of various screens between brick columns on the boundary wall, a pergola on an open balcony on the first floor, external and internal balustrades, garden gates, a driveway gate and a pool deck.

All the timber we used was balau hardwood with the exception of the substructure of the pool deck which was H3 and H4 CCA treated pine. In other articles you can read about how we have managed to keep our prices down by using this as a substructure whilst still being able to offer up to a 50 year guarantee on this treated timber.

Most of the screens were pretty straight forward with balau cleats on the wall and then clad using a non reeded 19 x 68 deck board. We used non reeded so that both sides would look the same, but we did battle to find non reeded boards as most of the deck boards available are already reeded, or grooved on one side. There were two screens that proved a little more difficult as the wall we were attaching them to was angled. So the boards had to be cut at that angle and secured to each other whilst still remaining level and the join remaining plumb.

The external balustrades were different to our normal vertical picket style balustrades as the client requested horizontal slats instead. Again we used non reeded deck boards for this with a normal post system. On each post we attached vertical cleats to accept the horizontal deck boards or slats. They were installed in line, or on top of the concrete slab, rather than being attached to the front of the concrete slab. The tiles had already gone down so we had to drill through the tiles without cracking them. We installed an “ankle” on the middle post to provide support which is attached to the vertical post and is then shaped to fit around the slab to attach again to the vertical of the concrete slab. This, in effect, allows the post to be attached to the outside but still allows the balustrade to sit on top of the slab. It is much neater but does require a bit more thought and re-enforcing.

Wooden decks durban

Click to enlarge

The pool deck was relatively simple as it was a low-level deck around the pool with a simple frame system using 38 x 114 joists and beams. Extra posts had to be concreted in as it wasn’t high enough to slot an under beam, or main beam, of 50 x 228 in.

The driveway gate was fun. We had the steel made up in a design that would work well by cladding it with wood. We had to source long enough non reeded boards to run the full width of 4m. One cannot join boards in this type of gate unless there is a centre steel vertical support which would spoil the look of the gate a bit. We had run out of standard non reeded boards and so had all suppliers so we sourced a 20 x 140 board and ripped it in half, length ways, to arrive at two boards of 20 x 68.

Wooden balustrades Durban

Click to enlarge

The pictures alongside show some work in progress and some completed work. It was an interesting but challenging job as there were many contractors on site all trying to work, and finish, before the handover of the house. The worst part of the job was fighting traffic from north Umhlanga to the freeway in both the morning and afternoon.

For a free, no obligation, quote on wooden decks, pergolas, garden gates, balustrades and all other outdoor timber work, please call us on 082 496 5444 or complete the form below.

Go back

Your message has been sent

Warning
Warning
Warning
Warning
Warning

Warning.

Wooden Decks Durban – Bluff

Wooden decks Durban

Click to enlarge

This wooden deck in Durban was the second phase of a job we started at the beginning of the year. We were originally asked to build a deck off the main bedroom. First we had to remove the aluminium window and install an aluminium sliding door. I always suggest that clients do this first so that we can build our wooden decks perfectly flush to the new opening.

We had various obstacles to overcome. There was a septic tank that we were building on top of so we had to leave sufficient space and a large enough trap door to access all three tanks. We built one large trap door so that the whole thing could be taken off to access these tanks. During our build a new soak away had to be built as the old one had packed up.

With all of this out-of-the-way, we could continue with phase two which was to complete the main deck with two steps off the front edge leading to the garden and a new second deck in front of the sliding doors to the lounge. This second deck had a corner step similar to the other deck.

Wooden decks Durban

Click to enlarge

These steps were the full length of the deck and had closed risers and treads. In order to build one of these you must basically build a second substructure in the same way as you build the deck substructure in order to span your deck boards across them. So each tread has two beams and joists and is then clad with deck boards. I can clearly remember building our first one which took ages because we tried to build each joist individually. We’ve since learned that with smaller structures one can build a frame and then pull it into position and attach it to the main structure and then clad it. Much quicker, much easier and a lot more accurate.

This was our final job for 2013 and we lost one day to rain which set us back a day and we had to spill over into the weekend. We had originally planned to finish on the Friday, but we had to come back on Saturday morning to seal it.

The original deck we built earlier on in the year had greyed already from the sun so we had to sand it quite a bit to get it back to its original colour for the two to match.
Most of our decks this year have been built using an H3 CCA treated pine substructure. We are able to offer a 50 year guarantee from the supplier for the H3 treated timber and a 30 year guarantee for the H4 treated timber. The cost

Wooden decks Durban

Click to enlarge

difference between balau and CCA pine is huge so we can keep our rates down to our clients and the H3 CCA pine will actually outlast the balau substructure. We still use balau as deck boards and balustrades simply because it is a lot more attractive and more stable so reduces cupping, bowing and checking. In the substructure, because of the size of the timber it is not as important to limit cupping and bowing.

For a free no obligation quote on your wooden decks, pergolas, walkways, balustrades and other outdoor timber construction please contact us on 082 496 5444 or use the contact us form below.

Go back

Your message has been sent

Warning
Warning
Warning
Warning

Warning.

Wooden Decks Durban – Paradise Valley Pinetown

Wooden decks Durban

Click to enlarge

This is a follow-up article on a previous article I wrote about a high level wooden deck we are building at Paradise Valley in Pinetown Durban. Click here for the original article.

The poles proved to be quite a story getting up. We were 5 people on the day. The poles were 9m long and we had to get them in to a hole of 1m deep, secure them and then pour concrete. The difficulty was to get the pole up because with 8m in the air and only 1m in the ground you have no leverage to pull the pole vertically plumb. We got two of them in without having to resort to other methods, but our third and final pole proved a bit more difficult as by now we had stays and ropes all over the place holding the poles in position while the concrete set. So there was nowhere that we could actually move the pole to get it into the hole without disturbing the other poles. We ended up pulling it up (3 of us) from the flat which was about 2 stories up, using ropes, while 2 others pushed the bottom into the hole. The top of the pole kept catching underneath the balcony. We eventually got it up over the balcony edge and could then pull it so the foot of the pole went into the hole. We then nailed a 38 x 114 to the top of the pole and pushed it to vertical. Each hole took about 6 barrows of concrete mix. We were lucky enough to be able to mix right where we

Wooden decks Durban

Click to enlarge

were building. I won’t say “never again”, because if challenged with the same task again I will most certainly attempt it. However, I will use a crane truck to get the poles in the hole. 9m is a bit long to handle by hand and although we did it, it was a bit dangerous at times and we had to continually stop to make sure that no one would get injured. A crane truck for a day will simply make the job a lot easier and much safer.

Wooden decks Durban

Click to enlarge

We built our platform which took us a full day. We used 50 x 228 beams and set the platform below the level of our deck so that we could stand on that platform and build our deck. Once we had the 50 x 228 installed on two sides, we cut the same timber to lengths of just over 2m and nailed them down perpendicular to these main beams to create a platform. Needless to say we have taken perfectly good timber and cut it into 3 pieces to create this platform. At some point I suppose we will use them for stair treads or similar, so it is not a complete waste of money.

We strapped ourselves into harnesses, hired a 10m extension ladder and set about building the deck substructure. We had to resort to our old method of installing the substructure of first setting posts, then cutting and notching posts, then installing beams and finally joists. So it took a fair amount of extra time but there is no other way of doing this at that height. The substructure for 20m² took one day and deck boards another full day. The balustrade will go in on Monday and then it’s just a matter of installing diagonal supports to stop any racking (sideways movement), filling, sanding and sealing. As mentioned above I will attempt another high level deck, but I will cost it more accurately and I will use a

Wooden decks Durban

Click to enlarge

crane truck to get the poles in.

For a free no obligation quote, please call us on 082 496 5444 or use the contact form below.

Go back

Your message has been sent

Warning
Warning
Warning
Warning
Warning

Warning.

w