Wooden Sun Decks Durban – Westville

Wooden Sun Decks Durban

Click to enlarge

Wooden Sun Decks Durban

Click to enlarge

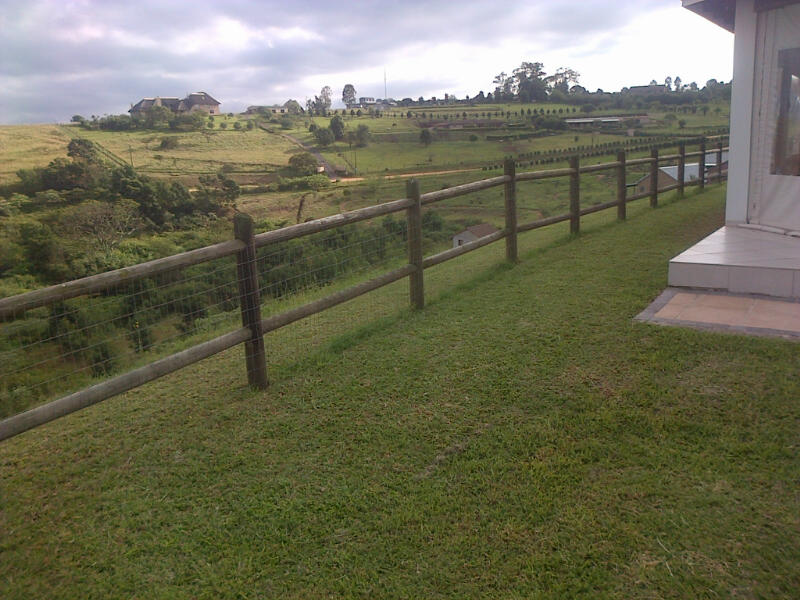
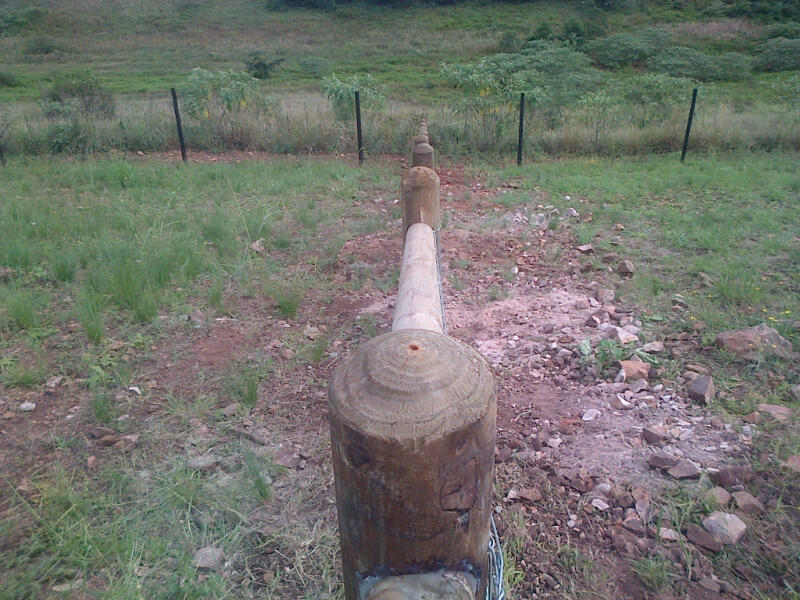
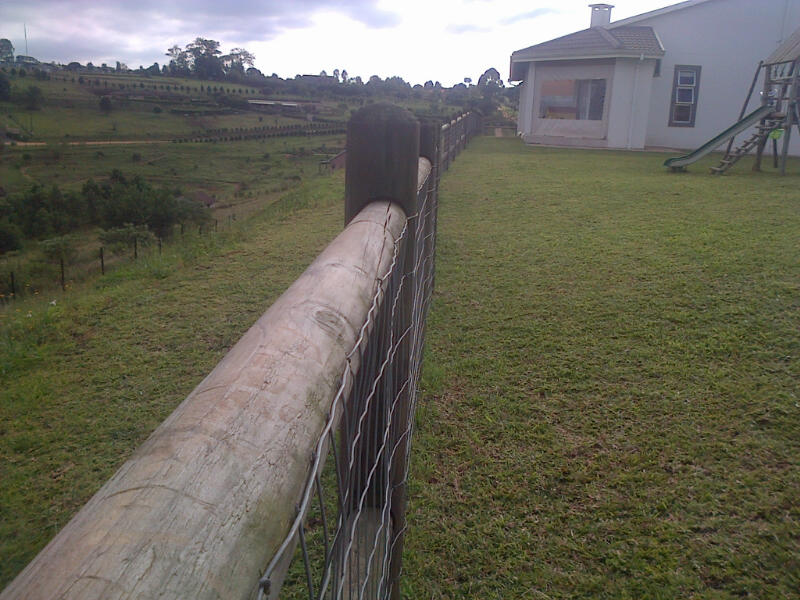
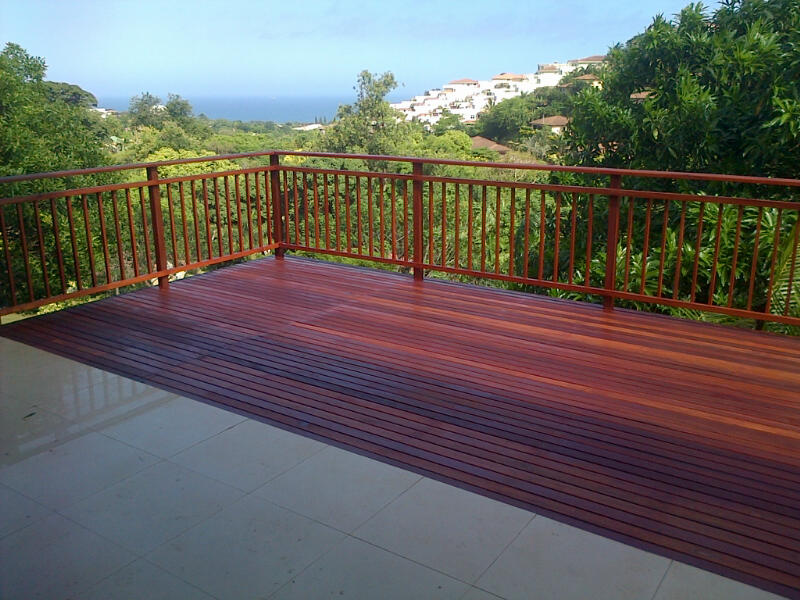
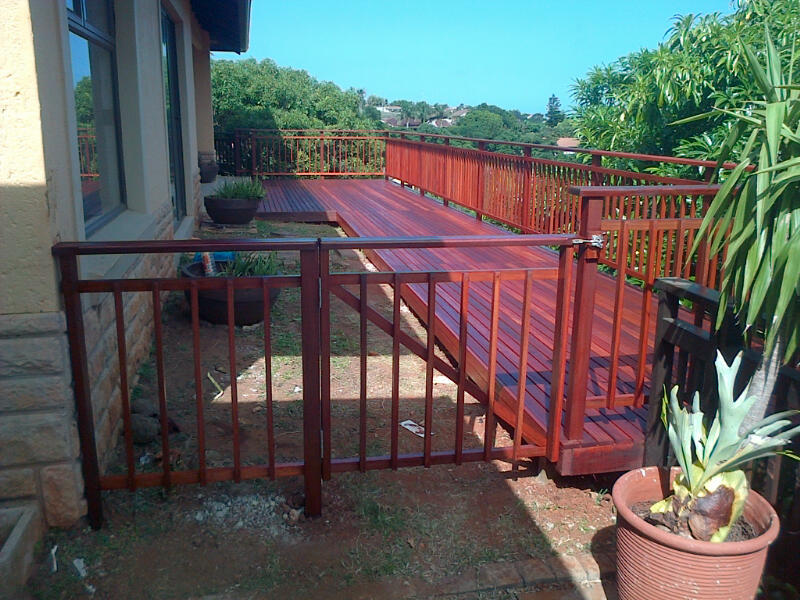
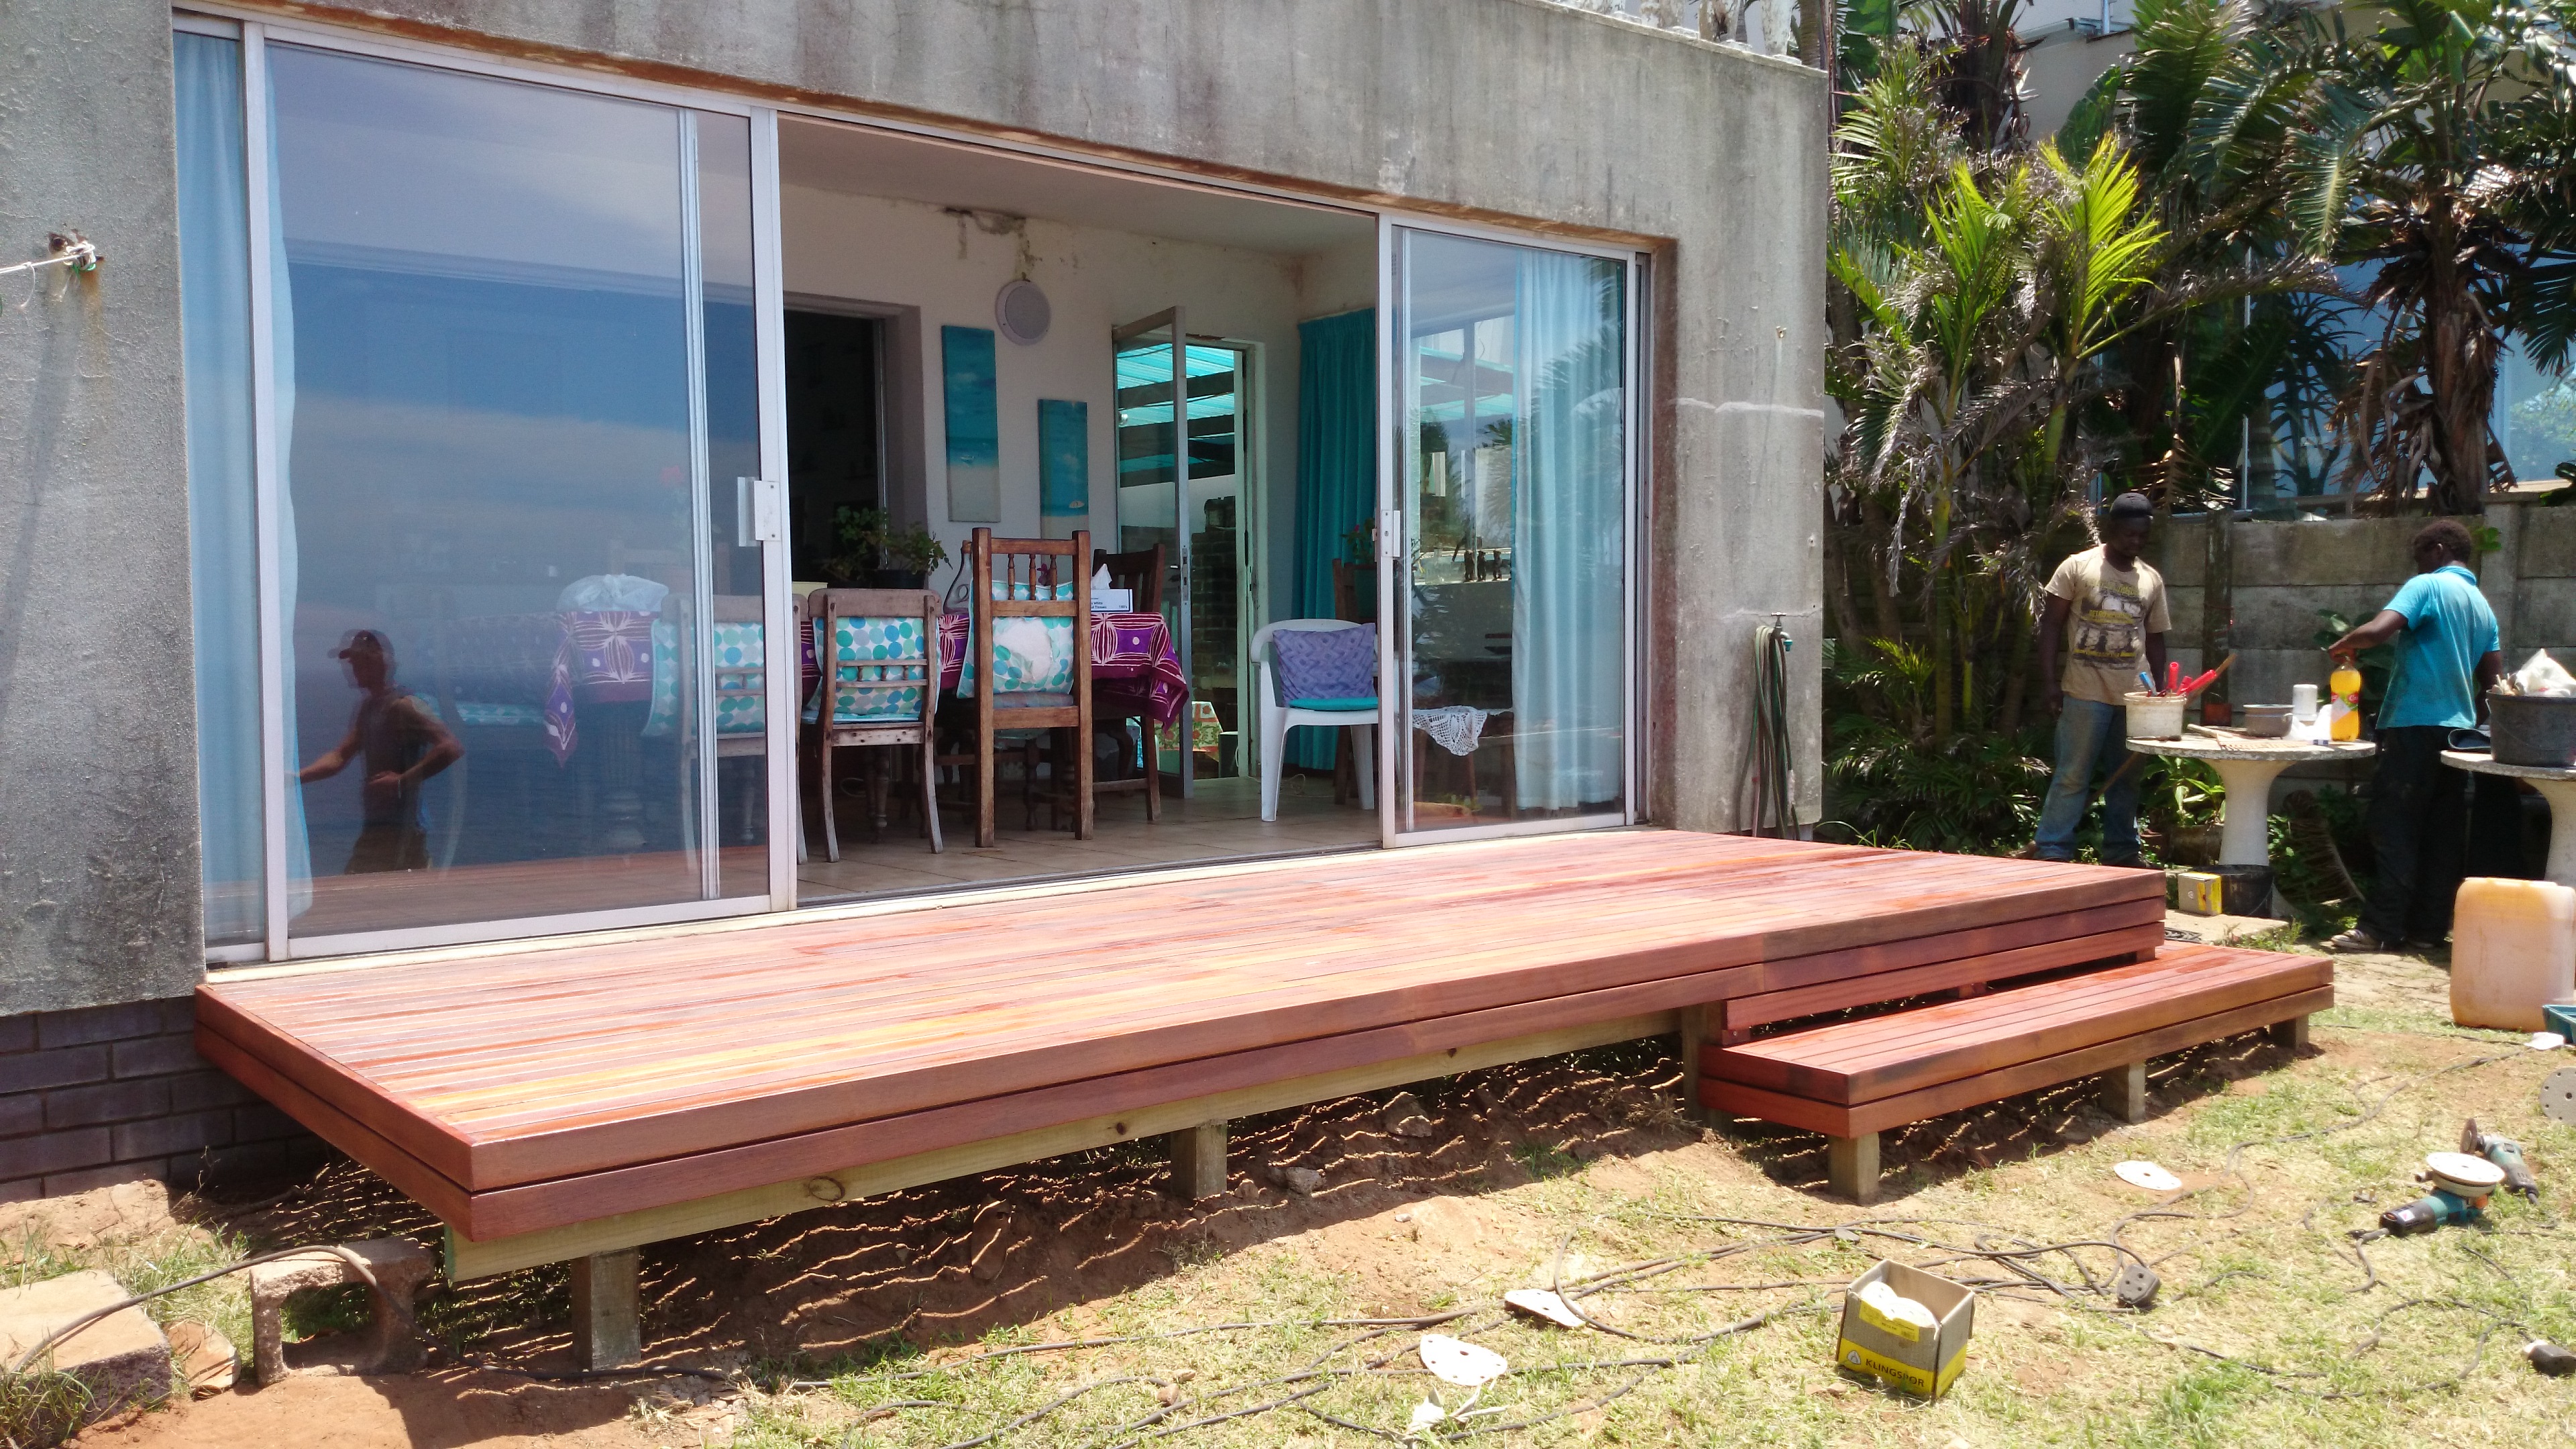
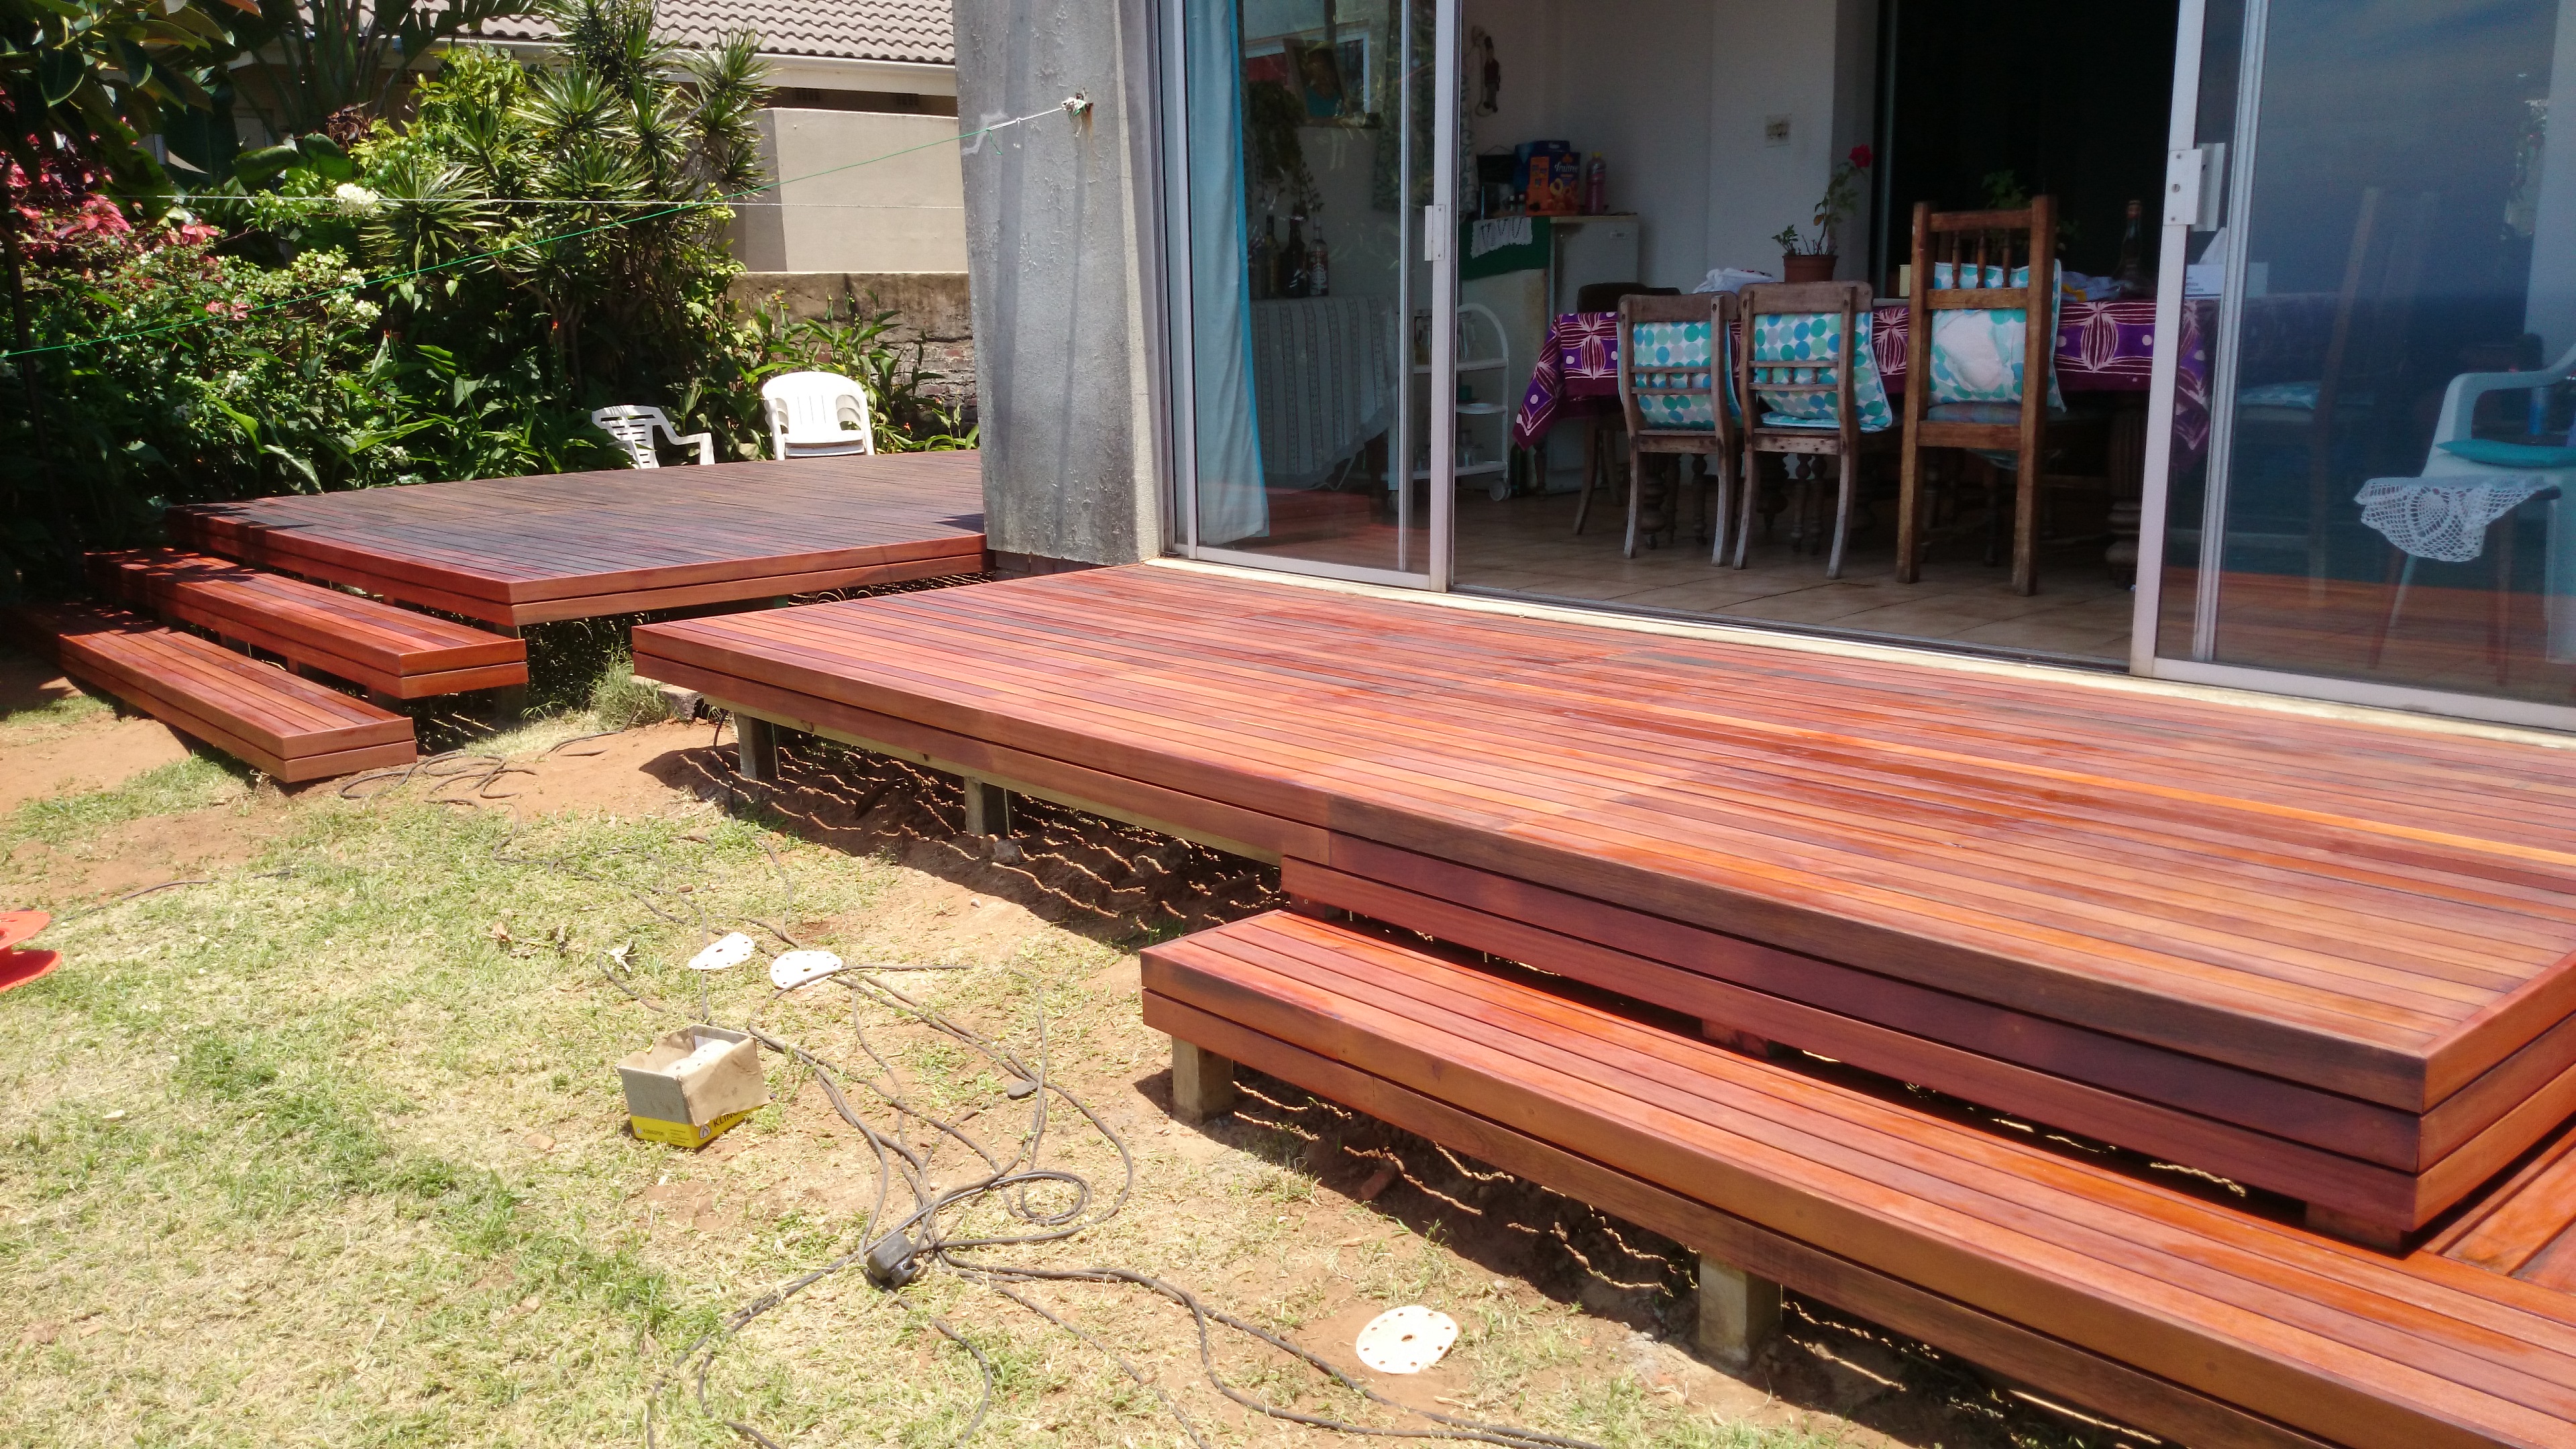
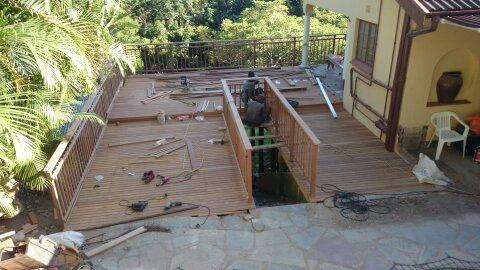
This wooden sun deck we built in Westville Durban was designed to try to maximise outdoor space. The house we built it at had very little outdoor space as it was situated on a steep plot. You can see from the pics that before we built the wooden sun deck, the garden had only a small area of about 1m around the pool on the front side of the garden. There was then a steep concrete staircase down the side of the house going to the back garden. The back garden was however not very usable as it was far from any entrance to the house. So the idea here was to build a wooden sun deck that extended from the slasto of the pool area to meet the far side of the house. It was about 48m² in total floor area and was surrounded by a wooden balustrade in a picket design. We left the existing concrete stair case in place and built the wooden sun deck so that one could use this existing stair case. Hence the U Shaped deck.

Wooden Sun Decks Durban

Click to enlarge

We also had to split the wooden sun deck into two levels as the area by the pool was a little lower than the area where it met the existing concrete deck. So we had a split level deck with a small step up of about 180mm. 180mm is always a good step height or riser height.

Wooden Sun Decks Durban

Click to enlarge

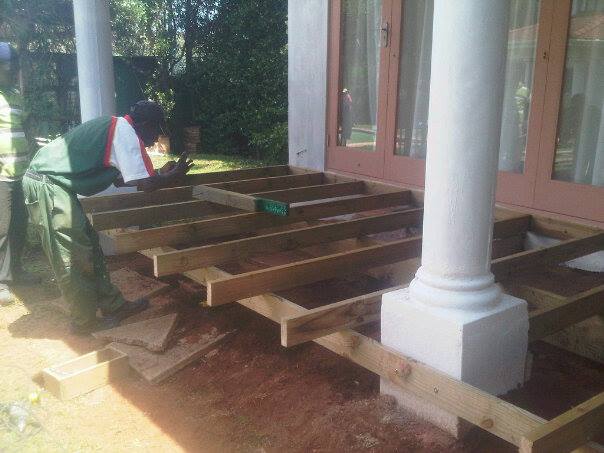
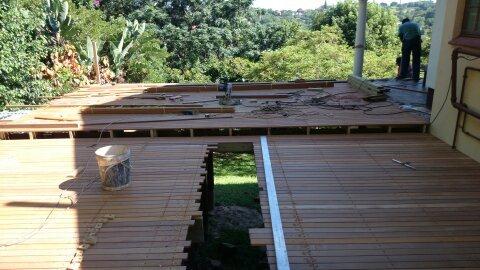
The posts beneath had also been lined up so as to avoid being placed in the middle of the stair case. Even though the outer posts were some distance from the bottom of the stairs, if we had placed them where they would normally have gone (i.e. equal distances from either end) then it would have spoilt the line of sight as one was walking down the stairs. So they were shifted slightly left and right to miss the line of the stairs.

We also had a garden shed beneath the front edge of the deck so we had to build around that which had had a new roof built on it and waterproofed. When building over waterproofed structures one cannot drill through the torch on as it will results in leaks beneath. You need to then build on either side of it or use thicker beams and joists to be able to span them further apart.

Wooden Sun Decks Durban

Click to enlarge

Wooden Sun Decks Durban

Click to enlarge

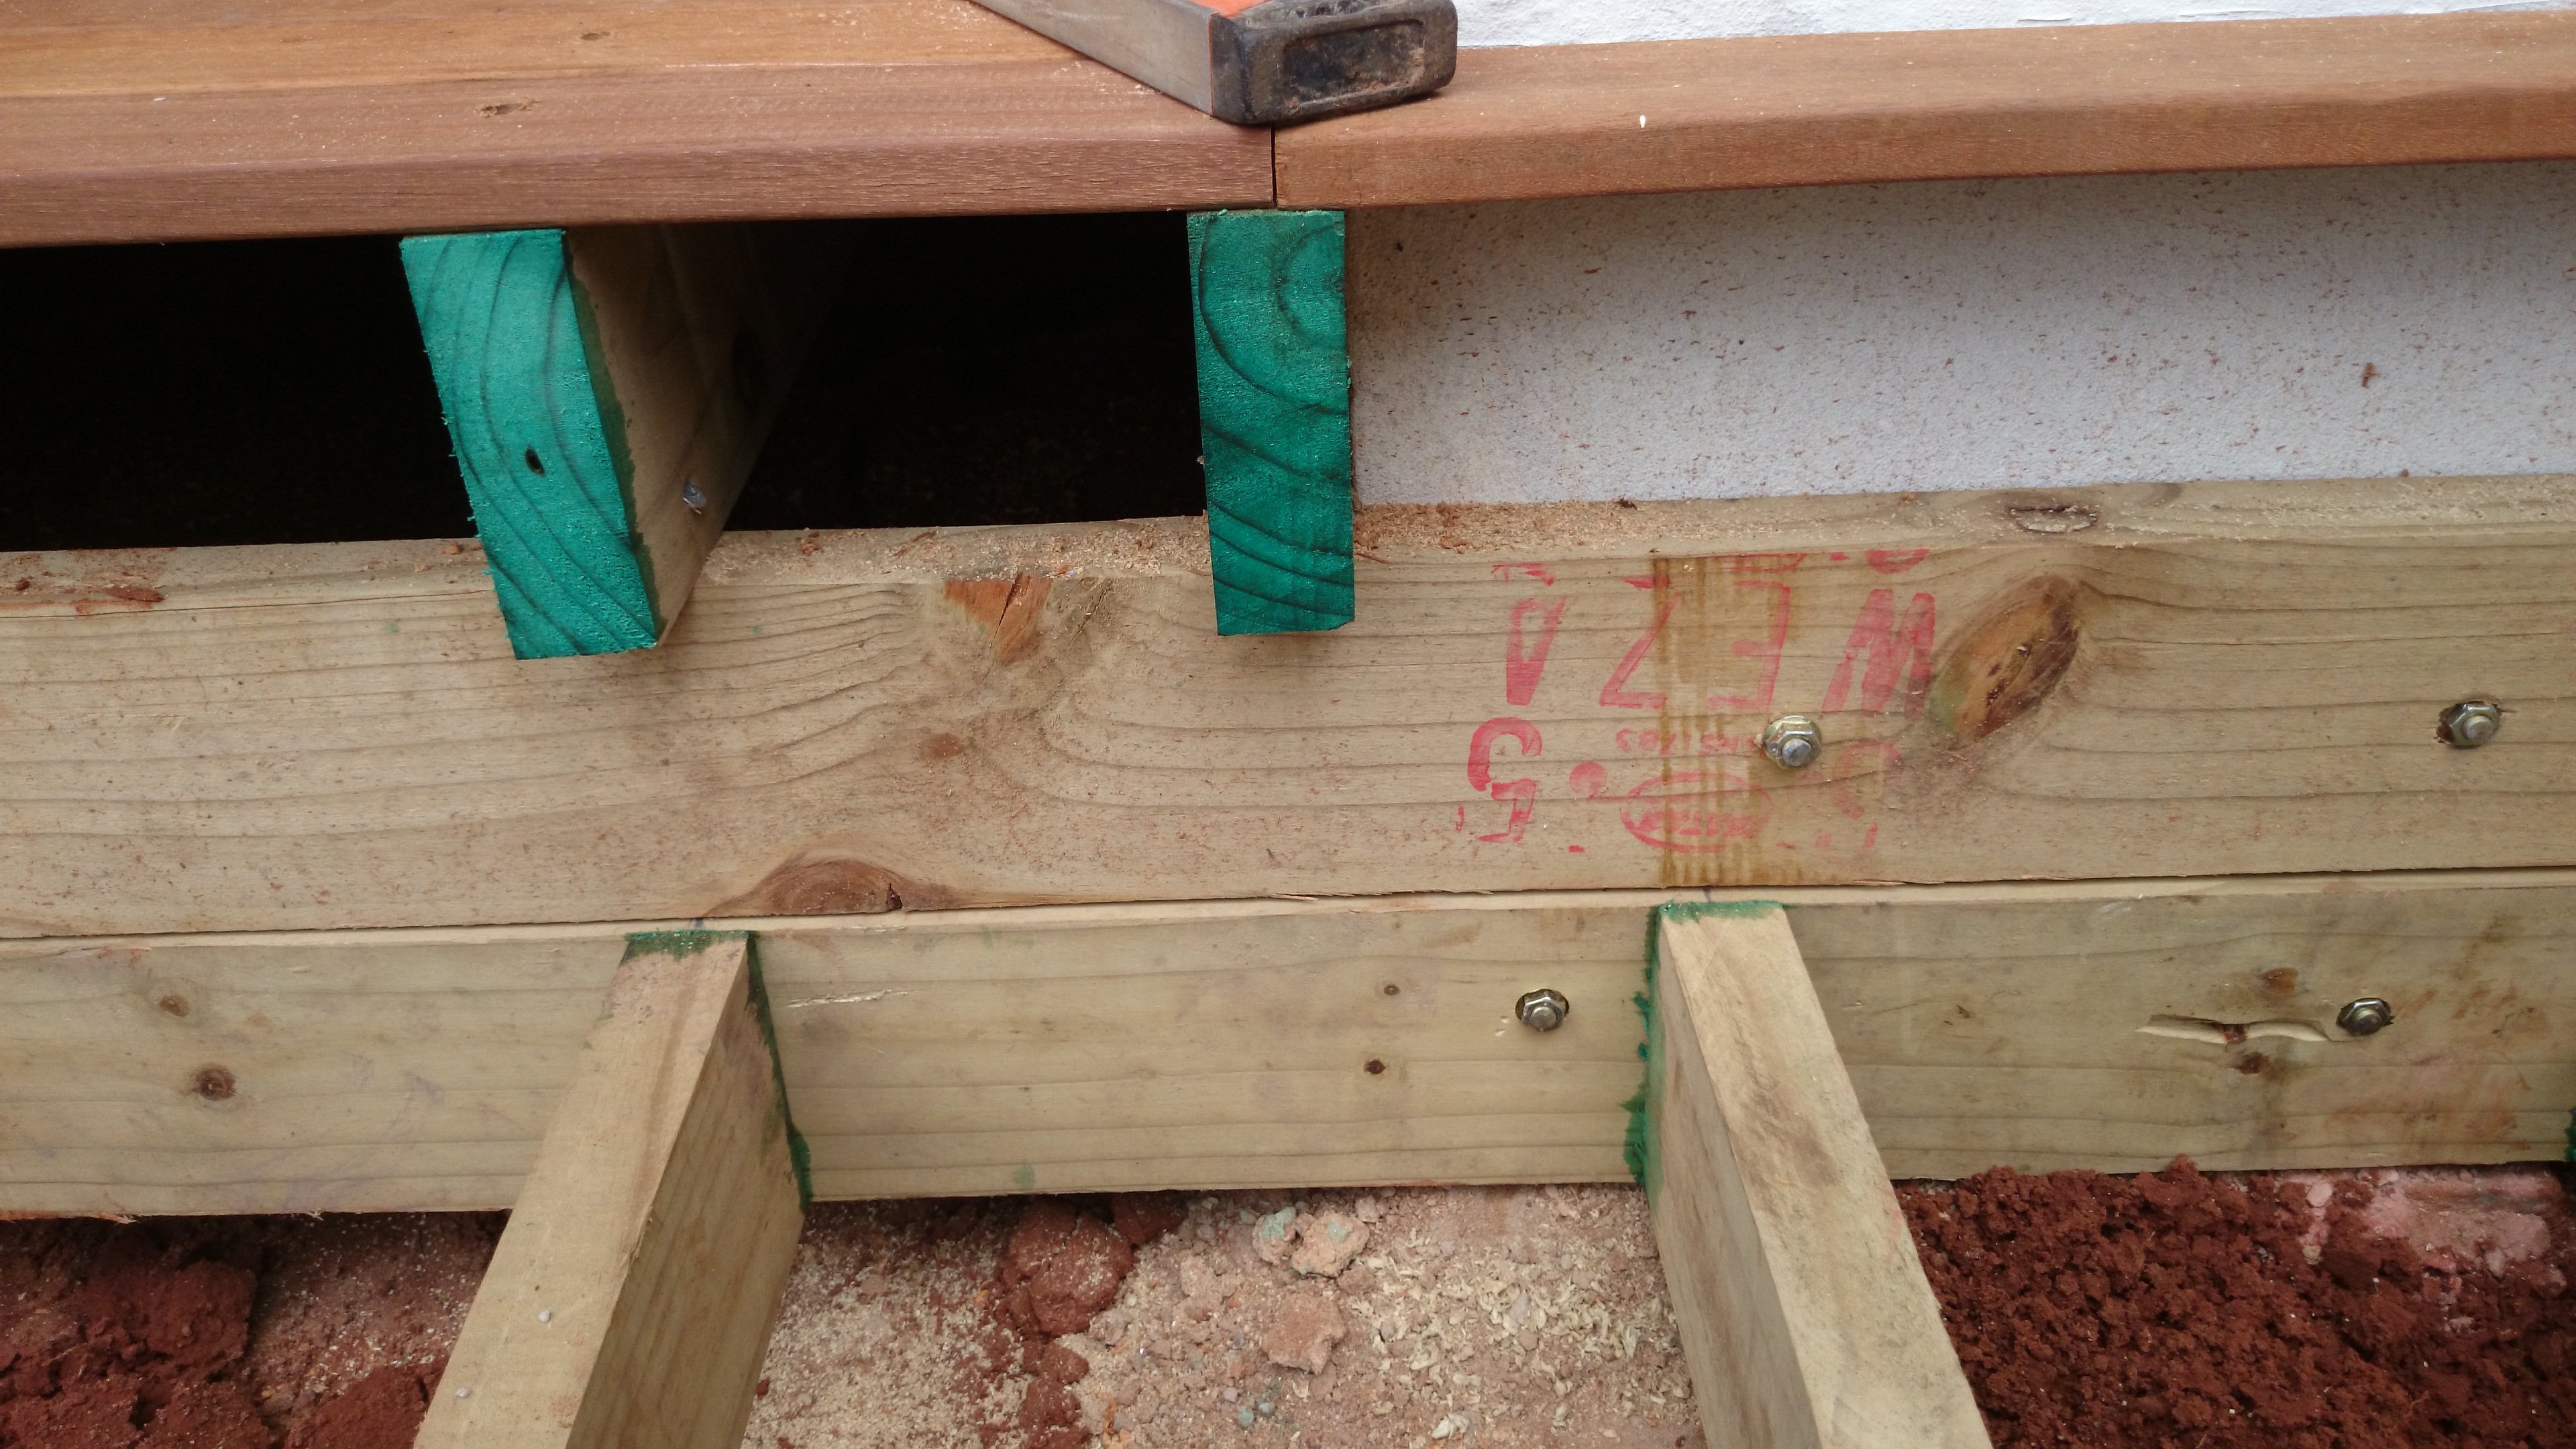
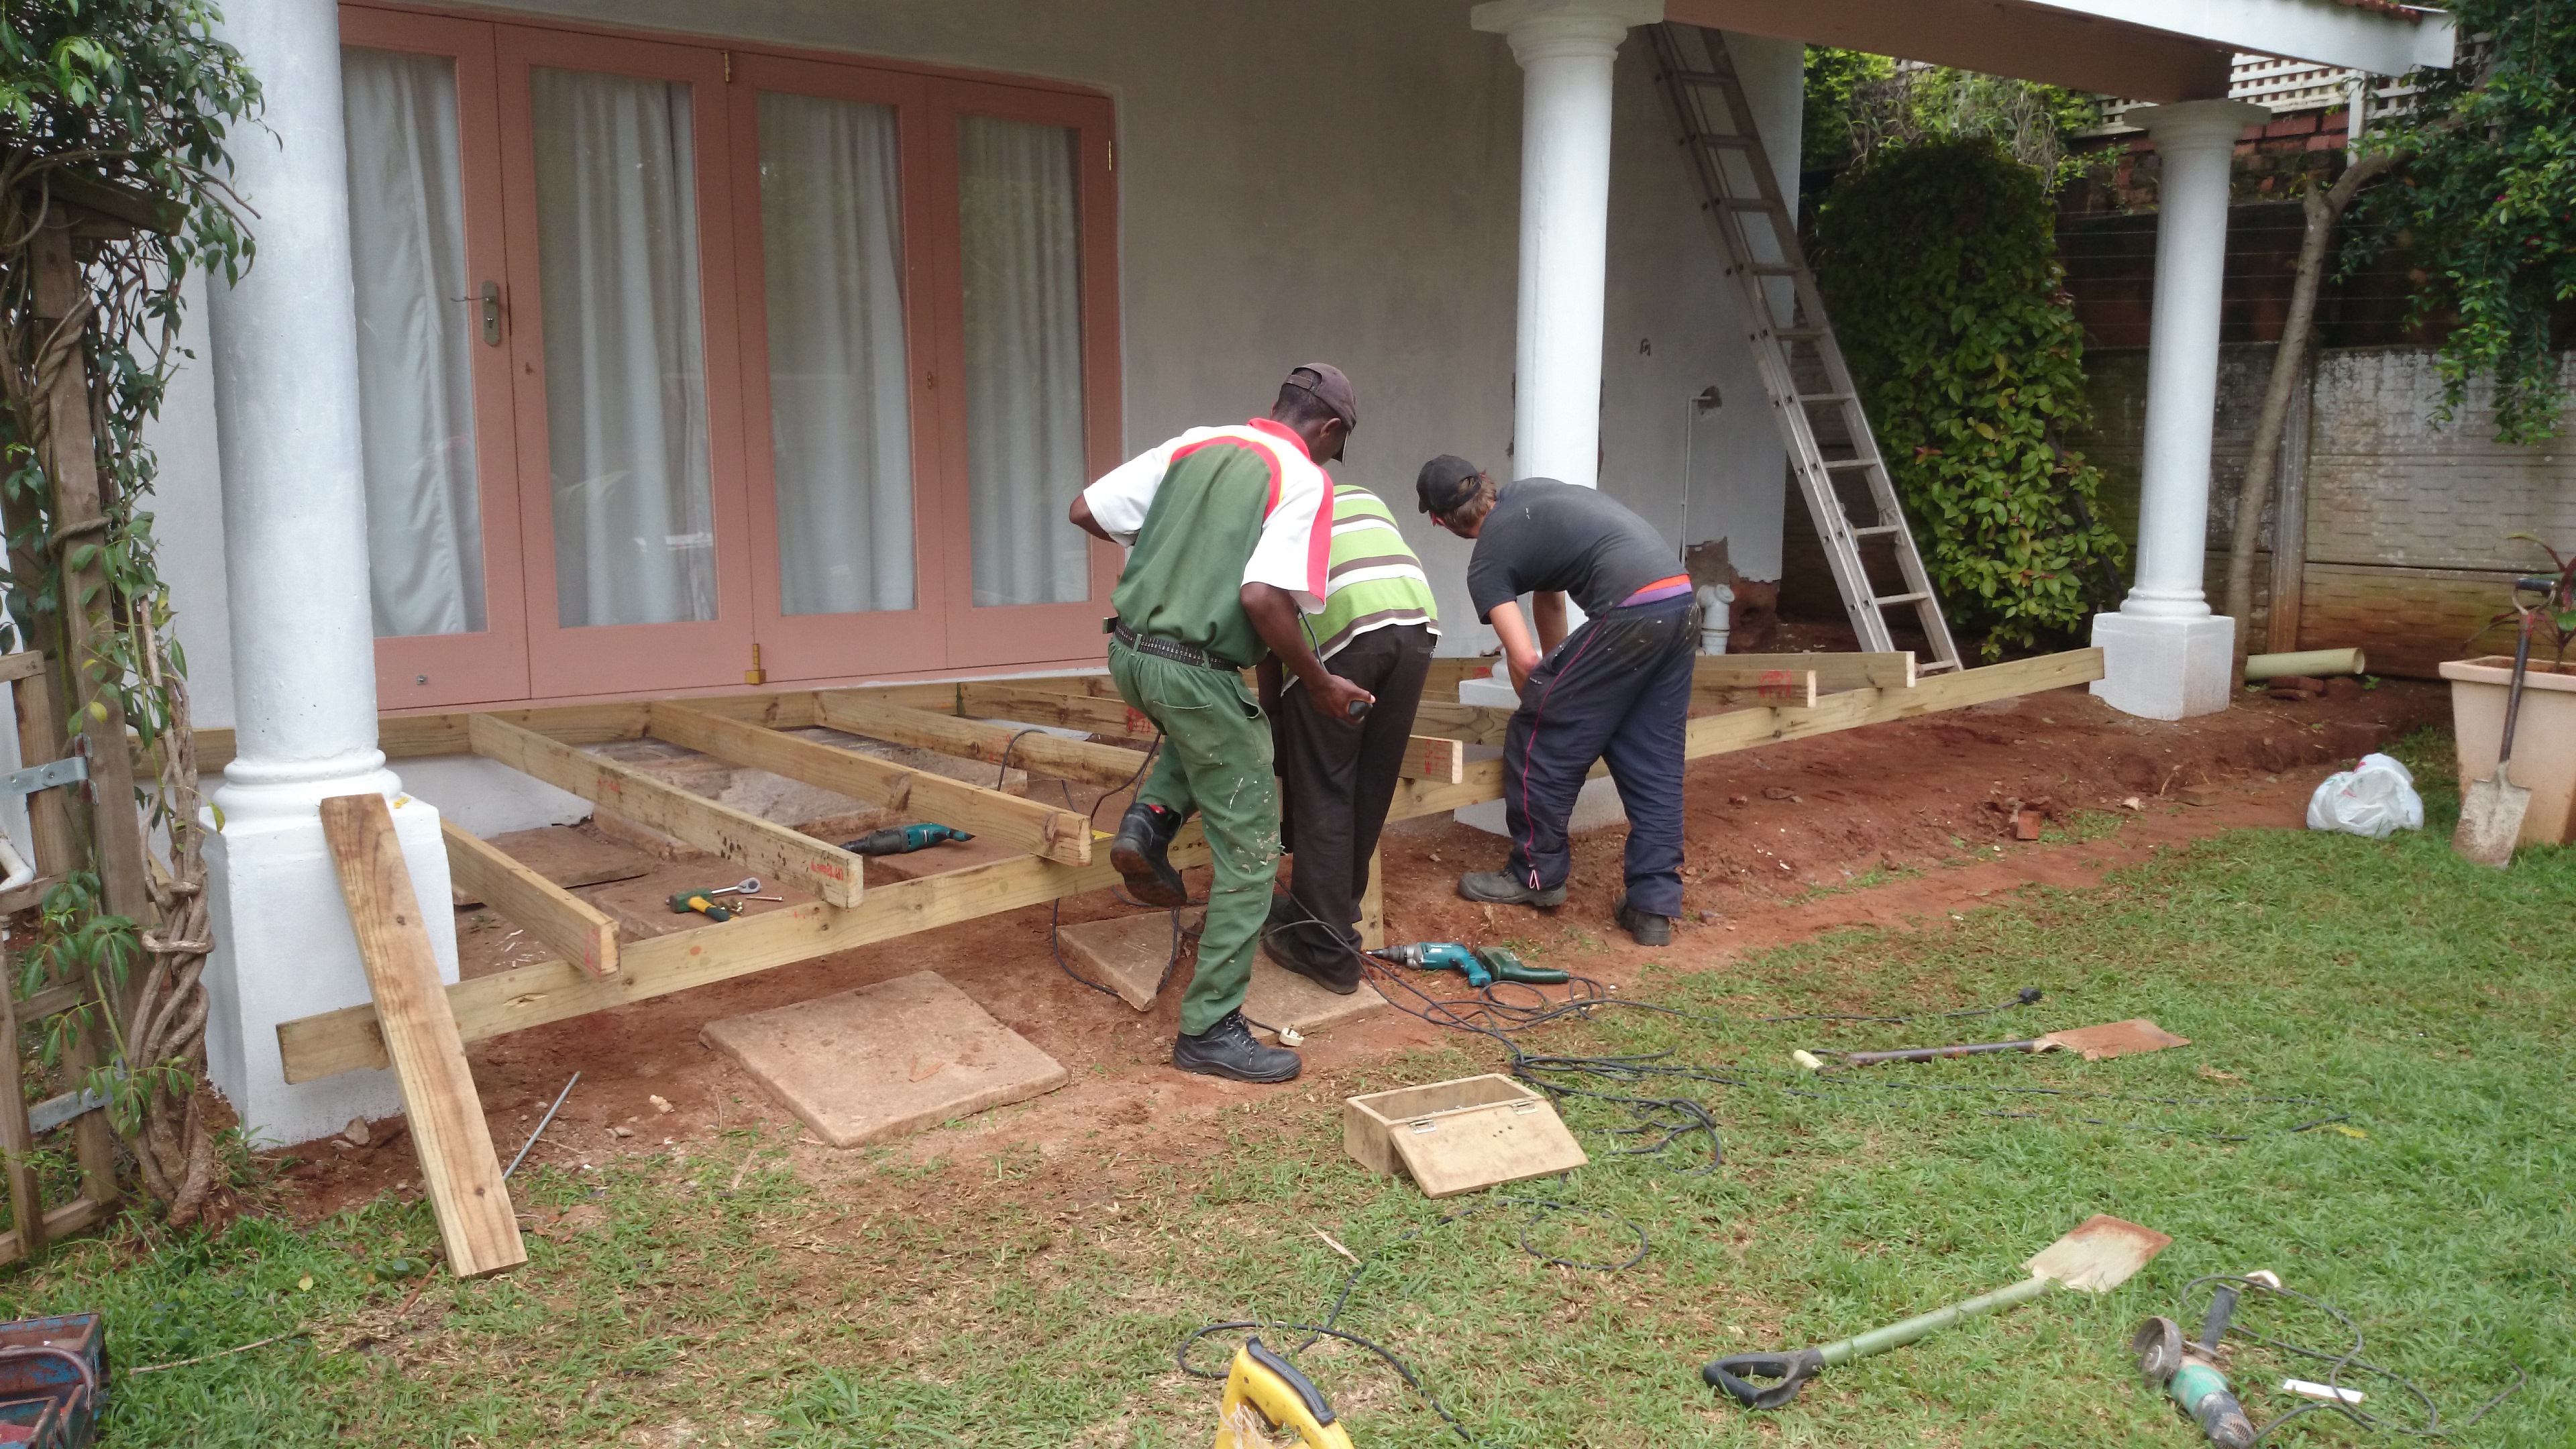
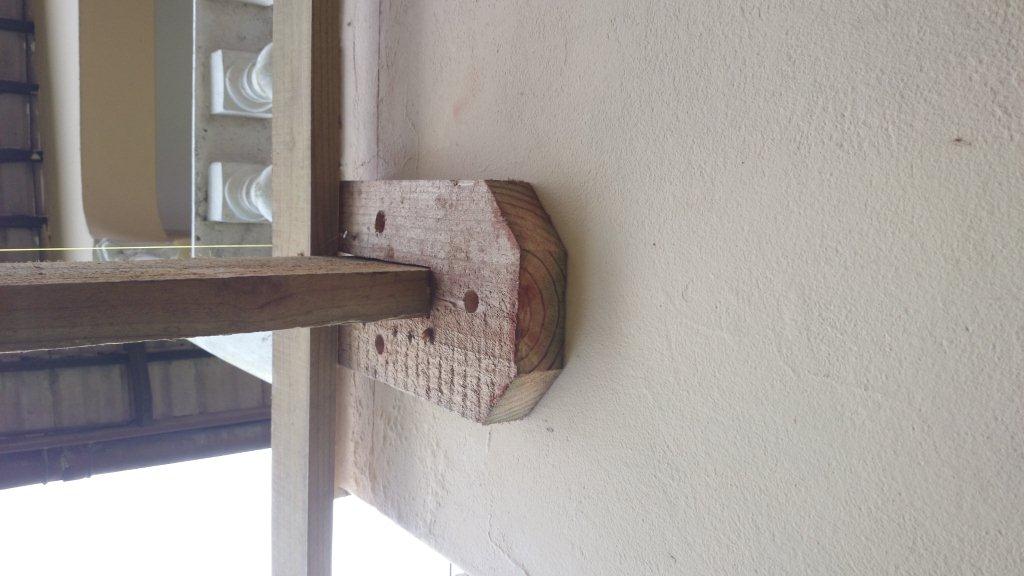
In the pics on this article you can also see the horse shoes we used to support the beams on the walls. Instead of dropping posts to ground you can simply attach the beam to the wall by cutting a horse shoe using the same timber as the beams. The bottoms are always cut to 45° for both neatness and to avoid having sharp corners jutting out. This also applies to the ends of main beams.

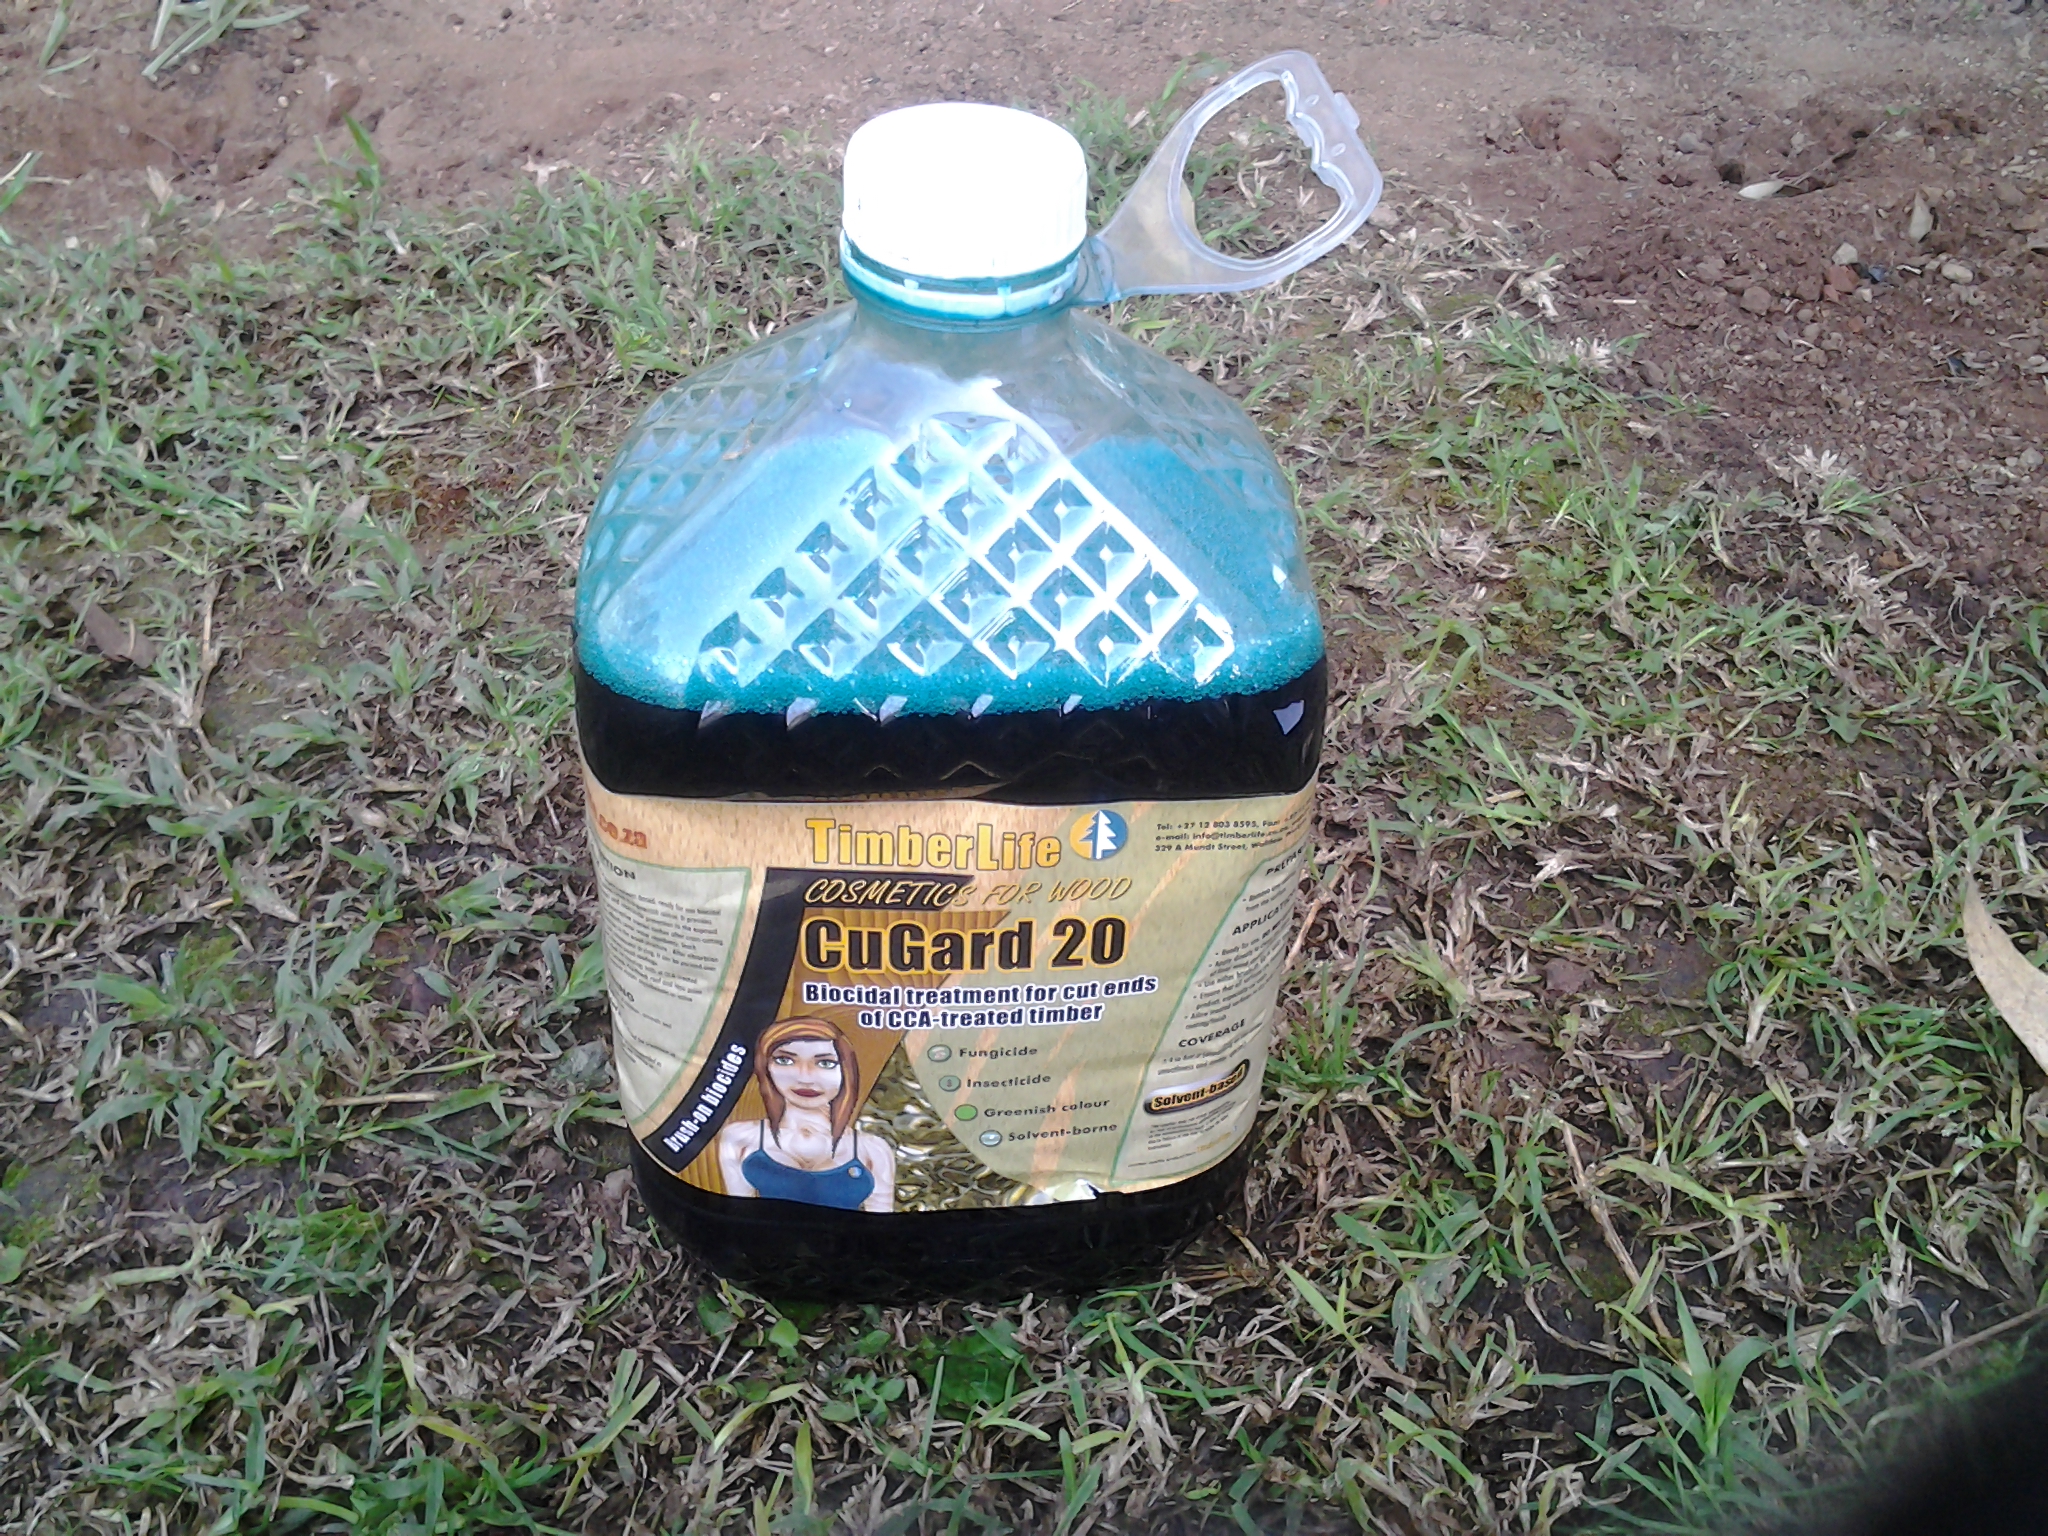
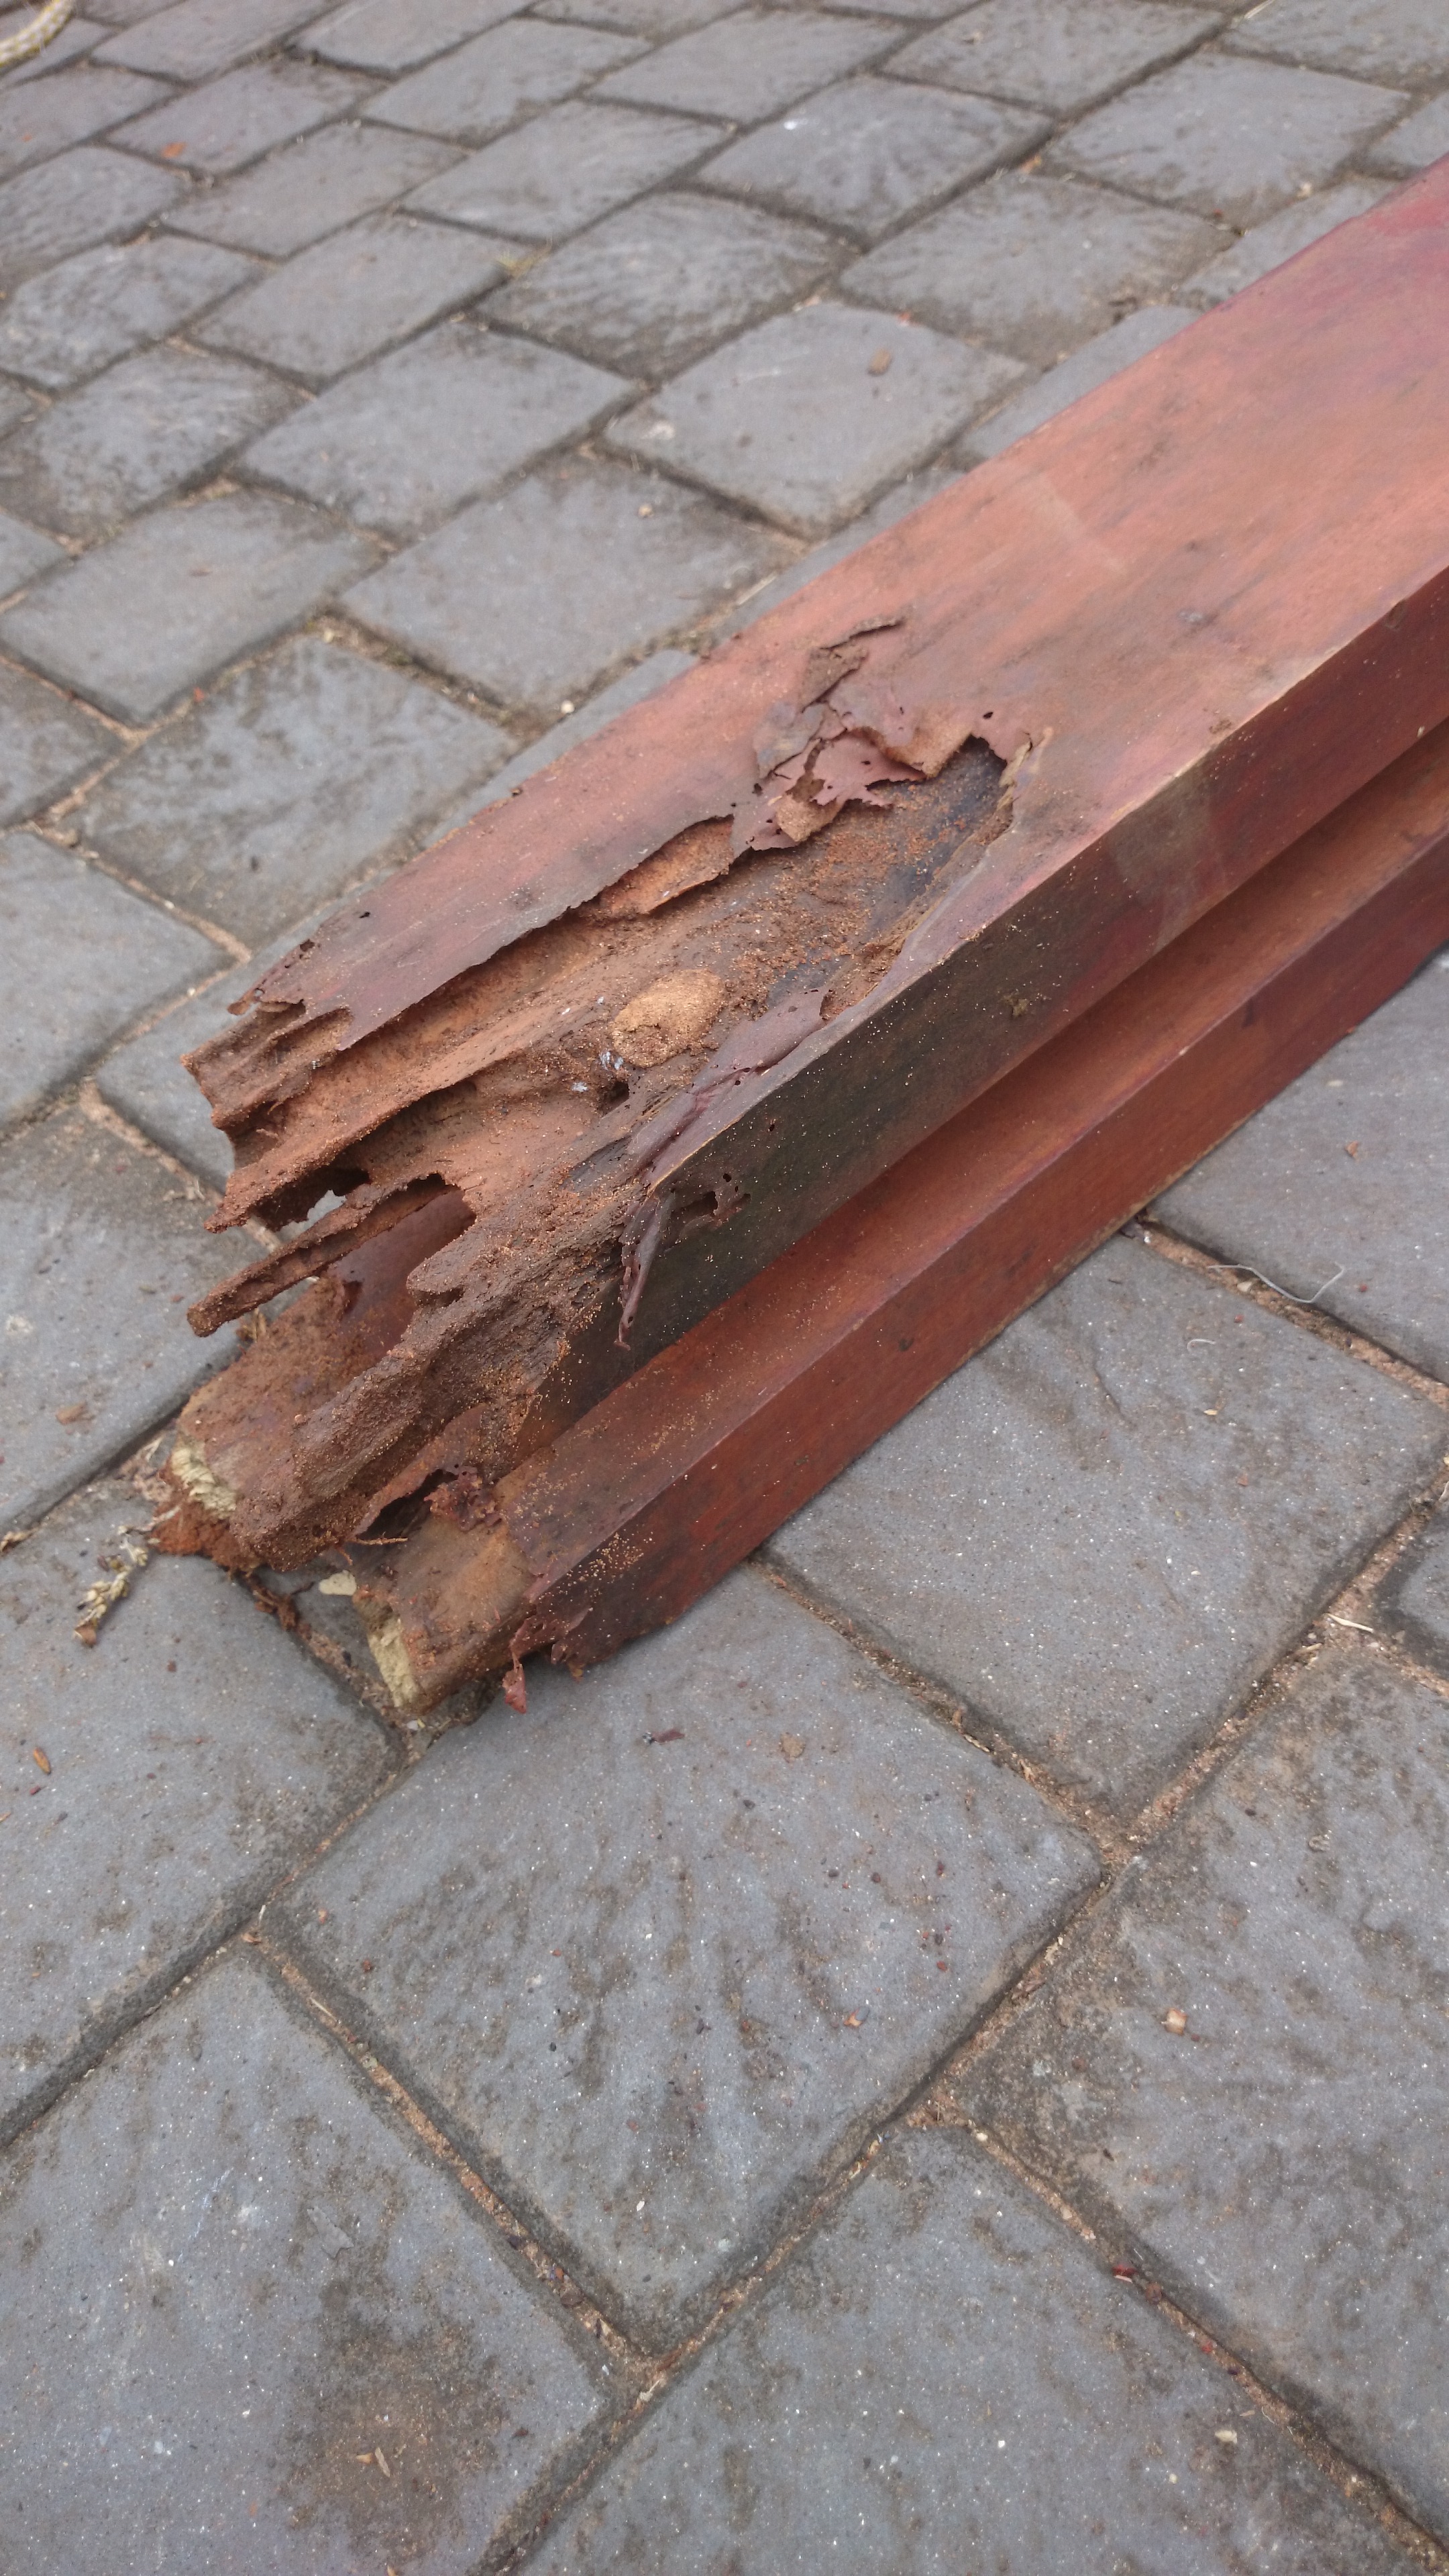
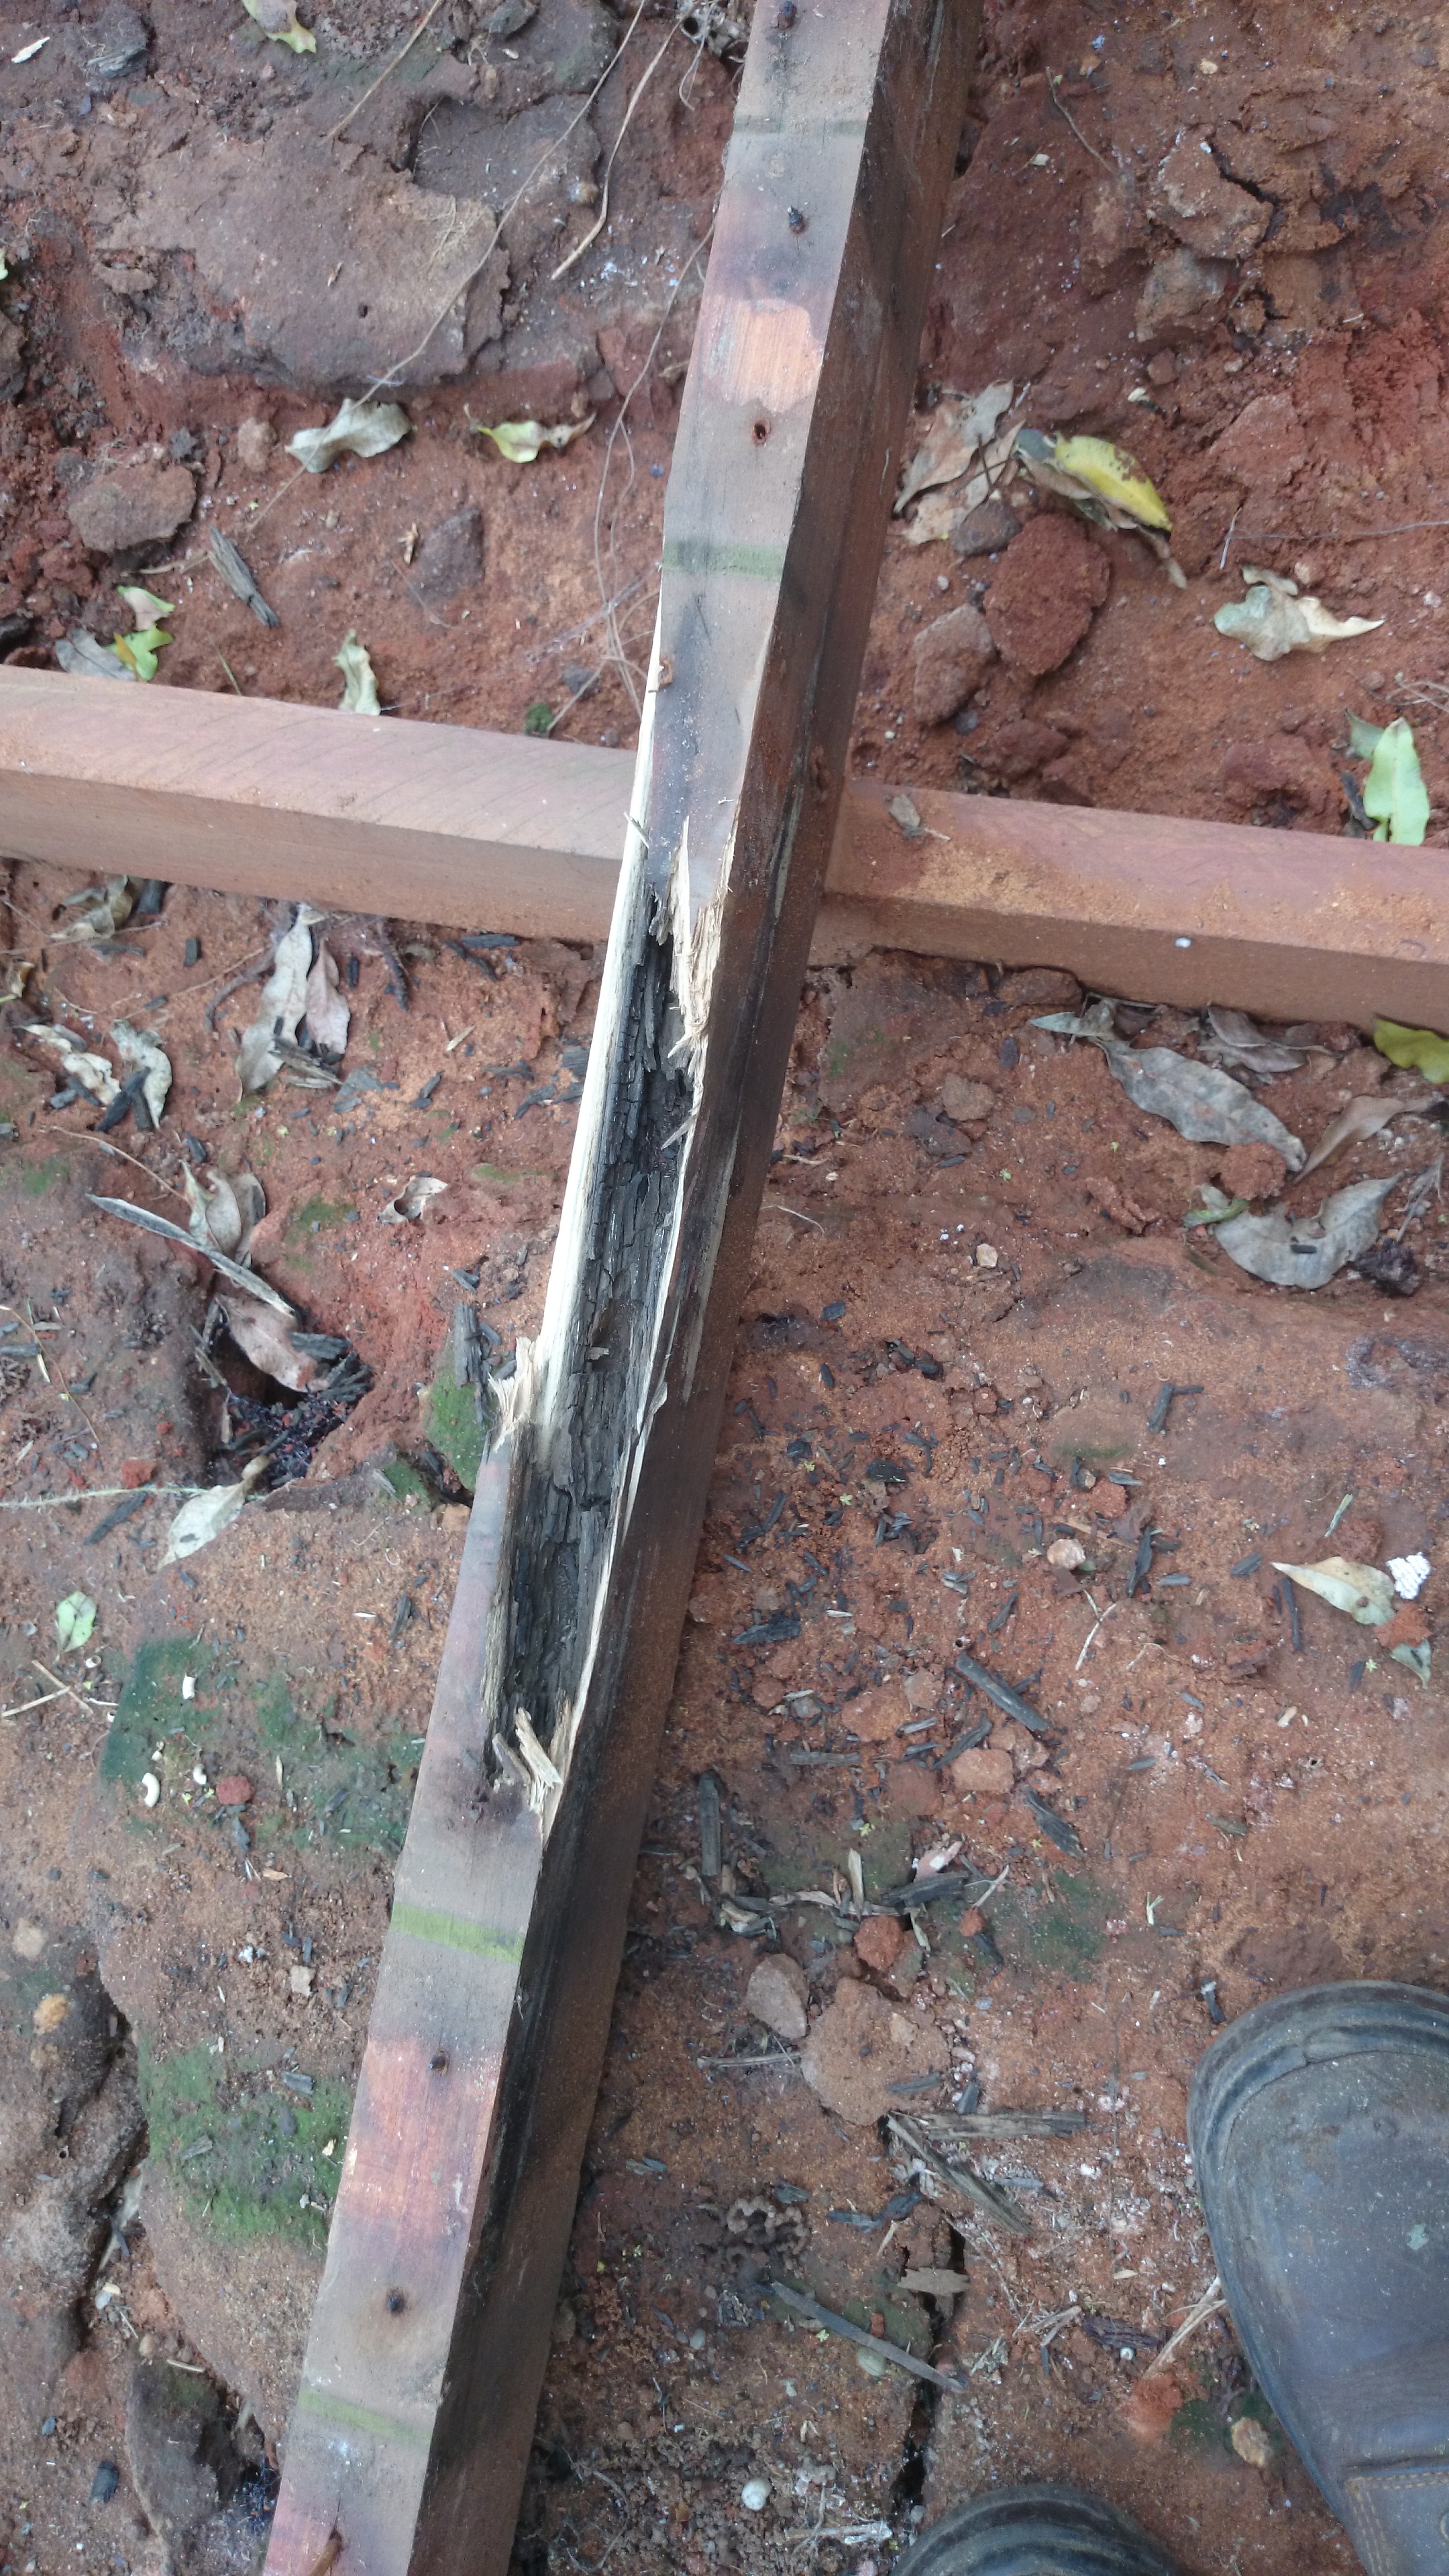
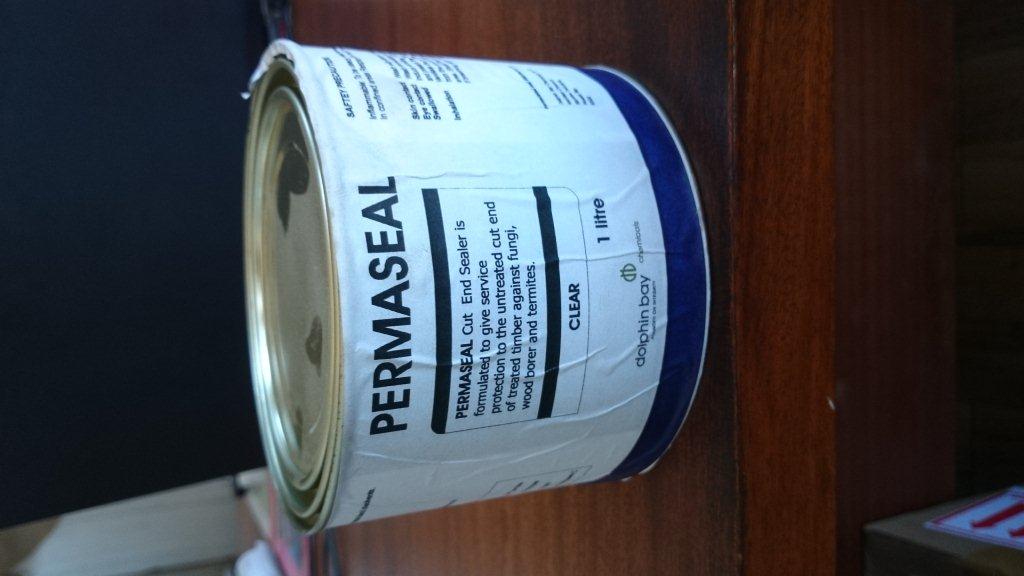
We treated our cut ends with Permaseal, an approved end sealer used to stop rot or insect damage to cut ends of CCA treated timber. This was necessary in order for us to activate the 50 year guarantee that the supplier provides on the CCA Treated pine substructure. There are a few articles on this blog that go into detail about this and what is required in order to activate your 50 year guarantee.

For a free no obligation quote on wooden sun decks, wooden floors or wooden fences, please contact us on 082 496 5444 or use the contact us form below.

← Back

Thank you for your response. ✨


Wooden Post and Rail Fencing Durban

Wooden Post and Rail Fence Durban

Click to enlarge

A wooden post and rail fence is an attractive boundary to your property. Although they have large gaps between the rails and posts they can be made secure by adding weldmesh as we did in this one in Summerveld. Wooden Post and Rail fences are traditionally associated with horse farms as in their normal state they successfully keep horses in without having to build a completely closed off boundary fence.

With a few fencing techniques they are relatively easy to install in that one simply needs to dig a hole, place a post, add a rail and then place the next post.  Of course you need to be careful that the top of each post is in a flat and straight line until you get to a point where the ground starts falling faster, at which point you would start a new line. So one would start with the first post and then dig a hole for the last post. Both posts can be set permanently. We use decomposed granite and cement mix so that the post is stable, without the need for concrete. This will prevent the posts from falling, or being knocked skew, over time. The decomposed granite is cheap in comparison to Umgeni sand and works just as well. The mix is a relatively weak mix (1 bag to 4 barrows), just enough to stabilise the decomposed granite without wasting cement.

From your first post dig all your other holes in a straight line. It is not absolutely important to get the holes the right distance apart. Rather set them 50mm or so shorter than they have to be to accept the rail as you can always cut 50mm off the rail to make it fit, but you can’t add a piece on to the rail. If you’re unsure dig shorter lines of posts so as not to find that half your holes need to be re-dug. Marking all the holes at the same time and digging them will save you time, and if you are using a breaker to get through rock, as we did on this job, then

Wooden Post and Rail Fence Durban

Click to enalrge

you can get finished with the breaker on day one rather than incur a hire charge for second day or more.

Then you simply place the rail in the pre cored hole in the first post and set your second post. It is better to use a nail, at 45° to secure this rail to the post so that it doesn’t move.

You will see from the pics in this article that every so often the top of the fence changes line to remain parallel to the ground. Don’t change it too often as this will give the top of the fence an uneven appearance, but change it where necessary to remain more or less parallel to the ground.
If the ground is fairly steep you can battle to get your rail in the post as the pre-cored holes are cored at 90° to the post. So you may need to trim the end of the post to get it to fit properly.

There are various types of posts that you can buy. Ends are the posts that have only one hole cored in them. Intermediaries are those that have two holes cored at opposite ends. There are also 90° bends and 135° bends that can be used for either a 45° corner or a 135° corner.

The posts come in various lengths so you can install a 900mm high fence, a 1.2m, 1.5m and so on. You can opt for a single rail, double rail or triple rail. Obviously you won’ get a 900mm high fence with three rails but they are available for the higher fences.

There are two different types of post and rail fence. Some of the poles are grown

Wooden Post and Rail Fence Durban

Click to enlarge

and manufactured in KZN. Others are grown and manufactured in The Cape. The Cape Timber is better as it is less prone to splitting, but, at the time of writing, there were not many companies bringing them up from The Cape due to volumes and cost. Be careful not to mix them though as the cored holes are often drilled in different places and the diameter sometimes varies.

Once you posts and rails are up you can install weldmesh on it to keep the dogs, or the kids, in or the neighbours’ dogs out.

Gates can be built from the post and rails and hinged using heavy-duty galvanised gate hinges. On this job we had some hoops fabricated from steel to latch the gate which added a nice finishing touch to the job.

For a free no obligation quote on your post and rail fence, other wooden fences, sun decks or flooring needs, please contact us on 082 496 5444 or use the contact us form below.

← Back

Thank you for your response. ✨

Wooden Sun Deck Repairs – Durban

Wooden sun deck repairs Durban

Besides our main activity of sundeck building in Durban, we also maintain and repair sundecks.

Wooden sun deck repairs need to be performed from time to time and the sooner they are attended to the better. If a wooden deck is constructed correctly these repairs can be kept to a minimum, but from time to, factors beyond anyone’s control can result in repairs having to be made to your wooden sun deck.

The pics alongside show how we repaired this wooden sun deck in The Bluff Durban. It had been built on two posts of balau that were about 2.6m high. One of the posts had, for some reason, sunk slightly, soon after building the deck, but had since stopped sinking. The deck was about 7 years old and the subsiding had apparently occurred in the first year after building it. We were happy that it had stopped subsiding so we were able to use the existing posts to correct it. The client didn’t want us to install a new post because there was a lot of concrete and paving around the base which would have resulted in digging that up in order to set a new post and remove the sinking one.

Wooden sun deck repairs Durban

Wooden sun deck repairs Durban

Wooden sun deck repairs Durban

Wooden sun deck repairs Durban

The reason for it subsiding could have been that there were no horizontal nails inserted into the bottom of the post before it was concreted in. Nailing 6” nails into the wood at the bottom of the post and then setting concrete around the post will stop this sinking as the nails will act as anchors in the concrete. Without them the post can very easily move through the concrete and sink. Another reason could have been that the ground was not completely compacted and the whole level of the ground at that point sunk. Being The Bluff, the latter is quite probable as The Bluff is essentially one large sand dune and is continually moving.

Because the post had sunk about 50mm the top of the deck was no longer level. We jacked the deck up using two scaffolding jacks, one on top and one below, and a 50mm pipe cut to size. We placed a nice flat piece of 50 x 228 timber below to give us a level base and a larger foot print that the scaffolding jack provided.

We took the pressure off the post by jacking it up until both scaffolding jacks became tight up against the ground and the beam respectively. We secured the scaffolding jacks to the beam and the base plate using screws so that it could not slip off once we started lifting the deck. Once the pressure was off the post we cut the post in half and then continued to jack the deck up to our required height checking periodically until the top of the deck surface was again level. Once it was level we installed two pieces of galvanised angle iron on opposite corners of the post using coach screws.

We then filled the cavity we had created in the post, of about 50mm, with a block off wood as a fail-safe in case the angle iron or coach screws ever failed. This way the post could not drop down, in the event of the angle iron failing, as the block would prevent that.

Although it doesn’t look as nice as it would have had we replaced the entire post, it was much easier to do, less expensive and eliminated the problem of digging up the concrete and paving.

For a free no obligation quote on your deck repairs, deck building or maintenance in KZN please contact us on 082 496 5444 or use the contact us form below.


← Back

Thank you for your response. ✨

CCA Treated Substructures in Wooden Sundecks – Durban

Wooden sundecks Durban North

Click to enlarge

As I’ve mentioned in previous articles we use a H3 CCA treated pine substructure which the suppliers offer a 50 year guarantee on. In order to activate that guarantee we need to adhere to best practices and there are a few things that we need to do, and document by way of pics. 

Although all decks we build are built according to best practices, when applying for a guarantee we need to document it. So if you require a guarantee please let us know beforehand so we can collect all the documents we need to process it. These include charge sheets and retention records from the treatment plant to ensure that the chemicals used in the treatment process penetrated the timber properly. The charge sheets also document all sorts of things such as how much solution was added to the chamber, how much wood was in the chamber and how much solution much was left over. From this one can work out what the penetration was and can be verified through the retention records.

When the wood is treated it is placed in a chamber and all the air is sucked out to create a vacuum. Solution is then added to the chamber which now takes up the void or vacuum and the solution is sucked into the timber. They call this pressure treatment.

Wooden decks Durban

Click to enlarge

CCA is an abbreviation for Chromated Copper Arsenate. The copper stops fungus growing on the wood, which in turn causes the fibres of the wood to break down and rot. The arsenate stops insects from eating it and the chrome binds the two so that they don’t leach out of the wood. There are different hazard classes of CCA treated timber. For a full explanation you can visit http://www.sawpa.co.za (South African Wood Preservers Association).

Once this pine has been treated it can now get wet without the fear of it rotting because the fungus cannot grow. It is not water that causes rot, but rather fungus. The water allows the fungus to grow which breaks down the fibres of the wood which causes rot. So now your wood can get wet without rotting.

When the wood is treated, this CCA solution they use penetrates the timber based on the pressure they use and the time it remains in the chamber. The longer the time, the greater the pressure and the stronger the solution, the higher the hazard class and more resistant it is to rot and insect infestation. So timber being used outdoors subject to weathering (rain and sun) needs to be of a higher Hazard Class than timber being used in your roof where it is protected from rain to a large degree.

The depth of the penetration is subject to the density of the timber (pine vs. saligna or gum), and the time in the chamber. These retention records mentioned above are obtained from coring a section of the timber on each batch to ensure that the solution penetrated the timber properly. The charge sheets will outline how long the timber was in the chamber, the strength of the solution etc.

Wooden deck guarantee

Click to enlarge

So once all these documents have been collated, one can apply for a guarantee from the suppliers of the solution used in the treatment process.

One last criterion is that where we cut a piece of timber we need to treat the end grain with an end sealer approved by the supplier. This is because the solution used in the treatment process does not penetrate all the way through the timber. Depending on the density of the wood it will penetrate about 16mm into the timber. With pine, as opposed to saligna, it will obviously penetrate further as the timber is softer. Timber such as balau cannot be successfully treated as it is too dense. However it rarely needs to be treated as it is naturally resistant to insect infestation and rot due to the resins and oils naturally found in the wood.

By following the manufacturers and SAWPA’s guidelines one can successfully use treated pine as suitable outdoor timber for decking.

The pictures alongside show where we have used an approved end sealer to treat the timber on all cut ends.

For a free no obligation quote on your decking and other outdoor requirements please contact us on 082 496 5444 or use the contact form below.

← Back

Thank you for your response. ✨

Timber Decks Durban – Umhlanga

Timber decks Durban

Click to enlarge

This existing timber deck in Umhlanga Durban had reached a point of no return and our recommendation to the client was that we remove it and replace it. It’s never a good thing to hear that you must throw it away and buy a new one because it can’t be fixed, but often wooden decks are not built as they should be built and they therefore do not last as long as they should.

From the picture alongside you can see the damage done to the posts at ground level as a result of insects. Given another year or so and those posts would have failed and although the deck might not have come falling down, it would have become unsafe and a danger to those trying to enjoy it.  See far below for pics of the finished product.

The existing deck had been built out of pine and I can only think that the wrong H class was used. As I’ve mentioned in other articles, pine used for decking purposes needs to be CCA treated to at least an H3 level and any pieces in direct contact with the ground should be treated to H4 level. You can read up more on the H levels here http://www.sawpa.co.za. In a nutshell though, off the shelf H2 treated timber will not last. And don’t be fooled by the timber yard telling you they will “double dip” it. The pressure between H2 and H3 treated timber is different, so doubling dipping H2 will not make H3, it will make H2 + H2 and it WILL rot. On the other hand if the correct H level is used the suppliers will offer up to a 50 years guarantee on this timber against rot and insect infestation. Who’s building a deck that will still be around in 50 years?

We first removed the existing deck boards so that the joists were exposed. We removed all joists but left the main beam on the front edge so that we could use it as our guide to installing the new beam. We used the existing posts as temporary posts to build our substructure, then installed our new beam and dropped posts to ground from there. We then removed the old beam and old posts and were left with a new timber deck substructure in pretty much the same place as the old one. It made our life easier and took a lot less time.

There was a gate we built and installed along the one side. We used stainless steel hinges on it. I’ve found that stainless steel hinges with bearings in the spine are not that costly. In fact a lot less expensive than brass and, in my opinion, a lot more durable. The solid brass can sometimes be a bit soft whereas stainless steel is a lot harder. This is especially the case when talking about screws. Brass screws tend to sheer of quite easily under pressure.

Timber decks Durban

Click to enlarge

It was a nice job to kick the year off with as it was relatively simple. The only hurdle was trying to build 3m in the air on a very steep slope. We used extension ladders but still it makes it difficult and a bit slower because someone has to hold the ladder and keep moving it when screwing down pickets on the balustrade which is time consuming.

For a free, no obligation quote on your timber decking and other outdoor timber construction needs in Durban please call us on 082 496 5444 or use the contact form below.

← Back

Thank you for your response. ✨

Timber decks Durban

Click to enalrge

Timber decks Durban

Click to enlarge

Timber decks Durban

Click to enlarge

Wooden Sundecks – Durban North

Wooden sundecks Durban North

Click to enlarge

Wooden sundecks Durban North

Click to enlarge

We completed these wooden sundeck jobs in Durban North last year during our busy decking season. There were two decks we built. They were both quite simple in that they were low-level wooden sundecks coming off the granny flat, which had just been refurbished measuring 5m x 2.2m.

The first one was a relatively small deck. It had two steps off the front edge with closed risers. That was probably the most difficult part of the job but we have worked out a way to build these quite effortlessly. We build the deck with a fascia beam on the front and then we build a box complete with supporting joists frame etc. We then attach this to the fascia beam of the deck we have just built and we are left with a frame which we can clad to create our riser and tread of our stairs. It is much easier to do it this way. Trying to build it piece by piece in situ is a lot more difficult and time-consuming. In fact building decks in sections and then hoisting them up into place is the easiest way to build as it allows you to work on a section of the deck on the floor, get everything square and then simply level it in place and attach it.  We had two concrete columns on the front edge of the deck so it was relatively easy to secure the deck and made for fewer posts and concrete.

Wooden sundecks Durban North

Click to enlarge

The second deck was closer to ground level off the patio of the main house. Again we built this in sections and lifted them up to secure them to the wall and then secured the front edge with posts to ground using concrete. Because of the length of the deck (11m odd) we had to build it in two sections and lift each section up independently of each other. It becomes a bit cumbersome trying to lift an 11m deck into place. So it is better to build it in two sections and lift each one separately. You need to be careful though that the entire structure remains flat from one end to the other. By doing them in two sections it is easy to get a kink in the middle. So run fish line from one end of the one section to the far end of the other section and adjust the join to get the entire frame flat and level.

In another article I will describe the different methods used to screw the deck boards down. Again there is an easy and quick way or there is the slow process of marking and cutting each board individually. What one wants to do is to lay all boards out and snap chalk line where the cuts should be, then cut them all, put them back and secure them. There is another method too where you screw the boards down and then lift the ends that need to be cut and cut with a skill saw.

Wooden sundecks Durban North

Click to enlarge

These two decks were sealed using Timberlife Satin Wood 28 Base, a sealer suitable for woods of low porosity. Being and oil based sealer it goes on very easily, cannot run or streak and when it comes to maintenance, you simply wipe clean and re-apply. You will need to do it a bit more often than other deck “sealers”, but there will be no more sanding as the oil cannot peel or flake like a coating does. It soaks into the wood, nourishes it, leaving the full natural look of the wood and simply disappears instead of flaking and peeling.

For a free no obligation quote on your wooden deck, balustrades, stairs etc. please call us on 082 496 5444 or use the contact us form below.

← Back

Thank you for your response. ✨

Wooden Parquet Floor Sanding and Sealing

We were called to quote on sanding and sealing the wooden Swiss parquet floors in an old house in Hillcrest. From the pics alongside you can see that these rooms are the typical large ones found in older houses.

Swiss parquet floor sanding Durban

Click to enlarge

The Swiss parquet floors have probably been there well on 40 years or probably even since the house was built. Since then carpets have been put down on top of them, probably in the seventies when those big thick pile carpets where the fashion. The carpets had been lifted some time ago but the sealer on the wooden floor was scuffed in many areas and although it was not peeling off or flaking, it had worn back to wood in high traffic areas and there were various marks on them from pot plants and other items that had been placed on them and left for long periods of time.

The total area we had to sand was 170m², so quite a nice sized area. It consisted of 3 bedrooms, passage, lounge, dining room and study. We were relatively lucky in that the existing coating had deteriorated to a point where it came off quite easily. One always needs to be careful of floors that have been coated fairly recently and still hold a lot of coating or sealer because it tends to clog the sand paper. In these cases one needs to use a very coarse grit paper of about 30 grit and at times you need to sand at 45 degrees to the grain to remove it and then sand again with the grain with a less coarse paper. Also, although the floor is flat, it is never perfectly flat and the large floor sander sometimes

Swiss parquet floor sanding Durban

Click to enlarge

leaves patches. So just turn the machine at a slight angle to get it to flatten the floor in that area and then go back with the grain to get your scratch marks all running in the same direction.

Once the bulk of the sealer or coating is off, one needs to come back with a smaller hand-held sander to remove those stubborn areas. Once it’s all off you need to remove the scratch marks with a finer sand paper. If you’ve started with a 30 grit paper, you may need to then go to a 60 and then to a 100 grit. But always finish on a 100 grit paper.

We used a polyurethane epoxy floor sealer with hardener or accelerator (mineral based) on these floors in order to speed up the drying time. The client was living in the house so we had to limit dust and had to paint rooms in a special order so that they could still live there while we sealed the floors.

I’m still not completely sold on water based products. The water based floor sealers I have used require many more coats to get the same thickness of coating. Although they dry a lot quicker and many more coats can be applied in the same day, they tend to use a lot more and, in my opinion, don’t provide as hard a finish as mineral based

Swiss parquet floor sealing Durban

Click to enlarge

products, especially those with catalysts for hardening.

In between coats we rubbed the floors with steel wool to remove the fibres in the wood that stand up when first coated. A thorough vacuum after that and a second coat was applied.

A quick tip on using the epoxy / polyurethane floor sealer.  Because this product has an accelerator, or hardener associated with it, it goes off, or dries, a lot quicker than a single pack polyurethane.  When you mix your sealer with the accelerator, you should use a flat-bottomed tin such as a coffee tin or jam tin and a flat paddle to mix.  The flat-bottomed tin allows one to mix it thoroughly because there are no ridges for the flat paddle to get stuck on (as opposed to a coke bottle).  A good choice for a flat paddle is a steel ruler.  If you were to pour it directly into your paint tray you will be need to clean that paint tray with every new mix otherwise the sealer will be getting hard already and will interfere with the smooth rolling on the floor.  So place a black dustbin bag (well it can be any colour really) over the paint tray and simply through the black bag away after each mix.  Don’t mix too much as the product has a pot life, (the time it can remain liquid enough to use in the pot).  A hot day will result it in going off quicker than a cold day, or a humid day, and using more accelerator will also result in a quicker drying time.  So be careful with your quantities, you don’t want to waste sealer.

Swiss parquet floor sealing DurbanZ

Click to enlarge

This product should be applied very thinly in order for it to dry quickly.  If it is applied too thickly the top will dry but the middle will still be tacky and it will take much longer to be able to walk on it to flat it and apply subsequent coats.  So mix just enough each time.  If it starts going off in the tray, rather through it away than try to apply it while it is already getting hard.  What happens then is that the front edge of the roller spreads it on the floor and the back-end of the roller starts to pull it off the floor because it is already tacky.  This results in a streaky floor which will mean getting the sander out again.  So rather waste a little sealer and star with fresh sealer than waste time by re-sanding it.  And then of course mix a little less so it doesn’t go off in the pot or tin.

For a free no obligation quote on installing wooden floors or floor sanding and sealing please call us on 082 496 5444 or use the contact us form below.

← Back

Thank you for your response. ✨

Solid Wood Floors Durban

Solid wood floors Durban

Click to enlarge

This client had existing saligna wooden floors which were suspended, or sprung, and she wanted to extend the floor to the other half of the room which was concrete with a linoleum covering. The total area was about 12 square metres. A small job in size but we needed to be careful to get it flush and level with the existing floor.

Saligna makes very nice floors in that it is relatively inexpensive as it is grown locally in South Africa. Saligna come from gum trees. It is a hardwood and relatively hard and dense so is moderately durable. It is not of course as good as teak or some of the other hardwoods, but it is cost-effective and does the job well. The sapwood is a pale yellow in colour, fairly well-defined from the light rose-brown heartwood. The grain is usually interlocked, occasionally straight and the texture is rather coarse. The wood weighs between 700-800 Kg / m³ when dried. It takes nails and screws reasonably well. So overall it makes a good flooring timber when taking into account cost and durability.

It is always a good idea to let the floor boards acclimatise on site in the area they will be installed, for about 2 weeks. Timber “moves” (expands and contracts) a bit in different climates and one wants all the movement to occur before installing the boards so as to limit any gaps that might open up after installation. This is particularly the case with saligna as it tends to “move” a bit more than other timbers. Saligna also prefers to be installed on a suspended system, as opposed to being stuck down to the concrete substrate, as it can then still move during its lifetime without cracking.

Solid wood floors Durban

Click to enlarge

We installed 30mm batons, also in Saligna, to the floor using hiltis and then attached our floor boards to these using oval nails. One should always use the same wood as the batons, or one of similar density, so that they can “move” at the same rate. A nail gun with brad nails isn’t the best way to secure them as the brad nails aren’t ribbed and can pull out in the future. There are pneumatic nail guns available that take ribbed nails which make the job a lot quicker and easier.

The trick in doing these floors, as it is with decks, is to make sure that the top of your batons are flat and level. If your substrate is flat and level and can’t move, the boards will go down nicely and the floor will give you many years of warmth and enjoyment.

These were tongue and groove boards so each board’s tongue slips into the other boards groove to give a seamless finish. The nails are hammered in at a 45 degree angle through the tongue so they are concealed.

Solid wood floors Durban

Click to enlarge

When these boards are machined the tongue and groove are machine slightly off center so that the boards can be sanded during their lifetime a few more times than if they were machined dead center. A board can only be sanded a number of times until the thickness between the top of the board and the tongue becomes so small that they start breaking off. This is particularly the case with saligna as it is not as hard as teak for instance and when it is sanded the sander removes slightly more wood than it would on a teak floor.

Solid wood floors Durban

Click to enalrge

We sanded the floor flat, installed some skirtings to match and then sealed it using a Woodoc Floor sealer.

For a free no obligation quote on solid wood floors, laminates and floor sanding and sealing please call us on 082 496 5444 or use the contact us form below.

← Back

Thank you for your response. ✨

Wooden Screens, Pergolas, Decks and Gates Durban

Driveway gate clad in balau

Click to enlarge

Wooden gates Durban

Click to enlarge

Wooden Screens Durban

Click to enlarge

Wooden balustrades and pergolas Durban

Click to enlarge

We were asked to quote on wooden screens, wooden pergolas, wooden decks and wooden gates on a new build in Prestondale, an area north of Umhlanga, at a development called Izinga Ridge. We originally quoted in about June 2013 and the work was awarded to us for s start date of about 1 November 2013. The job consisted of various screens between brick columns on the boundary wall, a pergola on an open balcony on the first floor, external and internal balustrades, garden gates, a driveway gate and a pool deck.

All the timber we used was balau hardwood with the exception of the substructure of the pool deck which was H3 and H4 CCA treated pine. In other articles you can read about how we have managed to keep our prices down by using this as a substructure whilst still being able to offer up to a 50 year guarantee on this treated timber.

Most of the screens were pretty straight forward with balau cleats on the wall and then clad using a non reeded 19 x 68 deck board. We used non reeded so that both sides would look the same, but we did battle to find non reeded boards as most of the deck boards available are already reeded, or grooved on one side. There were two screens that proved a little more difficult as the wall we were attaching them to was angled. So the boards had to be cut at that angle and secured to each other whilst still remaining level and the join remaining plumb.

The external balustrades were different to our normal vertical picket style balustrades as the client requested horizontal slats instead. Again we used non reeded deck boards for this with a normal post system. On each post we attached vertical cleats to accept the horizontal deck boards or slats. They were installed in line, or on top of the concrete slab, rather than being attached to the front of the concrete slab. The tiles had already gone down so we had to drill through the tiles without cracking them. We installed an “ankle” on the middle post to provide support which is attached to the vertical post and is then shaped to fit around the slab to attach again to the vertical of the concrete slab. This, in effect, allows the post to be attached to the outside but still allows the balustrade to sit on top of the slab. It is much neater but does require a bit more thought and re-enforcing.

Wooden decks durban

Click to enlarge

The pool deck was relatively simple as it was a low-level deck around the pool with a simple frame system using 38 x 114 joists and beams. Extra posts had to be concreted in as it wasn’t high enough to slot an under beam, or main beam, of 50 x 228 in.

The driveway gate was fun. We had the steel made up in a design that would work well by cladding it with wood. We had to source long enough non reeded boards to run the full width of 4m. One cannot join boards in this type of gate unless there is a centre steel vertical support which would spoil the look of the gate a bit. We had run out of standard non reeded boards and so had all suppliers so we sourced a 20 x 140 board and ripped it in half, length ways, to arrive at two boards of 20 x 68.

Wooden balustrades Durban

Click to enlarge

The pictures alongside show some work in progress and some completed work. It was an interesting but challenging job as there were many contractors on site all trying to work, and finish, before the handover of the house. The worst part of the job was fighting traffic from north Umhlanga to the freeway in both the morning and afternoon.

For a free, no obligation, quote on wooden decks, pergolas, garden gates, balustrades and all other outdoor timber work, please call us on 082 496 5444 or complete the form below.

← Back

Thank you for your response. ✨

Wooden Decks Durban – Bluff

Wooden decks Durban

Click to enlarge

This wooden deck in Durban was the second phase of a job we started at the beginning of the year. We were originally asked to build a deck off the main bedroom. First we had to remove the aluminium window and install an aluminium sliding door. I always suggest that clients do this first so that we can build our wooden decks perfectly flush to the new opening.

We had various obstacles to overcome. There was a septic tank that we were building on top of so we had to leave sufficient space and a large enough trap door to access all three tanks. We built one large trap door so that the whole thing could be taken off to access these tanks. During our build a new soak away had to be built as the old one had packed up.

With all of this out-of-the-way, we could continue with phase two which was to complete the main deck with two steps off the front edge leading to the garden and a new second deck in front of the sliding doors to the lounge. This second deck had a corner step similar to the other deck.

Wooden decks Durban

Click to enlarge

These steps were the full length of the deck and had closed risers and treads. In order to build one of these you must basically build a second substructure in the same way as you build the deck substructure in order to span your deck boards across them. So each tread has two beams and joists and is then clad with deck boards. I can clearly remember building our first one which took ages because we tried to build each joist individually. We’ve since learned that with smaller structures one can build a frame and then pull it into position and attach it to the main structure and then clad it. Much quicker, much easier and a lot more accurate.

This was our final job for 2013 and we lost one day to rain which set us back a day and we had to spill over into the weekend. We had originally planned to finish on the Friday, but we had to come back on Saturday morning to seal it.

The original deck we built earlier on in the year had greyed already from the sun so we had to sand it quite a bit to get it back to its original colour for the two to match.
Most of our decks this year have been built using an H3 CCA treated pine substructure. We are able to offer a 50 year guarantee from the supplier for the H3 treated timber and a 30 year guarantee for the H4 treated timber. The cost

Wooden decks Durban

Click to enlarge

difference between balau and CCA pine is huge so we can keep our rates down to our clients and the H3 CCA pine will actually outlast the balau substructure. We still use balau as deck boards and balustrades simply because it is a lot more attractive and more stable so reduces cupping, bowing and checking. In the substructure, because of the size of the timber it is not as important to limit cupping and bowing.

For a free no obligation quote on your wooden decks, pergolas, walkways, balustrades and other outdoor timber construction please contact us on 082 496 5444 or use the contact us form below.

← Back

Thank you for your response. ✨